Creating Tableau Density Map Using Hexbins
Job-ready Online Courses: Dive into Knowledge. Learn More!
In this Tableau tutorial, we are going to study what is Tableau density map. Moreover, we will discuss how to create density map using hexbins. At last, we see how to work with Tableau density map and many other things. So, let us start.
Tableau Density Map
Density maps in Tableau are an incredible method to indicate focus in a zone. I as of late observed a density delineate imagined the grouping of tornados over the US without speaking to whole states.
Do You How to Create Tableau Heat Map
Here we demonstrate to you proper methodologies to make Tableau density maps delineate Tableau. At that point, we’ll make it a stride further to utilize hexbins as a component of our thickness outline.
How to Create Density Map in Tableau?
Here, we are going to make Tableau density plot, let’s discuss its steps one by one:
i. Make computed fields for the adjusted scope and longitude.

ii. Drag the adjusted scope and longitude on to the Rows and Columns racks. Ensure that both are nonstop measurements. Set the stamp to square and set the size in the center.
Read about Show Me How – Tableau TreeMap
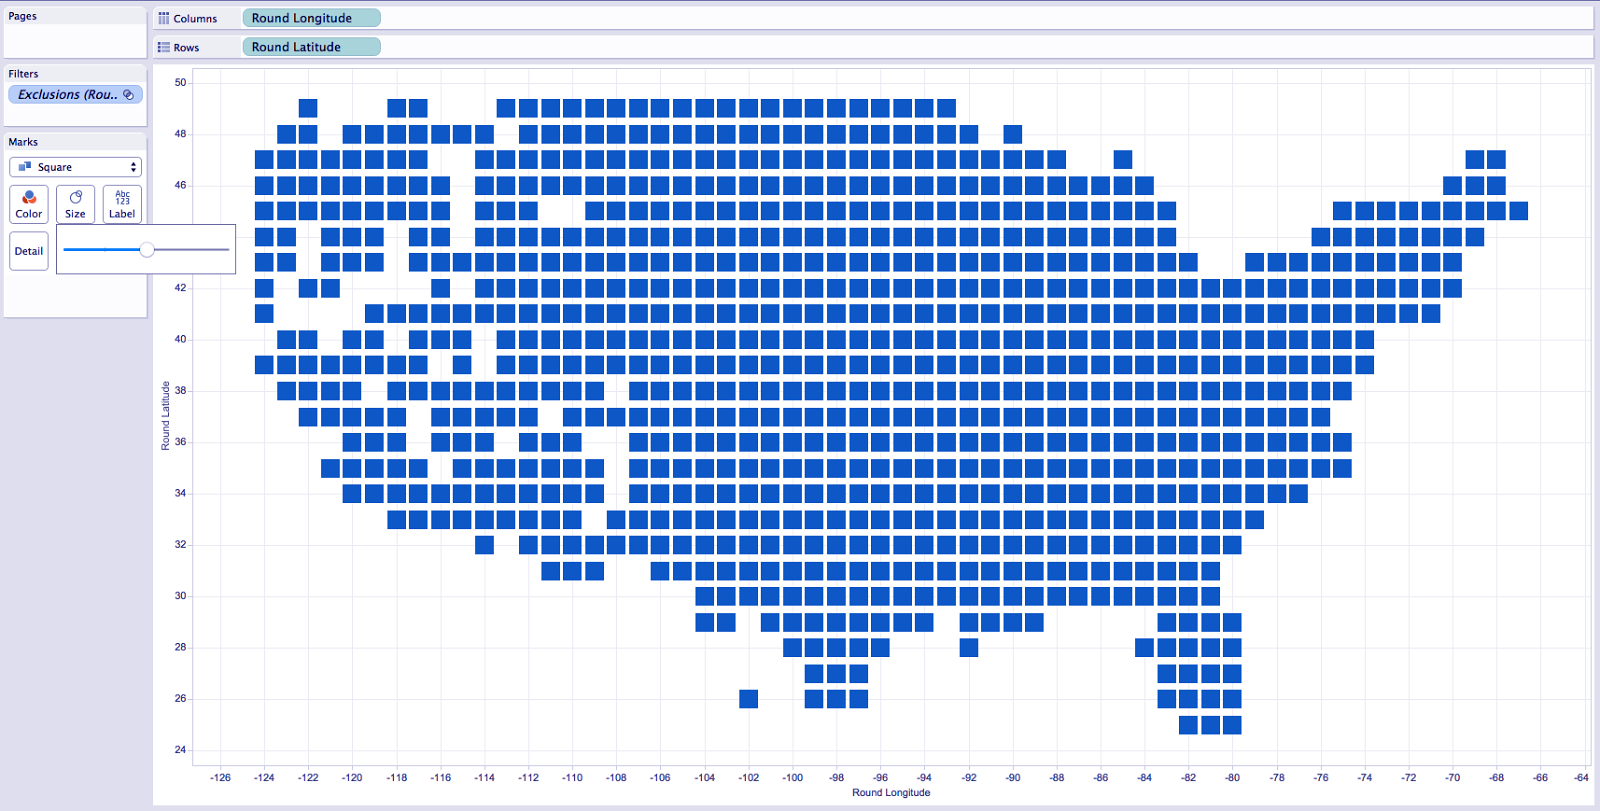
iii. Drag the measurement you have to the shading rack and kill gridlines. Cover up the two headers also.
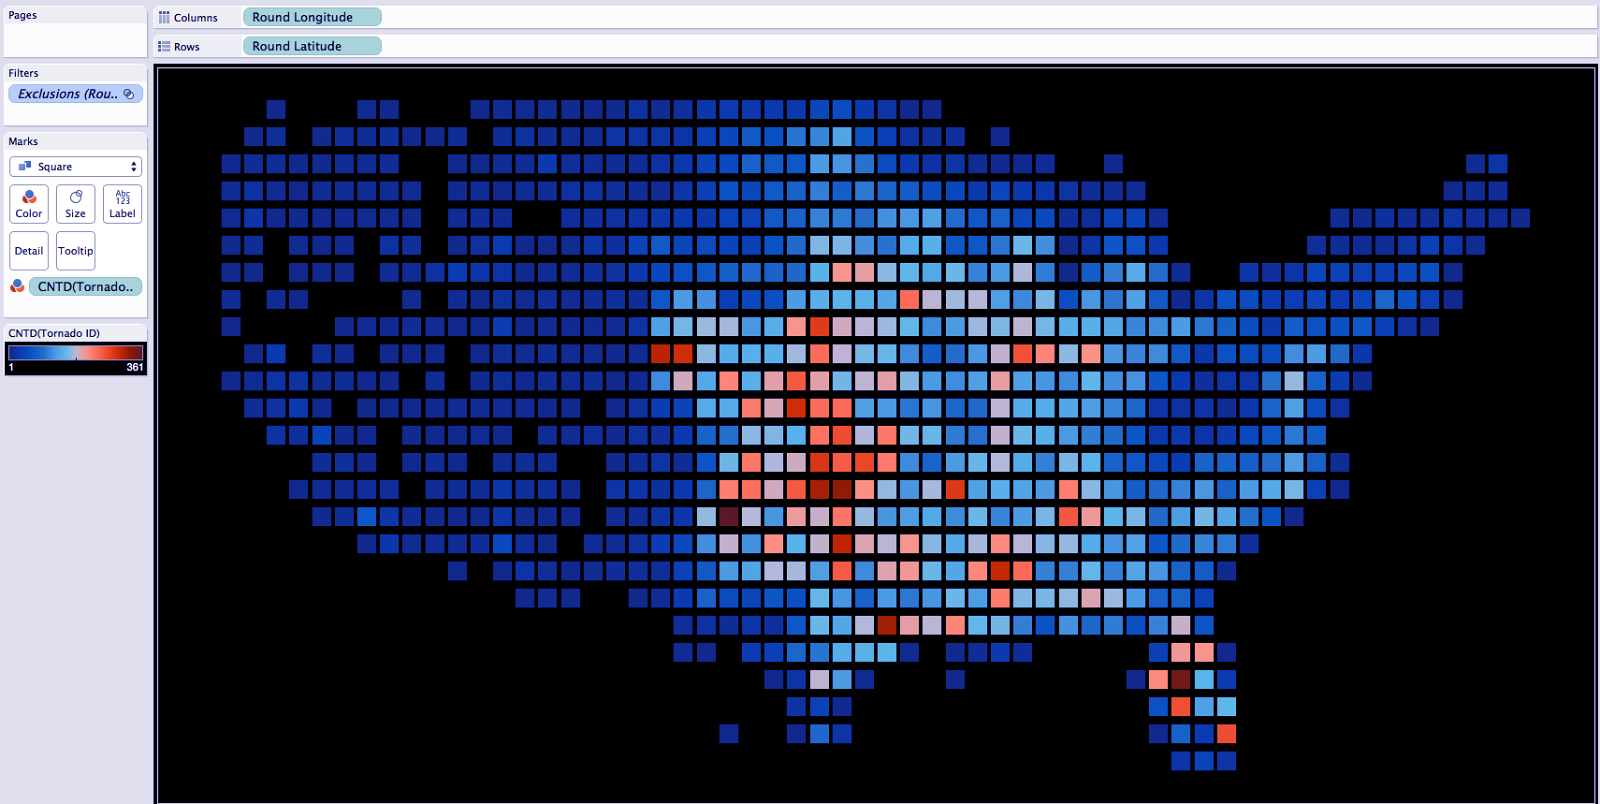
iv. At long last, carry the worksheet into the dashboard and size suitably. Here we utilized 1050 by 550, you can use any dimensions.
How to Create Density Map Using Hexbins in Tableau?
Following steps are helpful in creating Density Map Using Hexbins.
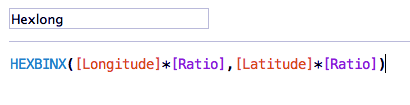
i. Make a parameter called “ratio.” This will give you a chance to control the binning. The higher the ratio, the more binning in the view.
Let’s look How to Create Hexbin Chart in Tableau
ii. Make the hexbins for longitude and latitude.
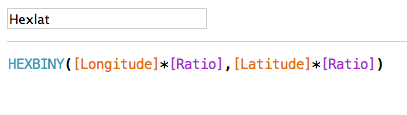
iii. Drag Hexlong and Hexlat to Columns and Rows, individually. Set your proportion to the binning level that you favor. For this situation, we utilized 2.5. Conceal the headers too.
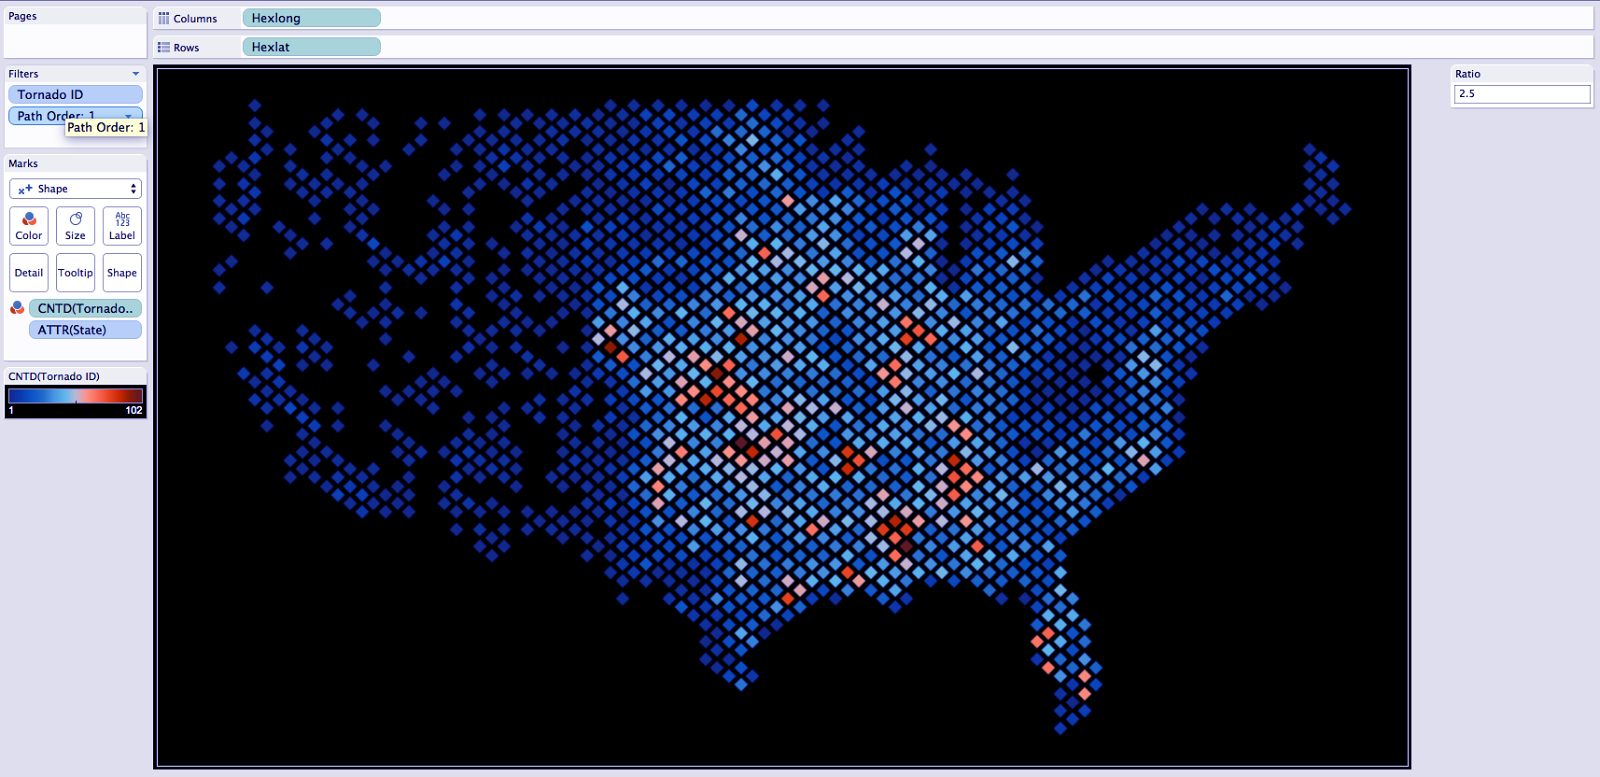
iv. Maneuver the worksheet into the dashboard and size properly. Here we utilized 1184 by 660 in this view.
Read about How to Add Data Layer to Map in Tableau
Conclusion
This was all about Tableau Density Map Tutorial. Hope you like our explanation.
Furthermore, if you have any query feel free to ask in a comment section.
Did you like this article? If Yes, please give DataFlair 5 Stars on Google


HOW ABOUT GIVE CREDIT TO THE PEOPLE WHO ACTUALLY CREATED THIS? YOUR WEBSITE IS DISRESPECTFUL AND IS USING CONTENT FROM DEVELOPERS WITHOUT RECOGNIZING THEIR WORK.
We had hired a freelance content writer for Tableau articles, it seems he had copied the content from another sites. We will surely give complete credit to the developer/site/portal, send the link of original content.