Tableau Assign Geographic Roles – Importing Tableau Geocoding File
Expert-led Courses: Transform Your Career – Enroll Now
In this Tableau tutorial, we are going to learn about Tableau Assign Geographic Roles to Data Elements. We will start with its basic and then move to the more advanced approaches. We will cover the topic with suitable examples, its advantages, and disadvantages and learn how to import tableau geocoding file.
So, let us start Tableau Assign Geographic Roles.
Tableau Assign Geographic Roles
While Tableau can map most geographic locations, you may still encounter locations that are unrecognizable in Tableau, and therefore do not show up on your map. It is still possible to visualize this. One way to make this happen is by importing your location information along with its latitude and longitude coordinates into Tableau.
Steps to Import Tableau Geocoding File
i. Go to the Map menu, and select Import Custom Geocoding.
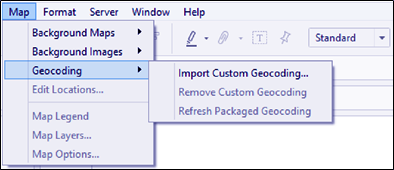
Step- 1 Import Tableau Geocoding File
ii. In the Import Custom Geocoding window, select the folder that contains the Busiest Airports.csv. Note your folder path may be different from what is shown in the following screenshot:
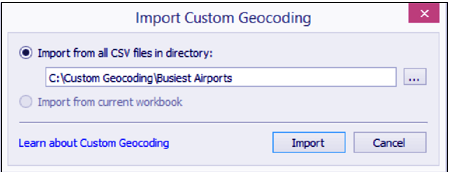
iii. Click on Import. This will load the custom geocoding, and depend on how fast your machine is, may take a few minutes.
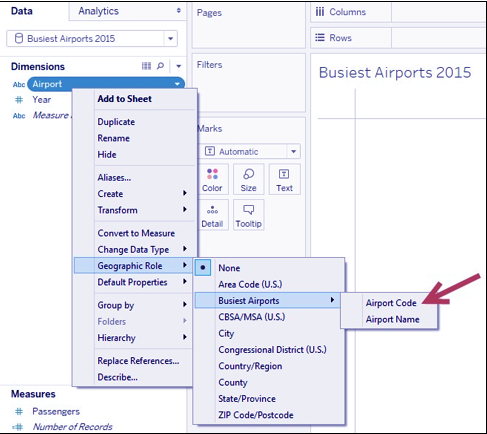
iv. After the custom geocoding is imported, right-click on the Airport dimension field and change the Geographic Role to Busiest Airports, and then Airport Code:
v. Double-click on the Airport field in the Dimensions section of the sidebar. This will create a map in your view.
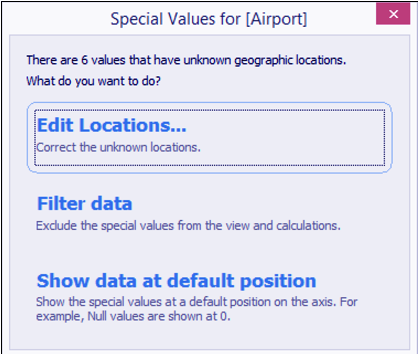
vi. Click on the indicator shown in the bottom-right corner of your view:

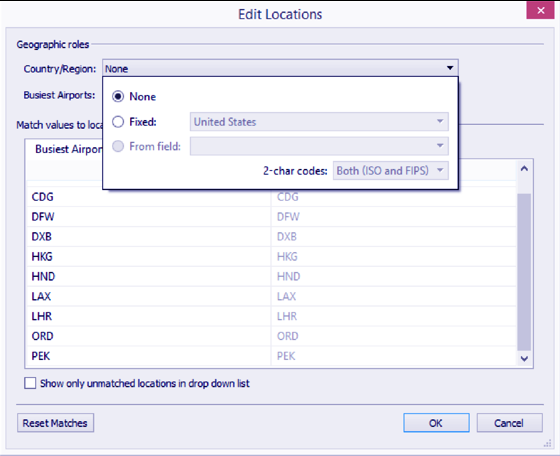
vii. In the Special Values for [Airport] window, select Edit Locations…:
Step-7 Import Tableau Geocoding File
viii. Select None for Country/Region Click OK when done:
ix. From Measures, drag Passengers to Color.
x. Right-click on the Passengers pill in the Color property in the Marks card and select Measure, and then Average.
xi. From Measures, drag Passengers to Size.
xii. Right-click on the Passengers pill in the Size property in the Marks card and select Measure, and then Average.
This was all about Tableau Assign Geographic Roles to Data Elements Tutorial. Hope you like our explanation of Importing Tableau Geocoding File.
Conclusion
In this Tableau Tutorial, we studied the Tableau Assign Geographic Roles to Data Elements, importing tableau geocoding file and many other points related to the topic. We thus complete another milestone in our journey.
We work very hard to provide you quality material
Could you take 15 seconds and share your happy experience on Google


