Transformation Wizard in Qlikview – 3 Unique Features
Expert-led Courses: Transform Your Career – Enroll Now
In the last tutorial, we learned about the QlikView Transformation wizard. Now, in this tutorial, we are going to learn about the other three features of Transformation Wizard in Qlikview. These three features are Fill Function, Column Manipulation and Rotating Tables. All of them serve different functions in data transformation.
So, let’s start the tutorial “Features of Transformation Wizard in Qlikview”.
Transformation Wizard in Qlikview – 3 Unique Features
Features of Transformation Wizard in Qlikview
There are 3 features of Transformation Wizard in Qlikview.
i. QlikView Fill Function
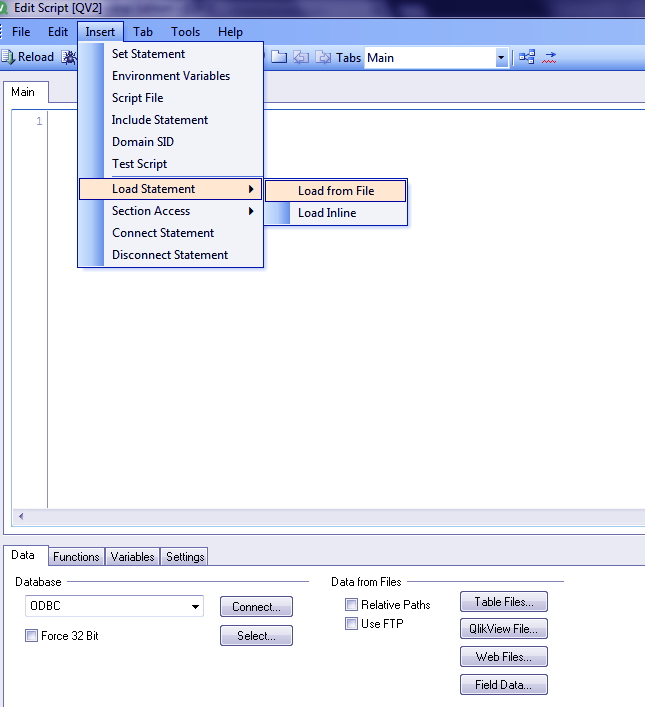
Fill function use when you want to fill in values from already existing fields. Let us understand this by applying the fill function to actual sales dataset. We will load the data file into Qlikview’s memory.
Do you know What is QlikView Data Types and its types?
Features of Transformation Wizard in Qlikview – Fill Function
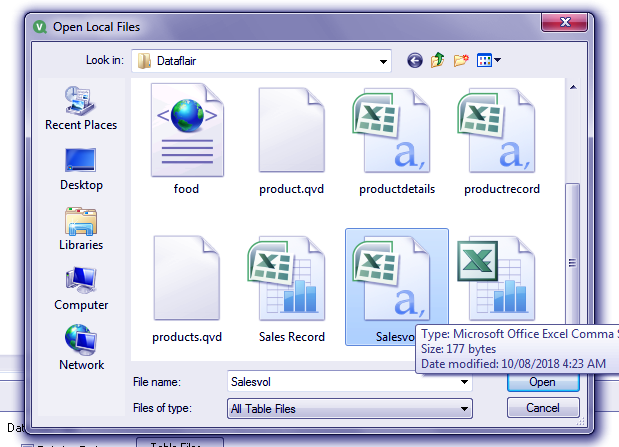
Select the data file named ‘Salesvol’. This is a monthly data record of the sales volume along with an incomplete column of the production volume.
QlikView Fill Function – Features of Transformation Wizard
QlikView Fill Function
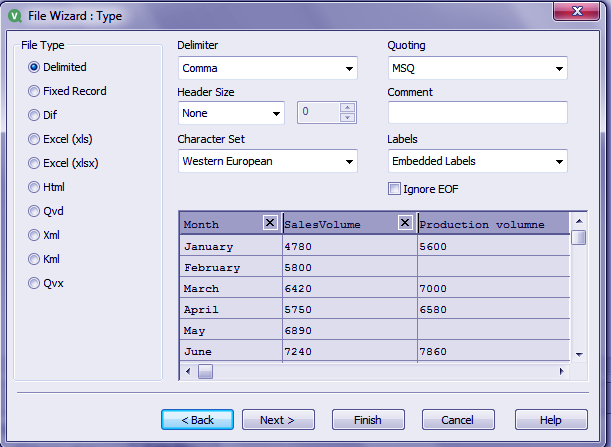
Click on NEXT and enable the transformation wizard.
Follow this link to know about QlikView Rank Function
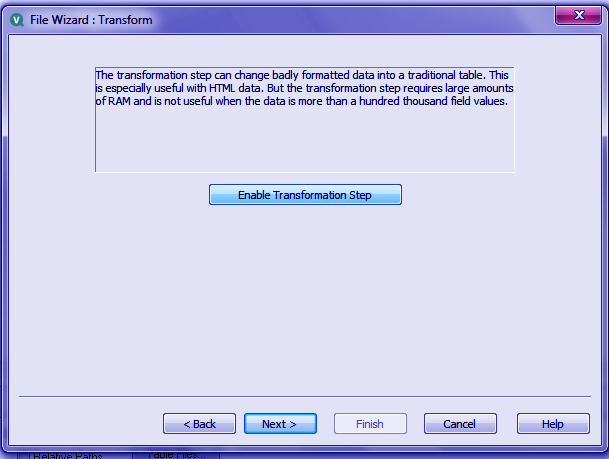
Features of Transformation Wizard in Qlikview – QlikView Fill Function
Select the FILL tab. You will see the data loaded.
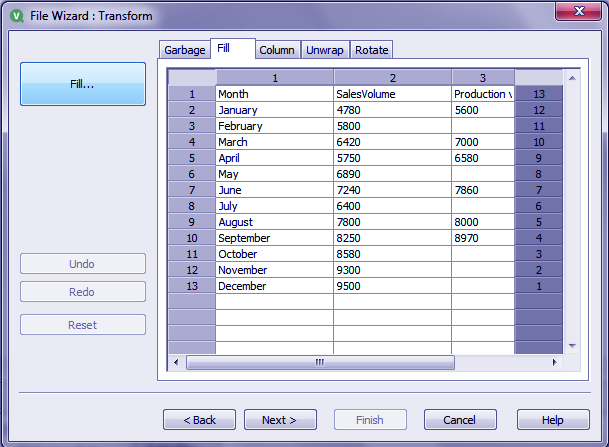
QlikView Fill Function – Features of Transformation Wizard
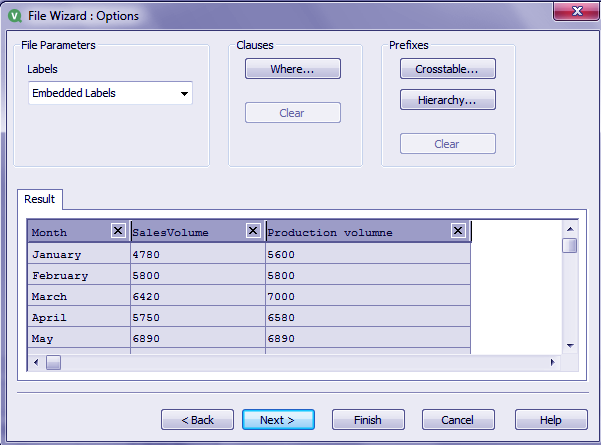
Now, if you notice the left out columns in the Production Volume field, are the ones where the sales were equal to the production done. So, in this case, we need to do is fill the empty columns with the values in the corresponding month’s sales volume column.
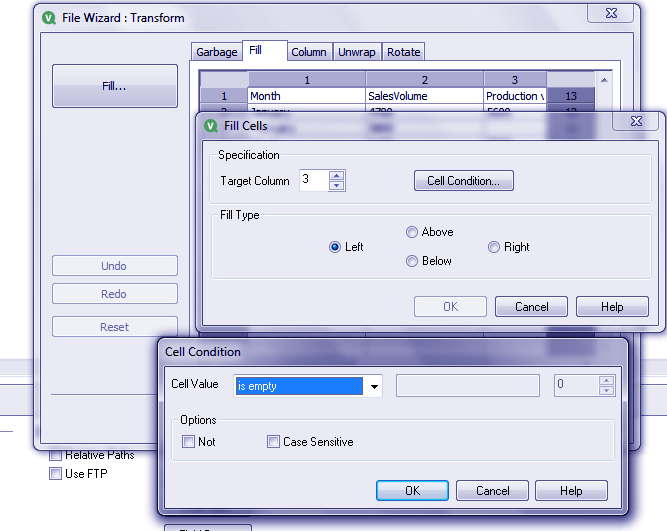
To do this, click on FILL option. Select the Target Column. Choose Fill Type. And click on Cell Condition if you wish to make any changes. Click on OK.
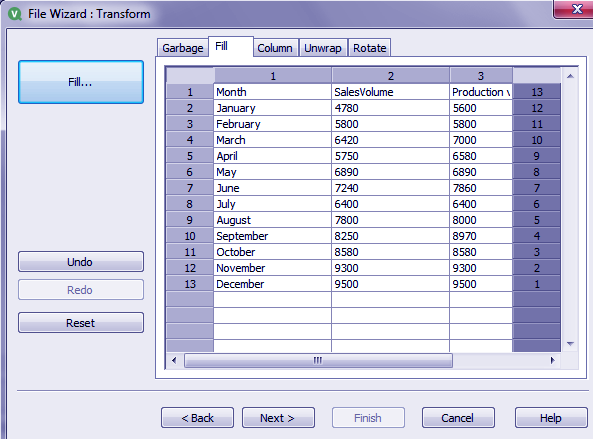
QlikView Fill Function
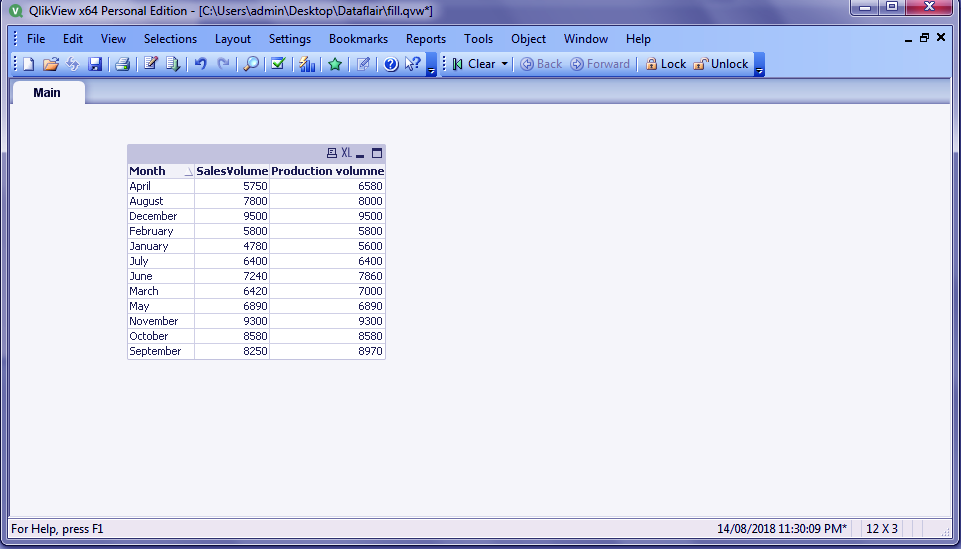
As you can see, the empty sections are filled with values.
Have a look – How to Create Synthetic Keys in QlikView?
QlikView Fill Function – Features of Transformation Wizard
Click on NEXT.
Features of Transformation Wizard – QlikView Fill Function
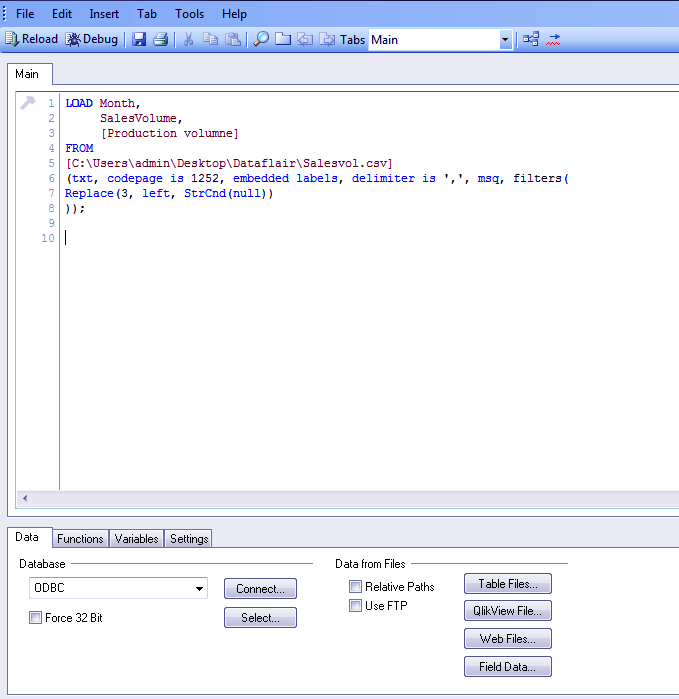
Click FINISH. The new script will be loaded automatically.
LOAD Month,
     SalesVolume,
     [Production volumne]
FROM
[C:\Users\admin\Desktop\Dataflair\Salesvol.csv]
(txt, codepage is 1252, embedded labels, delimiter is ',', msq, filters(Replace (3, left, StrCnd(null))
));
QlikView Fill Function
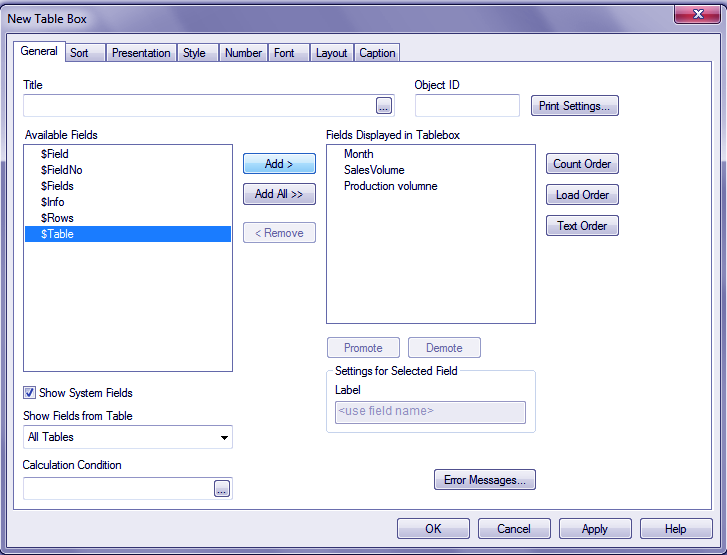
Save it and click OK. Create a table box to see the transformed dataset.
Let’s Explore How to Create QlikView List & Multi Box?
QlikView Fill Function – Features of Transformation Wizard
Features of Transformation Wizard in Qlikview – QlikView Fill Function
ii. QlikView Column Manipulation
Through Column Manipulation, you can create a new column and enter values in it from a preexisting column. Although this happens base on a criterion which you set, it is an expression or a function. In our file of Sales volume, we wanted to add a new column and repeat the months’ list next to the production volume column. For this, we use a column manipulation feature.
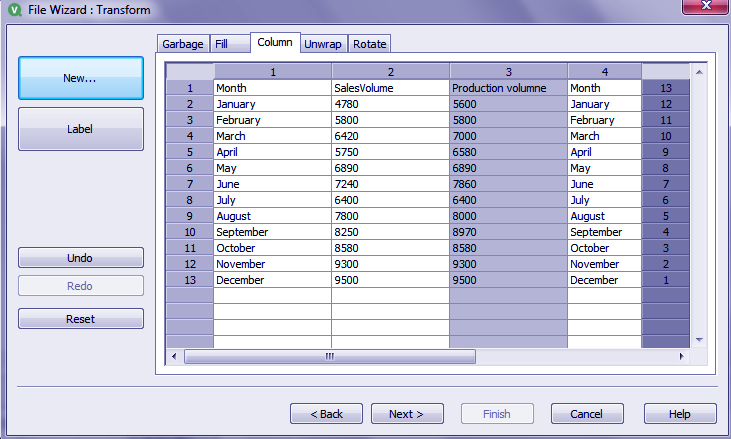
Enable the transformation wizard and go to the COLUMN tab. To do the changes click on NEW…
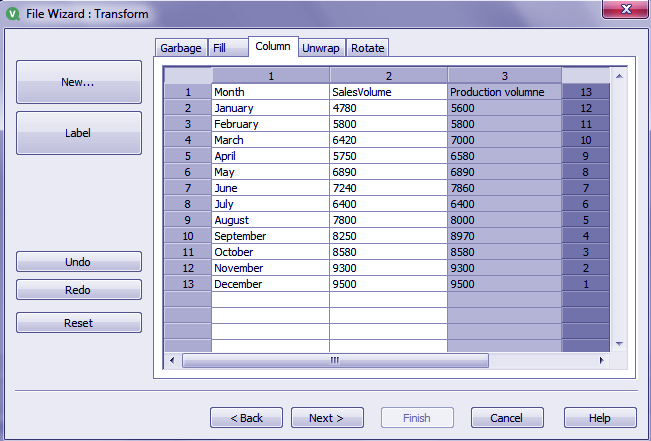
QlikView Column Manipulation – Features of Transformation Wizard
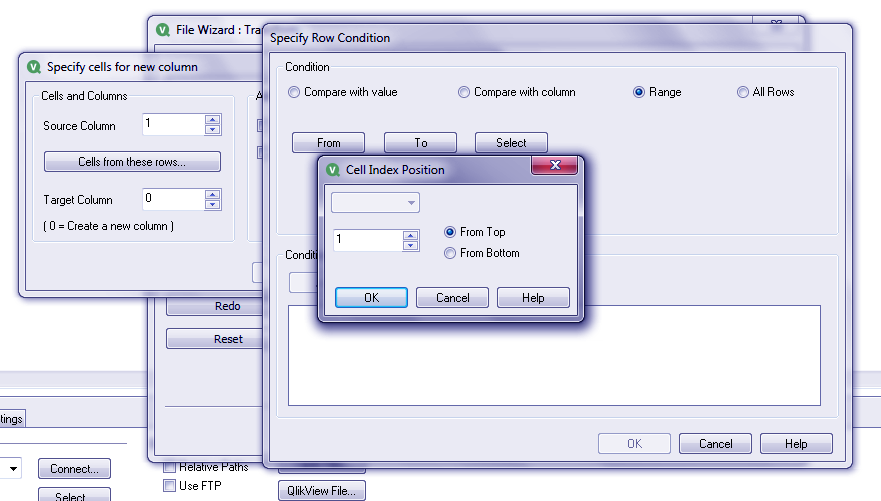
Select the Source Column (we have selected 1 because we want the Month field). Now, click on ‘Cells these rows’ to apply a condition on the rows. We have chosen RANGE condition and selected the start value of the range.
Transformation Wizard in Qlikview Features – QlikView Column Manipulation
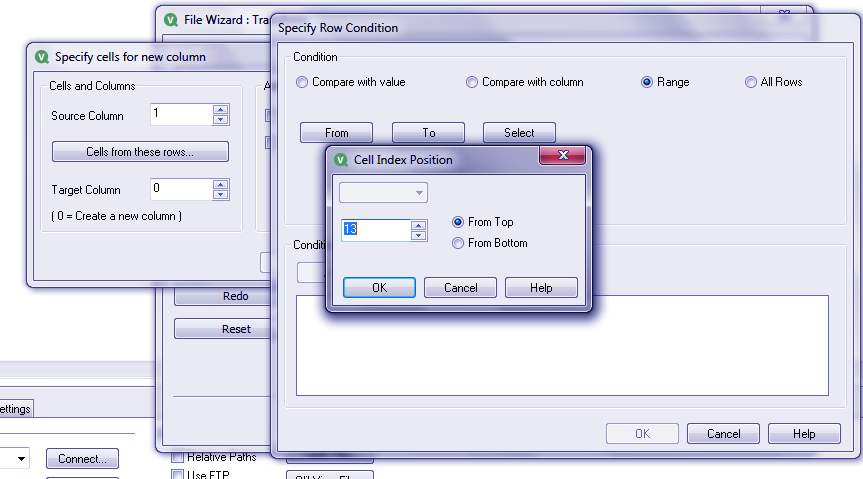
Next, select the end value of the range from TO option.
Do you know how to generate data in QlikView?
QlikView Column Manipulation – Features of Transformation Wizard
Once this is done, click on AND to display the expression code.
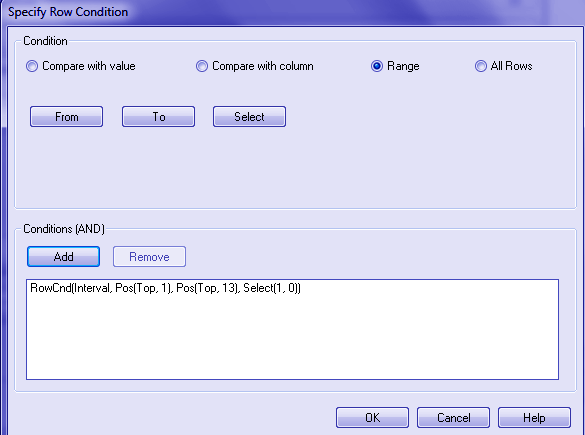
QlikView Column Manipulation
Click on OK.
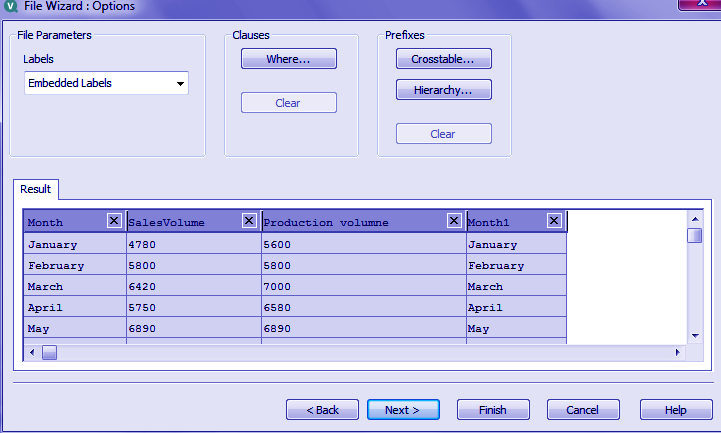
We have the column added with months list in it.
Features of Transformation Wizard – QlikView Column Manipulation
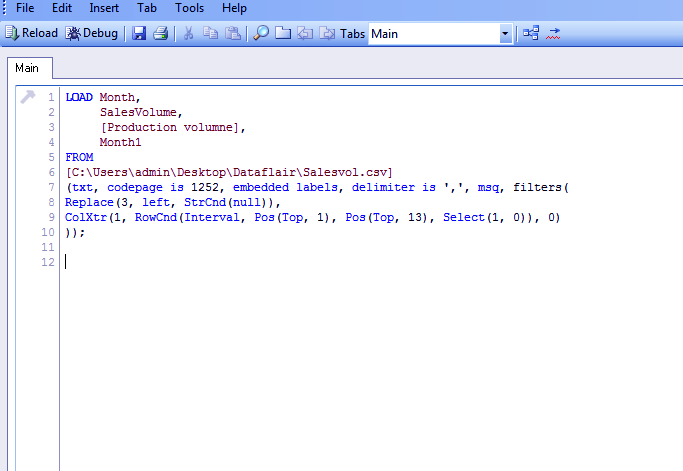
Click on NEXT. And then click FINISH.
QlikView Column Manipulation – Transformation Wizard Features
The new script will be automatically loaded in the script editor.
Follow this link to about QlikView Distribution Service
LOAD Month,
     SalesVolume,
     [Production volumne],
     Monthl
FROM
[C:\Users\admin\Desktop\Dataflair\Salesvol.csv]
(txt, codepage is 1252, embedded labels, delimiter is ',', msq, filters(Replace (3, left, StrCnd(null)),
ColXtr(1, RowCnd(Interval, Pos(Top, 1), Pos(Top, 13), Select(1,0)), 0)
));
Features of Transformation Wizard – QlikView Column Manipulation
Save the script. Close the script editor by clicking OK and create a table box after reloading the script with CTRL+R.
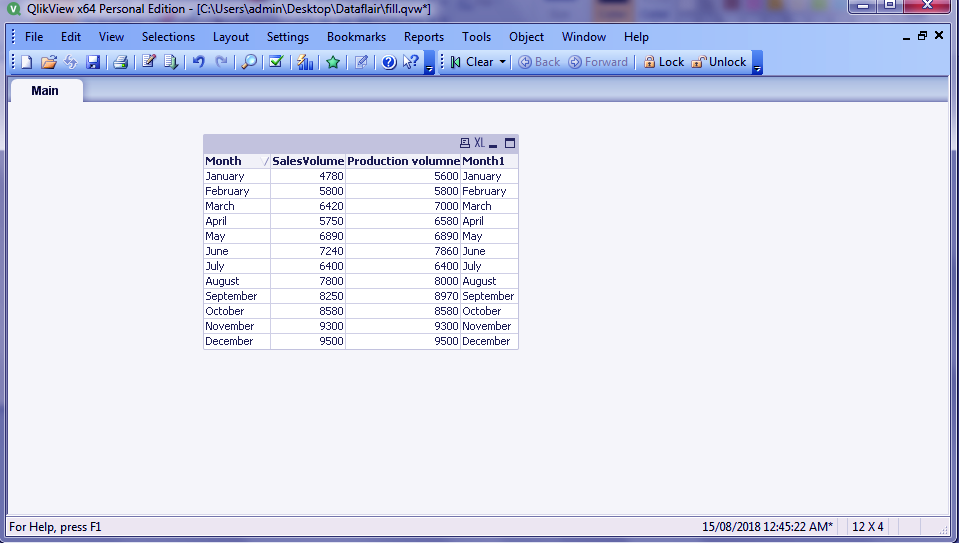
QlikView Column Manipulation
The new column has been added to the table using column manipulation.
iii. QlikView Rotating Tables
The Rotating Tables tab in the transformation wizard changes the orientation of the table. It transposes the table which means rows and columns switch places. You can change the orientation of the table in several other ways as well by using this feature.
In order to rotate or transpose a table. Enable the Transformation Wizard and select the ROTATE tab.
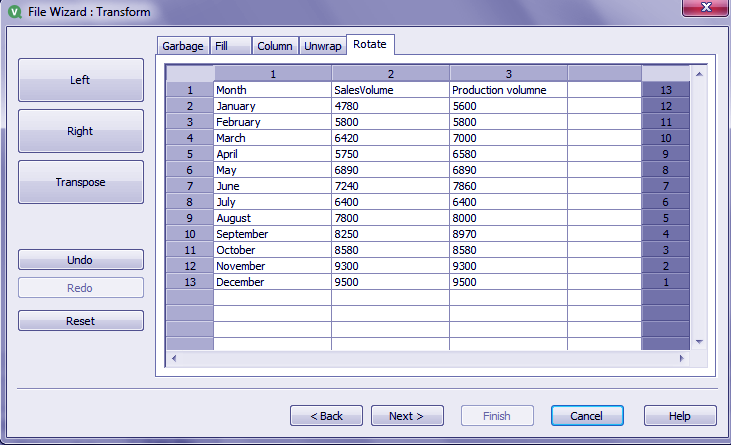
Features of Transformation Wizard – QlikView Rotating Tables
Click on the TRANSPOSE option. The table will be rotated.
Do you know how to apply trellis in Pie & Bar charts in QlikView?
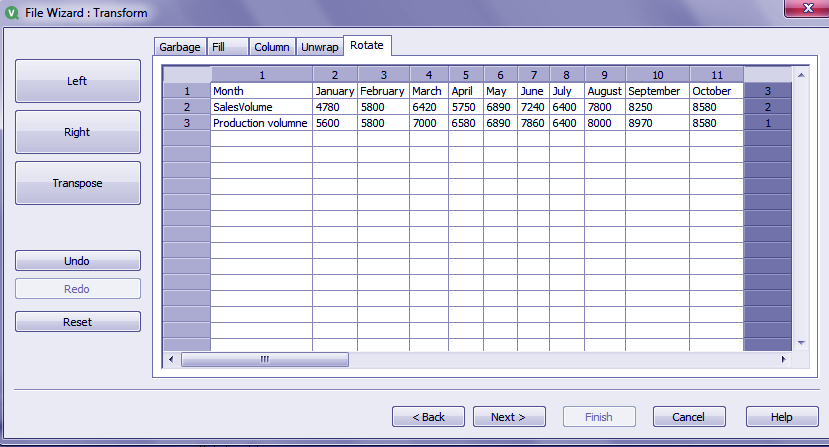
QlikView Rotating Tables
Click on NEXT and then FINISH. The script will be loaded
LOAD Month,
     January,
     February,
     March,
     April,
     May,
     June,
     July,
     August,
     September,
     October,
     November,
     December
FROM
[C:\Users\admin\Desktop\Dataflair\Salesvol.csv]
(txt, codepage is 1252, embedded labels, delimiter is ',', msq, filters(Replace(3,left, StrCnd(null))),
Transpose ()
));
Features of Transformation Wizard – QlikView Rotating Tables
Save the script. Reload it and create a new table box object. Select all the fields and the final rotated table will be displayed.
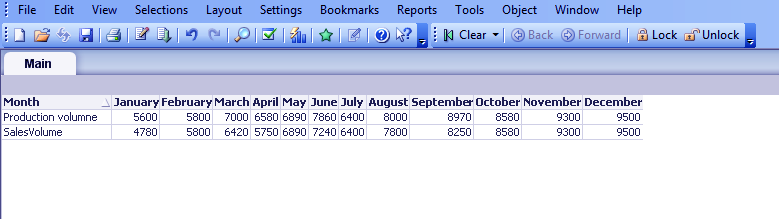
QlikView Rotating Tables
So, this was all about Features of Transformation Wizard in Qlikview. Hope you like our explanation.
Conclusion
This was all about the ways you can transform your data in. All features of Transformation Wizard in Qlikview are a part of the Transformation process of the ETL process (Extract, Transform, Load). Fill, column and rotate functions are given to save user’s time and ease up working with huge amounts of data. Furthermore, if you have any query, feel free to ask in the comment box.
Related Topic – QlikView Ports
Your opinion matters
Please write your valuable feedback about DataFlair on Google


