Creating QlikView List Box | Multi Box in QlikView
We offer you a brighter future with industry-ready online courses - Start Now!!
In our last tutorial, we talked about QlikView vs Power BI. Today, we will focus on some important sheet objects like- QlikView List Box and Multi Box. In this QlikView List Box Tutorial, we will learn QlikView list box tree view and associative feature. Along with this, we will also discuss what is QlikView Multi Box and How to create multi-box.
Both of these sheet objects use for display data or important information in specific ways by which you can analyze it having different perspectives and extract varied insights from it.
So, let’s start our journey with QlikView List Box.
QlikView List Box
A list box lets you choose a single field from the data file in table form that has been loaded into the QlikView memory. A single list of values from the field you have selected will be displayed as the final result. The properties window of the QlikView list box contains several tabs that provide many options for making changes in the list box.
The function and layout of the tabs will be the same as that shown in the previous QlikView Documents Tutorial.
We will discuss the QlikView list box properties tab here in brief.
Through the general properties tab, you can select the field, enter a title for the box, activate the read-only mode in which no changes can be made and many more such operations can do.
You can change the font, layout and presentation of the QlikView list box and the values being displayed in it. There is a separate tab for each. In the presentation tab, you can select an image as well.
You can also add an expression, put a caption, modify the numerical settings and set sorting criterions.
How to Create a List Box in QlikView?
Creating a list box in QlikView is an easy task. Load a data file into the QlikView script. Save your QlikView document in the .qvw extension and click OK in the script editor. Reload the script from CTRL+R and then you can create a QlikView List Box.
Do you know the Architecture of QlikView?
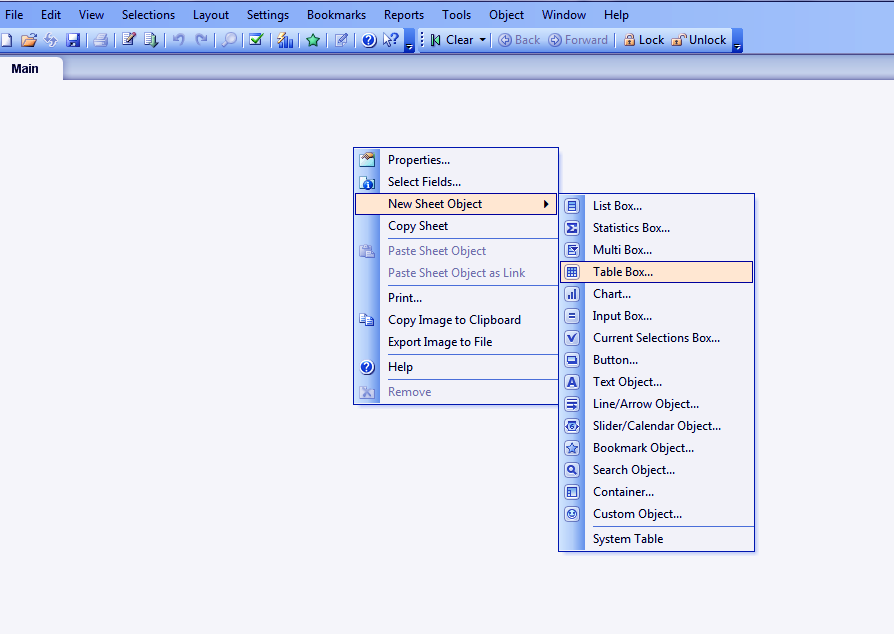
Go to the LAYOUT option present on the toolbar, then select New Sheet Object and then select List Box. You will see a dialogue box appearing. This is a List Box properties dialogue box from where you can access properties and make changes in the list box according to your preferences.

Step.1 To Create QlikView List Box
Select the field you want to make a list box in QlikView and enter the title of the box otherwise the field name will be taken up as the title. You can select the whole table (if fields are cyclic) or individual fields. Click OK after making desired selections.
Next, you will see a List Box on the currently selected sheet.
Step.2 To Create QlikView List Box
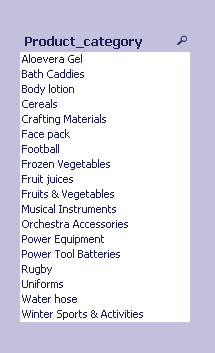
There is also a search feature given in a QlikView list box where you can search for the values you are looking for just by typing some initial letters.
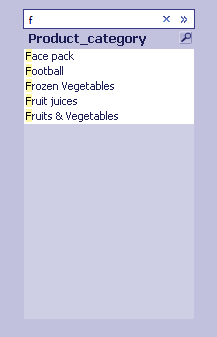
Step.3 To Create QlikView List Box
Let’s explore the QlikView Database Connection and Inline data
QlikView ListBox Tree View
If the data loaded from source is in a hierarchical table form, e.g. World then North America then the USA then California then NapaValley, a QlikView list box will display as a tree view. The fields are called the nodes which can collapse within one another and only the main fields will be shown in the list box. This form of representation is known as a Tree View list box.
After collapsing the nodes, the field remaining are called branch in the hierarchy, rather than an individual node.
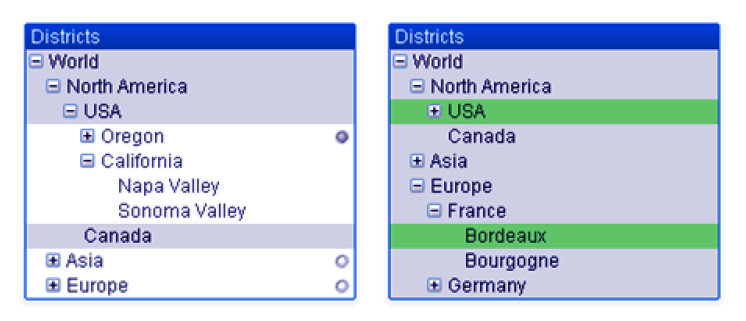
QlikView List Box Tree View
Associative Feature
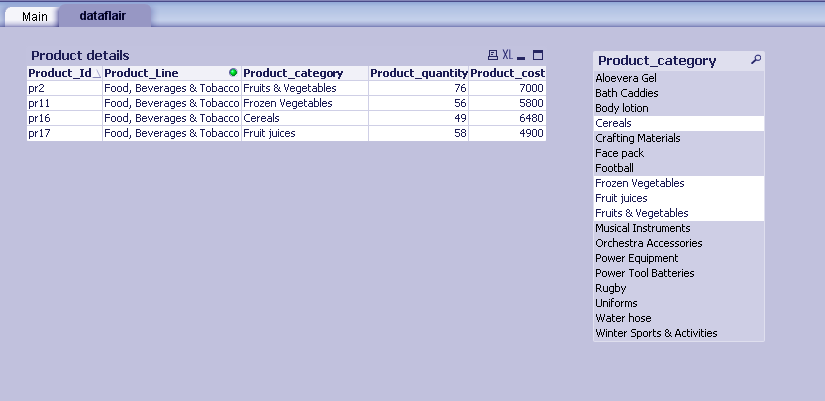
As per the associative data model of QlikView, all the related data fields or values are associated or linked to each other and whenever you make a selection on any value, all the data values linked to it will be activated in all the sheet objects present on the current sheet.
Creating QlikView List Box and Multi Box – Associative Feature
The unlinked or unrelated data is automatically omitted from the objects for that time. You can attain the original state of the objects by clearing all the selections by right-clicking on the objects.
Associative Feature
Read about QlikView Careers Opportunities – Latest Jobs Trends & Salaries
QlikView Multi-Box
QlikView Multi Box is also a data visualization sheet object. Why it is called a multi-box is because of its layout. It is like a compressed table box that shows only the field names in the columns and has a drop-down list by which you can see all the values of a field. This box is useful as it saves a lot of space of your dashboard or sheet and lets you add more objects to your dashboard for better analytics results.
How to Create a Multi Box in QlikView?
QlikView Multi Box is created through the similar process of creating any other sheet object. Just when you are selecting a new sheet object, click on Multi Box in QlikView.
Step.1 To Create QlikView Multi Box
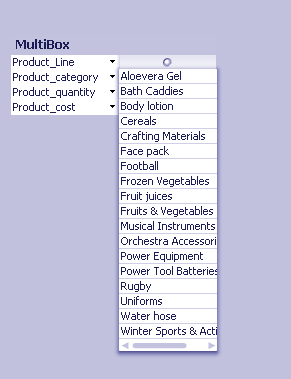
Next, you will see a Multi Box properties window, from where you can select or add the fields to display in the multi box, enter a title for the box, sort, change the layout, presentation and font of the multi box.

Step.2 To Create QlikView Multi Box
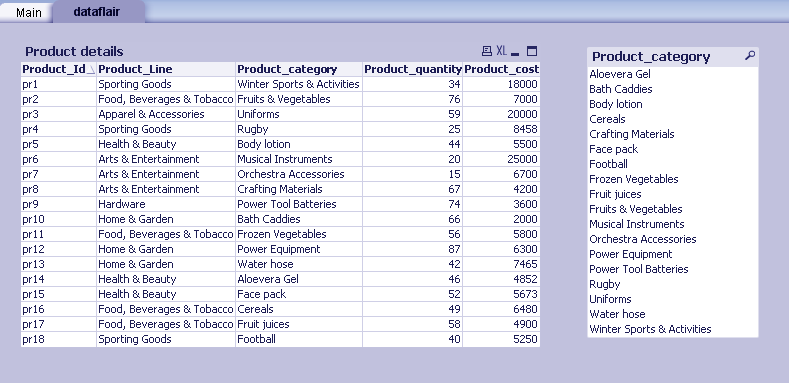
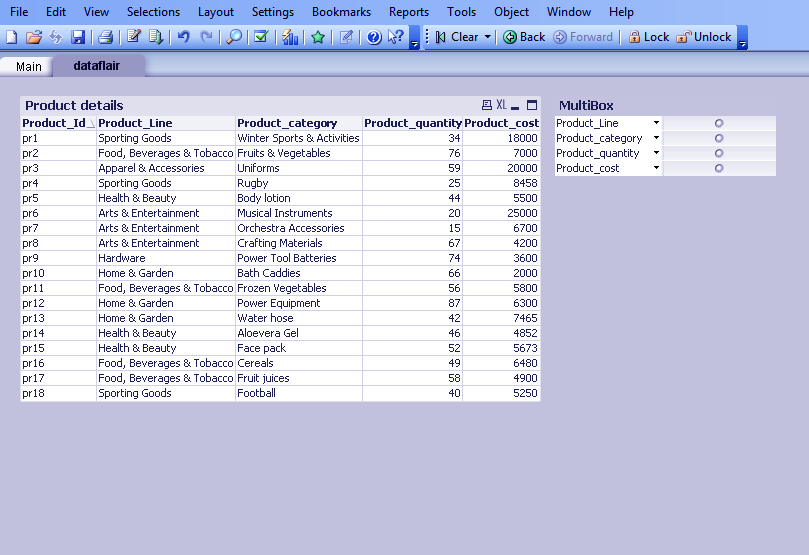
Here in our screenshot below, you can see that we add four fields from our data file to display in the QlikView multi-box. Upon clicking on the downward arrow beside each of the field names, the entire list of values in that field will unroll right there.
Follow this link to know about QlikView Navigation Pane
Step.2 To Create QlikView Multi Box
QlikView Multi Box also functions on the associative model. When you make a selection on a value in the multibox all the objects in the sheet like a table box, the list box will automatically get refresh showing only the related values of the selection made.
Step.3 To Create QlikView Multi Box
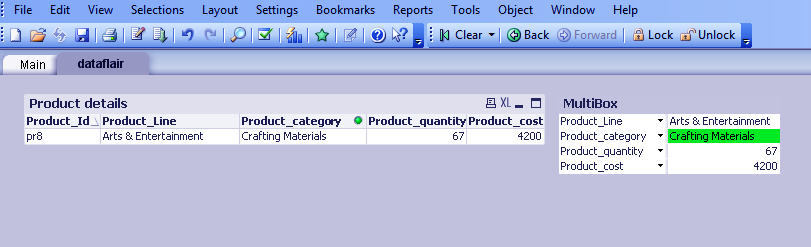
Pay attention to the system screenshots we have attached below, as soon as we made a selection from the PRODUCT_CATEGORY field and selected CRAFTING MATERIALS, the table box adjacent to it also filtered the information to show only the values linked to crafting materials. The same happened in the multibox. This makes data analysis much faster and efficient.
Step.4 To Create QlikView Multi Box
So, this was all about QlikView List and Multi Box Tutorial. Hope you like our explanation.
Conclusion
Hence, we discussed the role of multi-box and list box plays in easing up the seemingly overwhelming process of data analysis. Its associative feature makes it an even more significant part of QlikView. Still have a doubt, feel free to ask with us.
Keep practicing!
Related Topic – QVD Files
You give me 15 seconds I promise you best tutorials
Please share your happy experience on Google


