QlikView Transformation Wizard – How to Delete Rows in QlikView
FREE Online Courses: Elevate Your Skills, Zero Cost Attached - Enroll Now!
In this section of the tutorial, we will learn about what is QlikView transformation wizard and its functions. Moreover, we will learn how to use transformation wizard and deletion or Garbage tab of the transformation wizard in QlikView.
Data transformation is the process of transforming or modifying data after loading it in QlikView’s memory.
So, let’s start QlikView Transformation Wizard Tutorial.
QlikView Transformation Wizard
The QlikView Transformation Wizard use for modify data after loading it into QlikView’s memory from an external source. This is the Transformation step from the ETL (Extract, Transform, Load) process. You can perform certain data modification or alteration functions like deletion (Garbage), addition or fill, column, unwrap, rotate etc.
Do you know what is QlikView Time Chart Wizard?
Functions of Transformation Wizard in QlikView
These are QlikView Transformation Wizard Functions:
i. Garbage
The Garbage tab removes or deletes the unwanted rows and columns from the table. It often happens in the case of HTML documents that they have extra rows and columns which are not of use. The garbage tab has two options,
Delete Marked, which deletes the highlighted rows and columns.
Conditional Delete… which deletes the rows based on a conditional criterion.
ii. Fill
Using the Fill tab, you can fill empty cells or replace the cell values with new values from the same column. It is used when you want to fill the same value from the column in other cells of that column. This can be done using Fill.. button given in the fill tab, where you can specify fill conditions and strategize filling of cells.
iii. Column
Through the Column tab, you can copy or duplicate the contents of one column to a new column. You can either copy all the cells of a column to a new one or select set of cells. There are two options given in this tab,
New… option opens a dialog called Specify cells for new column where you can specify the copy details about the column’s cells.
The Label option lets you set the label or name of the new column.
iv. Unwrap
From the Unwrap tab, you can unwrap a wrapped table. By a wrapped table it is meant that one half of the table comes on the right of the first half of table contents. The options available in Unwrap column lets you regain the normal/unwrapped (second half below first half) state. There are two options in the Unwrap tab,
From the Unwrap option the table is unwrapped. A table can wrap vertically or horizontally, so setting the border between the two is important.
From the Conditional Unwrap option, you can specify a condition for unwrapping the table.
v. Rotate
The Rotate tab changes the orientation of a table. The rows and columns switch places. This is a very popular layout, which is mostly use by web designers. You can rotate a table in three ways from the rotate tab.
Left option rotates the table counterclockwise
Right option rotates the table clockwise
Transpose option transposes a table, also calls mirroring a table along the diagonal axis. It switches the places of cells on top right corner and bottom left corner.
Let’s Explore Left, Right, Inner Keep Function in QlikView
How to Delete Row using Transformation Wizard?
Let us learn how to delete some rows from our existing data set using QlikView Transformation Wizard.
i. Load Data
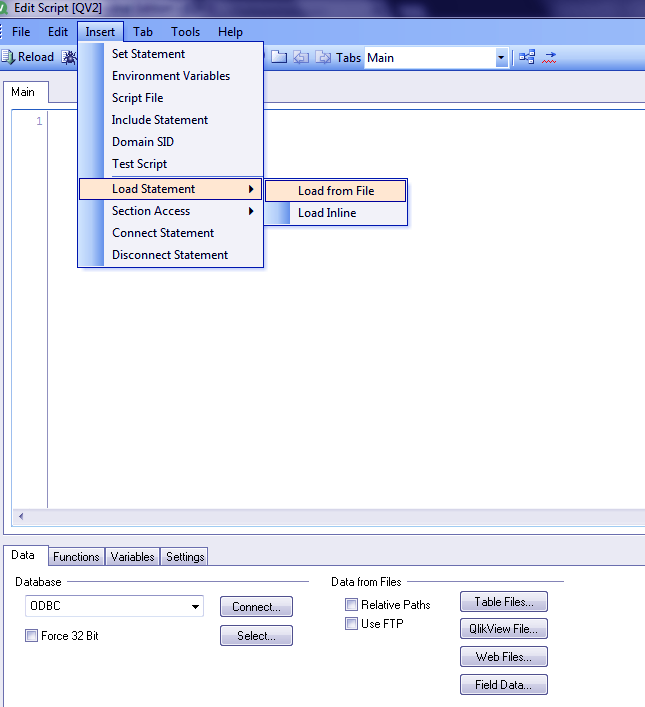
Open a new QlikView document. Open the scrip editor using the icon on the toolbar or by CTRL+E. Then go to the Insert option and select Load Statement. After this select Load From File option.
ii. Selecting From Source
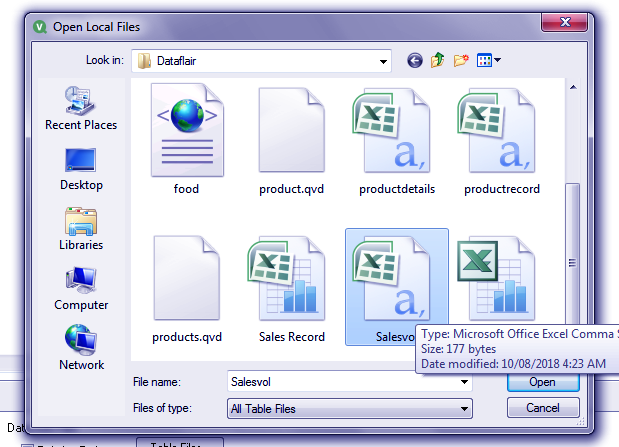
Now, you will direct to the storage drives in your devices from which you can select any CSV file. Click on Open.
Must Read – Quick Chart Wizard in QlikView
iii. File Wizard
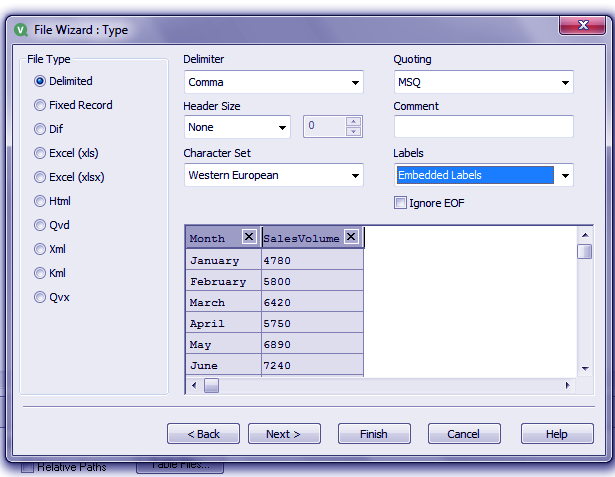
The next dialog box will File Wizard where the details of your selecte data file can see. Select EMBEDDED LABELS from the Labels drop down a list. Click on NEXT.
iv. Enabling Transformation
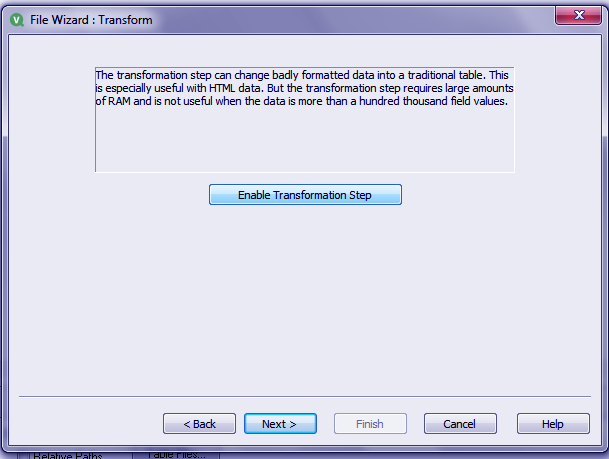
On clicking Next, you will get a Transform window asking your confirmation to initiate the transformation wizard. Click on Enable Transformation Step.
v. Transformation Type
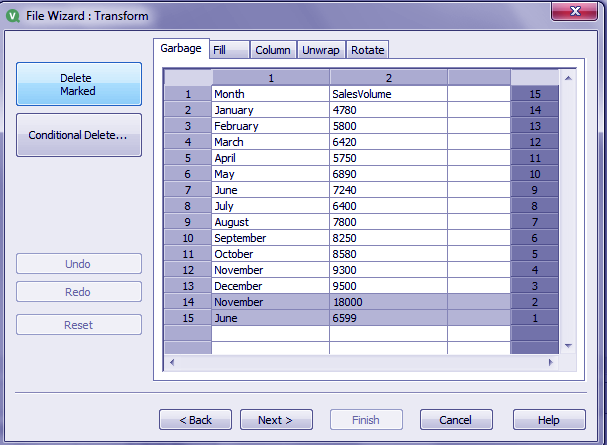
Now you will have the data in tabular form. In the Garbage Tab, deletion is done. We have selected the last two rows as they were not required in the yearly sales analysis. By clicking on Delete Marked, the marked or selected rows will get deleted. Click on NEXT.
Do you know how to apply QlikView Layout Themes?
vi. Transformation Options
In the next window, you will have the transformed table after deletion. Again, select Embedded Labels to make the first rows as labels and click on Finish.
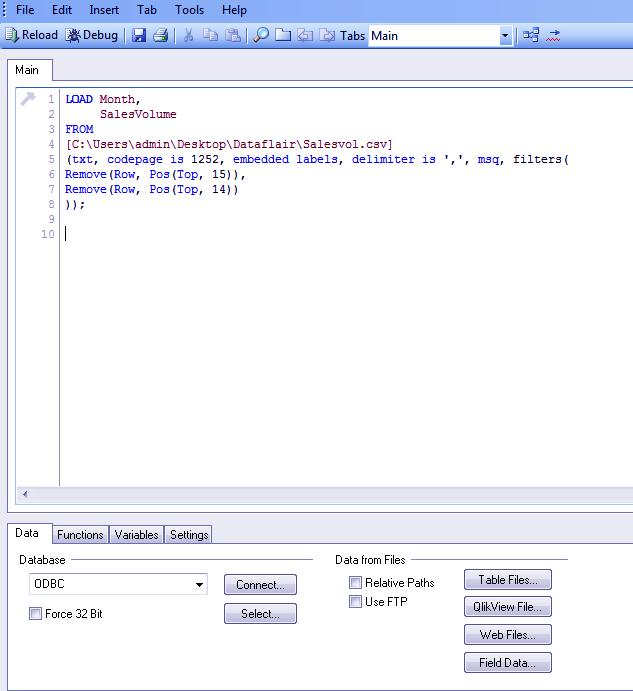
vii. Load Transformed Script
Upon clicking FINISH, new script will automatically get loaded with the code showing changes made. Save the script and document in .qvw extension and click Ok.
LOAD Month,
     SalesVolume
FROM
[C:\User\admin\Desktop\Dataflair\Salesvol.csv]
(txt, codepage is 1252, embedded labels, delimiter is ',', msq, filters(
Remove(Row, Pos (Top, 15)),
Remove(Row, Pos (Top, 14))
));viii. Displaying Table
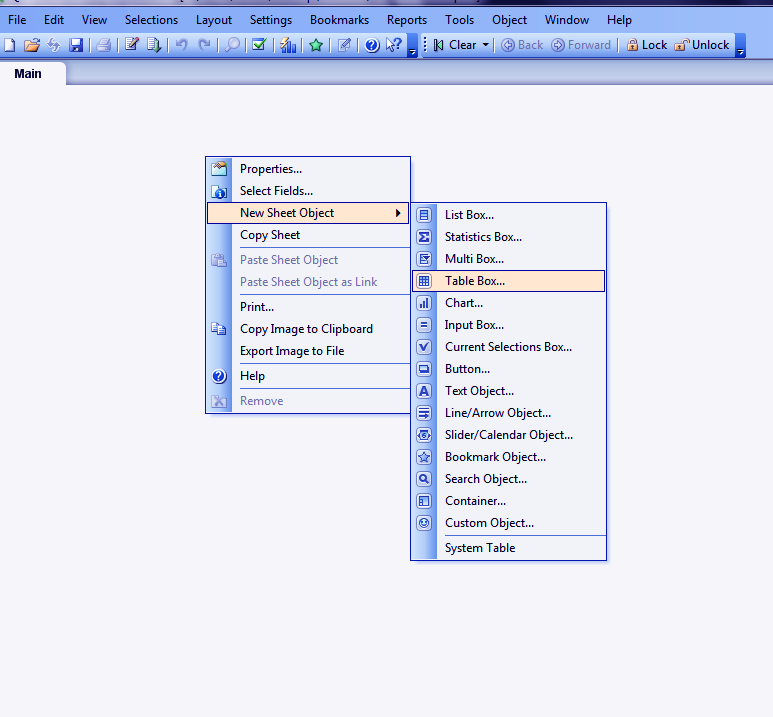
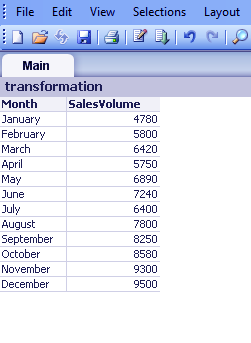
Reload the new script by CTRL+R or by the icon in the toolbar. Create a table box to get the transformed data displayed on the screen.
Include this in your learnings – Operators in QlikView
As you can see, the last two rows have been deleted from the final table.
So, this was all about QlikView Transformation Wizard Tutorial. Hope you like our explanation.
Conclusion
Hence, we studied the garbage tab or marked deletion using the transformation wizard in QlikView. It makes data modification much easier and faster. Furthermore, if miss something or you have any query, feel free to ask in the comment box.
Related Topic – QlikView Server Load Sharing
We work very hard to provide you quality material
Could you take 15 seconds and share your happy experience on Google
