Loading Data From Database in QlikView – Simple Steps to Load Data
Interactive Online Courses: Elevate Skills & Succeed Enroll Now!
In our last session, we talked about Loading Data from files. Today, we will learn Loading Data From Database in QlikView. Moreover, we will learn different steps to load data from database in Qlikview.
If data could only be loaded from external files or inline, how limited the scope of QlikView will become. That is why being able to connect and fetch data from commercial databases is a very important facility.
As databases stores data in great amounts, more data can use for analysis in QlikView by connecting to databases.
So, let’s start the Loading Data From Database in QlikView.
Loading Data From Database in QlikView
QlikView provides easy ways of connecting to external data sources, databases to be specific. It connects with several commercial databases through an ODBC or OLE DB connection interface.
The basic steps are to first install a driver specific to the database you want to connect and also, configure that database as an ODBC data source.
In the Database section of the script editor, you can select the type of connection interface from ODBC and OLE DB. Then click on Connect. This will open a dialog in which you can select the Data Source Name (DSN) of the database of your choice from a list of available DSNs.
To view the user databases available, check the Show user DSN box. Once you have selected your database name, you can test the connection.
Upon exiting this dialog, the connection statement will load into the script with keyword CONNECT. After setting up the connection with the desired database, you can select which data files are to load from the databases available under the DSN.
This can done through Select option given below Connect option. Here, you can select from available databases from a drop-down menu.
Then you can select from the tables available in the selected database. Then in an adjacent section, you see the list of fields present in the selected table.
Once you click on Ok, you will see that the script has been updated and now shows statements for the selected table using SELECT and FROM keywords.
Upon saving and executing the script, data will finally get loaded from the database and will be ready to be used in sheet objects.
The sheet objects created will follow the associations as usual and such fields which are common in two or more tables loaded from the database will link the table and become the Key fields.
How QlikView Load Data From Database?
QlikView can connect to many different data sources like MySQL, Oracle, SQL server etc. Data from a database can load into the QlikView’s in-memory and can quickly retrieve for further analytical purposes.
Let us see how to connect databases in QlikView. Before we move on, you might need to make sure that you have a pre-existing database in your computers.
In order to connect with a database, you need to follow some steps. You can connect through ODBC connection which connects to DSN (Data Source Name) and then the DSN connection lets you connect to the available databases.
If you do not have a DSN connected to the required database, you can do that online.
Steps for Data Connection in QlikView
Moving on with the steps for data connection,
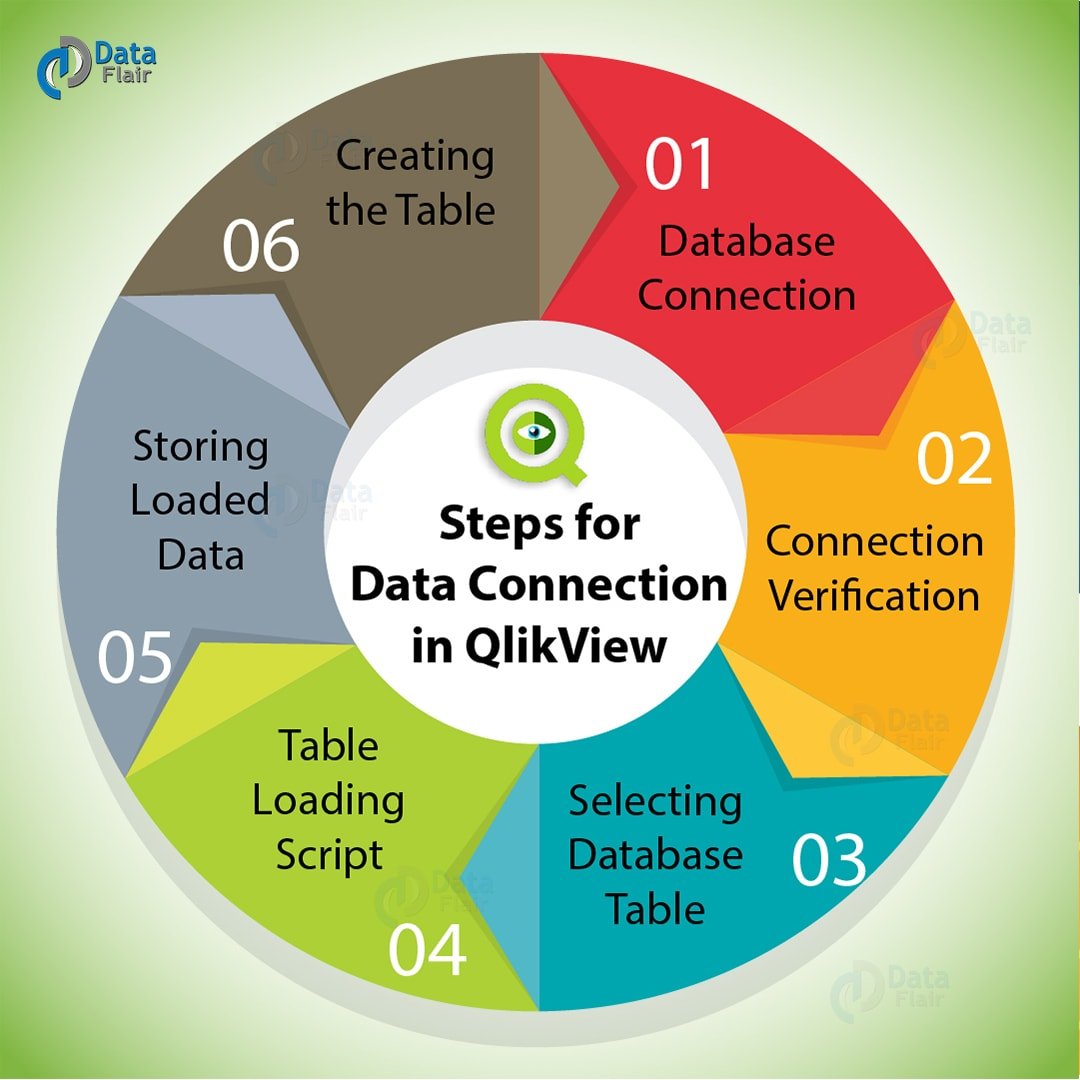
Steps for Data Connection in QlikView
i. Database Connection
Open the script editor in QlikView and click on the Connect option after choosing ODBC/OLE DB options given in the database section. A window will appear showing all the existing or available DSNs.
We have selected mysqluserdsn (DSN). Further, you can click on Test Connection to check if the connection with the data source is okay. A messages flash CONNECTION TEST SUCCEEDED when your connection goes okay.
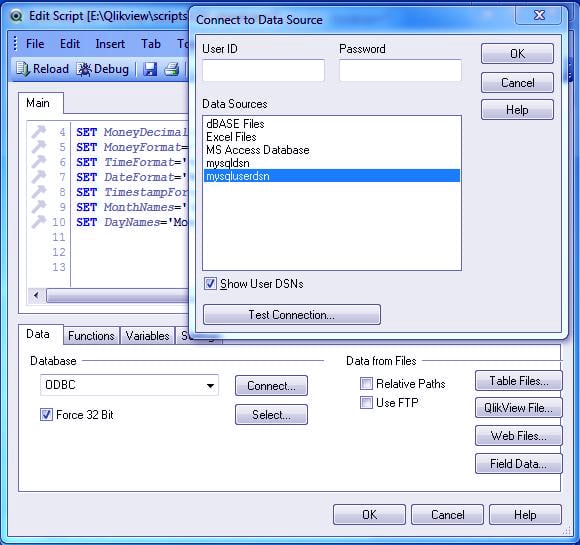
Loading Data From Database in QlikView – Database Connection
ii. Connection Verification
The ODBC Connect statement will be displayed on the script editor window, which will instruct the system to load data from the selected data source.
Now, to select database and tables from the selected data source click on Select given below the Connect option.

Loading Data From Database in QlikView – Connection Verification
iii. Selecting Database Table
Here, as we select the database named ‘Sakila’ which is in the Data source file ‘mysqluserdsn’ that we selected and got connected to in the previous step.
It has got a list of tables residing within the database ‘Sakila’ to select from. We have chosen the table called ‘actor’. (You can select databases available in the data source you will connect to). Then click OK to continue.
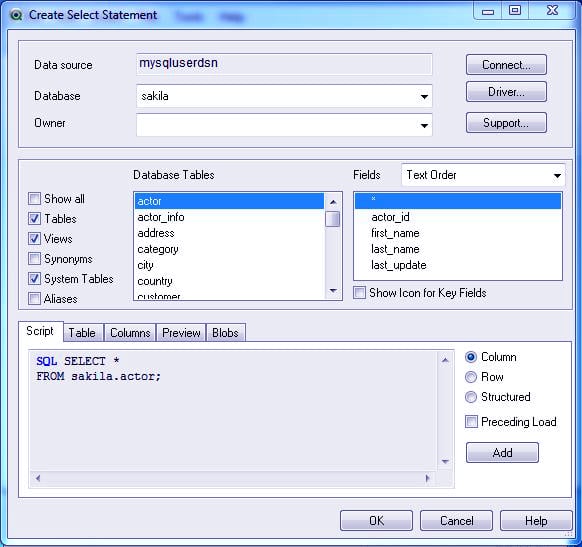
Loading Data From Database in QlikView – Selecting Database Table
iv. Table Loading Script
Now that the table titled actor is been selected it starts showing in the script in the form of a script statement as well.
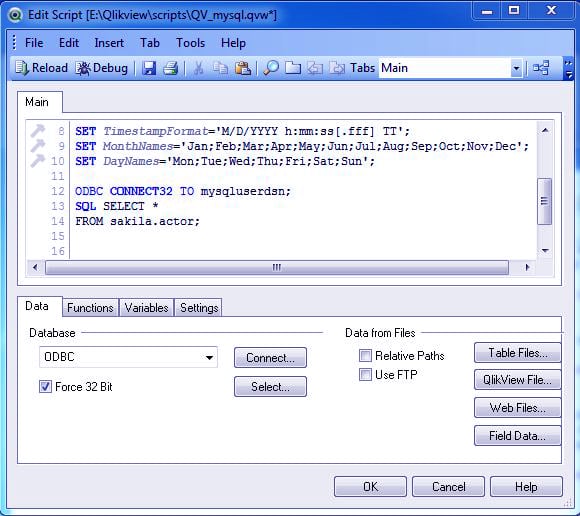
Loading Data From Database in QlikView – Table Loading Script
v. Storing Loaded Data
We will have to type some commands to store our data permanently. We define a path and provide all the major information by this command. The extension to this file will be .qvd .
Also, we will save this file with a suitable name in .qvw format.
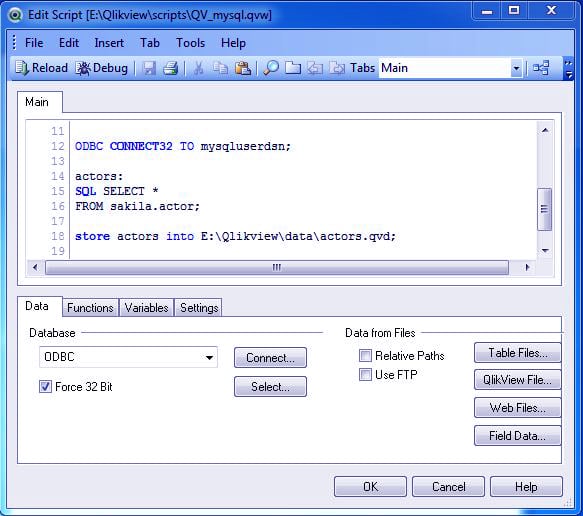
Loading Data From Database in QlikView – Storing Loaded Data
vi. Creating the Table
The final .qvd file can retrieve or reload in the main document by pressing CTRL+R. You can now select a straight table (or any other mode of representation to your liking) to visualize the data in the form of a table having columns and rows.
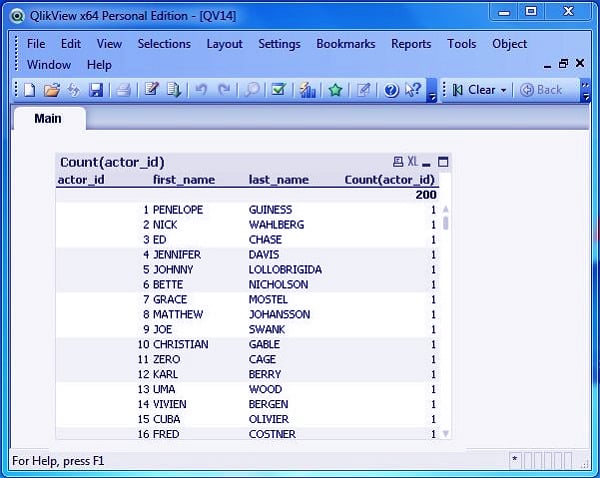
Loading Data From Database in QlikView – Creating the Table
So, this was all about Loading Data from Database in QlikView. Hope you like our explanation.
Conclusion
Hence, in this tutorial, we learned loading data from database in QlikView and how to establish a connection to a data source in QlikView. In addition, we studied how to select and load tables from databases available in the connected data sources. Still, have a query, feel free to approach us through comment section!
We work very hard to provide you quality material
Could you take 15 seconds and share your happy experience on Google


