Creating QlikView Reports – Types of Reports in QlikView
We offer you a brighter future with industry-ready online courses - Start Now!!
Our last session was on QlikView Themes. Here, we will talk about QlikView Reports, in which we will see types of Reports in QlikView.
Moreover, we will learn how to create QlikView Reports. At last, we will discuss the QlikView Report Editor.
Being a Business Intelligence tool, QlikView is loaded with all the requisites to analyse and document data.
Once you have done your analysis and have come to a certain conclusion, the next step will be saving and printing the inference that you have displayed in the form of various sheet objects.
These inferences that are then printed are known as reports.
So, let’s start the QlikView Reports Tutorial.
What are QlikView Reports?
To report or document the analysis performed QlikView reports creates and prints. QlikView reports are basically the sheet objects like charts, tables, graphs, list etc., that are present in a document.
There is a tab called Reports in the menu bar through which all the report related tasks manage which we will discuss in the sections to follow.
This QlikView reports tab use when complex tables having multiple sheet objects (charts and tables) creates.
Because a single sheet object can print directly but when more than one sheet objects are required in a report form with proper layout, the Report Editor is used.
Do you know What is QlikView Architecture & How it Works?
Types of Reports in QlikView
As in the case of Bookmarks, QlikView reports are also of different types depending upon the user and permission to access. There are four kinds of QlikView reports:
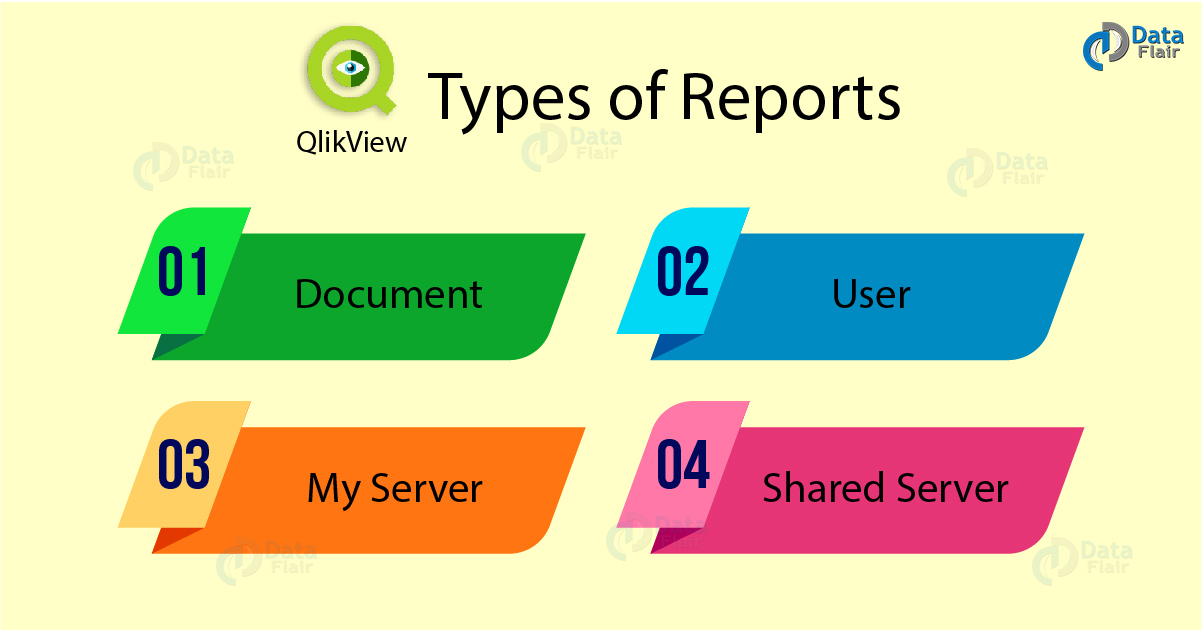
Types of QlikView Reports
a. Document Reports
These QlikView reports contain sheet objects of a document. A user can access these reports either locally or through the QlikView’s Server. The document reports save in the same Qvw file in which it creates.
b. User Reports
The user reports, save separately on the user’s local device. These QlikView reports create when an authorized user is working on a QlikView server document. User reports cannot create by AJAX clients and are only made from the Windows-based.
c. My Server Reports
My server reports are the personal server reports created by authenticated users working at the QlikView Server, with the QlikView documents.
These QlikView reports create using information of these documents stored in a server repository and are only accessible to the authenticated users from any device with authenticated accounts.
d. Shared Server Reports
The personal server reports can flag and share with other authorized users. These shared reports are known as Shared Server Reports in QlikView.
Like my server reports, shared server reports also store in the QlikView’s repository and can access from a computer through an authenticated user account.
Have a look at – QlikView Master Calendar
How to Create QlikView Reports?
Now, we’ll learn how to create document reports in QlikView step by step.
1. Step one
Open Report Editor from the Reports tab present on QlikView’s document menu bar.

Step.1 To Create QlikView Reports
2. Step Two
A Report Editor dialog box will open where we can control all the task. In this dialog box, you can select documents from the Available Reports drop-down list.
Also, new Qlikview reports can add, and existing reports can delete from the Add and Delete button gave at the bottom of the report editor window.
To add/create a new report, click on Add… button then enter a name for your report.

Step.2 To Create QlikView Reports
3. Step Three
After creating/adding a new report, click on Edit>> button to edit the report layout.
To add sheet objects (chart, table, list etc.) from the document, click and hold the sheet object then drag it on the blank space at the centre of the edit mode.
The added sheet objects are then referred to as Items. You can adjust and resize these items, add texts and images along.

Step.3a To Create QlikView Reports
Follow this link to know about QlikView Use Cases
We have used a sample movie database to create reports and have added several pie and bar charts into the report by dragging. Also, we have added a table box titled ‘Movie List’ from another sheet present in the document.
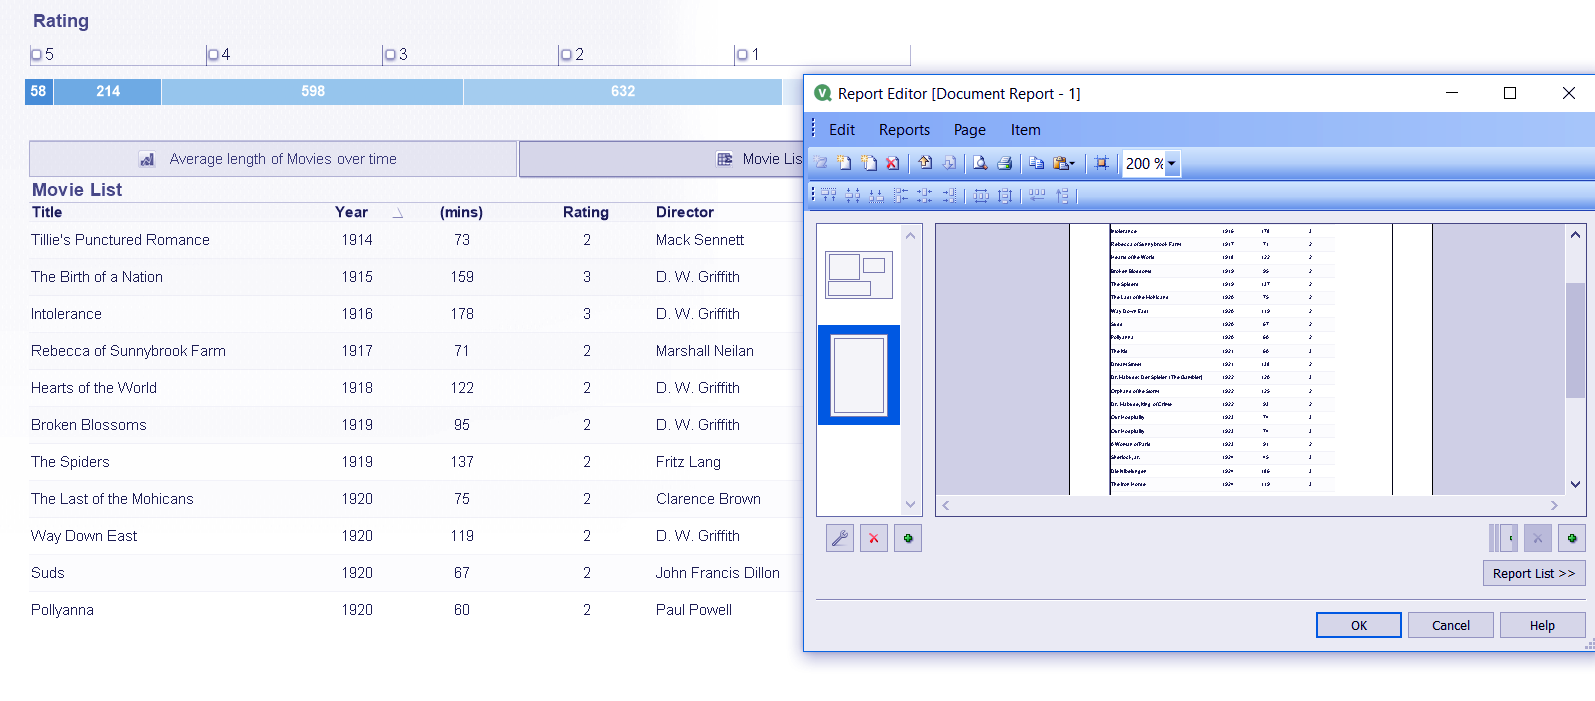
Step.3b To Create QlikView Reports
4. Step Four
You can also preview the create report by going to Reports>Print Preview.
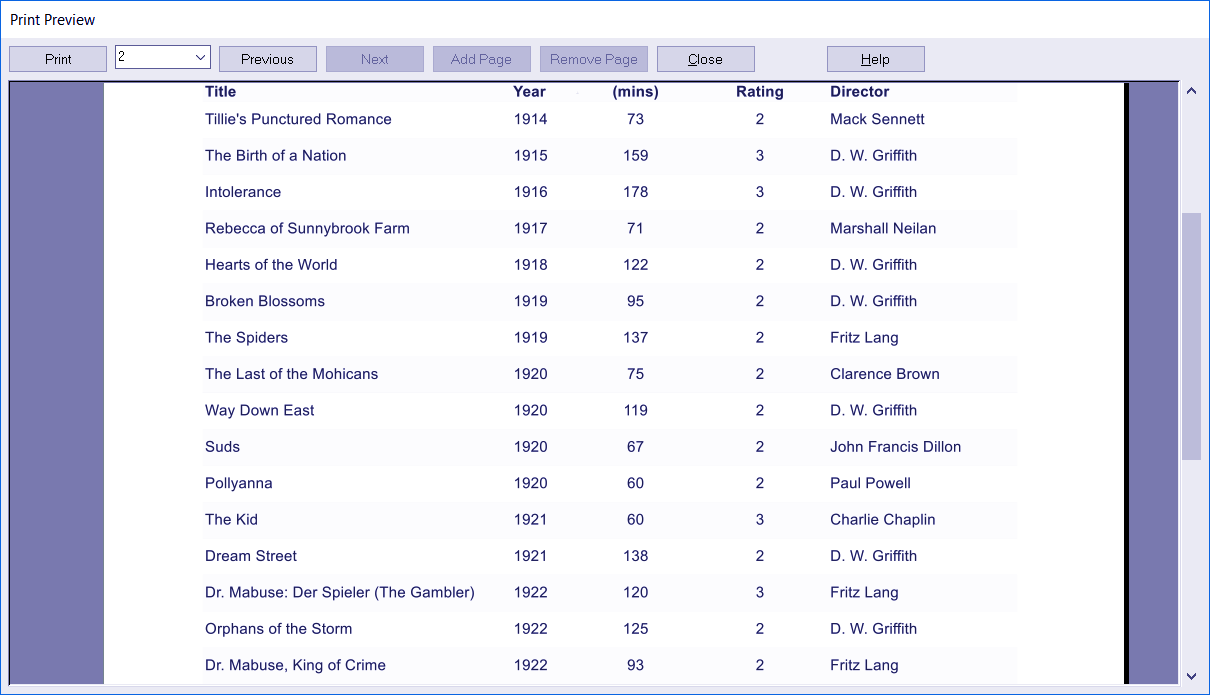
Step.4a To Create QlikView Reports
Click OK to confirm if you are happy with the report.
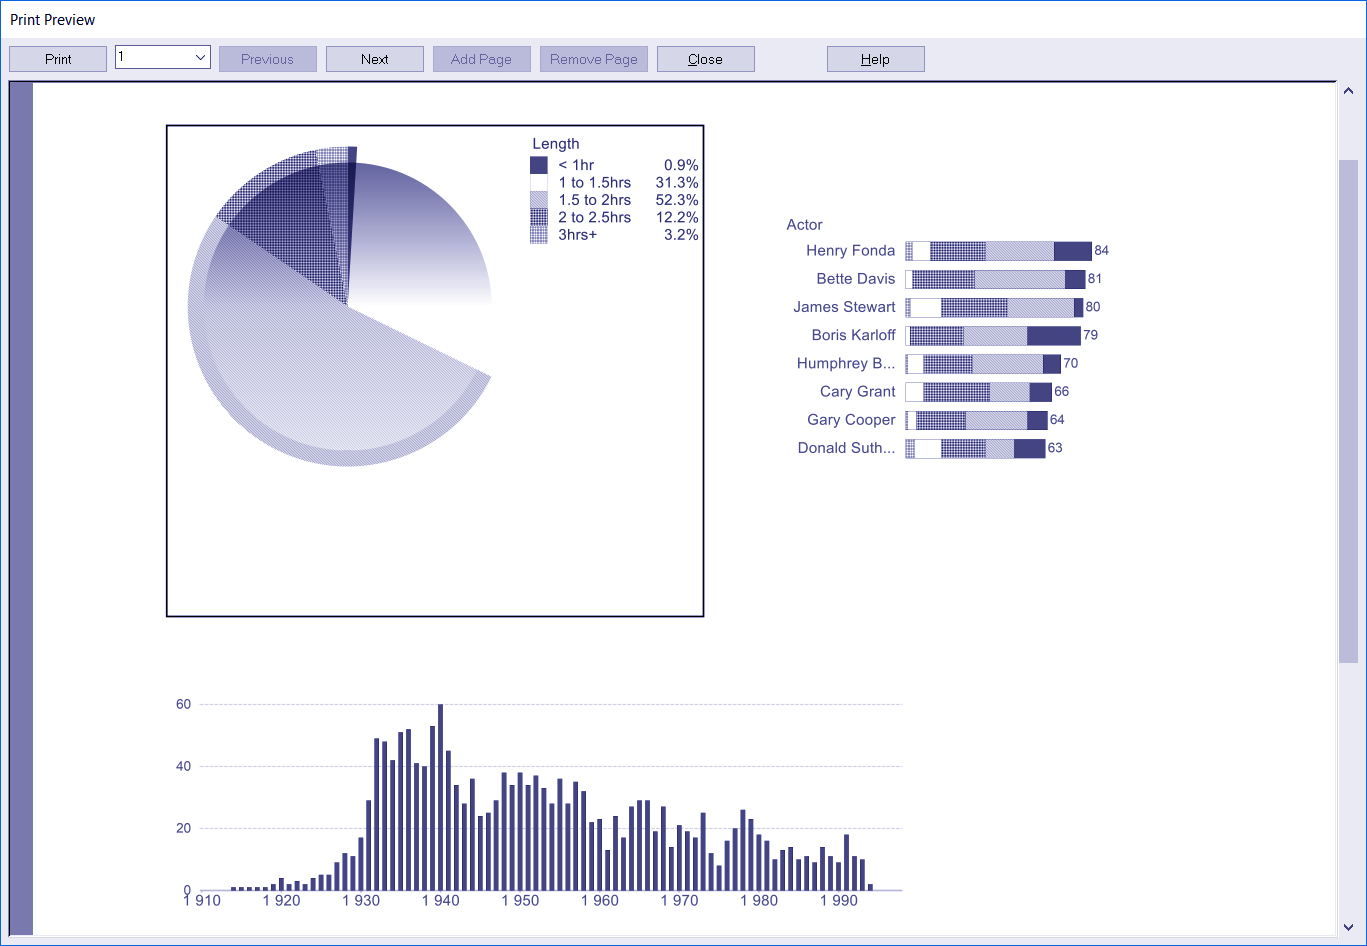
Step.4b To Create QlikView Reports
5. Step Five
In the Report menu, the newly created report will display.
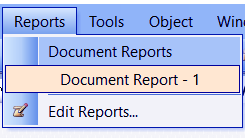
Step.5 To Create QlikView Reports
6. Step Six
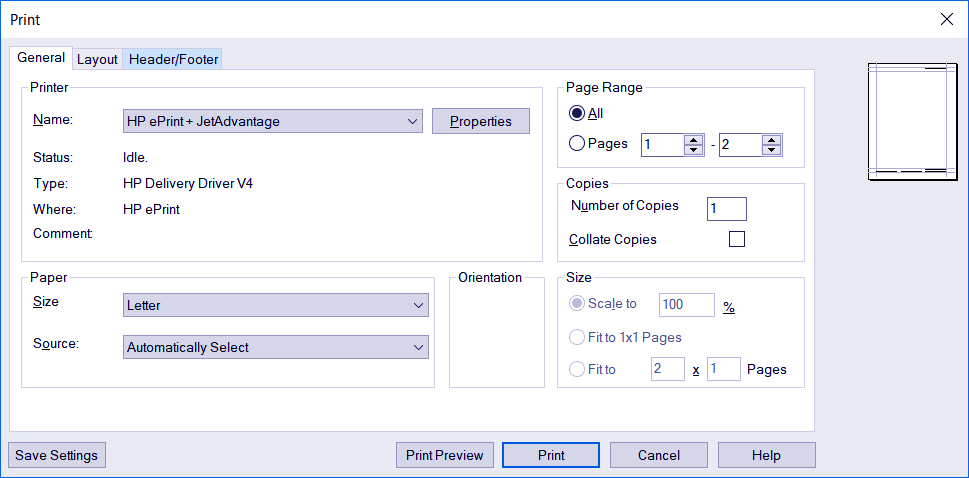
Click on the report’s name to open the Print dialog box.
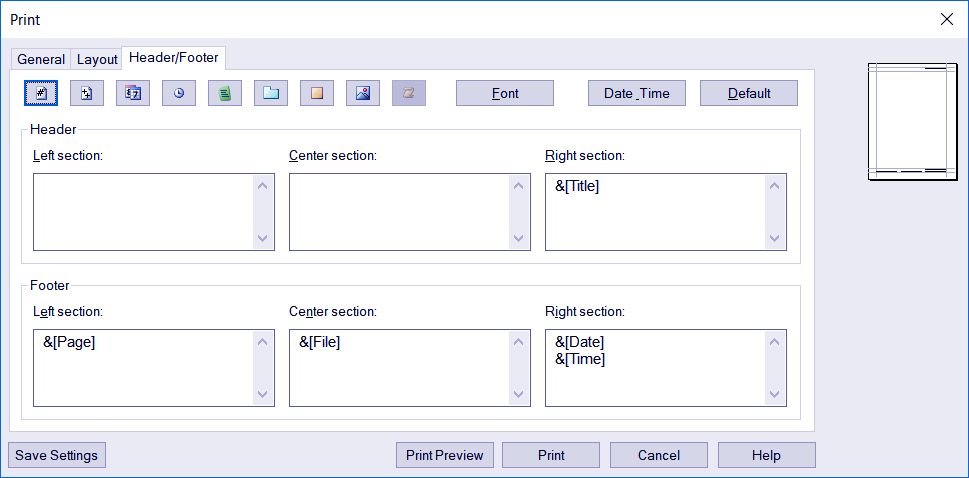
In this dialog box you can manipulate the printing options from tabs like General, Layout and Header/Footer. In the Header/Footer tab, you can select from the icons given in the row at the top and click on them to add them to display in the position you want.
Let’s Revise How to Run QlikView Silent Installation?
Step.6a To Create QlikView Reports

Step.6b To Create QlikView Reports
Step.6c To Create QlikView Reports
7. Step Seven
Preview the final report from Print Preview and click on Print to print the report.

Step.7 To Create QlikView Reports
QlikView Report Editor
In this section, we will navigate through the parts and tabs of the QlikView report editor. There are two sections in a report editor, one is the report list, and another is the page editor.
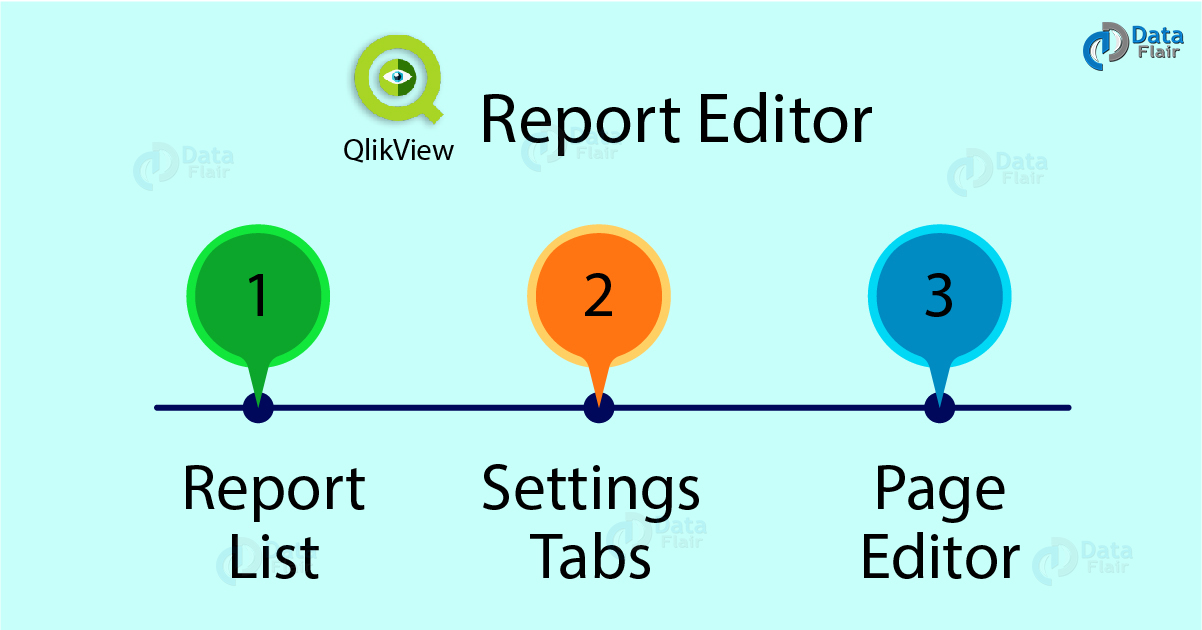
Report Editor in QlikView
Read about QlikView Publisher Repository (QVPR)
a. Report List
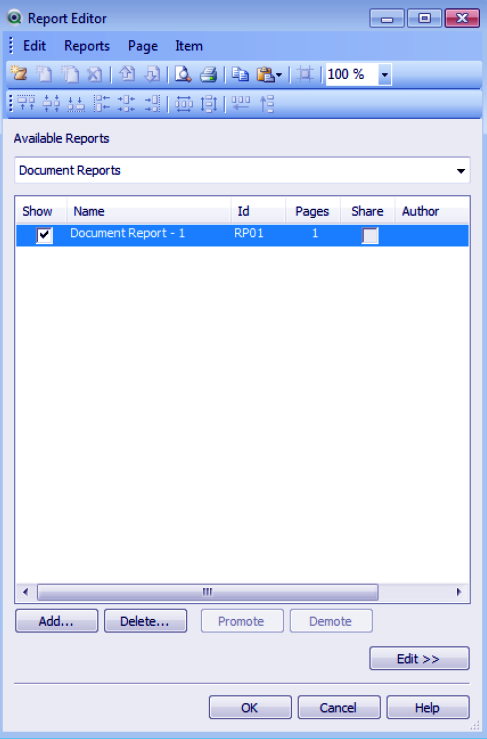
As soon as you open the report editor you will see two sections in the front; an Available Reports column and a Report List.
The Report list is used for managing already existing reports and creating new reports. You can Add, Delete, Demote and Promote reports in the list.
You can select a report and go to the page editor to edit the pages of that report. The report list dialog contains many titles on like Show (to show the report on the report menu), Name, ID, Pages, Share and Author.
QlikView Reports – Report List
b. Setting Tabs
There are four tabs in QlikView report editor; Edit, Report, Page and Item. Each of these has settings options. Let us explore each settings tab in detail.
i. Report Setting
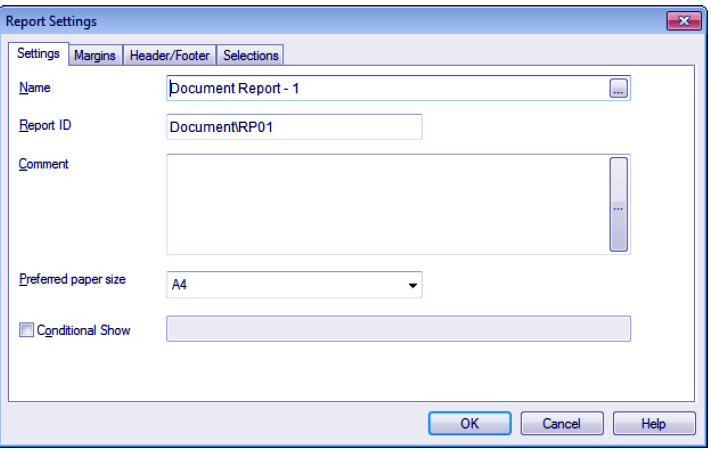
From this settings tab, general report settings can manage. There are four sections in the report settings dialog; Settings, Margin, Header/Footer and Selections tab.
In the general settings tab you can select the name, page size for printing, add a comment, see the report ID.
With the Conditional Show option, you can enter an expression which the system will evaluate and if the expression value returns True then the report will show otherwise it will be hidden.
From the Margin and Header/Footer you can set the margin dimensions and texts like date, time, title etc. respectively. From the Selections tab, you can manage which selections are to show in the report.
QlikView Reports – Report Setting
Let’s revise different ways to implement data loading in QlikView
ii. Page Settings
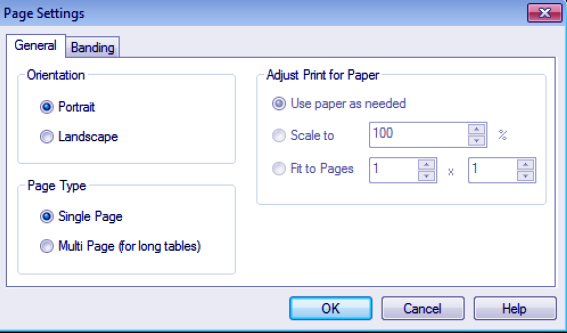
Through the page settings option, you can manage the settings of the report pages. There are two or three tabs in the page settings dialog box; General, Banding and Settings.
In the general tab you can select the orientation (Portrait or Landscape), Page type (Single or Multiple) and Print settings.
Through the settings tab, you can select and manage the introduction and Appendix placement options only for multi-paper pages.
With the banding tab if you can print the report specifically for every value in a selected field from the drop-down menu. This is called Looping pages over possible values in field.
Reports in QlikView – Page Settings
iii. Item Setting
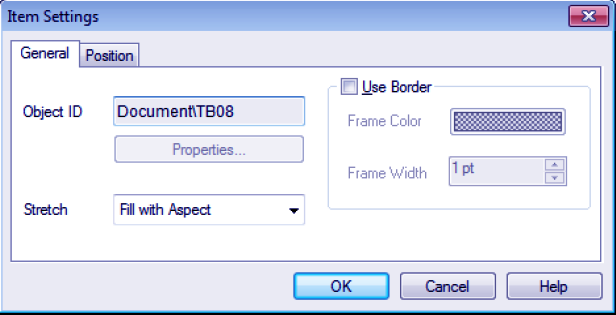
The Item settings option lets you manipulate settings for the items you have selected to be in your report. Those items are present in the page preview pane.
From the settings dialog box, you can see the document item Object ID, set the size and border. Also, the dimensions of the item can be set through the Position tab.
QlikView Reports – Item Setting
c. Page Editor
The user can edit the pages of a report through the Page Editor which can invoke by Editor>> button present at the bottom right of the report list window. In this section we will navigate through different panes and bars of the page editor.
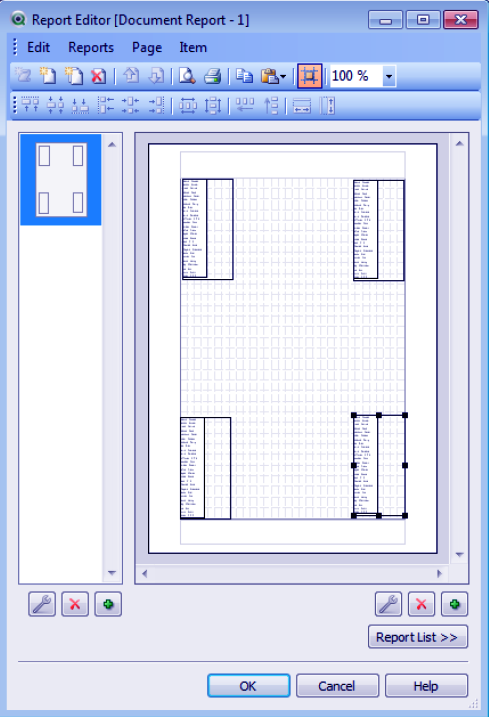
QlikView Reports – Page Editor
Also, Read – QlikView November 2017 and Features of 12.2
i. Menu Bar
In the Menu Bar locate at the top holds four menu options, namely, Edit Menu, Reports Menu, Page Menu and Item Menu from where you can access many options for the report pages.
a. Edit Menu
The table given below describes all the options available in the edit menu.
- Copy option copies the currently selected item or the current page in the report.
- Paste Report option pastes the report from the Clipboard.
- Paste Page option pastes the page from the Clipboard.
- Paste Item option pastes the item from the Clipboard to the report edit section.
- Snap to Grid option displays a grid in the report to help align the report items.
b. Report Menu
This menu applies on the report.
- Add option adds a report, it is only available when you are viewing the Report List.
- Delete option deletes a report, only available when viewing the Report List.
- Promote option moves the selected report one step up in the list of reports.
- Demote option moves the selected report one step down in the list of reports.
- Export option saves the report file as an XML document.
- Import option imports a report that has been saved as XML.
- Print Preview… option opens the Print Preview dialog from where you can see how the current report looks when printed in the current selections in the QIikView document.
- Print… option opens the Print dialog and prints the current report.
- Report Settings option opens the dialog from where various properties for the report can be set such as margins, header/footer setting etc.
c. Page Menu
Applies on the pages.
- Promote option promotes the currently selected page. You can do this by dragging and dropping the page on the page list pane as well.
- Demote option demotes the currently selected page. You can drag and drop the page down the page list as well.
- Add Multi Page option adds a multi-paper page after the currently selected page.
- Add Single Page option adds a single-paper page after the currently selected page.
- Delete option deletes the currently selected page.
- Page Settings option opens the dialog from where you can set various properties for the selected page.
d. Item Menu
This menu contains options exclusively for items like Left align, Right align, Bottom align, Top align, Center Horizontally, Center Vertically etc., used for item alignment.
Options for Height and Width, adding new text, a new image or new selections are also available.
You also delete an item from Delete option of this menu.
Let’s Explore QlikView Navigation Pane
ii. Page List Pane
The page list pane, located at the centre left of the page editor and manage by the icons provided on the toolbar. The table given below contains a description of each page list pane icon.
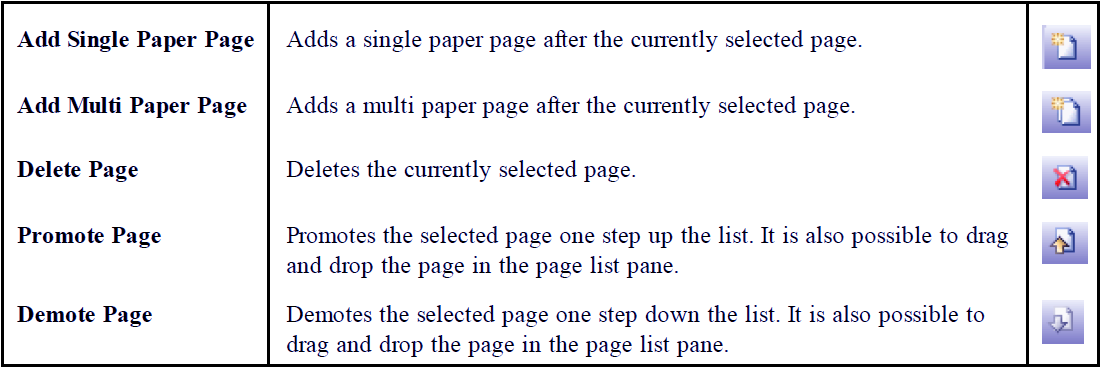
QlikView Reports – Page List Pane
iii. Page Preview Pane
The page preview pane is the pane at the very centre of the page editor. It the same empty space where you drag and drop your sheet objects to include them in your report.
The page preview pane manage by the three icons of Add, Remove and Settings present at the bottom right of the preview pane.
Also, the alignment of the page and page items can adjust using the icons provided on the toolbar.
Reports in QlikView – Page Preview Pane
QlikView Reports – Page Preview Pane
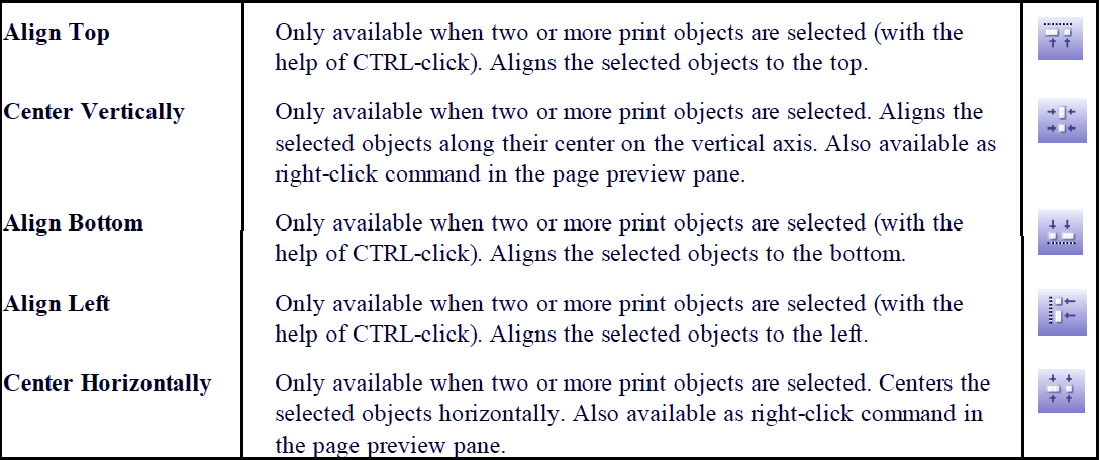
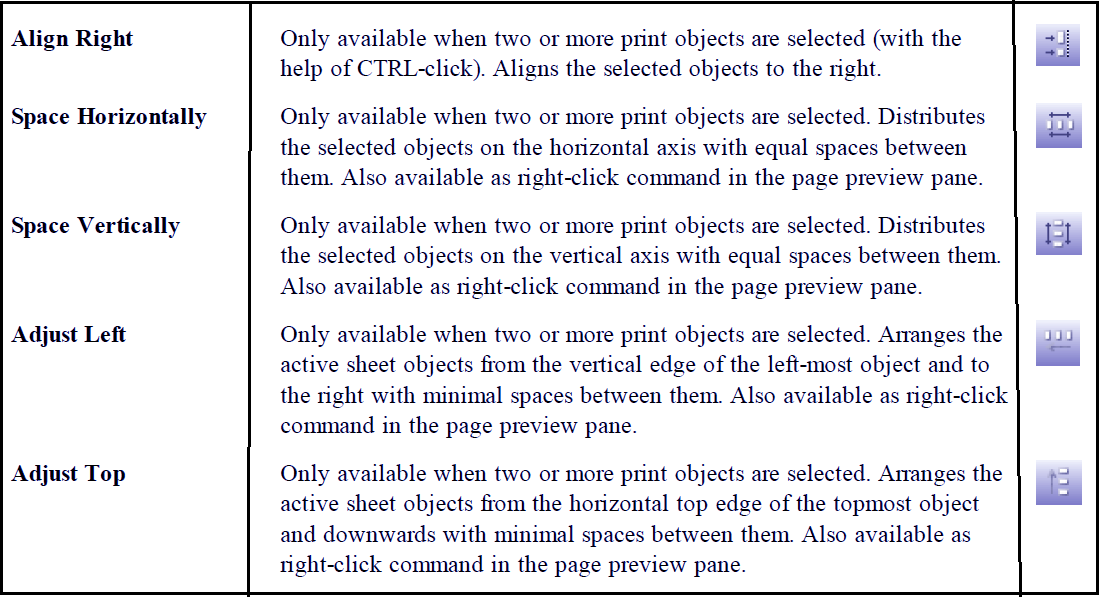
iv. Toolbar Commands
The objects in the page preview pane can manage and altered using options given in the toolbar as commands.
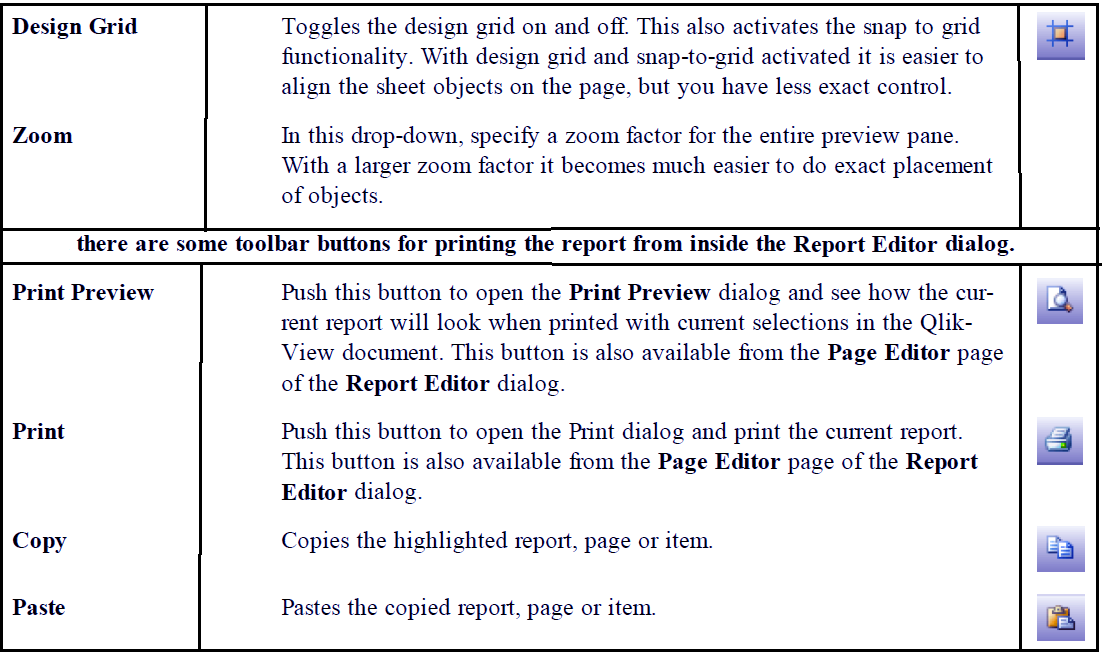
QlikView Reports – Toolbar Commands
So, this was all about QlikView Reports Tutorial. Hope you like our explanation.
Conclusion
So, this way we complete our tour of the QlikView reports tutorial.
We learned about the two sections of the report editor; a report list section and a page editor section and the tabs and options available within these sections.
Furthermore, if you have any query, feel free to ask in the comment section.
Related Topic – QlikView Installation
Did you know we work 24x7 to provide you best tutorials
Please encourage us - write a review on Google


