Filter Pane in Qlik Sense – Properties, Pros, & Cons
Job-ready Online Courses: Dive into Knowledge. Learn More!
1. Objective – Qlik Sense Filter Pane
Earlier we discussed Qlik Sense Visualization Selections. Today, we will see Filter Pane in Qlik Sense. Moreover, we will look at Qlik Sense Filter Pane extensions. Also, we will discuss how to create a Filter Pane in Qlik Sense. Along with this, we will look at properties and pros and cons of Qlik Sense Filter Pane. At last, we will see why we use Filter Pane in Qlik Sense.
So, let’s start Qlik Sense Filter Pane Tutorial.
Filter Pane in Qlik Sense – Properties, Pros, & Cons
Have a look at Qlik Sense Histogram Visualization
2. Introduction to Filter Pane in Qlik Sense
Exploring data through making selections and searches is the most effective of all. It lets you gain deeper and fresh insights into data which you might otherwise miss on a visually represented data. In Qlik Sense, the easiest way to delve into data is by creating a Filter Pane visualization. Filter Pane is a simple way of displaying data dimensions and their values in a list form. You can see all the values within a dimension in the filter pane residing on a sheet and make selections as per your requirement. Let us see how a filter pane is created and managed in the following sections.
3. How to Create Filter Pane in Qlik Sense?
In order to create the filter pane in Qlik Sense, follow the steps given below,
- Open the Editor in the sheet (from Edit option) you want to add a filter pane in.
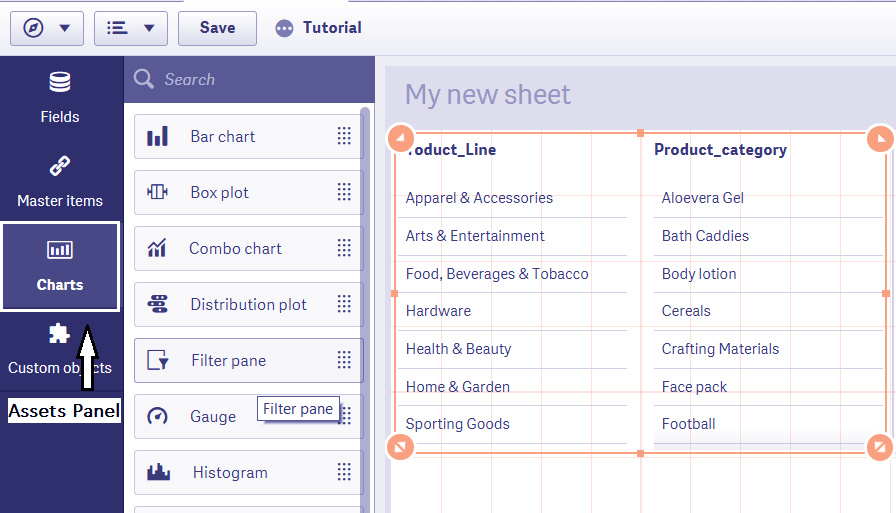
- Go to the Assets Panel on the left of the editor and select Charts option.
- Select Filter Pane from the list of charts given. Drag and drop it on the center grid or editing section.
Do you know about Qlik Sense Text and Image Visualizations
Selection of Filter Pane in Qlik Sense
- Now from the explore menu given on the right of the editor, add dimensions to be displayed in the filter pane from Add Dimension option.
- You can add as many dimensions as you want using the Add Dimension option.
- Also, you can the sort criterion and appearance settings from the properties/exploration menu.
- Adjust the filter pane according to the design and available space on your sheet.
- Click on Done and the final filter pane will appear on the sheet where you can make selections and searches.
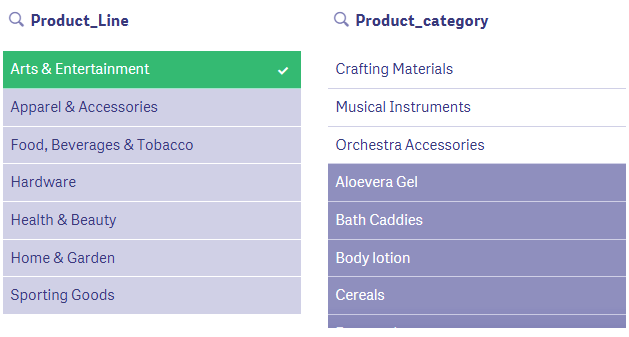
Final Filter Pane in Qlik Sense
Let’s learn more about Qlik Sense Gauge Chart
4. Why Use Qlik Sense Filter Pane?
Imagine, that there is a whiteboard and it is having many black dots spread on it. Can you make anything out of this information? Well, it makes no sense. But, if one takes a pen and starts connecting the dots in a certain way, soon you will see some shape, some structure or pattern on the board. The dots are no more a vague and meaningless piece lying on the board. Rather it is contributing to making a shape or a pattern.
Similarly, data files or data tables are like dots on the board. The data tables contain loads of data values in them which is analyzed by the analyst in some context and is then called information. So, what makes mere values of data, valuable bits of information? It is the context given to it by associations and relations that are formed between different data tables and fields, just like connecting the dots.
Due to these associations existing between relevant data fields and values, a defined set of data can be examined by making selections in the right ways. And to make selections and understand the whole story behind a data set, filter panes are used.
5. Properties of Filter Pane in Qlik Sense
In the exploration menu or properties menu, you get three sections,
- Data
- Sorting
- Appearance
You can configure the filter pane according to your needs from these sections.
Let’s take a tour to Qlik Sense Box Plot
a. Data Section
In this section, you can add dimensions to be displayed in the filter pane by Add Dimensions option. You can rearrange the order of appearance of the dimensions in the table by switching the positions of the field names in this section. The field name on top displays first in the filter pane.

Data Section in Filter Pane
b. Sorting Section
In this section, we can sort the dimensions internally on a different basis like sort by the expression, sort by frequency, sort numerically and sort alphabetically each either ascending or descending.
Have a look at Qlik Sense Treemap Visualization
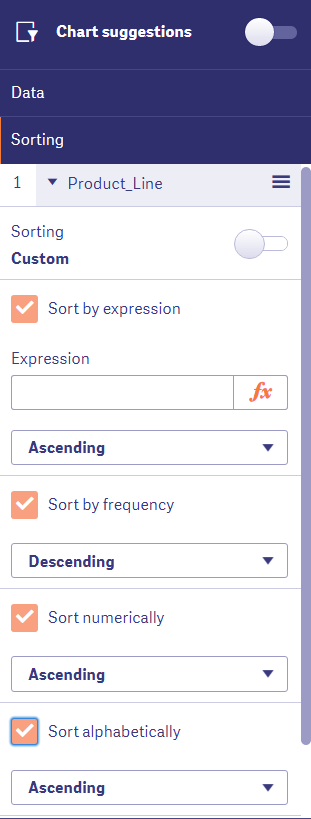
Sorting Section in Filter Pane
c. Appearance Section
The appearance details of the filter pane you can select options to show Title, Subtitle, Footnote and other details like descriptions, measures, and dimensions.
Do you know about Qlik Sense Color Functions
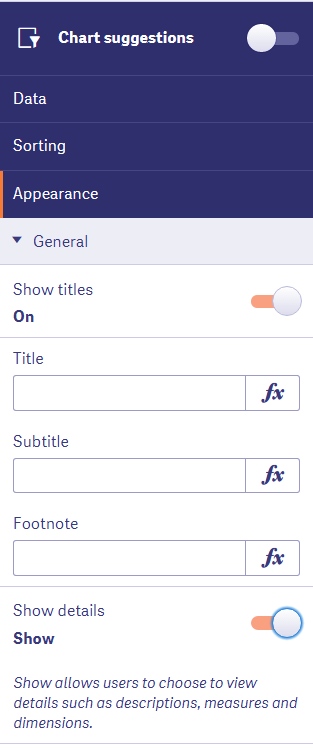
Appearance Section in Filter Pane
6. Advantages and Limitations of Filter Pane
Much like every other object filter pane also have both advantages and limitations. One major advantage and significance of filter panes is that we can make selections, and can analyze data. It also follows the color schemes for selections and associations which makes studying data and relationship between data values convenient for the user. Its disadvantage lies in handling and managing data when dimensions have a large amount of data.
Let’s read Qlik Sense Conditional Functions
So, this was all in Filter Pane Qlik Sense Tutorial. Hope you like our explanation.
7. Conclusion
Hence, in this tutorial of Filter Pane in Qlik Sense, we saw how to create in Filter Pane. Moreover, we discussed the properties of Filter Pane. Also, we looked at the advantages and disadvantages of Filter Pane in Qlik Sense. Use it whenever you want to view data values and make selections as a part of your analysis.
Share your feedback of reading Qlik Sense Filter Pane article through comments.
See also –
If you are Happy with DataFlair, do not forget to make us happy with your positive feedback on Google


