Image Processing with SciPy and NumPy in Python
Master Python with 70+ Hands-on Projects and Get Job-ready - Learn Python
In this Python tutorial, we will use Image Processing with SciPy and NumPy. We will deal with reading and writing to an image and displaying the image. We will cover different manipulations and filtering images in Python. Along with this, we will discuss extracting features.
So, let’s discuss Image Processing with SciPy and NumPy.
Image Processing with SciPy and NumPy
Prerequisite for Image Processing with SciPy and NumPy
For image processing with SciPy and NumPy, you will need the libraries for this tutorial. We checked in the command prompt whether we already have these:
Let’s Revise Range Function in Python – Range() in Python
C:\Users\lifei>pip show scipy
Name: scipy
Version: 1.0.0
Summary: SciPy: Scientific Library for Python
Home-page: https://www.scipy.org
Author: SciPy Developers
Author-email: [email protected]
License: BSD
Location: c:\users\lifei\appdata\local\programs\python\python36-32\lib\site-packages
Requires: numpy
Required-by:
C:\Users\lifei>pip show numpyName: numpy
Version: 1.14.1
Summary: NumPy: array processing for numbers, strings, records, and objects.
Home-page: http://www.numpy.org
Author: NumPy Developers
Author-email: [email protected]
License: BSD
Location: c:\users\lifei\appdata\local\programs\python\python36-32\lib\site-packages
Requires:
Required-by: scipy, pandas, matplotlib
If you don’t already have them installed, use the following commands:
pip install scipy
pip install numpy
Also, some methods like imsave() did not show up with scipy in our interpreter. So, we used pip to install Pillow. Works for us.
C:\Users\lifei>pip install Pillow
Collecting Pillow
Downloading https://files.pythonhosted.org/packages/bc/6d/40ad1421a015c3710b329e99842ece044492cc5ff51159b5b23558000aad/Pillow-5.1.0-cp36-cp36m-win32.whl (1.4MB)
100% |████████████████████████████████| 1.4MB 499kB/s
Installing collected packages: Pillow
Successfully installed Pillow-5.1.0
C:\Users\lifei>pip install matplotlib
Collecting matplotlib
Downloading https://files.pythonhosted.org/packages/c6/e0/1f98872856dcbd042220a142b5a2b4cb9a8f0efe959ae20f6cb73bd9f3e6/matplotlib-2.2.2-cp36-cp36m-win32.whl (8.5MB)
100% |████████████████████████████████| 8.5MB 448kB/s
Requirement already satisfied: numpy>=1.7.1 in c:\users\lifei\appdata\local\programs\python\python36-32\lib\site-packages (from matplotlib) (1.14.1)
Collecting pyparsing!=2.0.4,!=2.1.2,!=2.1.6,>=2.0.1 (from matplotlib)
Downloading https://files.pythonhosted.org/packages/6a/8a/718fd7d3458f9fab8e67186b00abdd345b639976bc7fb3ae722e1b026a50/pyparsing-2.2.0-py2.py3-none-any.whl (56kB)
100% |████████████████████████████████| 61kB 222kB/s
Collecting cycler>=0.10 (from matplotlib)
Downloading https://files.pythonhosted.org/packages/f7/d2/e07d3ebb2bd7af696440ce7e754c59dd546ffe1bbe732c8ab68b9c834e61/cycler-0.10.0-py2.py3-none-any.whl
Requirement already satisfied: pytz in c:\users\lifei\appdata\local\programs\python\python36-32\lib\site-packages (from matplotlib) (2018.3)
Collecting kiwisolver>=1.0.1 (from matplotlib)
Downloading https://files.pythonhosted.org/packages/fd/59/8742e2c77c852e09f0d409af42ccc4165120943ba3b52d57a3ddc56cb0ca/kiwisolver-1.0.1-cp36-none-win32.whl (44kB)
100% |████████████████████████████████| 51kB 610kB/s
Requirement already satisfied: six>=1.10 in c:\users\lifei\appdata\local\programs\python\python36-32\lib\site-packages (from matplotlib) (1.11.0)
Requirement already satisfied: python-dateutil>=2.1 in c:\users\lifei\appdata\local\programs\python\python36-32\lib\site-packages (from matplotlib) (2.7.2)
Requirement already satisfied: setuptools in c:\users\lifei\appdata\local\programs\python\python36-32\lib\site-packages (from kiwisolver>=1.0.1->matplotlib) (39.2.0)
Installing collected packages: pyparsing, cycler, kiwisolver, matplotlib
Successfully installed cycler-0.10.0 kiwisolver-1.0.1 matplotlib-2.2.2 pyparsing-2.2.0
Let’s get to the Desktop:
>>> import os
>>> os.chdir('C:\\Users\\lifei\\Desktop')
Read About Methods in Python – Classes, Objects and Functions in Python
How to Read and Write to an Image in Python?
Before we start image processing with SciPy and NumPy, we must be able to open them. This is how we open it:
>>> from scipy import misc
>>> f=misc.face()
>>> misc.imsave('demo.png',f)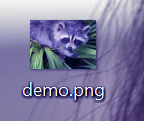
Image Processing with SciPy and NumPy
imsave needs you to have the library PIL installed in your system. It lets you save an array as an image. This creates an image on our Desktop.
Now, we import pyplot from matplotlib.
>>> import matplotlib.pyplot as plt
>>> plt.imshow(f)
<matplotlib.image.AxesImage object at 0x0864E050>
>>> plt.show()
This makes the following image of a raccoon face show up:
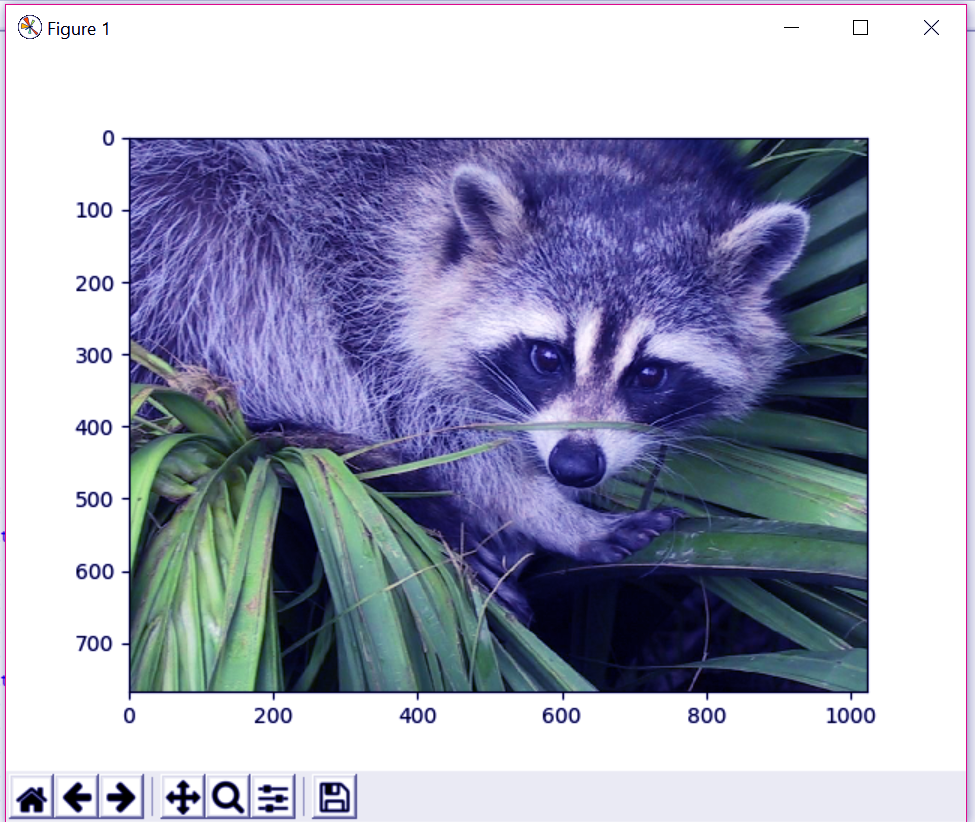
Image Processing with SciPy and NumPy – Reading and Writing to Images
Read About Python Sets and Booleans with Syntax and Examples
a. Creating a Python numpy array
Continuing where we left:
>>> f=misc.imread('demo.png')
>>> type(f)
<class 'numpy.ndarray'>
>>> f.shape #This gives us the size of the array. The image is 1024x768.
(768, 1024, 3)
>>> f.dtype
dtype('uint8') #This means it is an 8ibit image (0-255)
b. Opening a RAW file in Python
A RAW file is one with the extension .raw. It is a camera image file holding minimally processed data from an image sensor. The sensor can be of a digital camera, a motion picture film scanner, or an image scanner.
Let’s first create such a file.
>>> f.tofile('demo.raw')
Open a raw file
This creates the following icon on the Desktop:
Now, we import another module- np.
>>> import np
>>> fromraw=np.fromfile('demo.raw',dtype=np.uint8)
>>> fromraw.shape
(2359296,)
>>> fromraw.shape=(768, 1024, 3)
For much larger data, we can use memory mapping:
>>> memmap=np.memmap('demo.raw',dtype=np.uint8,shape=(768,1024,3))This reads data from the file but does not load it into memory.
Let’s Read About Python Date and Time – Syntax and examples
c. Working on more than one image at once in Python
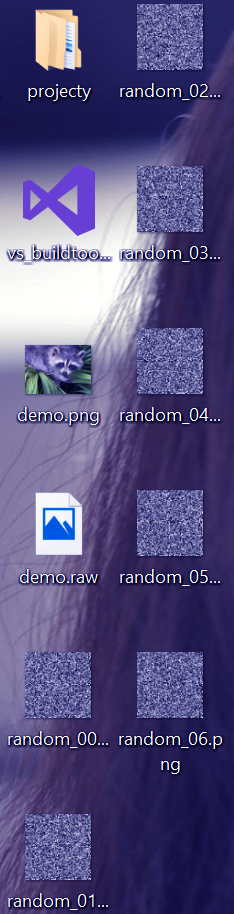
>>> for i in range(7):
im=np.random.randint(0,256,10000).reshape((100,100))
misc.imsave('random_%02d.png'%i,im)
>>> from glob import glob
>>> filelist=glob('random*.png')
>>> filelist.sort()
Get to your Desktop to find the following image files:
SciPy and NumPy
Let’s Learn Python Strings with String Functions and String Operations
How to Display an Image in Python?
>>> f1=misc.face(gray=True) #For a grayscale image
>>> plt.imshow(f1,cmap=plt.cm.gray)
<matplotlib.image.AxesImage object at 0x0919E810>
We can use min and max values to increase contrast:
>>> plt.imshow(f1,cmap=plt.cm.gray,vmin=30,vmax=200)
<matplotlib.image.AxesImage object at 0x0919E9B0>
>>> plt.axis('off') #This removes axes and ticks
(-0.5, 1023.5, 767.5, -0.5)
a. Drawing Contour Lines using Python
We call the contour() method to draw contour lines on the image.
>>> plt.contour(f1,[50,200])
<matplotlib.contour.QuadContourSet object at 0x019954F0>
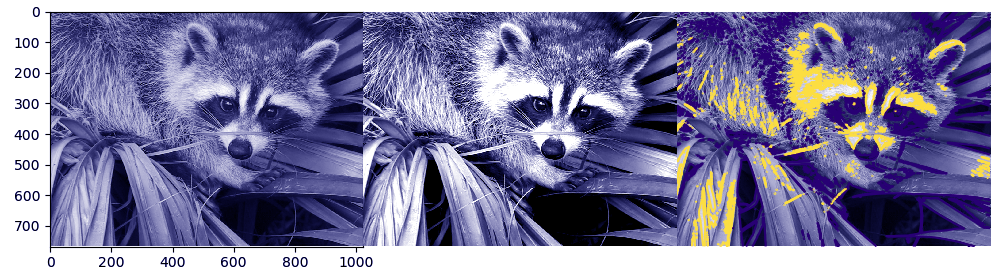
Image Processing with SciPy and NumPy – Drawing Contour Lines
b. Interpolation using Python
Adjusting the ‘interpolation’ argument, we can adjust the intensity variation. By setting it to ‘bilinear’, we get smooth intensity variations, and by setting it to ‘nearest’, we get a fine inspection of intensity variations.
Do You Know About Python Decision Making Statements with Syntax and Examples
>>> plt.imshow(f1[320:340,510:530],cmap=plt.cm.gray,interpolation='bilinear')
<matplotlib.image.AxesImage object at 0x01F2FB90>
>>> plt.imshow(f1[320:340,510:530],cmap=plt.cm.gray,interpolation='nearest')
<matplotlib.image.AxesImage object at 0x019954B0>
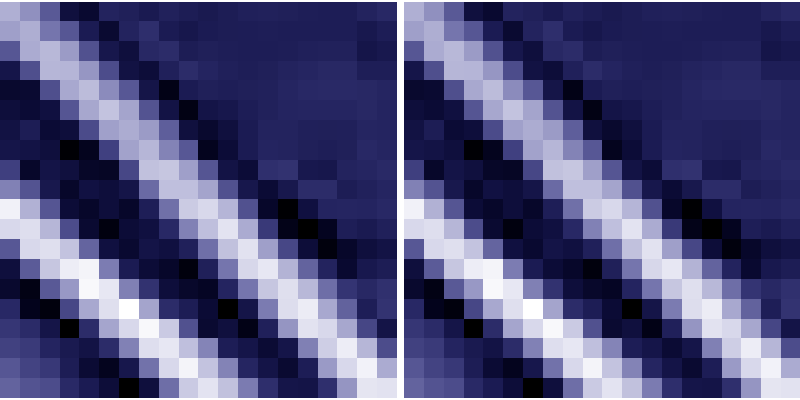
Image Processing with SciPy and NumPy – Interpolation
Basic Manipulations for Images in Python
Let’s look at images as arrays and use numpy to handle them.
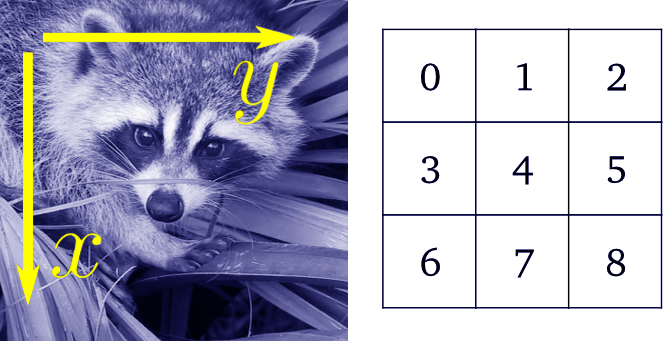
Image Processing with SciPy and NumPy – Manipulations for Images
>>> face=misc.face(gray=True)
>>> face[0,40]
127
>>> face[10:13,20:23]
array([[141, 153, 145],
[133, 134, 125],
[ 96, 92, 94]], dtype=uint8)
>>> face[100:120]=255
>>> lx,ly=face.shape
>>> X,Y=np.ogrid[0:lx,0:ly]
>>> mask=(X-lx/2)**2+(Y-ly/2)**2>lx*ly/4
>>> face[mask]=0
>>> face[range(400),range(400)]=255
This gives us the following result:
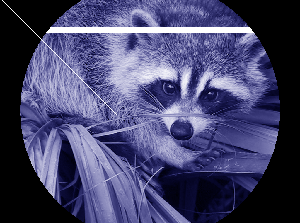
Image Processing with SciPy and NumPy
Have a Look at Python Generators and Generator Expressions in Detail
a. Statistical Information using Python
We can use the max() and min()functions to return the maximum and minimum along a given axis. The function mean() returns the average of the array elements along the given axis.
>>> face=misc.face(gray=True)
>>> face.mean()
113.48026784261067
>>> face.max()
250
>>> face.min()
0
b. Geometrical Transformations using Python
We can rotate, crop, and flip an image using scipy.
>>> face=misc.face(gray=True)
>>> lx,ly=face.shape
>>> crop=face[lx//4:-lx//4,ly//4:-ly//4]
>>> flip=np.flipud(face)
>>> from scipy import ndimage
>>> rotate=ndimage.rotate(face,45)
>>> rotate_noreshape=ndimage.rotate(face,45,reshape=False)
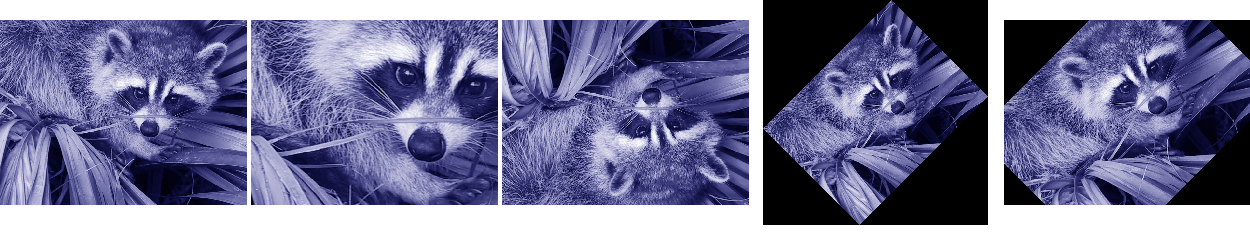
Image Processing with SciPy and NumPy – Geometrical Transformations
Read More About Errors and Exceptions in Python Programming
How to Filter an Image in Python?
We can also blur/smooth, sharpen, and denoise images. Through local filters, we can use a function of the values of the neighboring pixels to replace the value of a pixel.
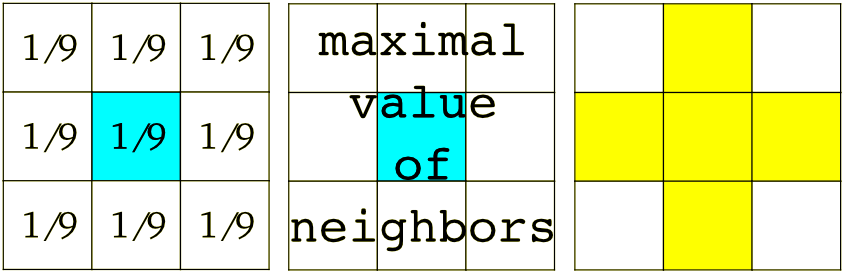
Image Processing with SciPy and NumPy – Filtering Images
a. Blurring/Smoothing Effect using Python
We can either use a Gaussian filter or a uniform filter:
>>> face=misc.face(gray=True)
>>> blurred=ndimage.gaussian_filter(face,sigma=3)
>>> way_blurred=ndimage.gaussian_filter(face,sigma=5)
>>> local_mean=ndimage.uniform_filter(face,size=11)
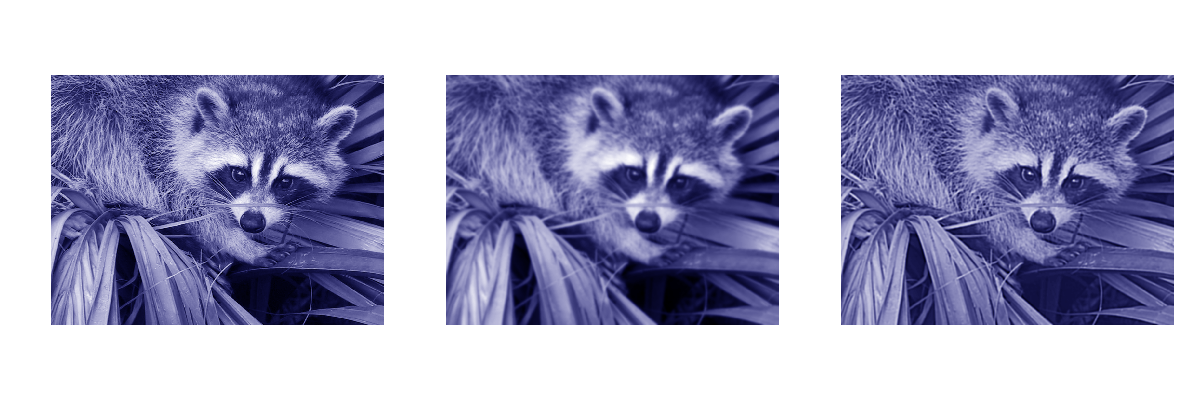
Image Processing with SciPy and NumPy – Blurring/Smoothing
b. Sharpening Effect using Python
We can sharpen a blurred image as:
>>> face=misc.face(gray=True).astype(float)
>>> blurred=ndimage.gaussian_filter(face,3)
Do you know Comparison Between Python Iterators and Generators
We can also add a Laplacian approximation to increase the weight of the edges:
>>> filter_blurred=ndimage.gaussian_filter(blurred,1)
>>> alpha=30
>>> sharpened=blurred+alpha*(blurred-filter_blurred)
c. Denoising Effect using Python
>>> f=misc.face(gray=True)
>>> f=f[230:290,220:320]
>>> noisy=f+0.4*f.std()*np.random.random(f.shape)
This gives us a noisy face. To smooth the noise and the edges, we use a Gaussian filter:
>>> gauss_denoised=ndimage.gaussian_filter(noisy,2)
To preserve the edges, we use a median filter:
>>> median_denoised=ndimage.median_filter(noisy,3)
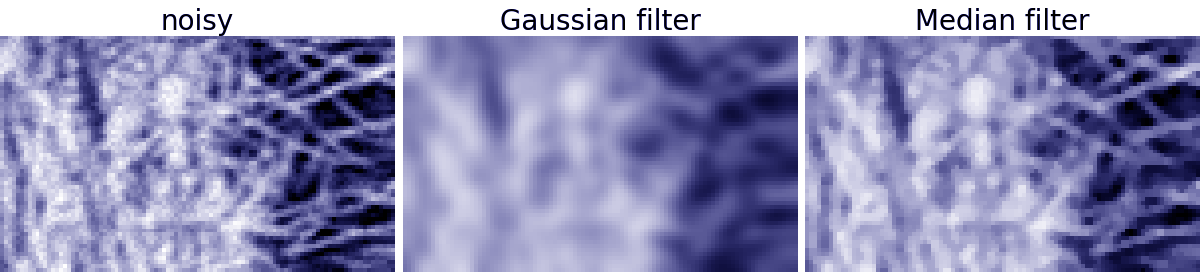
Image Processing with SciPy and NumPy – Denoising
For figures with straight boundaries and low curvature, a median filter provides a better result:
>>> im=np.zeros((20,20))
>>> im[5:-5,5:-5]=1
>>> im=ndimage.distance_transform_bf(im)
>>> im_noise=im+0.2*np.random.randn(*im.shape)
>>> im_med=ndimage.median_filter(im_noise,3)
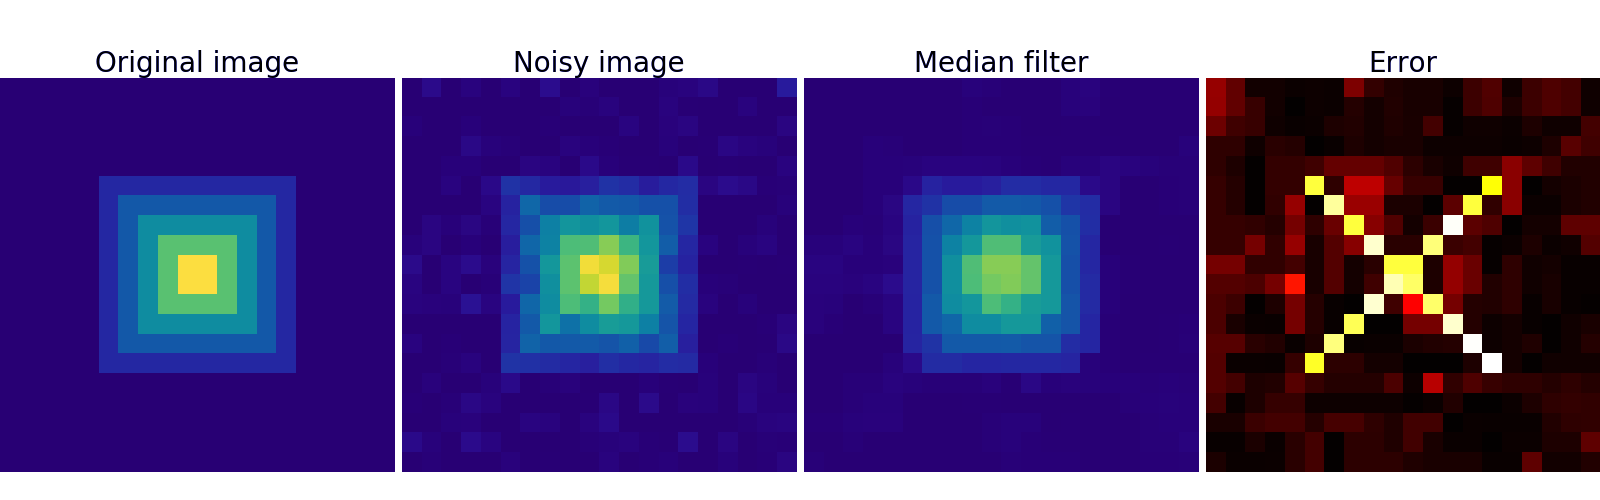
Image Processing with SciPy and NumPy – Denoising
Do You Know About Python Comment, Indentation and Statement
Extracting Features
We can also extract features in our images, like detecting edges and carrying out segmentation. Let’s see how.
a. Edge Detection using Python
>>> im=np.zeros((256,256))
>>> im[64:-64,64:-64]=1
>>> im=ndimage.rotate(im,15,mode='constant')
>>> im=ndimage.gaussian_filter(im,8)
For high-intensity variations, we can use Sobel, a gradient operator-
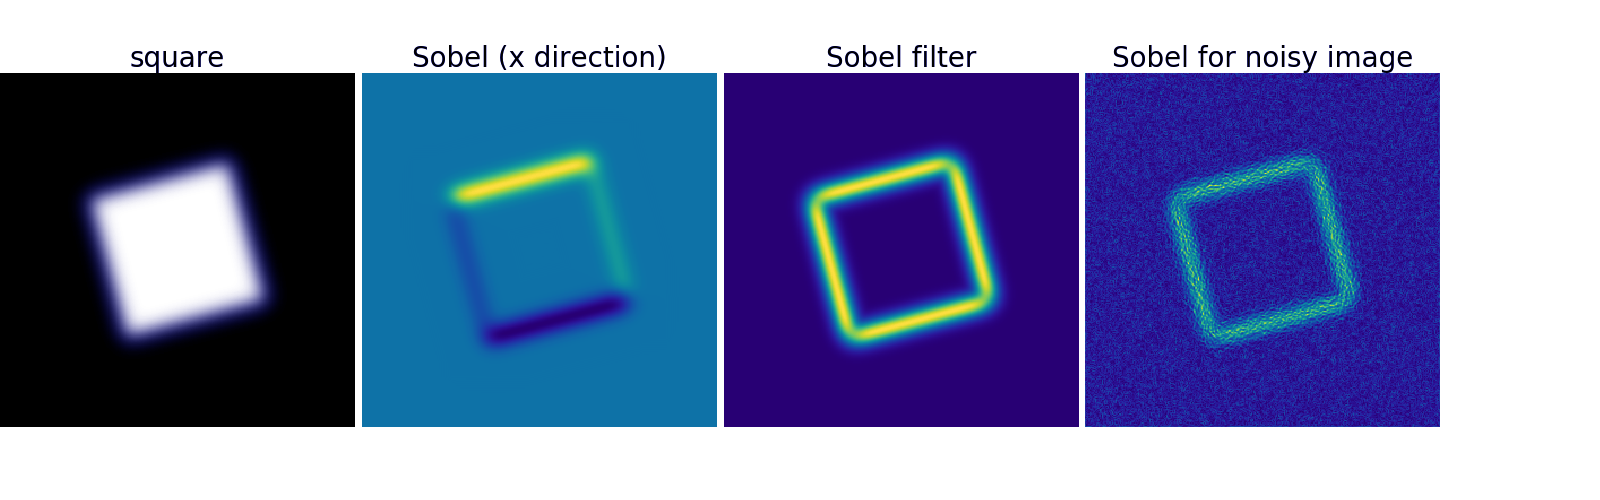
Image Processing with SciPy and NumPy – Edge Detection
>>> sx=ndimage.sobel(im,axis=0,mode='constant')
>>> sy=ndimage.sobel(im,axis=1,mode='constant')
>>> sob=np.hypot(sx,sy)
b. Segmentation using Python
>>> n,l=10,256
>>> im=np.zeros((l,l))
>>> np.random.seed(1)
>>> points=l*np.random.random((2,n**2))
>>> im[(points[0]).astype(np.int),(points[1]).astype(np.int)]=1
>>> im=ndimage.gaussian_filter(im,sigma=l/(4.*n))
>>>
>>> mask=(im>im.mean()).astype(np.float)
>>> mask+=0.1*im
>>> img=mask+0.2*np.random.randn(*mask.shape)
>>>
>>> hist,bin_edges=np.histogram(img,bins=60)
>>> bin_centers=0.5*(bin_edges[:-1]+bin_edges[1:])
>>>
>>> binary_img=img>0.5
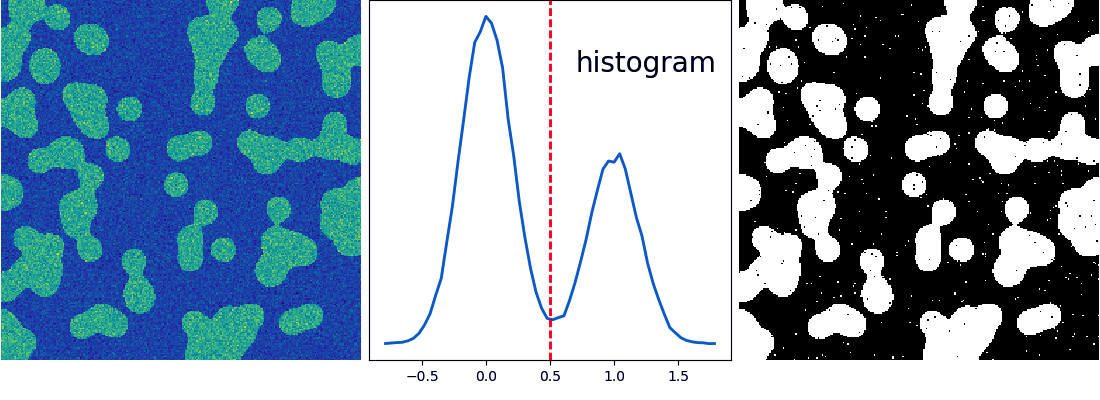
Image Processing with SciPy and NumPy
Let’s Explore Python Modules vs Packages
So, this was all about Image Processing with SciPy and NumPy. Hope you like our explanation.
Conclusion
You’ve turned your computer into a custom photo studio!
We have covered everything from the basic image to how advanced filtering works with NumPy and SciPy. You can now edit photos like an expert, with the help of the tricks we learnt to work on the code.
Furthermore, if you have doubts, feel free to ask in the comment section.
Related Article- Python Web Framework
For reference
Did you like this article? If Yes, please give DataFlair 5 Stars on Google


How to work on an image pixel by pixel like read one pixel and change one pixel at a time
You may vary the arguments of the imshow function to get different results or to modify the image as described in the article.