Create Python Virtual Environment – Install Python Packages
Python course with 57 real-time projects - Learn Python
In this blog, we will discuss what a Python virtual environment is? Moreover, we will study how to create Virtual Environment in Python Programming Language and how to install Python packages using pip.
Along with this, we talked about installing Python. If you still haven’t installed Python, do it right away.
So, let’s start creating Python Virtual Environment.
What is Python Virtual Environment?
Developing a Python application, you may want to use modules that don’t ship with the standard library.
Or sometimes, you need a specific version of a library for a bug to be fixed, or for some other reason.
Does this mean that installing Python once isn’t enough for every application you craft? Maybe application X needs version 1.0, but application Y needs version 2.0.
This leaves one of them unable to run.
To work with this, we create a Python virtual environment. In essence, it is a self-contained directory tree containing a Python installation for a particular version of Python.
Apart from that, it also has a list of additional packages. This way, application X can have its virtual environment with version 1.0, and B can have its own with version 2.0.
Lets start with how to create Python Virtual Environment.
How to Create a Virtual Environment in Python?
To create a Python virtual environment and manage it, we use the module venv. Normally, it will install the latest version of Python for you, but you can choose that.
But before we begin, let’s find out which version of Python we are using.
To do this, type the following in your Command Prompt (for Windows; type ‘cmd’ in search):
python –version
This is what it will look like:
Microsoft Windows [Version 10.0.16299.248]
(c) 2017 Microsoft Corporation. All rights reserved.
C:\Users\lifei>python –version
Python 3.6.0
C:\Users\lifei>
Now, let’s check if we have pip installed.
C:\Users\lifei>pip –version
pip 9.0.1 from c:\users\lifei\appdata\local\programs\python\python36-32\lib\site-packages (python 3.6)
We do. This is because we installed Python from python.org. In case you do not have pip installed, you may need to install it manually.
Now, let’s begin. In your command prompt, move to the directory you want to work in:
C:\Users\lifei>cd Desktop
Now, type in the following:
C:\Users\lifei\Desktop>python -m venv workwithenv
You will see the following directory on your Desktop (or whichever directory you chose to work with):
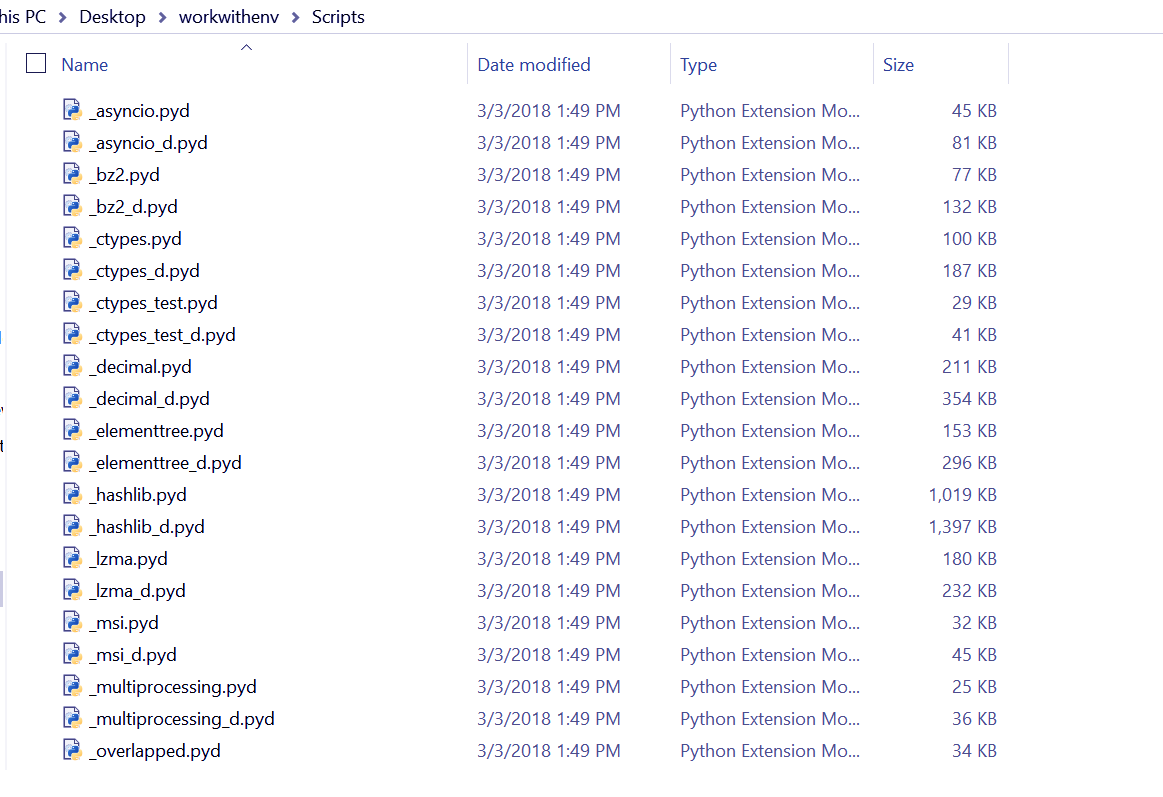
Inside this, you can see the following contents:
While the directory Include is empty, the other two aren’t:
As you can see, the command created the directory ‘workwithenv’ because it didn’t already exist.
It also created subdirectories containing a copy of the Python interpreter, the standard library, and various supporting files.
Now, to activate the Python Virtual Environment, we will run the batch file activate.bat in the directory Scripts:
C:\Users\lifei\Desktop>workwithenv\Scripts\activate.bat
We get the following output:
(workwithenv) C:\Users\lifei\Desktop>
This script is for the bash shell. If you have any doubt in Python Virtual environment, Please comment.
Managing Python Packages with pip
Like we said earlier, pip is a program that will let you install, upgrade, and remove Python packages. Using pip, you can install Python packages from the Package Index (PyPI).
Or, you can use pip’s search feature this way:
C:\Users\lifei\Desktop\workwithenv>pip search astronomy
acalib (0.1.3) – Advanced Computing for Astronomy Library
vaex-astro (0.1.5) – Astronomy related transformations and FITS file support
astro-scripts (0.4.0) – Small scripts for astronomy
astrobase (0.3.8) – Python modules and scripts useful for variable star work in astronomy.
astrocats (0.3.32) – Package for downloading, analyzing, and constructing open astronomy catalogs.
astrodbkit (0.6.6) – Astronomy database management using SQL and Python
astroML (0.3) – Tools for machine learning and data mining in Astronomy
astromodels (0.4.1) – Astromodels contains models to be used in likelihood or Bayesian analysis in astronomy
astroobs (1.4.5) – Provides astronomy ephemeris to plan telescope observations
astropy (3.0) – Community-developed python astronomy tools
astropyp (0.0.dev133) – Astronomy Pypeline Framework and FITS Viewer
astrotoyz (0.1.4) – Astronomy tools built on the Toyz framework
Barak (0.3.2) – A set of astronomy-related routines for generating Voigt profiles from atomic data, reading and writing data, working with SEDs, passbands and dust extinction laws.
cadcdata (1.2.1) – Client for accessing data at the Canadian Astronomy Data Centre
python-casacore (2.2.1) – A wrapper around CASACORE, the radio astronomy library
cygrid (0.9.8) – Cygrid is a cython-powered convolution-based gridding module for astronomy
DDFacet (0.3.2) – Facet-based radio astronomy continuum imager
f311 (18.1.31.1) – Astronomy-related API, command-line tools, and windowed applications
gammapy (0.7) – A Python package for gamma-ray astronomy
gary (0.1a) – Galactic astronomy and gravitational dynamics.
gastropy (0.0dev) – (g)astronomy
hips (0.2) – Python astronomy package for HiPS
mclearn (0.1.6) – Active learning algorithms with application in astronomy.
novas (3.1.1.4) – The United States Naval Observatory NOVAS astronomy library
palpy (1.8.1) – PAL — A Positional Astronomy Library
PyAstronomy (0.12.0) – A collection of astronomy related tools for Python.
pyzpace (0.2.dev1) – Zach Pace’s astronomy-related python tools
sinistra (0.3.3) – A collection of astronomy related tools.
skyfield (1.1) – Elegant astronomy for Python
SWHT (0.1.2) – Spherical Wave Harmonic Transform for radio astronomy visibility data
C:\Users\lifei\Desktop\workwithenv>
This listed out a list of packages that work with astronomy. Now, we want to search for packages working with numbers.
(We won’t include the output since it’s too long to include here) But I have a feeling we want to work with the package ‘numpy’ here.
Let’s install python packages.
1. Installing Python Packages
C:\Users\lifei\Desktop\workwithenv>pip install numpy
Collecting numpy
Using cached numpy-1.14.1-cp36-none-win32.whl
Installing collected packages: numpy
Successfully installed numpy-1.14.1
C:\Users\lifei\Desktop\workwithenv>
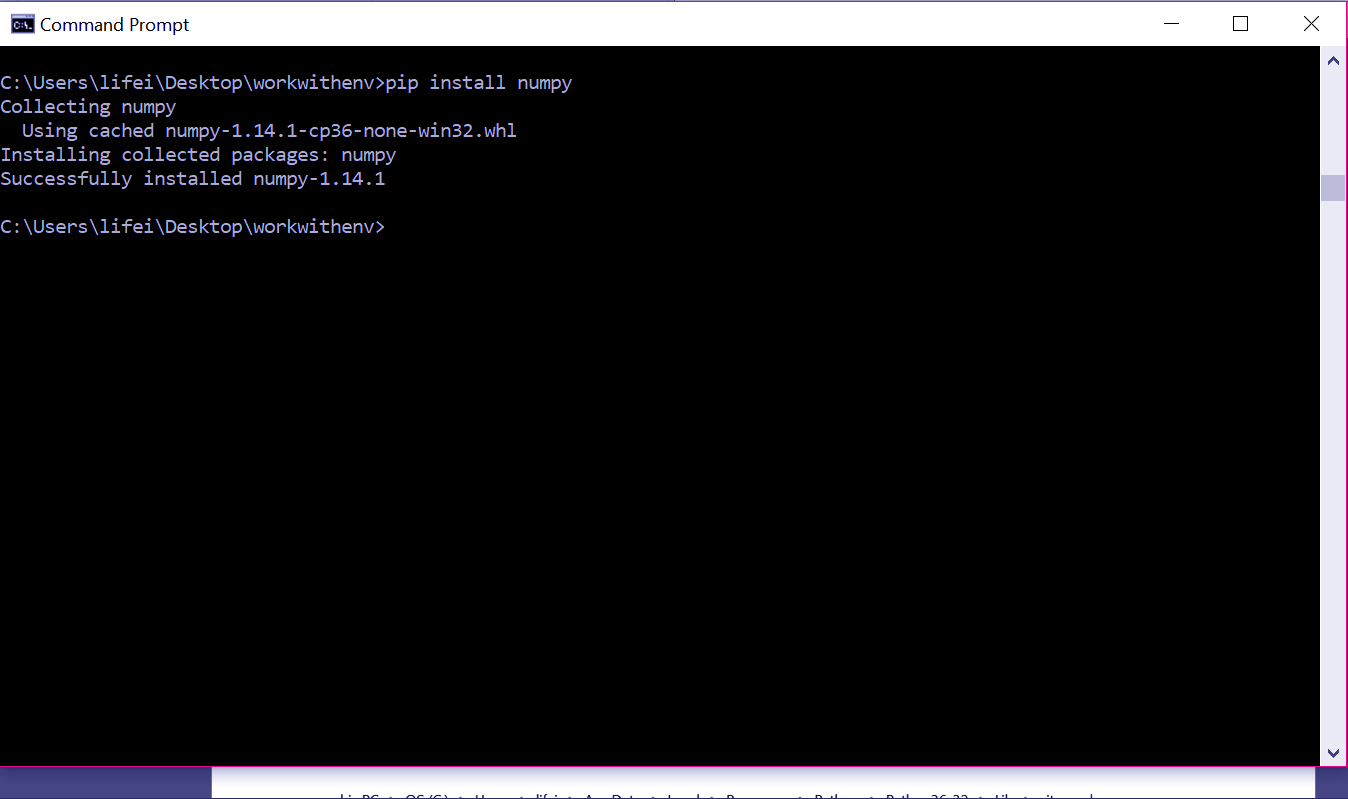
This is what it looks like in the command prompt:
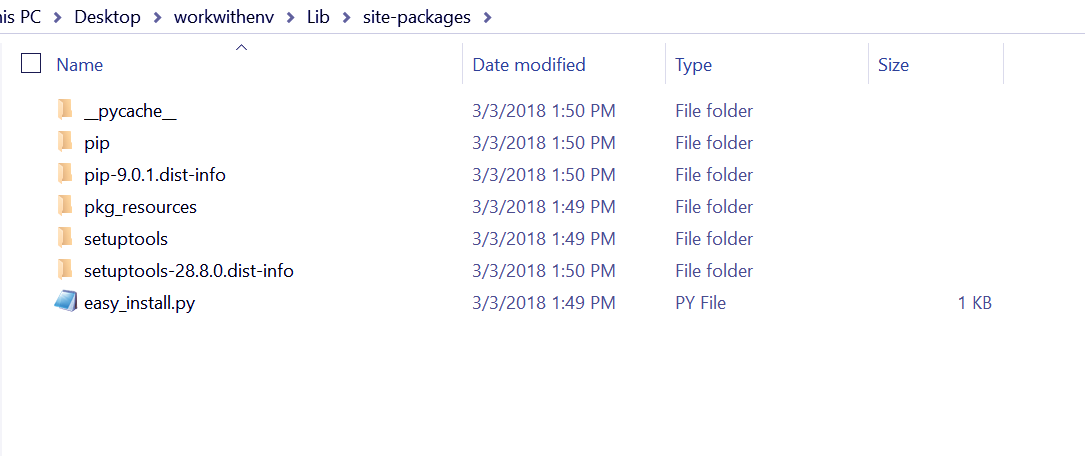
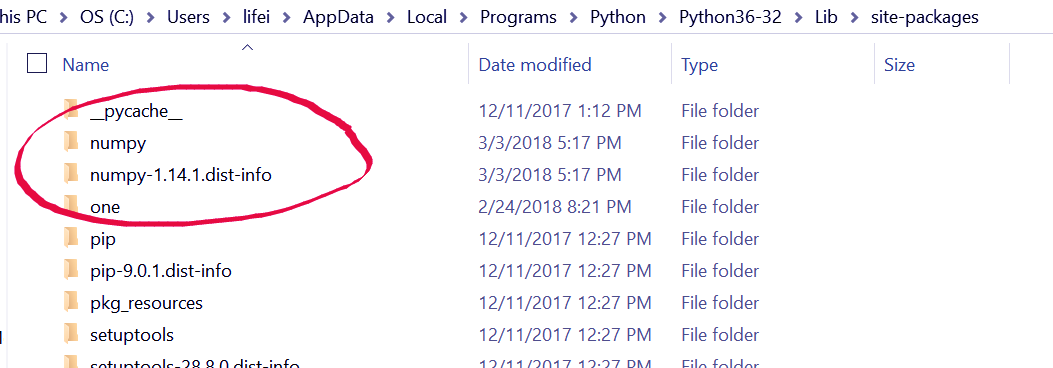
Now, we look into C:\Users\lifei\AppData\Local\Programs\Python\Python36-32\Lib\site-packages, and we find this:
Actually, pip has a number of subcommands like search, install, uninstall, and freeze.
You can also install a specific version of a package by following the package name by ==, and then by the version number:
pip install numpy==1.14.1
In fact, to check what version of numpy you are using, you can type the following in the interpreter:
>>> import numpy
>>> numpy.version.version
Output
Or, you can do:
>>> numpy.__version__
Output
Running the command to install numpy again will just be ignored by the interpreter.
C:\Users\lifei\Desktop\workwithenv>pip install numpy
Requirement already satisfied: numpy in
c:\users\lifei\appdata\local\programs\python\python36-32\lib\site-packages
2. Checking for Upgrades
However, you can check for upgrades:
C:\Users\lifei\Desktop\workwithenv>pip install –upgrade numpy
Requirement already up-to-date: numpy in
c:\users\lifei\appdata\local\programs\python\python36-32\lib\site-packages
3. Uninstalling a Python Package
To uninstall a package, we do this:
C:\Users\lifei\Desktop\workwithenv>pip uninstall certifi
Uninstalling certifi-2018.1.18:
c:\users\lifei\appdata\local\programs\python\python36-32\lib\site-packages\certifi-
2018.1.18.dist-info\description.rst
c:\users\lifei\appdata\local\programs\python\python36-32\lib\site-packages\certifi-
2018.1.18.dist-info\installer
c:\users\lifei\appdata\local\programs\python\python36-32\lib\site-packages\certifi-
2018.1.18.dist-info\license.txt
c:\users\lifei\appdata\local\programs\python\python36-32\lib\site-packages\certifi-
2018.1.18.dist-info\metadata
c:\users\lifei\appdata\local\programs\python\python36-32\lib\site-packages\certifi-
2018.1.18.dist-info\metadata.json
c:\users\lifei\appdata\local\programs\python\python36-32\lib\site-packages\certifi-
2018.1.18.dist-info\record
c:\users\lifei\appdata\local\programs\python\python36-32\lib\site-packages\certifi-
2018.1.18.dist-info\top_level.txt
c:\users\lifei\appdata\local\programs\python\python36-32\lib\site-packages\certifi-
2018.1.18.dist-info\wheel
c:\users\lifei\appdata\local\programs\python\python36-32\lib\site-
packages\certifi\__init__.py
c:\users\lifei\appdata\local\programs\python\python36-32\lib\site-
packages\certifi\__main__.py
c:\users\lifei\appdata\local\programs\python\python36-32\lib\site-
packages\certifi\__pycache__\__init__.cpython-36.pyc
c:\users\lifei\appdata\local\programs\python\python36-32\lib\site-
packages\certifi\__pycache__\__main__.cpython-36.pyc
c:\users\lifei\appdata\local\programs\python\python36-32\lib\site-
packages\certifi\__pycache__\core.cpython-36.pyc
c:\users\lifei\appdata\local\programs\python\python36-32\lib\site-
packages\certifi\cacert.pem
c:\users\lifei\appdata\local\programs\python\python36-32\lib\site-packages\certifi\core.py
Proceed (y/n)? y
Successfully uninstalled certifi-2018.1.18
C:\Users\lifei\Desktop\workwithenv>
4. Learning About a Python Package
To find out about a particular package, we use the subcommand ‘show’:
C:\Users\lifei\Desktop\workwithenv>pip show numpy
Name: numpy
Version: 1.14.1
Summary: NumPy: array processing for numbers, strings, records, and objects.
Home-page: http://www.numpy.org
Author: NumPy Developers
Author-email: [email protected]
License: BSD
Location: c:\users\lifei\appdata\local\programs\python\python36-32\lib\site-packages
Requires:
5. List the Packages Installed in Python
Now, to list all packages that are installed, we use ‘list’:
C:\Users\lifei\Desktop\workwithenv>pip list
DEPRECATION: The default format will switch to columns in the future. You can use –format=
(legacy|columns) (or define a format=(legacy|columns) in your pip.conf under the [list] section)
to disable this warning.
numpy (1.14.1)
pip (9.0.1)
setuptools (28.8.0)
virtualenv (15.1.0)
This listed the packages alongside the versions installed.
6. Freeze
The freeze subcommand with pip will return a list of packages installed, but in the format that
pip install expects:
C:\Users\lifei\Desktop\workwithenv>pip freeze
numpy==1.14.1
virtualenv==15.1.0
So, this is all about Python Virtual Environment and Install Python Packages. Hope you like our explanation.
Python Interview Questions on Virtual Environment
- What is virtual environment in Python?
- How to create a virtual environment in Python?
- How do Python virtual environments work?
- What is the use of virtual environment in Python?
- How to list virtual environments in Python?
Conclusion
Hence, in this lesson on Python virtual environment and Python Packages, we learned about how to set up a virtual environment so all your applications will run without a dispute.
Then, we learned how to use pip to install a package. We also saw subcommands like show, list, freeze, and so.
Did we exceed your expectations?
If Yes, share your valuable feedback on Google




why we need virtual environment if we install pyCharm.And my another question is which IDE is best for machine learning .
It is an environment where python interpreter, libraries and scripts are installed are isolated from those installed in system or in other virtual environments. To read more about it refer to this article: https://data-flair.training/blogs/python-virtual-environment/
And you can install any IDE for machine learning eg: Rodeo which is specifically built for ML and data science in python or you can use any other also like spyder, pycharm, eclipse etc.