Python PyQt5 Tutorial – Example and Applications
Master Python with 70+ Hands-on Projects and Get Job-ready - Learn Python
Today, we will explore Python PyQt5 Tutorial. In this PyQt5 tutorial of Python, we will learn a Python binding of Qt, which is a cross-platform GUI toolkit.
Moreover, we will see how to plot various GUI elements like buttons, windows, and input dialogs.
We will talk about version PyQt5, which isn’t backwards-compatible with version PyQt4. Also, we will look at PyQt Applications.
What is PyQt5?
PyQt is a Python binding of Qt, a cross-platform GUI toolkit.
This is free software by Riverbank Computing and implements over 440 classes and more than 6000 functions and methods.
Some of these are:
PyQt5 Tutorial – What is PyQt5
- A set of GUI widgets.
- An XML parser.
- QScintilla, a rich-text editor widget based on Scintilla.
- SVG support.
- Data-aware widgets.
- Classes to access SQL databases.
- Classes to embed ActiveX controls on Windows.
Features of PyQt5:
- Cross – platform compatibility: It can be used to develop applications on various operating systems like Windows, Linux, macOS.
- Customisable widgets: It provides you with a wide range of personalised tools that can be used to create a GUI for many applications.
- Advanced graphics: It supports advanced graphics creation, like 2D and 3D animations that can be used to create data visualizations.
- Event-driven programming: It allows developers to react to the user’s input and the system events.
1. Modules in PyQt5
We have the following modules available in PyQt5:
- QtQml
- QtQtuick
- QtCore
- QtGui
- QtPrintSupport
- GUI toolkit QtWidgets
- QGLContext
- QGLFormat
- QGLWidget
- QtWidget
- QtWebKit
- QtWebKitWidgets
2. PyQt5 Installation
For this, you need to install PyQt5. You can use pip for this-
pip install pyqt5
To import it into IDLE, you can do the following-
>>> import PyQt5
How to Create a Window in Python PyQt5?
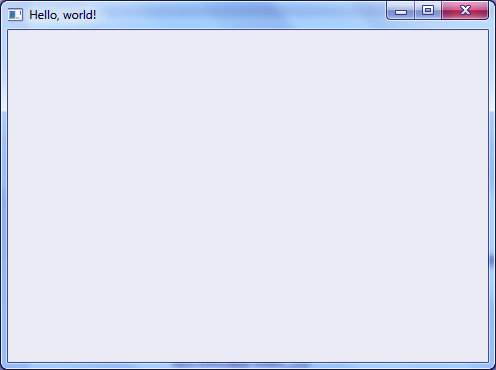
Let’s take a simple example of PyQt5 in Python to create an empty window on our screen.
>>> import sys
>>> from PyQt5.QtWidgets import QApplication, QWidget
>>> app=QApplication(sys.argv)
>>> root=QWidget()
>>> root.resize(320,240)
>>> root.setWindowTitle('Hello, world!')
>>> root.show()
Output

Creating a Window in Python
To enter the main loop for the application, we do the following-
sys.exit(app.exec_())
Another way to create a window will be:
>>> import sys
>>> from PyQt5.QtWidgets import QApplication, QWidget
>>> from PyQt5.QtGui import QIcon
>>> class App(QWidget):
      def __init__(self):
              super().__init__()
              self.title='Hello, world!'
              self.left=10
              self.top=10
              self.width=640
              self.height=480
              self.initUI()
      def initUI(self):
              self.setWindowTitle(self.title)
              self.setGeometry(self.left,self.top,self.width,self.height)
              self.show()
>>> if __name__=='__main__':
        app=QApplication(sys.argv)
        ex=App()
        sys.exit(app.exec_())
Output
Creating a Window in Python
Adding a Status Bar to Python PyQt5
It is possible to add a status bar to our window.
>>> import sys
>>> from PyQt5.QtWidgets import QApplication,QWidget,QMainWindow #Imported one more module
>>> from PyQt5.QtGui import QIcon
>>> class App(QMainWindow):
       def __init__(self):
              super().__init__()
              self.title='Hello, world!'
              self.left=10
              self.top=10
              self.width=640
              self.height=480
              self.initUI()
def initUI(self):
              self.setWindowTitle(self.title)
              self.setGeometry(self.left,self.top,self.width,self.height)
              self.statusBar().showMessage('In progress') #Added
              self.show()
>>> if __name__=='__main__':
       app=QApplication(sys.argv)
       ex=App()
We add this to the main window, and the showMessage() method prints it out to it.
Output
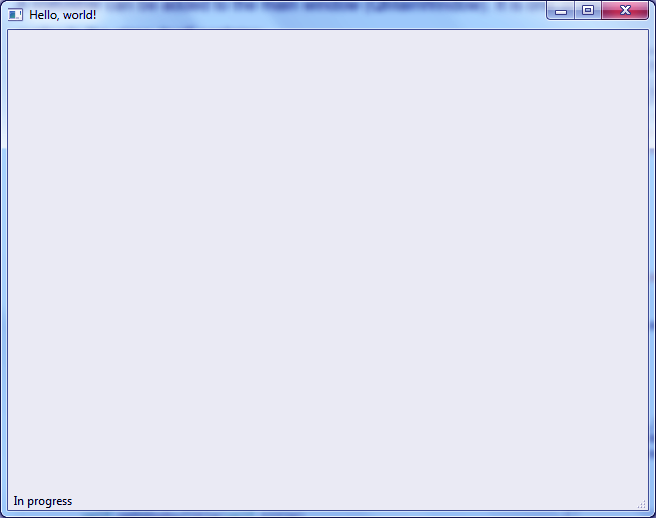
Adding a Status Bar in Python
Adding Buttons to Python PyQt5
Using the QPushButton class, we can add buttons to our screen.
>>> from PyQt5.QtWidgets import QApplication,QWidget,QPushButton
>>> from PyQt5.QtCore import pyqtSlot
>>> import sys
>>> class App(QWidget):
       def __init__(self):
               super().__init__()
               self.title='Hello, world!'
               self.left=10
               self.top=10
               self.width=640
               self.height=480
               self.initUI()
       def initUI(self):
               self.setWindowTitle(self.title)
               self.setGeometry(self.left,self.top,self.width,self.height)
               button=QPushButton('Click me',self)
               button.setToolTip('Thank you for thinking about me')
               button.move(100,70)
               self.show()
>>> if __name__=='__main__':
       app=QApplication(sys.argv)
       ex=App()
Output
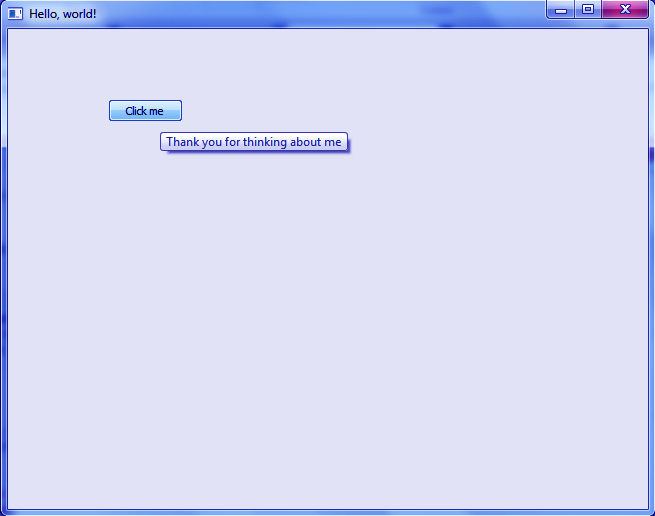
Adding Buttons
Signals and Slots in PyQt5
On an event, like a user click, a PyQt5 widget can emit a signal. For a button click (a signal), we can specify an action (a slot).
>>> from PyQt5.QtWidgets import *
>>> import sys
>>> class Dialog(QDialog):
       def slot_method(self):
               print("Calling the slot")
       def __init__(self):
               super(Dialog,self).__init__()
               button=QPushButton("Click me")
               button.clicked.connect(self.slot_method)
               mainLayout=QVBoxLayout()
               mainLayout.addWidget(button)
               self.setLayout(mainLayout)
               self.setWindowTitle("Hello, world!")
>>> if __name__=='__main__':
       app=QApplication(sys.argv)
       dialog=Dialog()
>>> dialog.exec_()
Calling the slot

Signals and Slots
Message Boxes in PyQt5
Let’s ask the user if he likes cookies
>>> from PyQt5.QtWidgets import QApplication,QWidget,QPushButton,QMessageBox
>>> import sys
>>> from PyQt5.QtCore import pyqtSlot
>>> from PyQt5.QtGui import QIcon
>>> class App(QWidget):
       def __init__(self):
               super().__init__()
               self.title='Hello, world!'
               self.left=10
               self.top=10
               self.width=400
               self.height=250
               self.initUI()
       def initUI(self):
               self.setWindowTitle(self.title)
               self.setGeometry(self.left,self.top,self.width,self.height)
               buttonReply=QMessageBox.question(self, 'Hello', "Do you like cookies?", QMessageBox.Yes | QMessageBox.No, QMessageBox.No)
               if buttonReply==QMessageBox.Yes:
                       print("Yeah")
               else: print("Nah")
               self.show()
>>> if __name__=='__main__':
       app=QApplication(sys.argv)
       ex=App()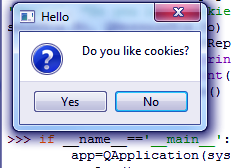
Message Boxes
When we click yes, it prints Yeah, closes this message box and then opens a new window.

Message Boxes in Python
Adding a Textbox in PyQt5
For this, we use the methods setText() and text(); the widget is QLineEdit.
>>> from PyQt5.QtWidgets import QMainWindow,QApplication,QWidget,QPushButton,QAction,QLineEdit,QMessageBox
>>> import sys
>>> from PyQt5.QtGui import QIcon
>>> from PyQt5.QtCore import pyqtSlot
>>> class App(QMainWindow):
       def __init__(self):
               super().__init__()
               self.title='Hello, world!'
               self.left=10
               self.top=10
               self.width=400
               self.height=140
               self.initUI()
       def initUI(self):
               self.setWindowTitle(self.title)
               self.setGeometry(self.left,self.top,self.width,self.height)
               self.textbox=QLineEdit(self)
               self.textbox.move(30,30)
               self.textbox.resize(280,40)
               self.button=QPushButton('Click me',self)
               self.button.move(15,85)
               self.button.clicked.connect(self.on_click)
               self.show()
       @pyqtSlot()
       def on_click(self):
               textboxValue=self.textbox.text()
               QMessageBox.question(self, 'Hello, world!', "Confirm: "+textboxValue,                                                                            QMessageBox.Ok, QMessageBox.Ok)
               self.textbox.setText("...")
>>> if __name__=='__main__':
       app=QApplication(sys.argv)
       ex=App()
Output
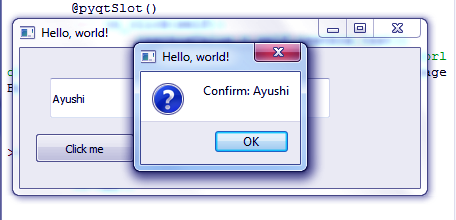
Adding a Textbox
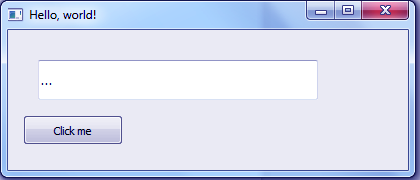
Adding a Textbox
Creating a Menu in PyQt5
Now, let’s create a menu with headings
>>> import sys
>>> from PyQt5.QtWidgets import QMainWindow, QApplication, QWidget, QPushButton, QAction
>>> from PyQt5.QtGui import QIcon
>>> from PyQt5.QtCore import pyqtSlot
>>> class App(QMainWindow):
       def __init__(self):
               super().__init__()
               self.title = 'Hello, world!’'
               self.left = 10
               self.top = 10
               self.width = 640
               self.height = 400
               self.initUI()
       def initUI(self):
               self.setWindowTitle(self.title)
               self.setGeometry(self.left,self.top,self.width,self.height)
               mainMenu=self.menuBar()
               fileMenu=mainMenu.addMenu('File')
               editMenu=mainMenu.addMenu('Edit')
               viewMenu=mainMenu.addMenu('View')
               searchMenu=mainMenu.addMenu('Search')
               toolsMenu=mainMenu.addMenu('Tools')
               helpMenu=mainMenu.addMenu('Help')
               exitButton=QAction(QIcon('exit24.png'), 'Exit', self)
               exitButton.setShortcut('Ctrl+Q')
               exitButton.setStatusTip('Exit application')
               exitButton.triggered.connect(self.close)
               fileMenu.addAction(exitButton)
               self.show()
>>> if __name__=='__main__':
       app=QApplication(sys.argv)
       ex=App()
Output
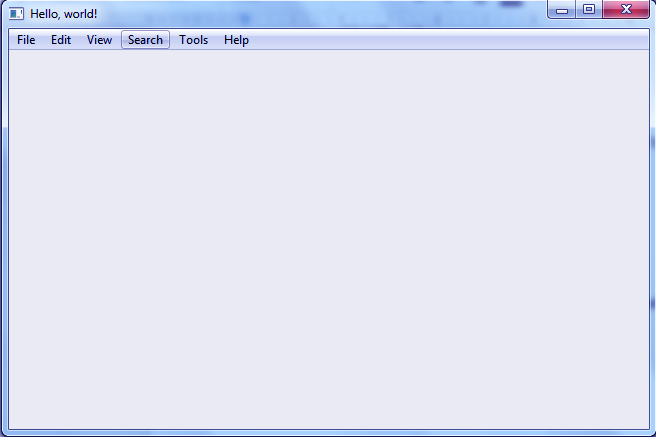
Creating a Menu
Setting Absolute Position in PyQt5
You can put your widgets anywhere you want on the screen.
>>> import sys
>>> from PyQt5.QtWidgets import QApplication, QWidget, QMainWindow, QLabel
>>> from PyQt5.QtGui import QIcon
>>> class App(QMainWindow):
       def __init__(self):
               super().__init__()
               self.title = 'Hello, world!'
               self.left = 10
               self.top = 10
               self.width = 440
               self.height = 280
               self.initUI()
       def initUI(self):
               self.setWindowTitle(self.title)
               self.setGeometry(self.left, self.top, self.width, self.height)
               label = QLabel('Pink',self)
               label.move(50,50)
               label2 = QLabel('Blue',self)
               label2.move(100,100)
               label3 = QLabel('Green',self)
               label3.move(150,150)
               label4 = QLabel('Lavender',self)
               label4.move(200,200)
self.show()
>>> if __name__=='__main__':
       app=QApplication(sys.argv)
       ex=App()
Output

Setting Absolute Position
Creating Input Dialogs in PyQt5
It is possible to add an input dialog.
>>> import sys
>>> from PyQt5.QtWidgets import QApplication,QWidget,QInputDialog,QLineEdit
>>> from PyQt5.QtGui import QIcon
>>> class App(QWidget):
       def __init__(self):
               super().__init__()
               self.title='Hello, world!'
               self.left=10
               self.top=10
               self.width=300
               self.height=250
               self.initUI()
       def initUI(self):
               self.setWindowTitle(self.title)
               self.setGeometry(self.left,self.top,self.width,self.height)
               self.getDouble()
               self.show()
       def getDouble(self):
               d,okPressed=QInputDialog.getDouble(self,'Get double','Value',9,0.5,100,9.5)
               if okPressed:
                       print(d)
>>> if __name__=='__main__':
       app=QApplication(sys.argv)
       ex=App()
Output

Creating Input Dialogs
Loading Images to PyQt5
To load an image into your window, you can try the following-
>>> import sys
>>> from PyQt5.QtWidgets import QApplication,QWidget,QLabel
>>> from PyQt5.QtGui import QIcon,QPixmap
>>> import os
>>> os.chdir('C:\\Users\\Ram\\Desktop')
>>> class App(QWidget):
       def __init__(self):
               super().__init__()
               self.title='Hello, world!'
               self.left=10
               self.top=10
               self.width=640
               self.height=480
               self.initUI()
       def initUI(self):
               self.setWindowTitle(self.title)
               self.setGeometry(self.left,self.top,self.width,self.height)
               label=QLabel(self)
               pixmap=QPixmap('df.png')
               label.setPixmap(pixmap)
               self.resize(pixmap.width(),pixmap.height())
               self.show()
>>> if __name__=='__main__':
       app=QApplication(sys.argv)
       ex=App()
Output

Loading Images
Color Dialogs in PyQt5
A color dialog is one that lets you choose a color from a color picker.
>>> import sys
>>> from PyQt5.QtWidgets import QApplication, QWidget, QPushButton, QColorDialog
>>> from PyQt5.QtGui import QIcon
>>> from PyQt5.QtCore import pyqtSlot
>>> from PyQt5.QtGui import QColor
>>> class App(QWidget):
       def __init__(self):
              super().__init__()
              self.title='Hello, world!'
              self.left=10
              self.top=10
              self.width=320
              self.height=200
              self.initUI()
       def initUI(self):
              self.setWindowTitle(self.title)
              self.setGeometry(self.left,self.top,self.width,self.height)
              button=QPushButton('Open color dialog', self)
              button.setToolTip('This opens the color dialog')
              button.move(10,10)
              button.clicked.connect(self.on_click)
              self.show()
       @pyqtSlot()
       def on_click(self):
              openColorDialog(self)
>>> def openColorDialog(self):
       color=QColorDialog.getColor()
       if color.isValid():
              print(color.name())
>>> if __name__=='__main__':
       app=QApplication(sys.argv)
       ex=App()
Output

Color Dialogs
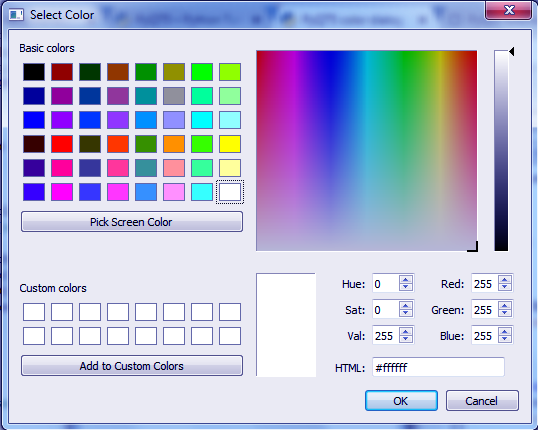
Color Dialogs
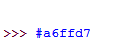
And then when we pick a color and click on ‘OK’, it gives us the HTML code of that color.
Color Dialogs
Font Dialogs to PyQt5
Now to choose a font-
>>> import sys
>>> from PyQt5.QtWidgets import QApplication, QWidget, QPushButton, QFontDialog
>>> from PyQt5.QtGui import QIcon
>>> from PyQt5.QtCore import pyqtSlot
>>> class App(QWidget):
       def __init__(self):
               super().__init__()
               self.title='Hello, world!'
               self.left=10
               self.top=10
               self.width=320
               self.height=200
               self.initUI()
       def initUI(self):
               self.setWindowTitle(self.title)
               self.setGeometry(self.left,self.top,self.width,self.height)
               button=QPushButton('The font dialog', self)
               button.setToolTip('Opens the font dialog')
               button.move(50,50)
               button.clicked.connect(self.on_click)
               self.show()
       @pyqtSlot()
       def on_click(self):
               print('Click')
               openFontDialog(self)
>>> def openFontDialog(self):
       font,ok=QFontDialog.getFont()
       if ok:
print(font.toString())
>>> if __name__=='__main__':
       app=QApplication(sys.argv)
       ex=App()
Output

PyQt5 Tutorial – Font Dialogs
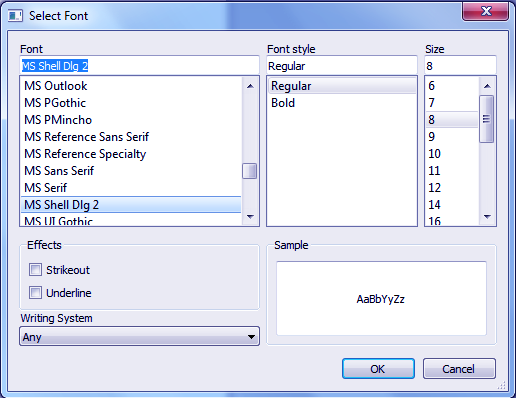
Font Dialogs

Font Dialogs
Python PyQt Applications
Here’s a list of applications that make use of PyQt-
- Dropbox- File-hosting service.
- Spyder- Python IDE.
- Calibre- e-book management application.
- Leo- Outliner and literate programming editor.
- OpenShot- Video-editing program.
- Veusz- Scientific plotting application.
- Orange- Data-mining and visualization framework.
- Kodos- Regular-expression debugger.
- Eric Python IDE.
- Anki- Spaced repetition flashcard program.
- Ninja-IDE- Extensible open-source Python IDE.
- qt-recordMyDesktop- Qt4 frontend for recordMyDesktop.
So, this was all about PyQt5 Tutorial. Hope you like our explanation.
Python Interview Questions on PyQt5
1. What is PyQt5 in Python?
2. What is PyQt5 used for in Python?
3. What is the difference between PyQt4 and PyQt5?
4. How to run PyQt5 on Windows?
5. What are the benefits of using PyQt5 in Python?
Conclusion
PyQt 5/6 wraps the Qt framework, giving you drag-and-drop design plus native-looking widgets on Windows, macOS, and Linux. Build main windows, dock panels, and signals-and-slots connections in minutes. Bundle apps with PyInstaller to ship one-click executables. Because PyQt ties into C++ Qt, performance stays high even for data-heavy dashboards.
Hence, in this Python PyQt5 Tutorial, we saw how to create GUI elements with PyQt5. Once you get the syntax, it seems easy to work with PyQt5.
Did we exceed your expectations?
If Yes, share your valuable feedback on Google


Kodos is mentioned as a pyqt5 application but I arrived here looking for the pyqt5 version because kodos has been dropped in Fedora. After looking for it all over I could not find the pyqt5 version and the reason it was dropped in fedora is because the maintainer has not updated it to pyqt5 and is stuck at pyqt4. Why do you list it here as pyqt5. Do you know a place where there exists kodos with pyqt5?
Hi Jnvilo
The applications we mentioned were generally of PyQt, and not specifically of PyQt5. Thanks for pointing it out, we have made the changes.
DataFlair
Hi there, thanks for the articles. I use PyQT5 for developing GUI, but i have no idea how to connecting it with any API/backend activity? Do you have any suggestion what packages can be use for this case? Btw i’m new in developing an apps, sorry if i ask a repeated question. Thanks
Hey, you can connect to any databse using PYQT and the you can run sql queries to access, update or delete from the database. You can use PYQT’s QSqlDatabase to connect with SQLITE3.
Thanks for this article.
My PyQt5 is not working, whenever, I print to the console I get this error message NameError: name ‘App’ is not defined, which makes me unable to do anything further..