Python Database Access – Python 3 MySQL
Master Python with 70+ Hands-on Projects and Get Job-ready - Learn Python
In this Python Database tutorial, we will see how to perform Python database access.
We also will see how to create a database in Python 3 and perform operations like insert, read, update, delete, commit, rollback, and disconnect.
We will also see how to deal with errors in Python Database Access.
Moreover, we will discuss PyMySQL and Installation and the benefits of Python database access.
So, let’s begin Python Database Access.
Python Database Access – Python 3 MySQL
What is Python Database Access?
A database is a collection of tables related to each other via columns. For most real-world projects, a database is a must.
We can use SQL (Structured Query Language) to create, access, and manipulate data.We can also make use of normalization to avoid redundancy of data.
For database programming, Python supports many database servers-
MySQL, Oracle, PostgreSQL, SQLite, Sybase, Microsoft SQL Server, mSQL, Microsoft Access, and many more.
It also supports Data Query Statements, Data Definition Language (DDL), and Data Manipulation Language (DML).
The standard database interface for Python is Python DB-API. For that, we have the module MySQLdb for MySQL.
This is independent of database engines, so we can write Python scripts to access any database engine. However, this isn’t compatible with Python 3.
So, in this Python Database Access tutorial, we use the module PyMySQL.
Advantages of Database Programming with Python
With Python, we have the following benefits:
- Platform-independent
- Faster and more efficient
- Portable
- Support for relational database systems
- Easy to migrate and port database application interfaces
- Support for SQL cursors
- It handles open and closed connections
Disadvantages of Database Programming in Python:
- Speed: Python is slower than other languages as it reads tasks line by line. So, it’s preferred less for high-speed tasks.
- Memory usage: Python uses a lot of RAM.
- Late errors: Python does not check the bugs before running it, which might crash the database connection while running it.
- Simpler tools: To perform huge or complex tasks, some people find Python’s built-in database tools very basic.
PyMySQL and Installation
PyMySQL implements the Python Database API 2.0. In this Python Database tutorial, we will use it to connect to a MySQL database server from Python.
We have the following requirements to install PyMySQL-
1. Python (any of)
- CPython>=2.6 or >=3.3
- PyPy>=4.0
- IronPython 2.7
2. MySQL(any of)
- MySQL>=4.1
- MariaDB>=5.1
To install it, run the following command in the command prompt-
C:\Users\lifei>pip install PyMySQL
Collecting PyMySQL
Using cached https://files.pythonhosted.org/packages/2f/be/4310bb405eb83b615cf9bd4501942d9ff000d8b9372ce84e920facbf5c36/PyMySQL-0.9.0-py2.py3-none-any.whl
Collecting cryptography (from PyMySQL)
Downloading https://files.pythonhosted.org/packages/67/62/67faef32908026e816a74b4b97491f8b9ff393d2951820573599c105cc32/cryptography-2.2.2-cp36-cp36m-win_amd64.whl (1.3MB)
100% |████████████████████████████████| 1.3MB 596kB/s
Collecting idna>=2.1 (from cryptography->PyMySQL)
Downloading https://files.pythonhosted.org/packages/4b/2a/0276479a4b3caeb8a8c1af2f8e4355746a97fab05a372e4a2c6a6b876165/idna-2.7-py2.py3-none-any.whl (58kB)
100% |████████████████████████████████| 61kB 1.3MB/s
Collecting asn1crypto>=0.21.0 (from cryptography->PyMySQL)
Using cached https://files.pythonhosted.org/packages/ea/cd/35485615f45f30a510576f1a56d1e0a7ad7bd8ab5ed7cdc600ef7cd06222/asn1crypto-0.24.0-py2.py3-none-any.whl
Collecting six>=1.4.1 (from cryptography->PyMySQL)
Using cached https://files.pythonhosted.org/packages/67/4b/141a581104b1f6397bfa78ac9d43d8ad29a7ca43ea90a2d863fe3056e86a/six-1.11.0-py2.py3-none-any.whl
Collecting cffi>=1.7; platform_python_implementation != “PyPy” (from cryptography->PyMySQL)
Downloading https://files.pythonhosted.org/packages/2f/85/a9184548ad4261916d08a50d9e272bf6f93c54f3735878fbfc9335efd94b/cffi-1.11.5-cp36-cp36m-win_amd64.whl (166kB)
100% |████████████████████████████████| 174kB 568kB/s
Collecting pycparser (from cffi>=1.7; platform_python_implementation != “PyPy”->cryptography->PyMySQL)
Using cached https://files.pythonhosted.org/packages/8c/2d/aad7f16146f4197a11f8e91fb81df177adcc2073d36a17b1491fd09df6ed/pycparser-2.18.tar.gz
Installing collected packages: idna, asn1crypto, six, pycparser, cffi, cryptography, PyMySQL
Running setup.py install for pycparser … done
Successfully installed PyMySQL-0.9.0 asn1crypto-0.24.0 cffi-1.11.5 cryptography-2.2.2 idna-2.7 pycparser-2.18 six-1.11.0
Also, make sure to install a database server on your machine. In this tutorial, we use MySQL. We download it from here-
dev.mysql.com/downloads/mysql
Connecting Python Database
Now that you’ve installed everything, let’s begin connecting to the database. Let’s create a database first.
1. How to Create a Python Database?
mysql> create database demo;
Query OK, 1 row affected (0.21 sec)
mysql> use demo;
Database changed
mysql> create user ‘ayushi’@’localhost’ IDENTIFIED BY ‘yourpassword’
-> ;
Query OK, 0 rows affected (0.21 sec)
mysql> grant all on demo.* to ‘ayushi’@’localhost’;
Query OK, 0 rows affected (0.22 sec)
mysql> create table student(fname varchar(20), lname varchar(20), age int, enrolment_no varchar(12));
Query OK, 0 rows affected (0.62 sec)
2. How to Connect to a Python Database?
>>> import pymysql
>>> db=pymysql.connect("localhost","ayushi","yourpassword","demo") #This saves a connection object into db
>>> cursor=db.cursor()
>>> cursor.execute("SELECT VERSION()")
Output
>>> print(f"You're running version {cursor.fetchone()}")Output
>>> db.close() #Closing the database connection
A cursor is an object that submits different SQL statements to the database server. A cursor returns a result set object
How to Create Tables in Python Database?
Now, let’s take a look at all operations one by one, starting with creating a table.
>>> import pymysql
>>> db=pymysql.connect("localhost","ayushi","yourpassword","demo")
caching sha2: succeeded by fast path.
>>> cursor=db.cursor()
>>> cursor.execute("DROP TABLE IF EXISTS student") #This drops the table and replaces it
>>> query="""CREATE TABLE student(
fname VARCHAR(20), lname VARCHAR(20),
age INT, enrolment_no VARCHAR(12))"""
>>> cursor.execute(query)
>>> db.close()
How to Insert a Record in a Python Database?
Let’s try inserting a record in ‘student’.
>>> import pymysql
>>> db=pymysql.connect("localhost","ayushi","yourpassword","demo")
caching sha2: succeeded by fast path.
>>> cursor=db.cursor()
>>> query='INSERT INTO student VALUES("Ayushi","Sharma",22,"0812CS141028")'
>>> try:
            cursor.execute(query)
            db.commit() #Commit writing to the database
except:
            db.rollback() #Rollback the transaction if not complete
1
>>> db.close()
Let’s check if this makes any changes to the database. In the command prompt:
mysql> select * from student;
+--------+--------+------+--------------+
| fname  | lname  | age  | enrolment_no |
+--------+--------+------+--------------+
| Ayushi | Sharma |   22 | 0812CS141028 |
+--------+--------+------+--------------+
1 row in set (0.00 sec)
How to Read Records in a Python Database?
Now, how can we fetch values from a database?
Let’s take an example to fetch records of students from ‘student’ who are older than 22.
We have added another record for this purpose.
>>> import pymysql
>>> db=pymysql.connect("localhost","ayushi","yourpassword","demo")
caching sha2: succeeded by fast path.
>>> cursor=db.cursor()
>>> query="select * from student where age>22"
>>> try:
            cursor.execute(query)
            resultset=cursor.fetchall() #To fetch all records that satisfy
            for record in resultset:
                        fname=record[0]
                        lname=record[1]
                        age=record[2]
                        enrolment_no=record[3]
                        print(f"Student: {fname} {lname}; Enrolment: {enrolment_no}; Age: {age}")
except:
            print("Sorry, we encountered a problem")
1
Student: Megha Sharma; Enrolment: 0812CS141015; Age: 24
>>> db.close()
We have the following methods and attributes-
- fetchone()– This fetches the immediate next row from the result set of the query.
- fetchall()– This fetches the entire result set; it will exclude the records already extracted.
- rowcount– This is an attribute. It returns an integer denoting the number of records that a call to execute() affected.
How to Update Records in a Python Database?
To update an existing record, we can simply use an SQL query for the same.
>>> import pymysql
>>> db=pymysql.connect("localhost","ayushi","yourpassword","demo")
caching sha2: succeeded by fast path.
>>> cursor=db.cursor()
>>> query="update student set age=age+1 where age<=22"
>>> try:
            cursor.execute(query)
            db.commit()
except:
            db.rollback()
1
>>> db.close()
Let’s see if this has made any changes to the actual database. In your command prompt:
mysql> select * from student;
+--------+--------+------+--------------+
| fname  | lname  | age  | enrolment_no |
+--------+--------+------+--------------+
| Ayushi | Sharma |   23 | 0812CS141028 |
| Megha  | Sharma |   24 | 0812CS141015 |
+--------+--------+------+--------------+
2 rows in set (0.00 sec)
How to Delete Records in a Python Database?
We can also delete records from a database using Python.
>>> import pymysql
>>> db=pymysql.connect("localhost","ayushi","swaysway7!","demo")
caching sha2: succeeded by fast path.
>>> cursor=db.cursor()
>>> query="delete from student where age>23"
>>> try:
            cursor.execute(query)
            db.commit()
except:
            db.rollback()
1
>>> db.close()
And in the command prompt:
mysql> select * from student;
+--------+--------+------+--------------+
| fname  | lname  | age  | enrolment_no |
+--------+--------+------+--------------+
| Ayushi | Sharma |   23 | 0812CS141028 |
+--------+--------+------+--------------+
1 row in set (0.00 sec)
Commit, Rollback, and Disconnecting in Python Database
A commit command tells the database to finalize the write to the database. A rollback lets us revert changes and get back to a previous state.
For committing, you can use commit(), and for rollback, you can use rollback().
After we’re done working with the database, we should close the database to release resources. We use close() for this.
If you don’t get any of this, we suggest reading up on the basic properties of transactions in databases.
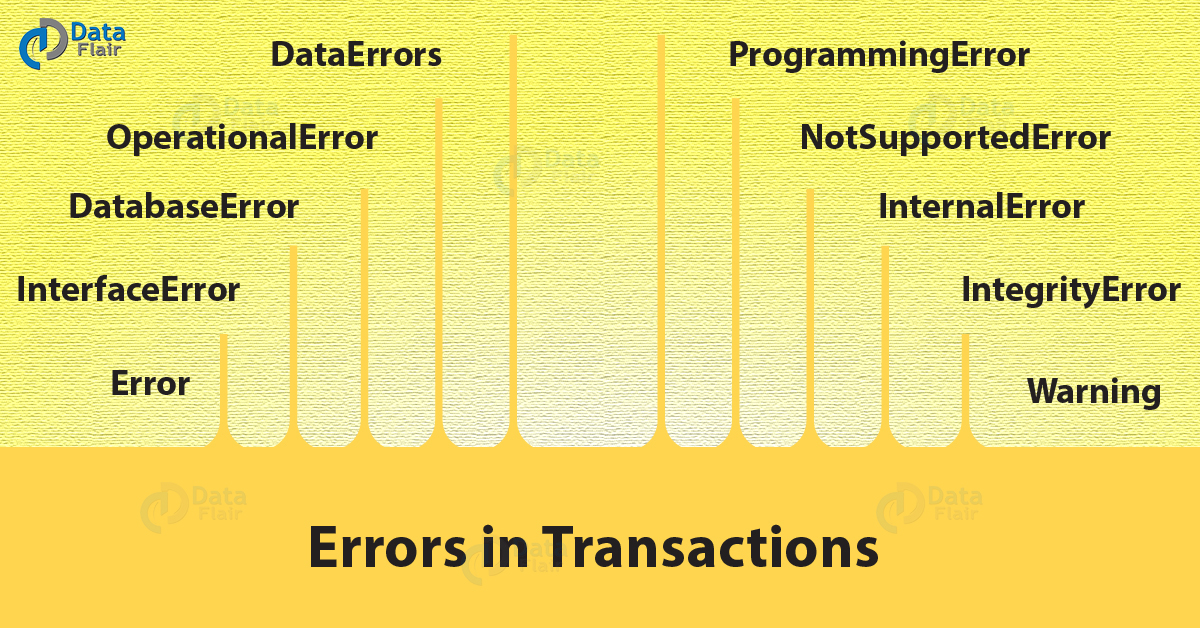
Errors in Transactions in Python Database
When holding a transaction, you may come across ten different kinds of errors:
Python Database Access – Python 3 MySQL
1. Error in Python Database
This is the base class for errors and a subclass of StandardError.
2. InterfaceError in Python Database
This is a subclass of Error, and Python uses it for errors relating to the module for database access.
3. DatabaseError in Python Database
This is a subclass of Error, and Python uses it for database errors.
4. OperationalError in Python Database
This is a subclass of DatabaseError. When Python loses connection to a database, it throws this error.
This may happen when we haven’t selected a database.
5. DataError in Python Database
This is a subclass of DatabaseError. Python uses this when there is an error in the data.
6. InternalError in Python Database
This is a subclass of DatabaseError. Python uses this for errors internal to the module we use for the database access.
7. IntegrityError in Python Database
Also a subclass of DatabaseError. Python uses this for cases where there can be damage to relational integrity.
This may happen when you try to enter duplicate records in the database.
8. Programming Error in Python Database
This is a subclass of DatabaseError. Errors like bad table names cause this. This may happen when we try to create a duplicate database.
9. NotSupportedError in Python Database
A subclass of DatabaseError. When we attempt to call functionality that it doesn’t support, Python raises this error.
10. Warning in Python Database
This is a subclass of StandardError. Python uses this for non-fatal issues.
So, this was all about Python Database Access. Hope you like our explanation.
Python Interview Questions on Database Access
- How do you connect to a database in Python?
- Which database is good with Python? Explain with reason.
- What is Database API in Python?
- How to fetch data from a database in Python?
- Can you use SQL in Python?
Conclusion
Hence, now you know how to access a database using Python with MySQL.
In addition, we saw how to perform Python database access and how to create a database in Python 3, and also perform operations like insert, read, update, delete, commit, rollback, and disconnect.
At last, we cover how to deal with errors in Python Database Access and PyMySQL and Installation, and the benefits of Python database access. That’s all for today.
Did you know we work 24x7 to provide you best tutorials
Please encourage us - write a review on Google


I am getting this error when I try connecting the database to python:
TypeError: Connection.__init__() takes 1 positional argument but 5 were given