Power BI Waterfall Chart – 8 Simple Steps to Create
Job-ready Online Courses: Knowledge Awaits – Click to Access!
1. Objective
In our last session, we studied Power BI Card Visualizations. Here, in this tutorial, we will learn about Power BI Waterfall Chart. In addition, we will discuss when to use and how to make a waterfall chart in Power BI. At last, we will talk about highlighting and cross-filtering with Power BI Waterfall Chart example.
So, let’s start the Power BI Waterfall Chart Tutorial.
Power BI Waterfall Chart – 8 Simple Steps to Create
2. What is Power BI Waterfall Chart?
A waterfall graph demonstrates a running aggregate as qualities are included or subtracted. It’s helpful for seeing how an underlying worth (for instance, net wage) is influenced by a progression of positive and negative changes.
The segments are shading coded so you can rapidly tell increments and abatements. The underlying and the last esteem sections frequently begin on the flat pivot, while the transitional qualities are skimming segments. As a result of this “look”, waterfall diagrams are additionally called connect outlines.
Do you know How to Create Power BI Combo Chart
3. Power BI Waterfall Chart – When to Utilize
Waterfall Charts outlines are an awesome decision:
- When you have changed for the measure crosswise overtime arrangement or distinctive classifications.
- To review the real changes adding to the aggregate esteem.
- To plot your organization’s yearly benefit by indicating different wellsprings of income and touch base at the aggregate benefit (or misfortune).
- Outline the start and the closure headcount for your organization in multi-year.
- To envision how much cash you make and spend every month and the running parity for your record.
4. How to Make a Waterfall Chart in Power BI?
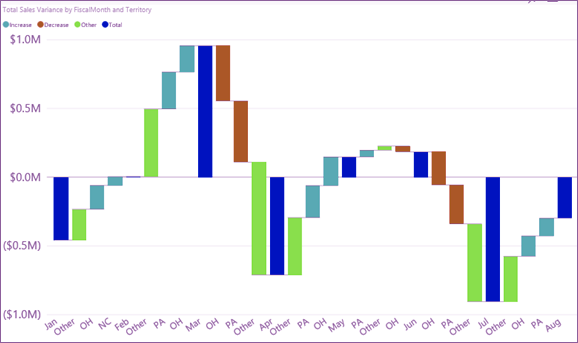
We’ll make a Power BI Waterfall Chart that showcases deals difference (evaluated deals versus genuine deals) by month. To take after a long, sign in to Power BI and select Get Data > Samples > Retail Analysis Sample.
- Select the Datasets tab and look to the new “Retail Analysis Sample” dataset. Select the Create report symbol to open the dataset in report altering the view.
- From the Fields sheet, select Sales > Total Sales Variance. On the off chance that Total Sales Variance isn’t in the Y Axis zone, drag it there.
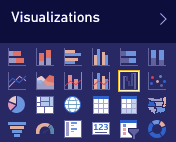
- Change over the diagram to a Waterfall.
Step.3 Power BI Waterfall Chart
- Select Time > FiscalMonth to add it to the Category well.
Read about How to Create ArcGIS Maps For Power BI with ESRI
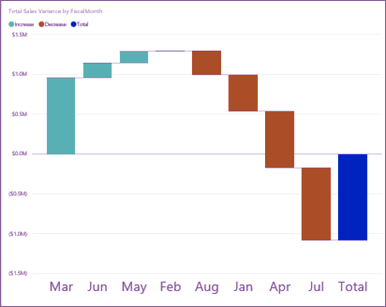
Step.4 Create Power BI Waterfall Chart
- Sort the waterfall chart sequentially. From the upper right corner of the graph, select the circles (…) and pick FiscalMonth.
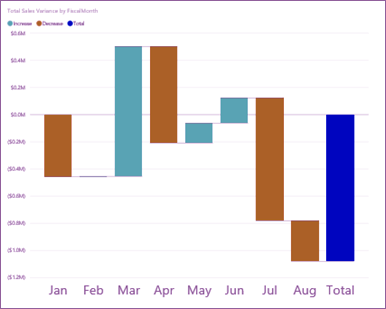
Step.5 Create Power BI Waterfall Chart
- Delve in somewhat more to perceive what’s contributing most to the progressions month to month. Drag Store > Territory to the Breakdown container.
- Naturally, Power BI adds the main 5 supporters of increments or declines by month. Yet, we’re just inspired by the best 2 donors. In the Formatting sheet, select Breakdown and set Maximum to 2.
Follow this link to know about Power Bi and Excel Integration
A speedy survey uncovers that the domains of Ohio and Pennsylvania are the greatest supporters of development, negative and positive, in our waterfall diagram.
Step.7 Create Power BI Waterfall Chart
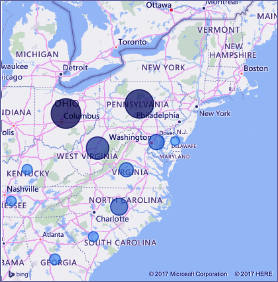
- This is an intriguing finding. Do Ohio and Pennsylvania have such a noteworthy effect since deals in these 2 domains are considerably higher than alternate regions? We can watch that. Make a guide that takes a gander at deals by an area.
Step.8 Create Power BI Waterfall Chart
Our guide underpins our hypothesis. It demonstrates that these 2 regions had the most astounding estimation of offers a year ago (bubble size) and this year (bubble shading).
5. Featuring and Cross-Separating
For data about utilizing the Filters sheet, see Add a channel to a report.
Featuring a section in a waterfall outline cross-channels alternate representations on the report page. Furthermore, the other way around. Notwithstanding, the Total section does not trigger featuring or react to cross-separating.
Have a look at Power BI Scatter & Bubble Charts
So, this was all about Power BI Waterfall Chart Tutorial. Hope you like our explanation.
6. Conclusion
Hence, in this Power BI Waterfall Chart tutorial, we learned how to make a waterfall chart in Power BI and when to utilize it. Furthermore, if you have any doubt, feel free to share with us!
Related Topic- Create Power BI Radial Gauge Chart
Your opinion matters
Please write your valuable feedback about DataFlair on Google


