How to Create Power BI Time Series Chart in 7 Easy Steps
Placement-ready Online Courses: Your Passport to Excellence - Start Now
1. Objective
In our last session, we talked about the Power BI Ribbon Chart. Here, in this Power BI Time Series Tutorial, we are going to create time series graph in Power BI. Moreover, we will learn the steps to make a Power BI Time Series charts.
So, let’s start the Power BI Time Series Graph.
How to Create Power BI Time Series Chart?
2. Power BI Time Series Graph
Today we’ll coordinate the information representation control in Power BI to the ARR in R Programming. Each time I see one of these posts about information representation in R, I get this tingle to test the breaking points of Power BI.
Today around evening time I read a post about plotting time series in R utilizing Yahoo Finance information by Joseph Rickert on the Revolution Analytics blog. In his blog, he depicts, in its most straightforward shape, how he gets stock information from the Yahoo Finance API and plots it on a diagram.
Do you know about Power BI Data Category?
Sounds like something Power BI can do!
Power BI Time Series Graph
He at that point goes ahead to depict making the graph intuitive utilizing extravagant R enchantment.
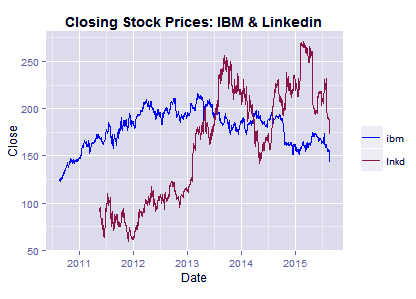
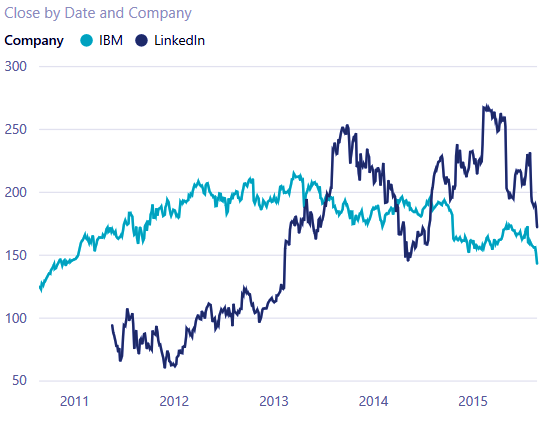
The sample of Power BI Time Series Graph
We should separate what we’re seeing here.
- Information for IBM and LNKD stock.
- Line chart.
- Mouseover legend.
- Date extend selector.
- Intuitive HTML introduction.
How to Import Excel Workbooks into Power BI Desktop
The date extend selector will be a hard one, yet how about we kick this gathering off!
3. How to Create Time Series Line Chart in Power BI?
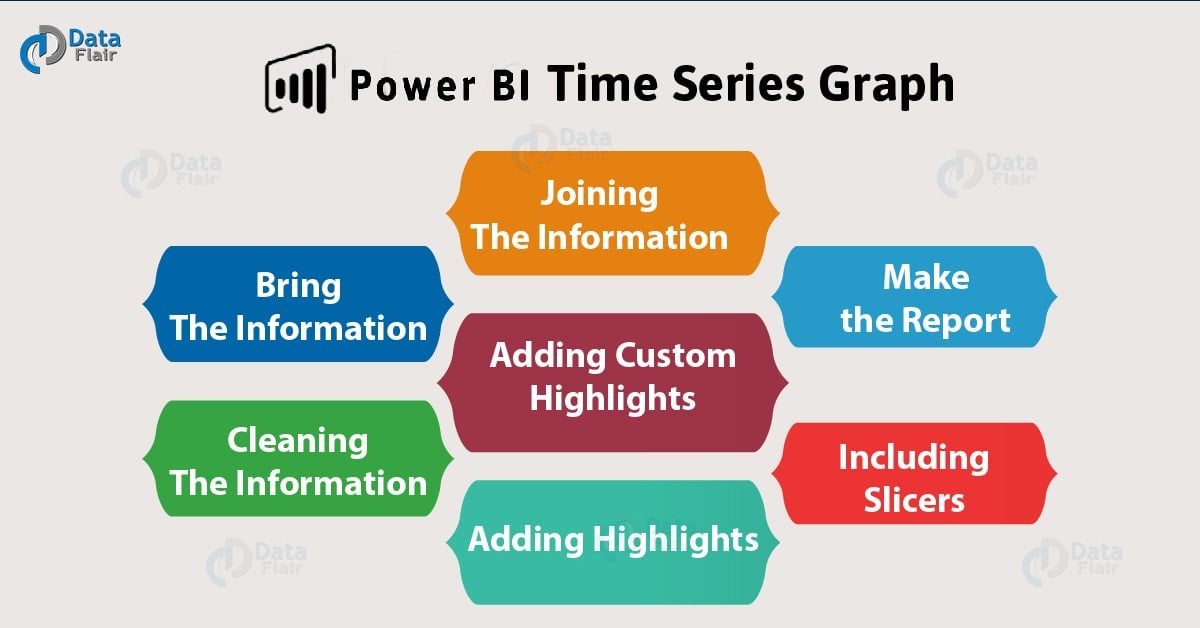
Following are the seven steps to make Power BI Time Series Charts:
a. Bring the Information
With anything Power BI, the initial step is getting the information.
In his blog, Joseph posts the accompanying connections as his sources
IBM Stock information: http://genuine chart.finance.yahoo.com/table.csv?s=IBM&a=07&b=24&c=2010&d=07&e=24&f=2015&g=d&ignore=.csv
Linkedin stock information: http://genuine chart.finance.yahoo.com/table.csv?s=LNKD&a=07&b=24&c=2010&d=07&e=24&f=2015&g=d&ignore=.csv
Opening these in a program downloads a CSV document. Be that as it may, we need to have the capacity to open the information in the favour R path with the factors in the URL. This additionally empowers us to effectively change the time frame later on.
Bringing in this information in Power BI is done by means of the “Internet” information source.
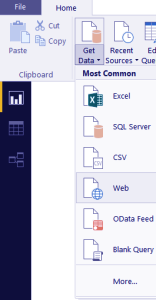
Bring the Data
In the following, excessively expansive exchange box, with a little information box we enter our first URL.
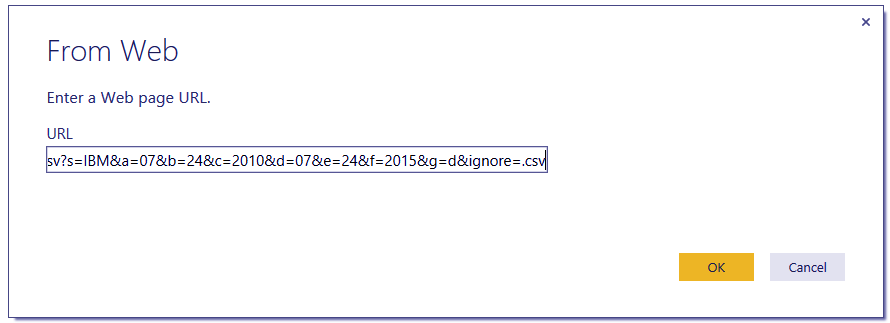
Step.1 Power BI Time Series Graph – Bring the Information
Squeezing “alright” gives us the accompanying discourse box.
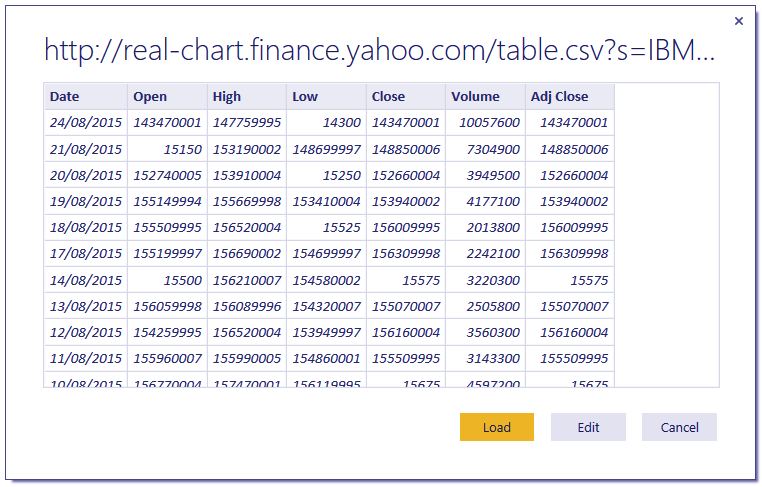
Power BI Time Series Chart – Bring the Data
The “Alter” catch will give us the Power Query screen which gives us a ton of alternatives to alter our current information or even make new highlights in our dataset. To rival the capacities of a particular instrument like R we’ll have to utilize the maximum capacity of Power BI.
Read about Power BI Card Visualizations – Two Ways for Creating Card
So squeeze that “Alter” catch and after that import the following dataset too utilizing a similar technique.
You should wind up having 2 datasets stacked, seeing the underneath screen.
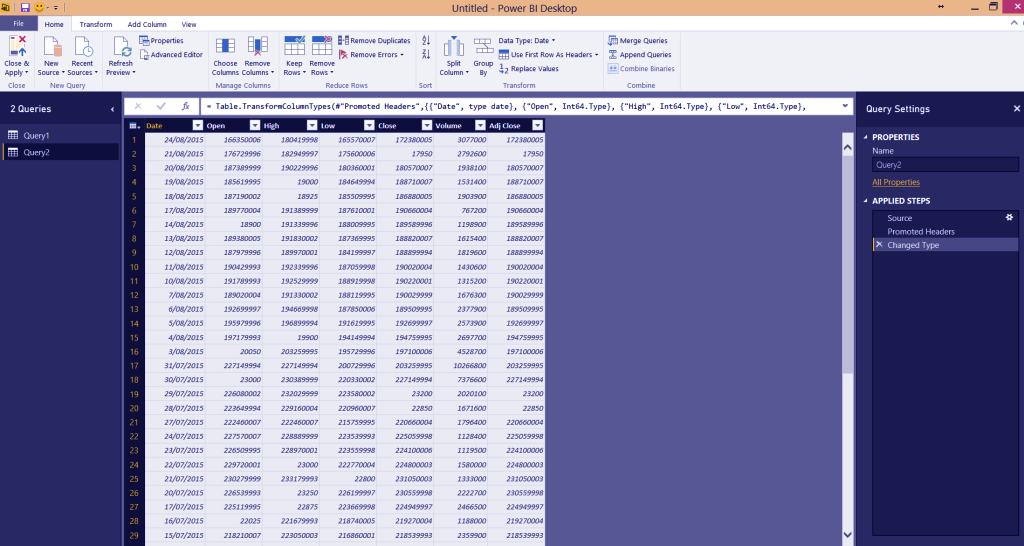
Power BI Time Series Graph – Bring the Data
b. Clean the Information
As you may have seen, the qualities were foreign made as though the stock was worth millions to billions. I’m certain IBM and LinkedIn will be upbeat to hear this. Nonetheless, you may have seen that stock is normally justified regardless of a few dollars for little organizations to just several dollars for the best organizations.
I’m feeling that the information may show up effectively for you, contingent upon your region. The period versus comma decimal problem is something average for Belgium.
To work around this issue in our information import we’ll make the accompanying strides.
Change over the numerical segments to content
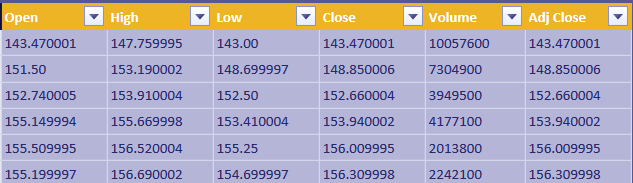
Step.2 Power BI Time Series Chart – Clean the Information
- Supplant the period by commas.
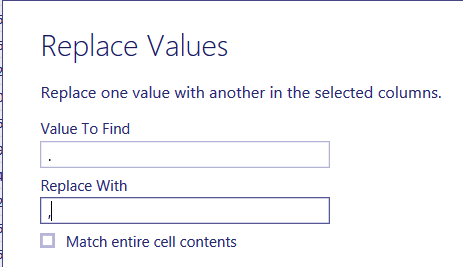
Power BI Time Series Graph – Clean the Information
- Change over the decimal segments to a decimal information write.
- Change over the entire number segment (Volume) to an entire number datatype.
Let’s Explore Power BI Conditional Formatting – Background, Font, Data Bars
Well here, we’re finished cleaning our information.
c. Join the Information
To demonstrate both datasets in one outline we have to join the information first.
In any case, to distinguish the joined information in one graph, we’ll have to include a section in both datasets before we go along with them.

Step. 3 Power BI Time Series Graph – Join the Information
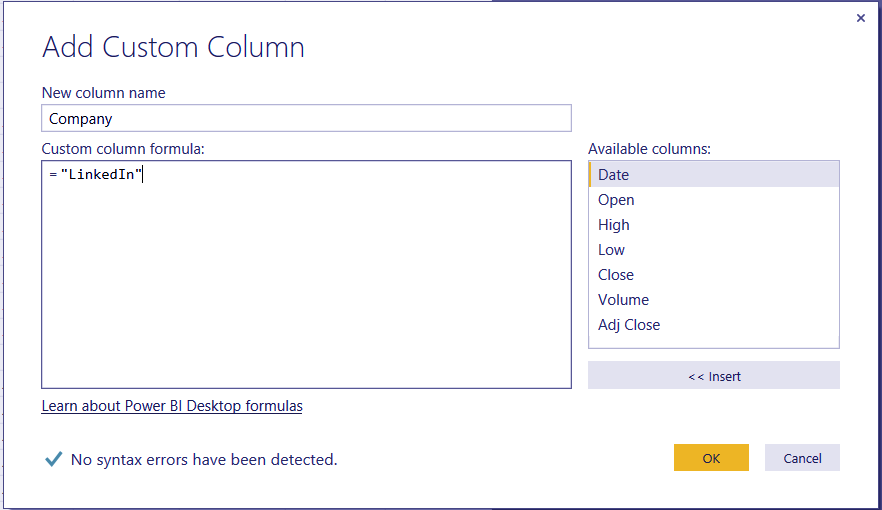
Including a segment is done by means of the suitably called menu thing “Include Column”.
There’s a plenty of decisions here, however, we’ll simply run with “Include Custom Column”.
For each dataset, including a segment called “Organization” and check it as having information for the particular inquiry utilizing an equation as found in this screen capture.

Step. 3 Join the Information
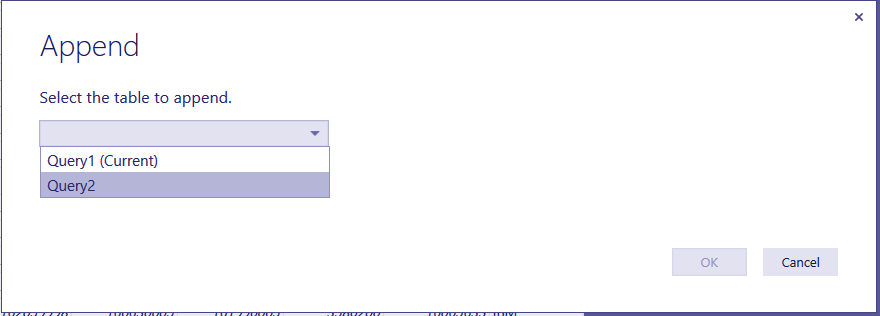
Next, we’ll have to join the 2 datasets.
This should be possible from the home menu utilizing the “Add Queries” thing.

Step. 3 Join the Information
In the wake of squeezing the “Affix Queries” thing, you’ll get the accompanying discourse box.
Step. 3 Join the Information
It advantageously demonstrates to you which dataset you’ve as of now got chose. That way you can astutely pick the dataset that you need to attach to the present one.
Do you know about How to Create Power BI Radial Gauge Chart
Next, you can tap the “Nearby and Apply” catch.
Step. 3 Join the Information
d. Make the Report
Tap the “Report” tab and how about we get the opportunity to work!
5 stages will get you the essential setup:
- Tap the 3 fields you need
- Close
- Organization
- Date
- Tap the line graph perception
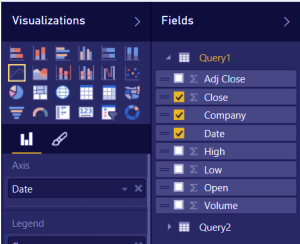
Step. 4 Make the Report
You’ll see this delightful diagram that you’ll perceive from the first article.
Step. 4 Power BI Time Series Graph – Make the Report
We got our information, we got a line graph and we got our mouse over data. Presently we have to make our date extend selector.
There are a few different ways to actualize this.
Tragically, the cool slider doohickey that R has isn’t one of them.
So what would we be able to do to make a cool date run selector in Power BI?
Power BI empowers us to utilize slicers or even utilize an information perception, similar to a treemap, as a kind of slicer.
e. Adding Highlights to Our Information
We’ll likely need to cut on a year, quarter and month. How about we add the pertinent information to our dataset.
For this, we have to alter our dataset, so we should press the “Alter Query” catch once more.
Including these fields is a breeze, we select a date field and go to the Add Column menu.
Read About Role of Power BI Developer
From that point we see a standout amongst the most extraordinary choices. We can include distinctive time segments with the snap of a catch.
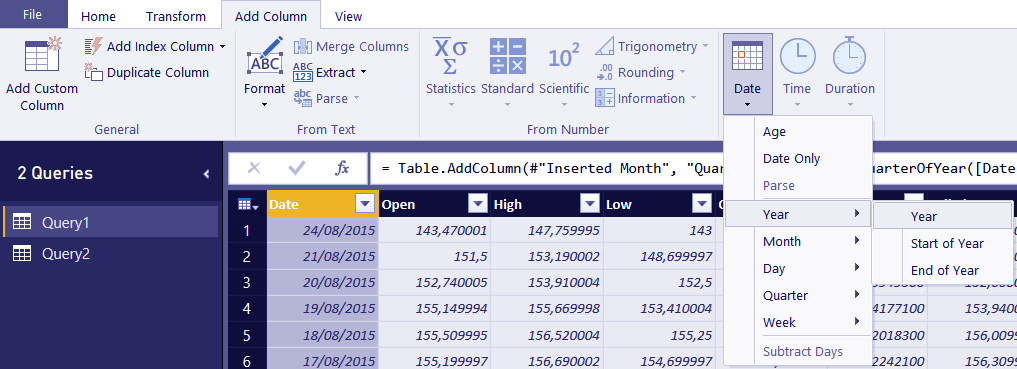
Step. 5 Power BI Time Series Graph – Adding Highlights to Our Information
f. Adding Custom Highlights to Our Dataset
Adding custom highlights to your dataset should be possible utilizing DAX.
DAX can be the subject for a considerable measure of other blog entries however for a simple begin look at Dustin Ryan’s blog entry on some regularly utilized DAX recipes.
For our little analysis, we don’t have to go this far in any case. So don’t hesitate to investigate or give your recommendations in the remarks or through twitter.
g. Including Slicers
In Power BI you can channel a view, that is one page in a report. There are a few conceivable outcomes to make channels, a slicer is one of them. A slicer is a channel that is available on the report page itself. Like the one in the first R representation. Separating works with information that has a place with a similar question or with inquiries that have a relationship characterized between them.
One of the slicers we’ll make is by utilizing a treemap.
Make a treemap perception and put the quarter name in there like in the screen capture.
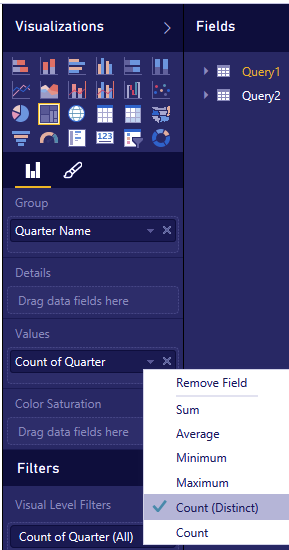
Step. 7 Including Slicers
This gives us a very revolting slicer with various hues. We can change these hues by means of the arrangement menu.
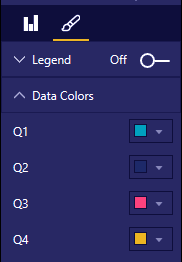
Step. 7 Including Slicers
Follow this link to Create Hyperlink in Power BI in Dashboard & Excel Power Pivot
Changing these hues gives an extraordinary outcome that will fit with the general look and feel of our dashboard. It will particularly enable us to abstain from influencing this thing to resemble a shading book.

Step. 7 Including Slicers
4. The Result
In the event that you’ve been following the procedure yourself, you most likely saw how quick and simple it is to toy around in Power BI.
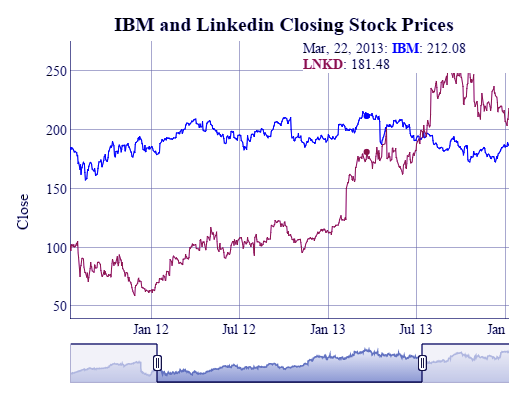
Leave a remark in the event that you have an inquiry or experienced an issue. The following is the outcome I got.
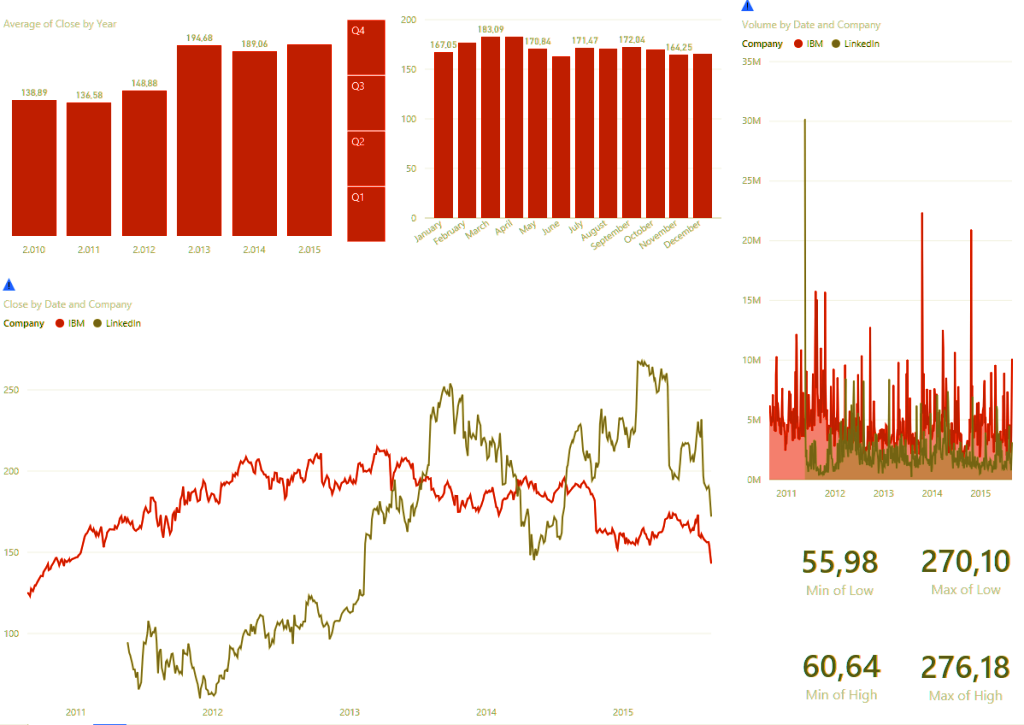
Power BI Time Series Graph – Result
On the off chance that you haven’t played around in Power BI yet, simply download the free Power BI Desktop application today and begin with the Power BI Zero to Hero series.
It’s significantly more easy to understand that keeping in touch with a few lines of R enchantment. I’d even contend that it’s a better time!
So, this was all about Power BI Time Series Charts. Hope you like our explanation.
5. Conclusion
Hence, in this tutorial, we learned about Plotting Power BI Time Series Chart. Is this information helps to you? Share your feedback with us.
Related Topic – Power BI Funnel Charts
For reference
Did you like this article? If Yes, please give DataFlair 5 Stars on Google


You have too much fluff in your writing. This article could been half the size if you went straight to the point