Power BI Relationship View – Create, Alter, Cardinality
Job-ready Online Courses: Click, Learn, Succeed, Start Now!
1. Objective
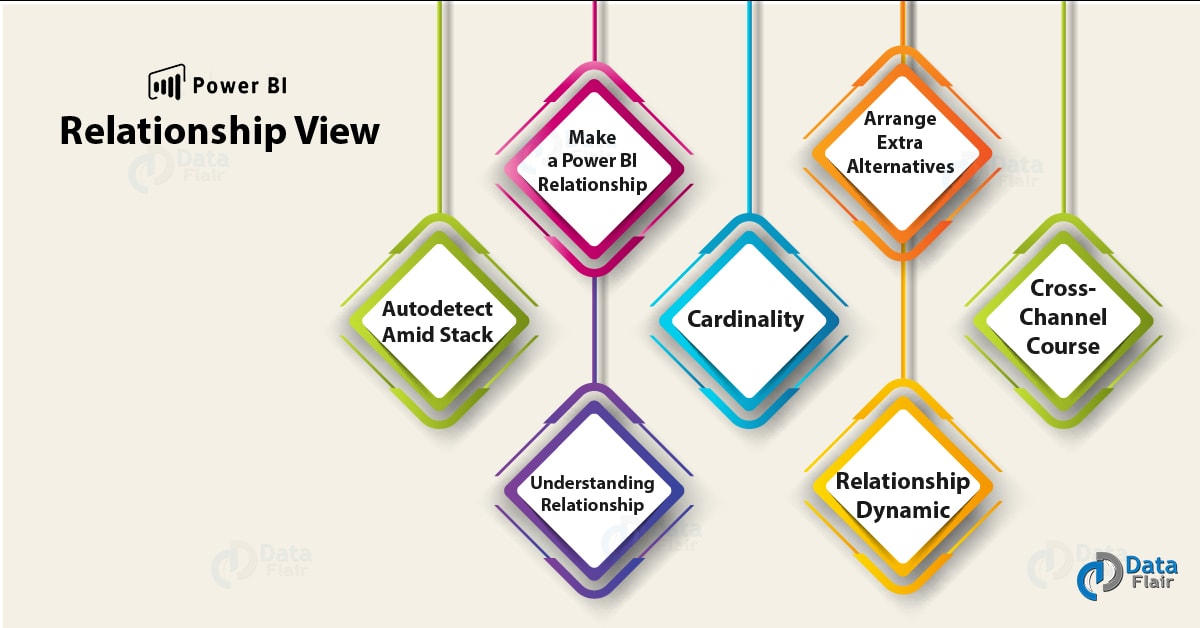
In our last tutorial, we talked about SSRS vs Power BI. Here, we are going to explore the Power BI Relationship view and Autodetect Amid Stack. Moreover, we will discuss how to create a relationship in Power BI and cardinality. At last, we cover Arrange Extra Alternatives and Cross-Channel Course.
So, let’s start Power BI Relationship View Tutorial.
Power BI Relationship View – Create, Alter, Cardinality
2. Power BI Relationship View
Power BI Relationship View demonstrates the majority of the tables, segments, and connections in your model. This can particularly useful when your model has complex connections between numerous tables.
A. Relationship view symbol – Click to demonstrate your model in Relationship View.
B. Relationship – You can float your cursor over a Power BI relationship to demonstrate the sections utilized. Double tap on a relationship to open it in the Edit Relationship exchange box.
In the figure above, you can see the stores table has a StoreKey section that is identified with the sales table. Which additionally has a StoreKey segment. We see it’s a many to one (*:1) relationship, and the symbol amidst the line demonstrates the cross-channel heading set to both. The bolt on the symbol demonstrates the bearing of the channel setting stream.
Do you know about Power BI Premium Capacity?
3. Autodetect Amid Stack
On the off chance that you question at least two tables in the meantime when the information stacks, Power BI Desktop will endeavour to discover and make connections for you. Cardinality, cross-channel bearing, and active properties are naturally set. Power BI Desktop takes a gander at segment names in the tables you are questioning to decide whether there are any potential connections. On the off chance that there are, those connections are made consequently. On the off chance that Power BI Desktop can’t decide with an abnormal state of certainty there is a match, it won’t naturally make the Power BI relationship. You can at present utilize the manage relationships exchange to make or alter connections.
4. How to Make a Power BI Relationship?
a. Utilizing Autodetect
On the Home tab, click Manage Relationships > AutoDetect.
Power BI Relationship View
b. Manually
- On the Home tab, click Manage Relationships > New.
- In the create Power BI Relationship exchange, in the primary table drop-down rundown, select a table, and afterwards select the segment you need to use in the relationship.
- In the to second table drop-down rundown, select the other table you need in the relationship in Power BI, at that point select the other segment you need to utilize, and after that snap OK.
Read more about Power BI Archived Workspace with Moving Content & Office 365
Power BI Relationship View
As a matter of course, Power BI Desktop will consequently arrange the cardinality (heading), cross-channel bearing, and active properties for your new Power BI relationship; notwithstanding, you can change these if fundamental. To take in more, see the understanding extra alternatives area later in this article.
Note that you’ll see a mistake that states one of the sections must have extraordinary qualities if none of the tables chose for the Power BI relationship has interesting qualities. No less than one table in a relationship must have an unmistakable, remarkable rundown of key qualities, which is a typical prerequisite for all social database advances.
On the off chance that you experience that mistake, there are a couple approaches to settle the issue:
- Utilize “Evacuate Duplicate Rows” to make a segment with interesting qualities. The disadvantage to this approach is that you will lose data when copy lines are expelled, and regularly a key (push) is copied all things considered.
- Include a middle person table made of the rundown of particular key qualities to the model, which will then connect to both unique segments in the relationship in Power BI.
For more point by point data, see the blog entry that examines this in detail.
c. Alter a Relationship View in Power BI
- On the Home tab, click Manage Relationships.
- In the Manage Relationships discourse, select the relationship, at that point click Edit.
5. Arrange Extra Alternatives
When you make or alter a Power BI relationship, you can arrange extra alternatives. As a matter of course, extra alternatives are consequently designed in view of the best figure. This can diverse for every relationship in light of the information in the segments.
6. Power BI Cardinality
Numerous to One (*:1) – This is the most widely recognized, default write. This implies the section in one table can have in excess of one occurrence of an esteem, and the other related table, regularly know as the Lookup table, has just a single example of an esteem.
Balanced (1:1) – This implies the segment in one table has just a single occasion of a specific esteem, and the other related table has just a single case of a specific esteem.
Follow this link to know about Integration of Microsoft Flow and Power BI
7. Cross-Channel Course
Both – This is the most widely recognized, default heading. This implies for sifting purposes, the two tables are dealt with as though they’re a solitary table. This functions admirably with a solitary table that has various query tables that encompass it. An illustration is a Sales actuals table with a query table for office. This is frequently called a Star pattern setup (a focal table with a few query tables.) However, in the event that you have at least two tables that likewise have query tables (with some in like manner) at that point, you wouldn’t have any desire to utilize the Both setting.
To proceed with the last case, for this situation, you likewise have a spending deals table that records target spending plan for every office. Also, the office table associates with both the deals and the spending table. Stay away from the Both setting for this sort of setup.
Single – This implies separating decisions in associated tables chip away at the table where esteems are being totalled. On the off chance that you import a Power Pivot in Excel 2013 or prior information show, all connections will have a solitary course.
8. Make this Power BI Relationship Dynamic
Whenever checked, this implies the relationship fills in as the dynamic, default relationship in Power BI. In situations where there is in excess of one connection between two tables, the dynamic relationship gives an approach to Power BI Desktop to consequently make perceptions that incorporate the two tables.
9. Understanding Power BI Relationship
When you have associated two tables together with a Power BI relationship, you can work with the information in the two tables as though they were a solitary table, liberating you from worrying about relationship subtle elements, or straightening those tables into a solitary table before bringing in them. By and large, Power BI Desktop can consequently make connections for you. So, making those connections yourself won’t require. In any case, if Power BI Desktop can’t decide with a high-level of conviction that a connection between two tables should exist, it won’t consequently make the relationship in Power BI. All things considered, you should make the relationship.
How about we complete a somewhat instructional exercise, to better demonstrate to you how connections function in Power BI Desktop.
Tip – You can finish this exercise yourself. Duplicate the ProjectHours table beneath into an Excel worksheet, select the greater part of the cells, click INSERT > Table. In the Create Table exchange, simply click OK. At that point in Table Name, type ProjectHours. Do likewise for the CompanyProject table. You would then able to import the information by utilizing Get Data in Power BI Desktop. Select your exercise manual and tables as an information source.
Let’s revise Power BI Custom Visualization – Titles, Legends, Backgrounds
This first table, ProjectHours, is a record of work tickets that record the quantity of hours a man has dealt with a specific undertaking.
Notice that each table has a task section. Each is named marginally unique, yet the qualities appear as though they’re the same. That is imperative, and we’ll hit it up shortly.
Since we have our two tables imported into a model, how about we make a report. The principal thing we need to get is the number of hours put together by venture need, so we select Priority and Hours from Fields.
On the off chance that we take a gander at our table in the Report canvas. You will see the quantity of hours is 256.00 for each venture, and it’s additionally the aggregate. Plainly this isn’t right. Why? This is on account of we can’t figure an aggregate of qualities from one table (Hours in the Project table), cut by values in another table (Priority in the CompanyProject table) without a connection between these two tables.
In this way, how about we make a connection between these two tables.
Keep in mind those sections we saw in the two tables with a venture name, however with values that carbon copy? We will utilize these two sections to make a connection between our tables.
Why these segments? All things considered, in the event that we take a gander at the Project section in the ProjectHours table, we see esteems like Blue, Red, Yellow, Orange, et cetera. Actually, we see a few columns that have a similar esteem. Basically, we have numerous shading esteems for Project.
In the event that we take a gander at the ProjName segment in the CompanyProject table. We see there’s solitary one of every one of the shading esteems for a venture. Each shading an incentive in this table is remarkable, and that is imperative since we can make a connection between these two tables. For this situation, a many-to-one relationship in Power BI. In a many-to-one relationship, no less than one section in one of the tables must contain one of a kind qualities. There are some extra choices for a few connections, and we’ll take a gander at those later, yet for the present. How about we make a connection between the Project segments in every one of our two tables.
So, this was all about Power BI Relationship View. Hope you like our explanation.
10. Conclusion
Hence, in this Power BI Relationship tutorial, we studied how to create relationships in Power BI and Autodetect Amid Stack. Moreover, we discussed cardinality. At last, we covered Arrange Extra Alternatives and Cross-Channel Course. So, this is the first part of Power BI Relationship. Soon we will come up with Part-2. Still, confused? share with us, we will surely get back to you!
Related Topic – Power BI Troubleshooting
For reference
Your 15 seconds will encourage us to work even harder
Please share your happy experience on Google


