Power BI Ribbon Chart – High Thickness Line Testing Works
Placement-ready Online Courses: Your Passport to Excellence - Start Now
1. Objective
In our last tutorial, we discussed Power BI Conditional Formatting. Here, in this Power BI Ribbon Chart Tutorial, we will learn how to create & arrange Ribbon charts in Power BI. Moreover, we will study the high thickness line testing works and new line examining calculation functions.
So, let’s start the Power BI Ribbon Chart Tutorial.
Power BI Ribbon Chart – High Thickness Line Testing Works
2. Power BI Ribbon Chart
You can utilize ribbon chart in Power BI to picture information, and rapidly figure out which classification of information has the most noteworthy rank. Power BI Ribbon chart is compelling at demonstrating rank change, with the most astounding extent dependably showed on top for each day and age. Ribbon charts are accessible in Power BI Desktop beginning with the September 2017 discharge and in resulting updates to the Power BI benefit.
Do you know How to Create Power BI Funnel Charts (Custom Visuals)
Power BI Ribbon Chart
3. How to Create Ribbon Chart in Power BI?
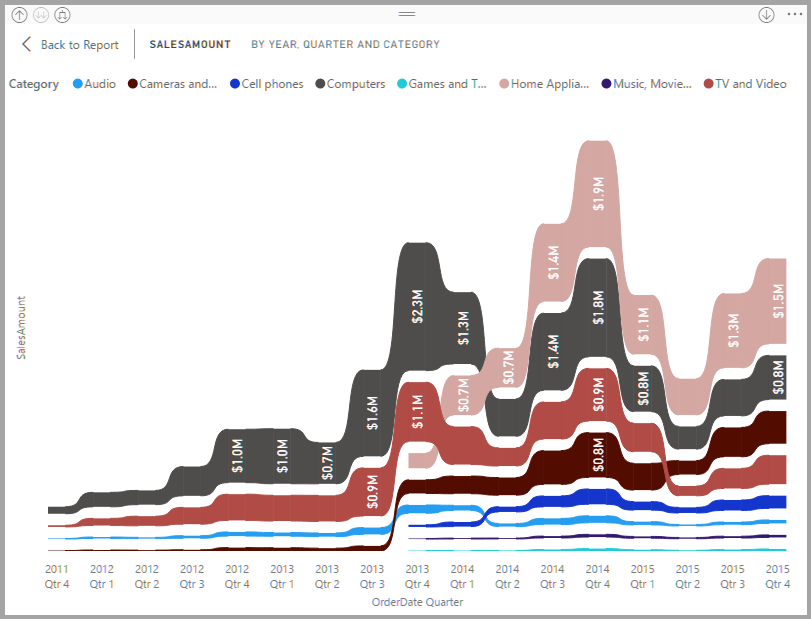
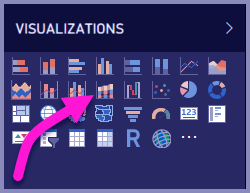
To make a Power BI ribbon chart, select the Ribbon chart from the Visualizations board.
Power BI Ribbon Chart
Power BI Ribbon outlines interface a class of information over the imagined time continuum utilizing ribbons. Subsequently empowering you to perceive how a given classification positions all through the traverse of the diagram’s x-pivot (more often than not the course of events).
4. How to Arrange a Ribbon Chart in Power BI?
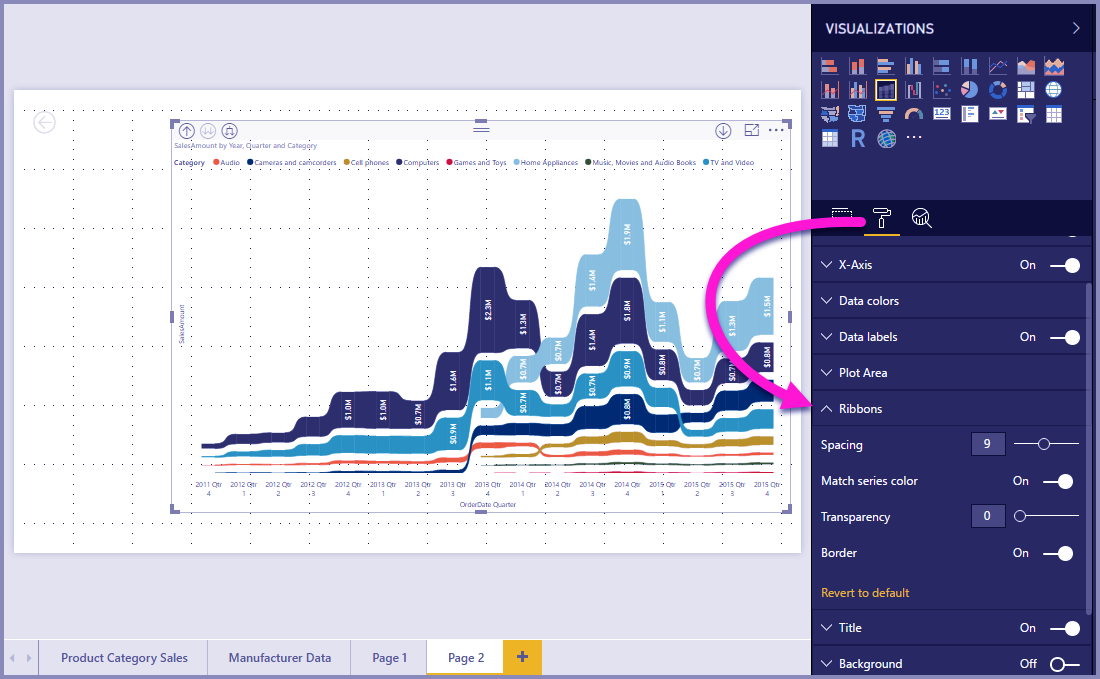
When you make a Power BI ribbon chart, you have arranging choices accessible in the Format segment of the Visualizations sheet. The designing choices for ribbon charts in Power BI are like those for a stack segment diagram, with extra arranging choices that are particular to the ribbons.
Power BI Ribbon Chart
Let’s Read About How to Use Power BI Bookmark
These designing alternatives for Power BI ribbon chart, let you change the accompanying:
- Dividing gives you a chance to alter how much space shows up between ribbons. The number is the level of the segment’s most extreme tallness.
- Match arrangement shading enables you to coordinate the shade of the ribbons with the arrangement shading. Whenever off, ribbons are dim.
- Straightforwardness determines how straightforward the ribbons are, with the default set to 30.
- Outskirt gives you a chance to put a dull verge on the best and base of the ribbons. As a matter of course, fringes are off.
Starting with the June 2017 arrival of the Power BI Desktop and updates to the Power BI benefit. Another testing calculation is accessible that enhances visuals that example high-thickness information. For instance, you may make a line graph from your retail locations’ business comes about. Each store having in excess of ten thousand deals receipts every year. A line diagram of such deals data would test information (select an important portrayal of that information, to delineate how deals shifts after some time) from the information for each store, and make a multi-arrangement line graph that in this way speaks to the hidden information. This is normal practice in imagining high-thickness information. Power BI Desktop has enhanced its examining of high-thickness information, the points of interest of which are depicted in this article.
Note – The High-Density Sampling calculation portrayed in this article is accessible in both Power BI Desktop and the Power BI benefit.
Follow this link to know about Power BI Gateway – Types, Working, How to Utilize
5. How High Thickness Line Testing Works?
Beforehand, Power BI chose a gathering of test information focuses on the full scope of basic information in a deterministic manner. For instance, for high-thickness information on a visual spreading over one schedule year, there may 350 example information focuses show in the visual, every one of which was chosen to guarantee the full scope of information (the general arrangement of fundamental information) was spoken to in the visual. To help see how this happens, envision plotting a stock cost over a one-year period, and choosing 365 information focuses to make a line diagram visual (that is one information point for every day).
In that circumstance, there are numerous qualities at a stock cost every day. Obviously, there is a day by day high and low. However, those could happen whenever amid the day when money markets are open.
For high-thickness line inspecting, if the hidden information test was taken at 10:30 AM and 12:00 PM every day, you would get an agent preview of the fundamental information (the cost at 10:30 AM and 12:00 PM), yet it won’t not catch the genuine high and low of the stock cost for that delegate information point (that day). In that circumstance – and others – the examining is illustrative of the hidden information. However, it doesn’t generally catch critical focuses, which for this situation, would day by day stock value highs and lows.
By definition, high-thickness information is inspected to make perceptions sensibly rapidly that are receptive to intuitiveness. Excessively numerous information focuses on a visual can impede it, and can take away from the perceivability of patterns. Along with these lines, how the information examines the thing that drives the production of the inspecting calculation to give the best perception encounter. In Power BI Desktop, the calculation presently enhances to give the best mix of responsiveness, portrayal, and clear safeguarding of essential focuses in each time cut.
Do you know How to Make Power BI Scatter & Bubble Charts
6. New Line Examining Calculation Functions
The new calculation for high-thickness line examining is accessible for line diagram and region outline visuals with a persistent x-hub.
For a high-thickness visual, Power BI keenly cuts your information into high determination lumps and afterwards picks critical focuses to speak to each piece. That procedure of cutting high determination information particularly tune to guarantee that the subsequent graph is outwardly indistinct from rendering the greater part of the hidden information focuses, yet considerably speedier and more intelligent.
a. Least and Most Extreme Qualities
For any given representation, the accompanying visual restrictions apply:
- 3,500 is the most extreme number of information focuses shows on the visual. Paying little respect to the number of basic information focuses or arrangement. In that capacity, in the event that you have 10 arrangement with 350 information focuses each. The visual has achieved its most extreme general information focuses constrain. In the event that you have one arrangement, it might have up to 3,500 information focuses if the new calculation regards that the best testing for the basic information.
- There is a greatest of 60 arrangement for any visual. On the off chance that you have in excess of 60 arrangement, separate the information and make numerous visuals with 60 or less arrangement each. It’s great practice to utilize a slicer to demonstrate just fragments of the information (just certain arrangement). For instance, in case you’re showing all subcategories in the legend, you could utilize a slicer to channel by the general classification on a similar report page.
These parameters guarantee that visuals in Power BI Desktop render rapidly. They are receptive to connect with clients and don’t bring about undue computational overhead on the PC rendering the visual.
Let’s explore the Power BI Waterfall Chart
b. Assessing Delegate Information
At the point when the quantity of fundamental information focuses surpasses the most extreme information focuses that can speak to in the visual (surpasses 3,500), a procedure called binning starts, which lumps the basic information into bunches called canisters, and afterwards iteratively refines those containers.
The calculation makes however many receptacles as could expect under the circumstances to make the best granularity for the visual. Inside each container, the calculation finds the base and greatest information esteem, to guarantee that essential and critical quality caught and shown in the visual. In light of the aftereffects of the binning and resulting assessment of the information by Power BI. The base determination for the x-pivot for the visual is resolved – to guarantee most extreme granularity for the visual.
As said already, the base granularity for every arrangement is 350 focuses, the most extreme is 3,500.
Each receptacle spoke to by two information focuses, which turn into the canister’s illustrative information focuses on the visual. The information focuses are just the high and low an incentive for that receptacle, and by choosing the high and low, the binning procedure guarantees any essential high esteem, or huge low esteem, is catch and render in the visual.
On the off chance that sounds like a considerable measure of investigation to guarantee the infrequent exception catches and appropriately shows in the visual, you are right. However, that is the correct purpose behind the new calculation and binning process.
Have a look at How to Create Power BI Donut Chart?
7. Tooltips and High Thickness Line Examining
Note this binning procedure, which brings about the base and most extreme incentive in a given container being catch and show. This may influence how tooltips show information when you drift over the information focuses. To clarify how and why this happens, how about we return to our case about stock costs.
Suppose you’re making a visual in view of stock cost and you’re looking at two changed stocks. Both of which are utilizing High-Density Sampling. The hidden information for every arrangement has heaps of information focuses. The high-thickness line inspecting calculation performs binning for every arrangement freely of the other.
Presently suppose that the principal stock bounces up in cost at 12:02. At that point, rapidly returns ten seconds after the fact. That is a vital information point. While binning happens for that stock, the high at 12:02 will an agent information point for that container.
In any case, for the second stock, 12:02 was neither a high nor low in the container that incorporates that time. Possibly the high and low for the canister that incorporates 12:02 happened three minutes after the fact. In that circumstance, when the line outline made and you float more than 12:02. You will see an incentive in the tooltip for the principal stock. However, you won’t perceive any an incentive in the tooltip at 12:02 for the second stock. That is on the grounds that the second stock had neither a high nor a low, for the canister that includes 12:02. There’s no information to appear for the second stock at 12:02. Hence, no tooltip information show.
Do you know what is the Role of Power BI Developer?
This circumstance will happen as often as possible with tooltips. The high and low qualities for a given container won’t coordinate consummately with the equitable scale x-hub esteem focuses, and in that capacity, the tooltip won’t show the esteem.
a. Step by Step instructions to turn on high thickness line examining
Of course, the new calculation turn on. To change this setting, go to the Formatting sheet, in the General card, and along the base. You see a flip slider called High-Density Sampling. To turn it off, slide it to Off.
8. Contemplations and Impediments
The new calculation for high-thickness line testing is an essential change to Power BI. However, there are a couple of contemplations you have to know when working with high-thickness esteems and information.
- On account of expanding granularity and the binning procedure. Tooltips may just demonstrate an esteem if the delegate information is line up with your cursor. See the Tooltips and high thickness line inspecting segment in this article for more data.
- At the point when the measure of a general information source is too enormous. The new calculation disposes of arrangement to oblige the information import most extreme requirement.
- In this circumstance, the new calculation orders legend arrangement one after another in order begins down the rundown of legend components. In order to arrange to the point that the information import most extreme is come to, and does not import extra arrangement.
- At the point when a basic informational index has in excess of 60 arrangement. The new calculation arranges the arrangement one after another in order and disposes of arrangement past the 60th sequentially request arrangement.
- In the event that the qualities in the information are not of sort numeric or date/time. Power BI won’t utilize the new calculation and will return to the past (non-high-thickness testing) calculation.
- The Show things without any information setting aren’t bolstering by new calculation.
- The new calculation isn’t upheld when utilizing a live association with a model facilitated in SQL Server Analysis Services. It bolsters in models facilitate in Power BI or Azure Analysis Services.
So, this was all about Power BI Ribbon Chart Tutorial. Hope you like our explanation.
9. Conclusion
Hence, in this Power BI Ribbon Chart tutorial, we studied how to create & arrange ribbon charts in Power BI. In addition, we discussed High Thickness Line Testing, New Line Examining Calculation Functions, and Tooltips and High Thickness Line Examining. Furthermore, if you have any query regarding Power BI Ribbon Chart, feel free to ask in the comment box.
Related Topic- Create Power BI KPI
For Reference
Did we exceed your expectations?
If Yes, share your valuable feedback on Google


