R Factor – Learn the complete process from Creation to Modification!
FREE Online Courses: Knowledge Awaits – Click for Free Access!
R factor is used to store categorical data as levels. It can store both character and integer types of data. These factors are created with the help of factor() functions, by taking a vector as input.
So, why waste time? Let’s start the process of creating factors, accessing its components, generating factor level and modification with the help of examples.
What is R Factor?
R factors are variables. It takes a limited number of different values. Hence, those variables are often known as categorical variables. In order to categorise the data and store it on multiple levels, we use the data object called R factor. They can store both strings and integers. They are also useful in the columns which have a limited number of unique values.
The factor is stored as integers. They have labels associated with these unique integers. We need to be careful while treating factors like strings. Factor contains a predefined set value called levels. By default, R always sorts levels in alphabetical order.
Before proceeding ahead, let’s first revise the R Vector Operations
Attributes of a Factor
Some important attributes of the factor that we will use in this article are:
- x: The input vector that is to be transformed into a vector.
- levels: This is an optional vector that represents a set of unique values that are taken by x.
- labels: It is a character vector that corresponds to the number of labels.
- Exclude: With this attribute, we specify the values to be excluded.
- ordered: This is a logical attribute that determines if the levels should be ordered.
- nmax: This attribute specifies the upper bound for the maximum number of levels.
How to Create an R Factor
In order to create your first R factor, we make use of the factor() function.
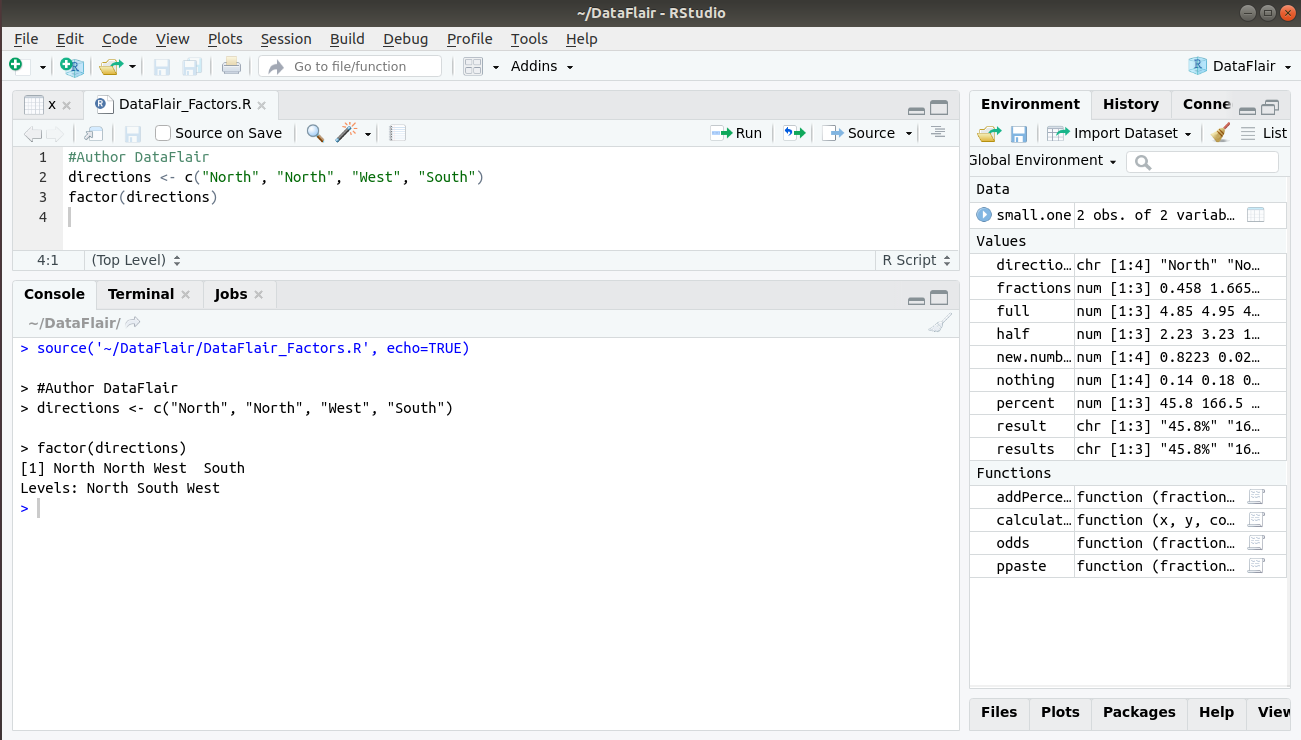
To create our factor, we first create a vector called ‘directions’ that holds the direction “North”, “West” and “South”. Notice how “East” is absent from this vector.
> #Author DataFlair
> directions <- c("North", "North", "West", "South")
Let us convert this vector into a factor using the factor() function:
factor(directions)
Output:
Notice that in the output, we have three levels “North”, “South” and “West”. This does not contain the redundant “North” that was occurring twice in our input vector.
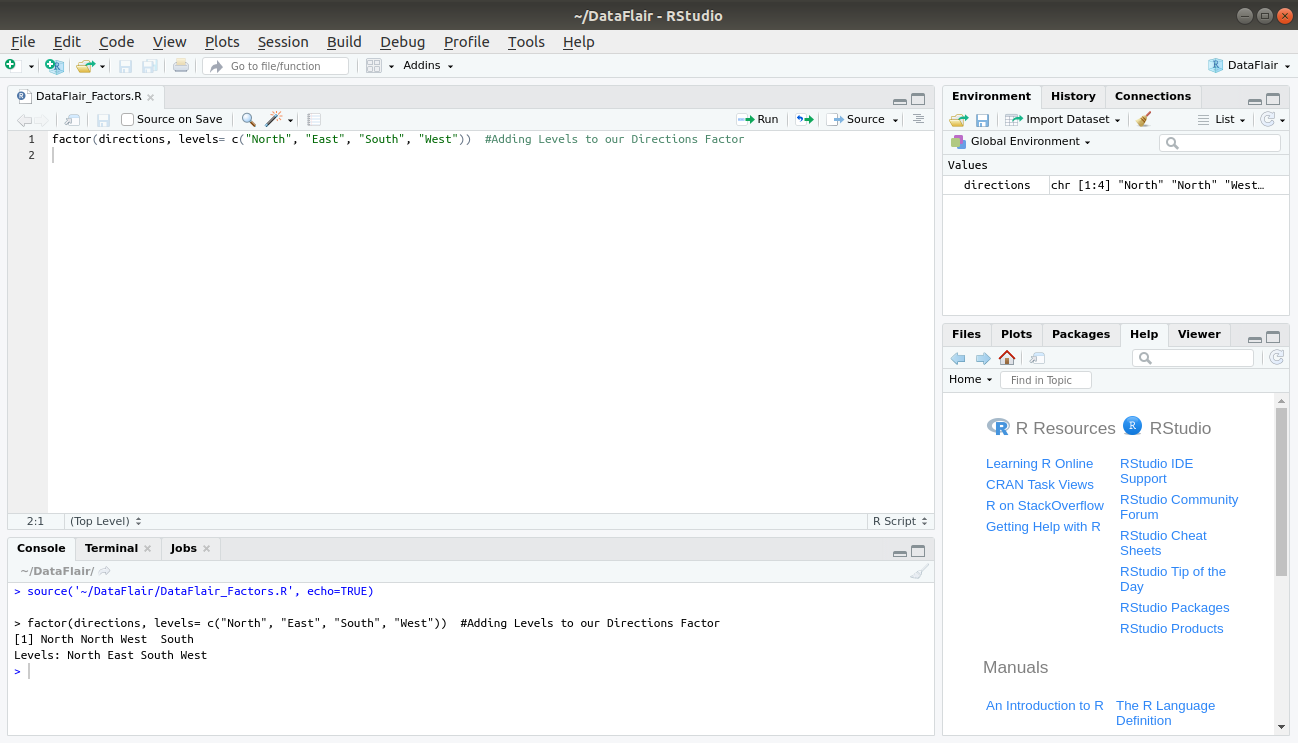
In order to add this missing level to our factors, we use the “levels” attribute as follows:
factor(directions, levels= c("North", "East", "South", "West"))Output:
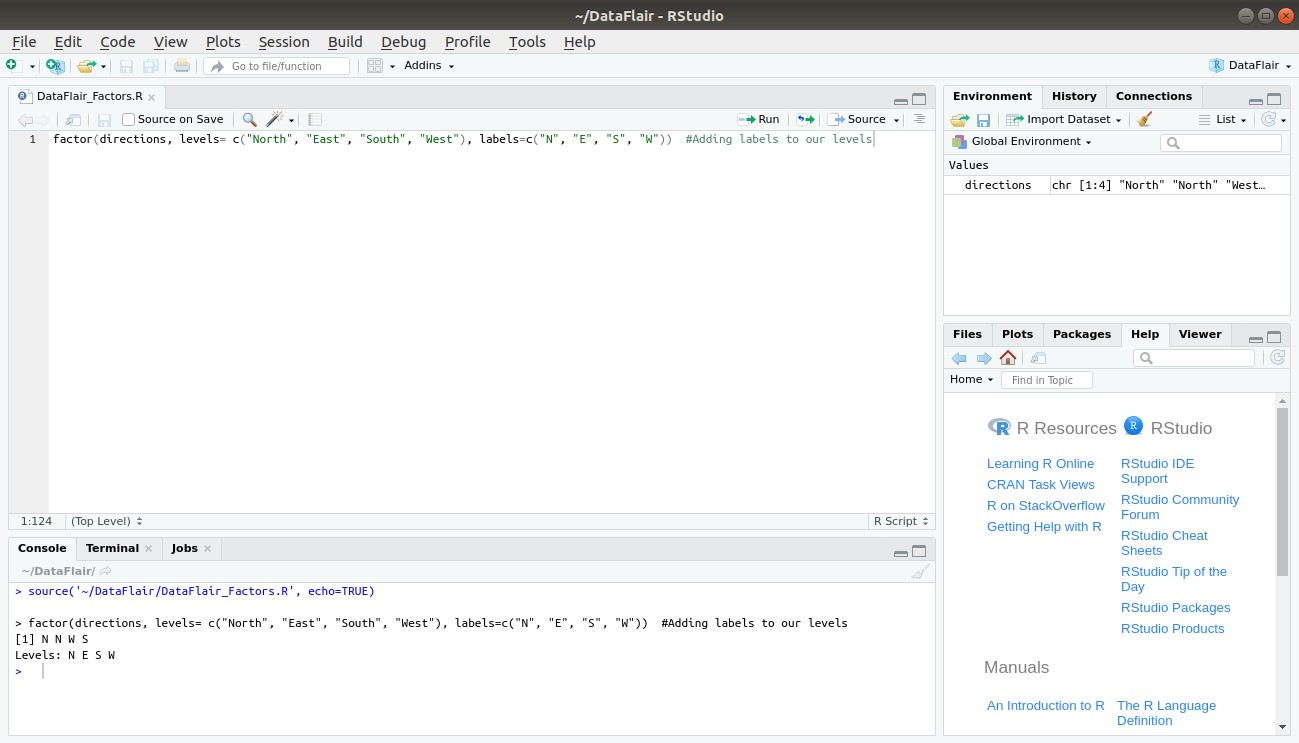
In order to provide abbreviations or ‘labels’ to our levels, we make use of the labels argument as follows –
factor(directions, levels= c("North", "East", "South", "West"), labels=c("N", "E", "S", "W"))Output:
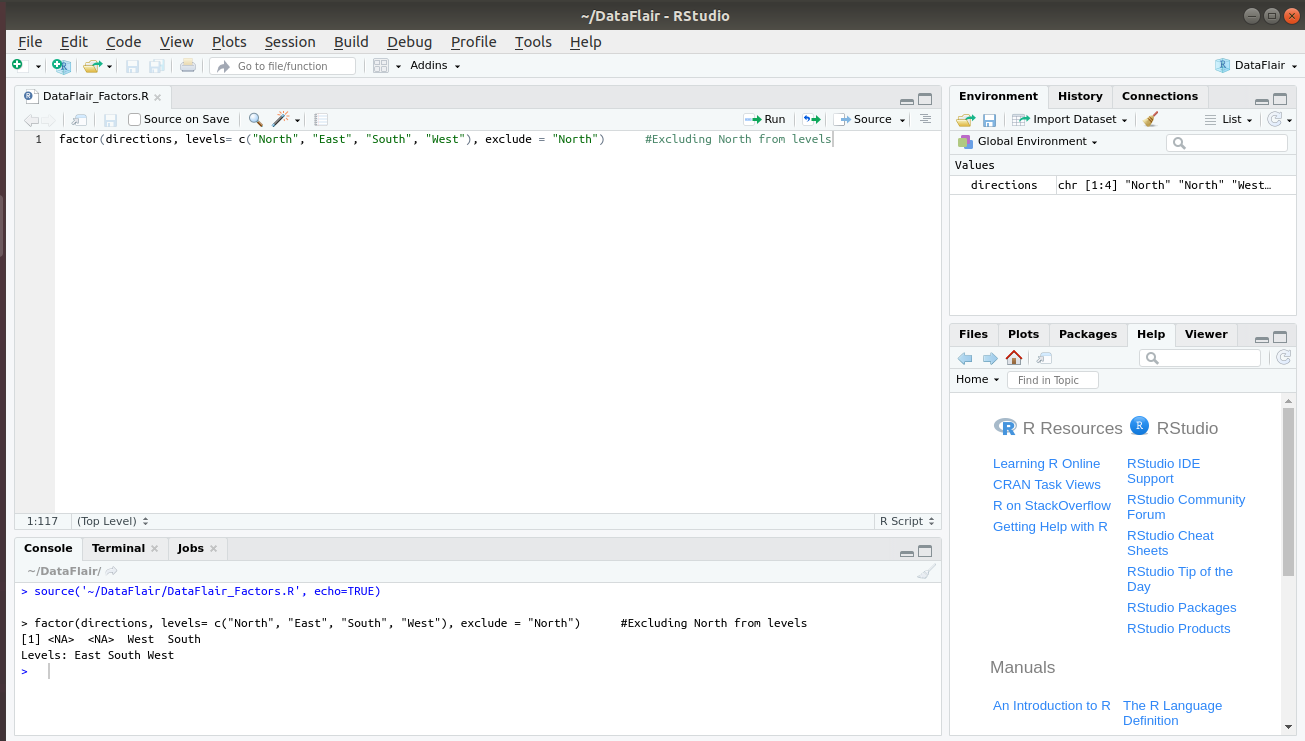
Finally, if you want to exclude any level from your factor, you can make use of the exclude argument. For example, let us exclude “North” from the list of levels. In order to do so, we initialise exclude with “North”.
> factor(directions, levels= c("North", "East", "South", "West"), exclude = "North")Output:
Master all the Types of Arguments in R programming
How to Generate Factor Level in R
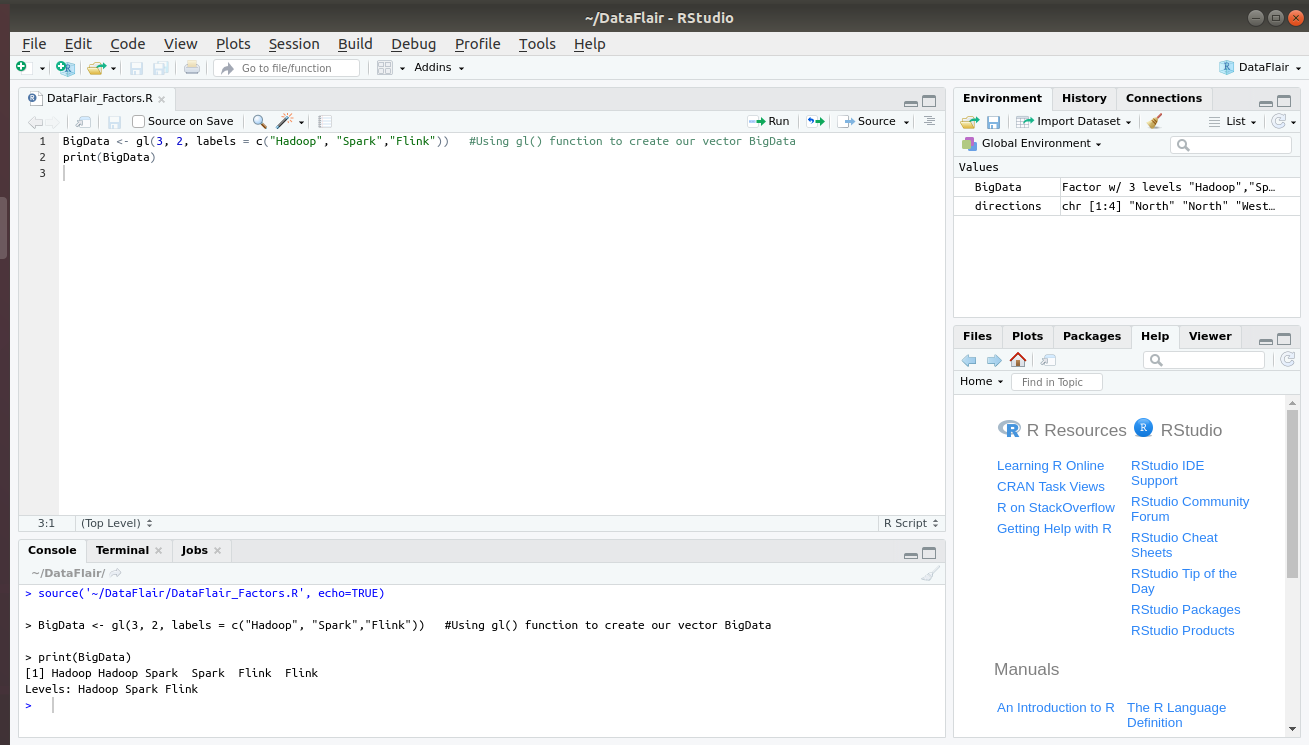
In order to generate factor levels in R, we make use of the gl() function. The syntax for generating factor is gl(n, k, labels) where n is an integer specifying the number of levels.
- k is an integer that gives out a number of replications.
- And, labels are simply the vector of labels for our factor.
> #Author DataFlair
> BigData <- gl(3, 2, labels = c("Hadoop", "Spark","Flink"))
> print(BigData)
Output:
Accessing Components of Factor in R
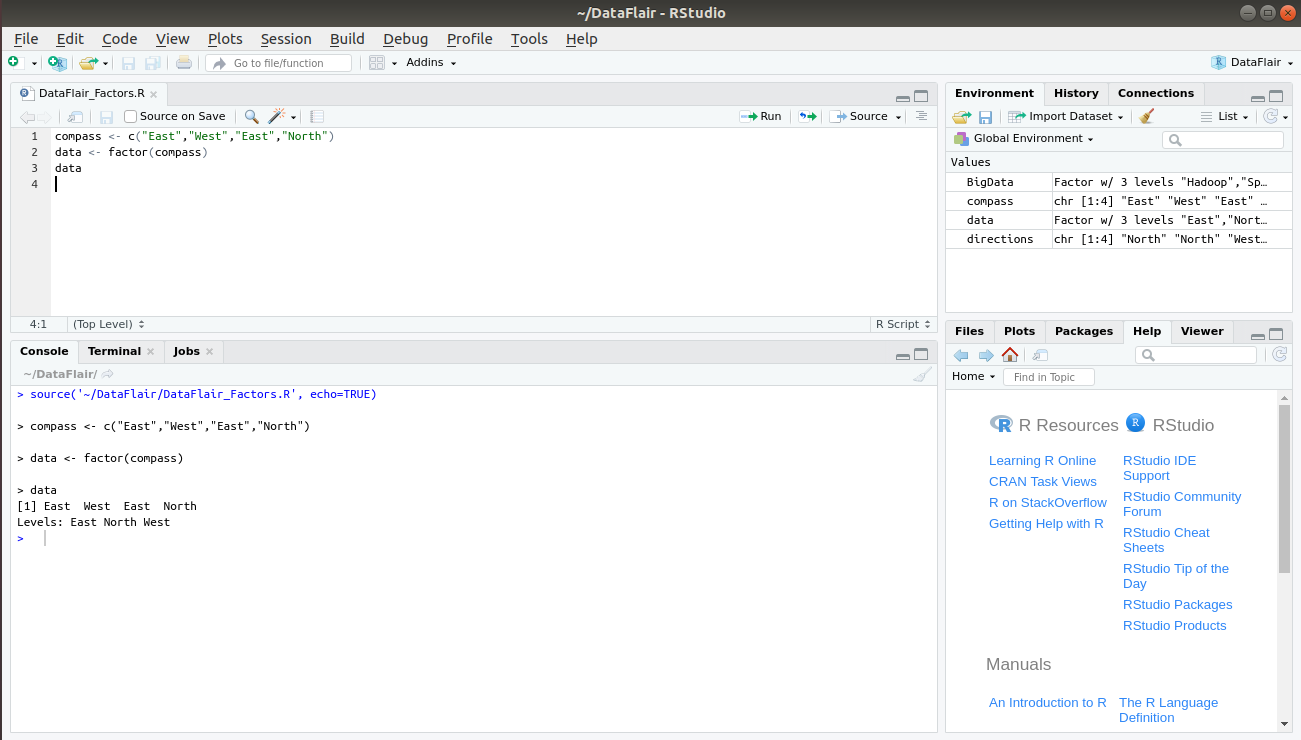
Let us first create a factor “data” as follows:
#DataFlair
compass <- c("East","West","East","North")
data <- factor(compass)
data
Output:
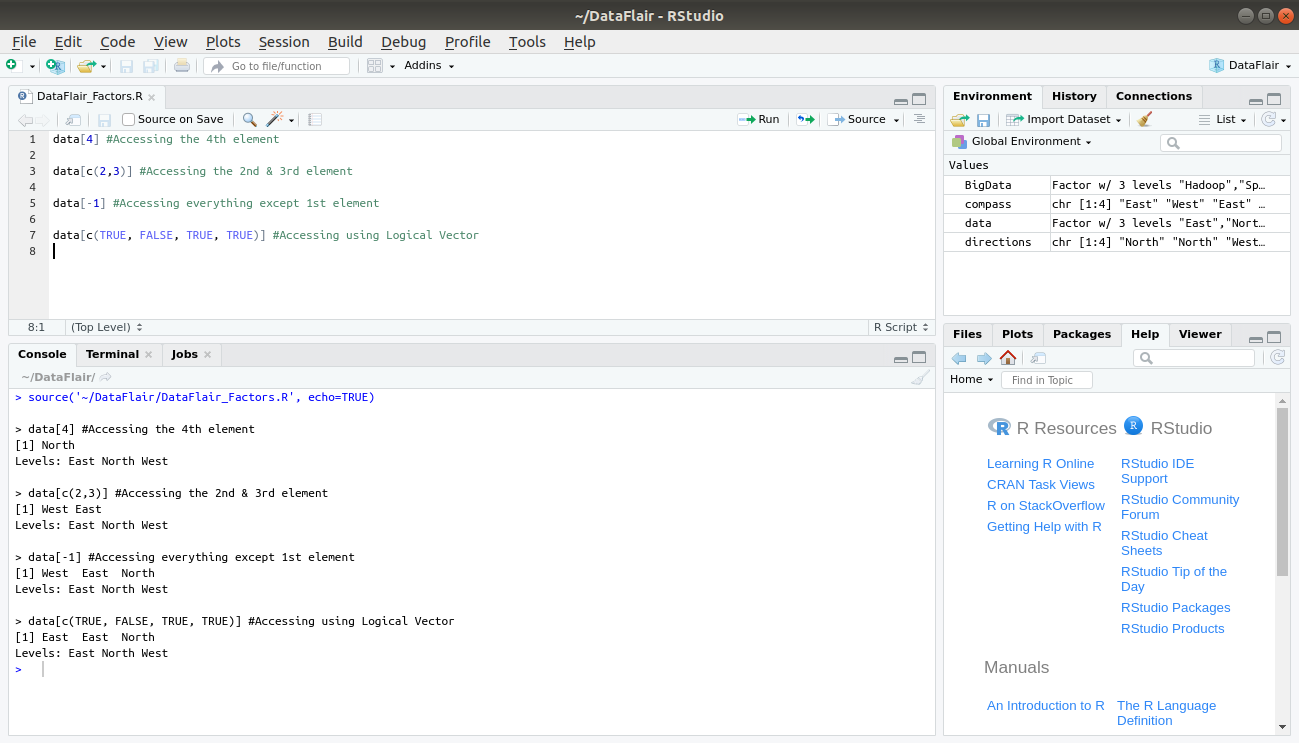
There are various ways to access the elements of a factor in R. Some of the ways are as follows:
> #Author DataFlair
> data[4] #Accessing the 4th element
> data[c(2,3)] #Accessing the 2nd & 3rd element
> data[-1] #Accessing everything except 1st element
> data[c(TRUE, FALSE, TRUE, TRUE)] #Accessing using Logical Vector
Output:
Wait! Have you checked – R Data Frame Tutorial
How to Modify an R Factor?
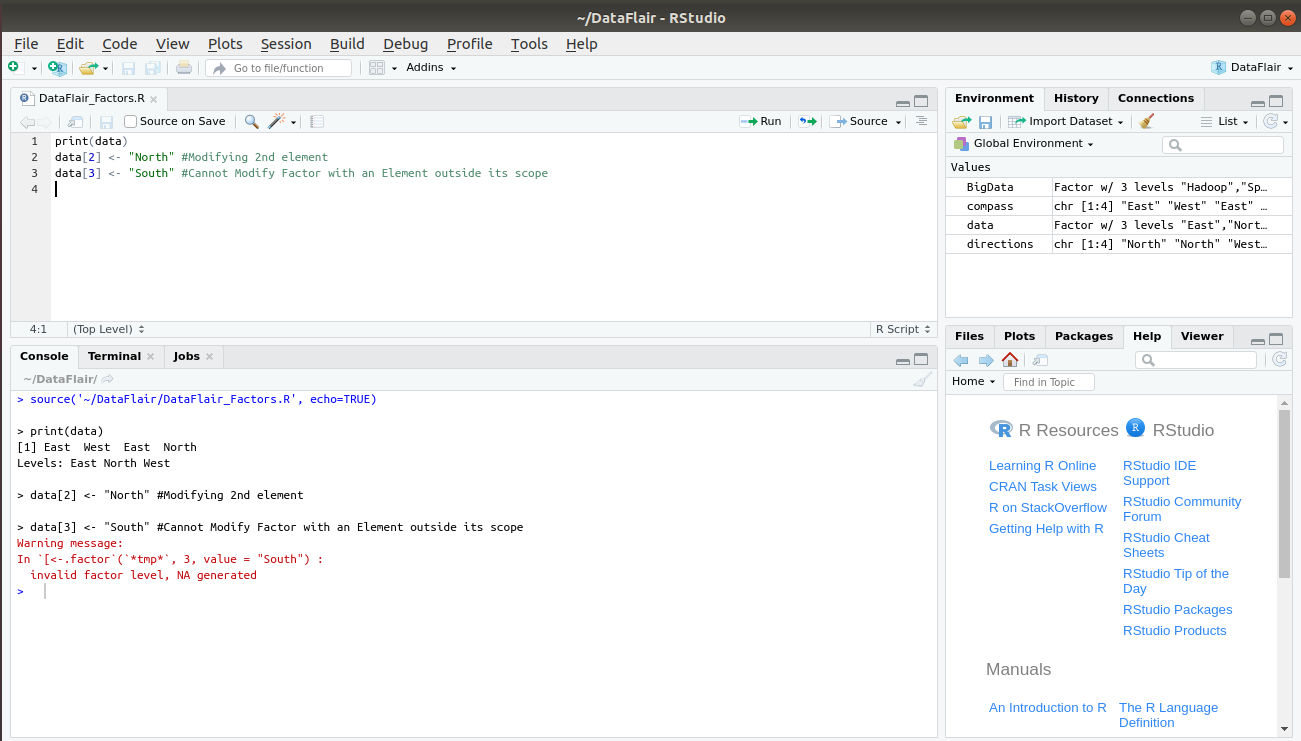
To modify a factor, we are only limited to the values that are not outside the predefined levels.
print(data)
data[2] <- "North" #Modifying 2nd element
data[3] <- "South" #Cannot Modify Factor with an Element outside its scope
Output:
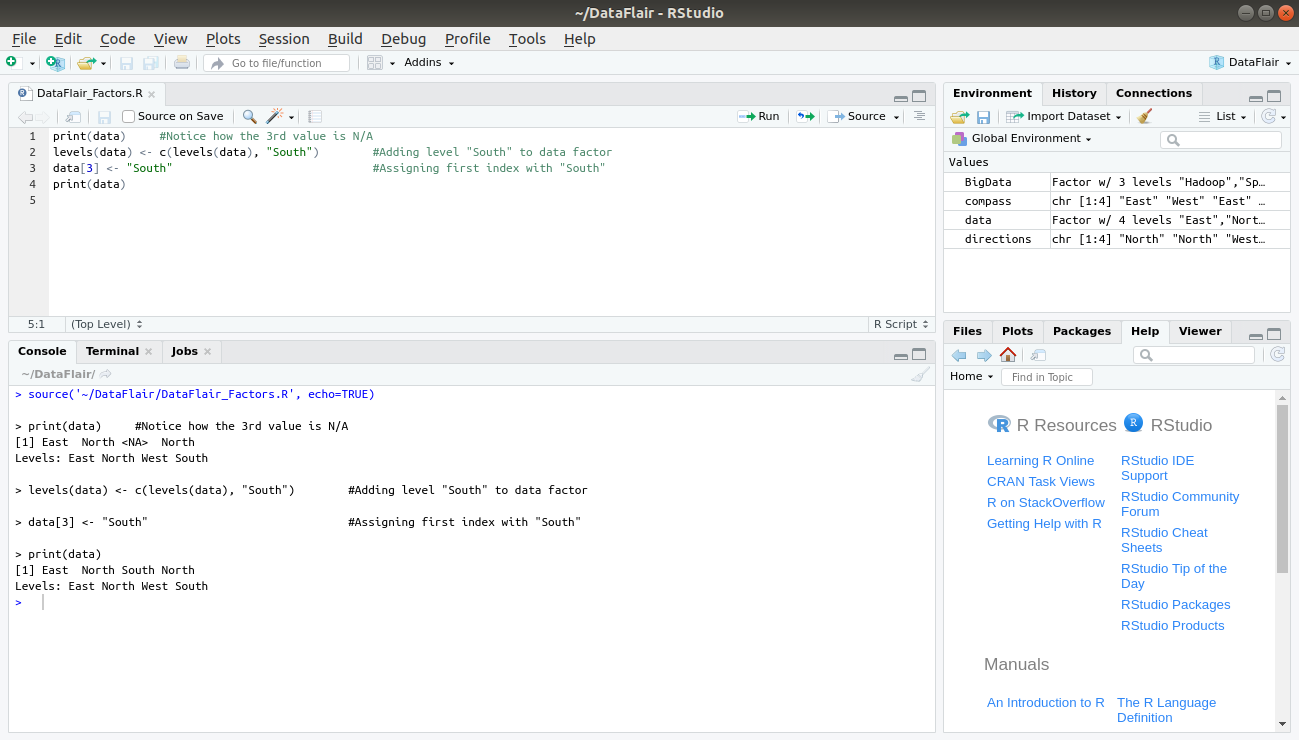
In the above example, modifying the third element with “South” gave out an error because it is not present in the pre-defined levels. In order to bypass this, we will have to add another level that includes “South” and modify our factor.
print(data)
levels(data) <- c(levels(data), "South")
data[3] <- "South"
print(data)
Output:
Factor Functions in R
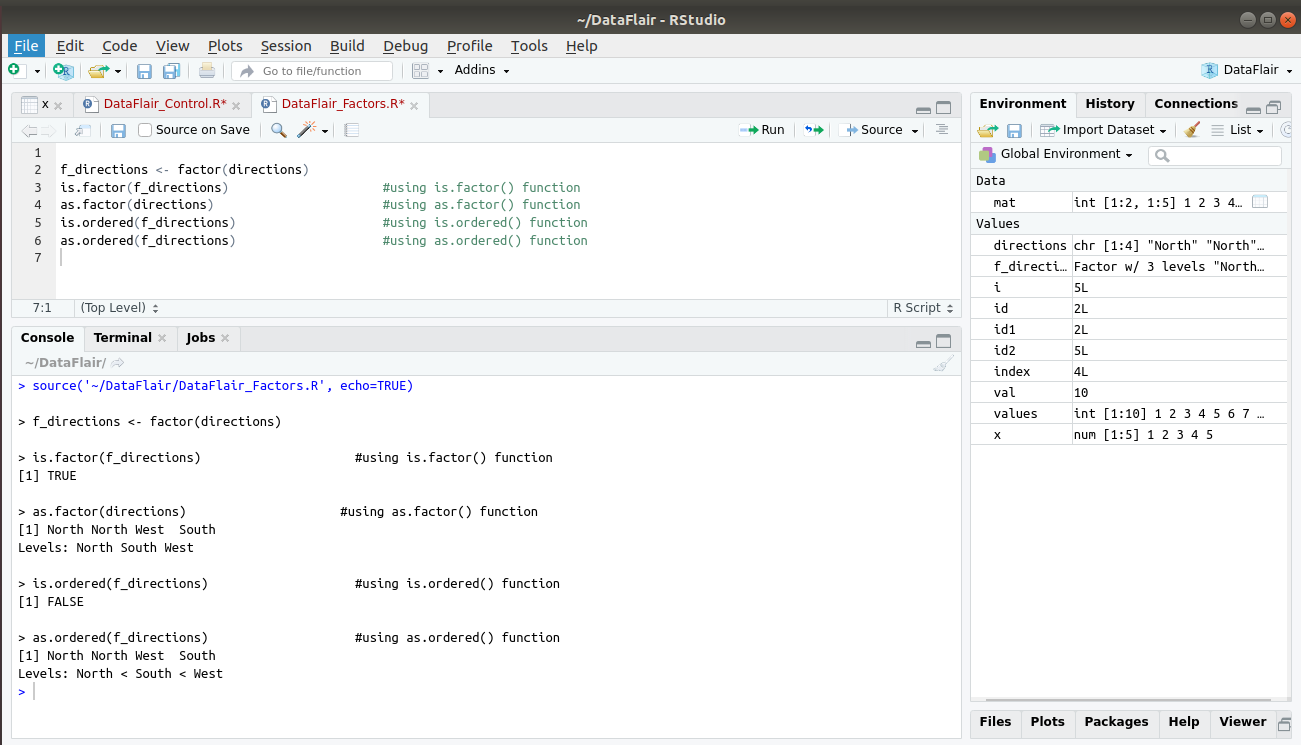
In this section, we will discuss some key functions that are related to factor. Some of these functions; is.factor(), as.factor(), is.ordered(), as.ordered(). is.factor() checks if the input is present in the form of factor and returns a Boolean value (TRUE or FALSE). as.factor() takes the input (usually a vector) and converts it into a factor. is.ordered() checks if the factor is ordered and returns boolean TRUE or FALSE. The as.ordered() function takes an unordered function and returns a factor that is arranged in order.
f_directions <- factor(directions)
is.factor(f_directions)
as.factor(directions)
is.ordered(f_directions)
as.ordered(f_directions)
Output:
Summary
Now, it’s easy for you to create and generate factors in R. Factors are the important part of Data Structures. To master in R language, you should have an entire of factors.
Now, it’s the right time to discuss R Control Structures
If you have any suggestion or feedback, please post it in the comment section.
If you are Happy with DataFlair, do not forget to make us happy with your positive feedback on Google
