ListView in Android – Time to convert your data into list form
We offer you a brighter future with industry-ready online courses - Start Now!!
ListView in Android is a type of ViewGroup that shows the list of items in the form of rows. In ListView the list layout is created using ListView. It is the most basic but one of the most important UI components in Android. It shows the list in vertical form and it becomes scrollable automatically.
The items are added automatically using Adapter. An adapter basically bridges between the UI component and the data source for items. An adapter holds the data and sends it to the Adapter view after that View takes the data from the adapter view and shows it in ListViews.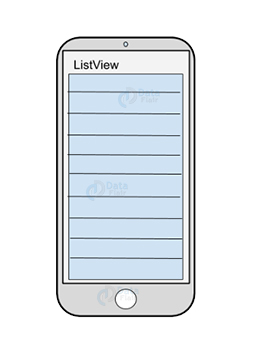
Parameters of ListView in Android
We can also set the action to be processed after a list item is clicked using the onListItemClick() method. In this method, 4 parameters are passed:
- ListView: This contains the item of the view.
- View: This tells the specific view that was selected.
- Position: It tells the position of the selected item in the array.
- Id: Id is used to uniquely identify a view.
- To add a ListView in our application we define it using the following:
<ListView xmls:android= “http://schemas.android.com/apk/res/android”
xmls:tools= “http://schemas.android.com/tools”
android:id= “@+id/MyLV”
>
Attributes of ListView in Android
To customize the ListView in Android, we can add certain attributes to it, such as:
- Id: id uniquely identifies a ListView.
- Divider: This defines the color or drawable among different list items.
- DividerHeight: This defines the height of the divider between list.
- Items.listSelector: This property sets the selector for listView.
- Entries: This specifies the reference to the array resource.
- Background: It sets the background of the ListView. Background can be either color or even an image.
- ChoiceMode: It sets the number of items that can be selected at once.
- TextSize: It sets the size of the text that will be displayed.
- Layout_width: It sets the width of the layout.
- Layout_height: It sets the height of the layout.
- Layout_gravity: It sets the gravity of the layout.
Android Adapters
As we know, adapters in listView are here to help the View fetch data from the source and show them on the screen to users. Now here we are talking about listView, and ListView is a subclass of AdapterView class. And, we have two adapters in Android:
Array Adapter in Android
We use this when we want a list of single items, backed by an Array.
Base Adapter in Android
It is the base class of normal implementation of Adapters that are used in ListView.
Get a deep knowledge of Android Adapters with DataFlair.
How to create listView in Android:
Now, in Android ListView article, we are going to learn how to implement ListView in android using Array Adapter and Base Adapter. Let’s first start with Array Adapter in android.
A. Using the Array Adapter in Android
Now we will implement this ListView in our application using ArrayAdapter with the following steps:
1. To implement this, we will first create a new project and name it. Then we will create the ListView in the activity_main.xml file as follows:
<?xml version="1.0" encoding="utf-8"?>
<LinearLayout xmlns:android="http://schemas.android.com/apk/res/android"

   android:layout_width="match_parent"
   android:layout_height="match_parent"
   android:orientation="vertical">

   <ListView
       android:id="@+id/listview1"
       android:layout_width="match_parent"
       android:layout_height="wrap_content"
       android:divider="#07755C"
       android:dividerHeight="2dp"></ListView>

</LinearLayout>
2. Next, we will write the following code in MainActivity.java file as follows:
package com.DataFlair.mylistview;

import android.os.Bundle;
import android.widget.ArrayAdapter;
import android.widget.ListView;
import androidx.appcompat.app.AppCompatActivity;

public class MainActivity extends AppCompatActivity {
   private ListView mylist;
   private ArrayAdapter myAdapter;
   private String[] names = {"User 1", "User 2", "User 3", "User 4", "User 5", "User 6", "User 7", "User 8", "User 9", "User 10", "User 11", "User 12", "User 13", "User 14", "User 15", "User 16", "User 17", "User 18", "User 19", "User 20"};

@Override
   protected void onCreate(Bundle savedInstanceState) {
       super.onCreate(savedInstanceState);
       setContentView(R.layout.activity_main);
       mylist = findViewById(R.id.listview1);
       myAdapter = new ArrayAdapter(this, android.R.layout.simple_list_item_1, names);
       mylist.setAdapter(myAdapter);
   }
}
3. After we have written all the codes, we will now run the code.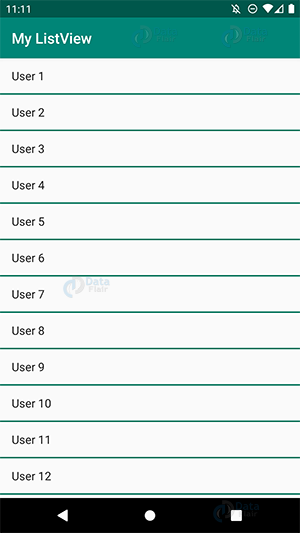
To show you the scrollable list, I have added more item in it, it is shown below:
B. Using the Base Adapter in Android
Now we will implement this ListView in our application using BaseAdapter with the following steps:
1. To implement this, we will first create a new project and name it. Then we will create the ListView in the activity_main.xml file as follows:
<?xml version="1.0" encoding="utf-8"?>
<LinearLayout xmlns:android="http://schemas.android.com/apk/res/android"
   android:layout_width="match_parent"
   android:layout_height="match_parent"
   android:orientation="vertical">

   <ListView
       android:id="@+id/List_View"
       android:layout_width="match_parent"
       android:layout_height="wrap_content"
       android:divider="@color/colorPrimaryDark"
       android:dividerHeight="2dp" />
</LinearLayout>
2. Next, create a new layout file and name it my_listview. Write the following code in my_listview.xml file:
<?xml version="1.0" encoding="utf-8"?>
<LinearLayout xmlns:android="http://schemas.android.com/apk/res/android"
   android:layout_width="match_parent"
   android:layout_height="match_parent"
   android:orientation="horizontal">

   <TextView
       android:id="@+id/text_View"
       android:layout_width="fill_parent"
       android:layout_height="60dp"
       android:layout_gravity="center"
       android:divider="@color/colorPrimaryDark"
       android:dividerHeight="2dp"
       android:textColor="@color/black"
       android:textSize="20dp" />
</LinearLayout>
3. Now create a java file, name it myAdapter.java and write the following code:
package com.dataflair.baseadapterlistview;

import android.content.Context;
import android.view.LayoutInflater;
import android.view.View;
import android.view.ViewGroup;
import android.widget.BaseAdapter;
import android.widget.TextView;

public class myAdapter extends BaseAdapter {
   Context context;
   String[] Users;

   LayoutInflater inflater;

   public myAdapter(Context applicationContext, String[] countryList) {
       this.context = context;
       this.Users = countryList;
       inflater = (LayoutInflater.from(applicationContext));
}

   @Override
   public int getCount() {
       return Users.length;
   }

   @Override
   public Object getItem(int i) {
       return null;
   }

   @Override
   public long getItemId(int i) {
       return 0;
   }

   @Override
   public View getView(int i, View my_view, ViewGroup view_Grp) {
       my_view = inflater.inflate(R.layout.my_listview, null);
       TextView Name = my_view.findViewById(R.id.text_View);
       Name.setText(Users[i]);
       return my_view;
   }
}
4. Next, we will write the following code in MainActivity.java file as follows:
package com.dataflair.baseadapterlistview;

import android.os.Bundle;
import android.widget.ListView;

import androidx.appcompat.app.AppCompatActivity;

public class MainActivity extends AppCompatActivity {

   ListView myList;
   String[] names = {"\n User 1", "\n User 2", "\n User 3", "\n User 4", "\n User 5", "\n User 6", "\n User 7", "\n User 8", "\n User 9", "\n User 10", "\n User 11", "\n User 12", "\n User 13", "\n User 14", "\n User 15", "\n User 16", "\n User 17", "\n User 18", "\n User 19", "\n User 20"};

   @Override
   protected void onCreate(Bundle savedInstanceState) {
       super.onCreate(savedInstanceState);
       setContentView(R.layout.activity_main);
       myList = findViewById(R.id.List_View);
       myAdapter customAdapter = new myAdapter(getApplicationContext(), names);
       myList.setAdapter(customAdapter);
   }
}
5. After we have written all the codes, we will now run the code: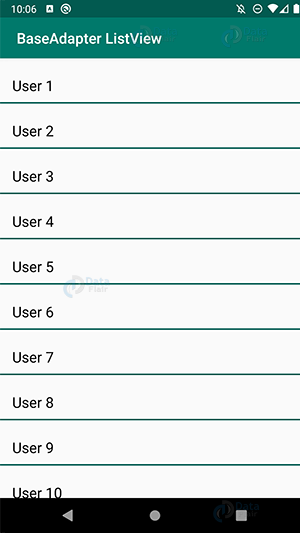
Now we will see the running of BaseAdapter ListView in android with the help of a gif.
Summary
So in this article, we have read about the ListView in Android. We also read how we can define it and what all are the attributes required to customize it. In the end, we also implemented ListView in our application. Now it is your turn to try it in your way and see how much fun it is to use it.
I hope you liked this article. If you have any queries about listView in Android and its implementation, please feel free to ask in the comment section.
Did you know we work 24x7 to provide you best tutorials
Please encourage us - write a review on Google


