Android Menu – Steps to implement Menu in Android
We offer you a brighter future with industry-ready online courses - Start Now!!
Welcome back to DataFlair Android Tutorial Series. Today in this article, we are going to learn and implement Android Menu. A Menu is a crucial part of the User Interface that handles frequent functionalities of the application. The menu helps us provide a user-friendly interface that handles a lot of actions.

Before proceeding ahead, learn top UI Controls for your application.
Types of Android Menu
Let us see the various types of menu in Android:
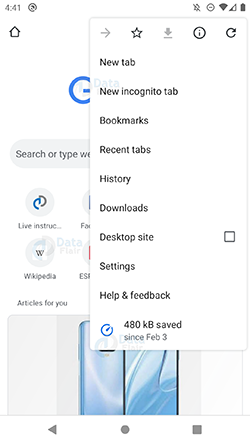
1. Android Options Menu
The Options Menu is a collection of options for an activity. It has a set of items that are useful to perform actions. It helps us to combine multiple actions together.
Following is an example of Options Menu:
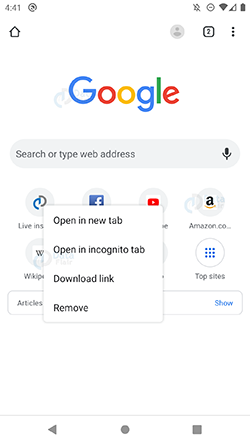
2. PopUp Menu
Pop-Up menu is a menu that displays a list of items in a popup window. A pop-up menu appears below the view by default, in case there is no space, it appears above it.
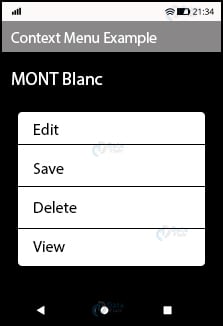
3. Contextual Menu
A contextual menu is a floating menu. It appears only when the users long-press an element or right clicks on that. It generally affects the selected element.
How to Define Android Menu
To define it, we need to write its code in a layout file. And that file is created in the resource folder as, res/menu/file.xml. Here, file can be any name that you provide. Following are important elements of a menu:
| <element> | Description |
| <menu> |
|
| <items> |
|
| <group> |
|
You can define it as:
<menu xmlns:android="http://schemas.android.com/apk/res/android">
   <item
       android:id="@+id/search"
       android:title="Search Here" />
   <item
       android:id="@+id/filter"
       android:title="Apply Filter" />
   <item
       android:id="@+id/My_account"
       android:title="My Account" />
</menu>
Like any other UI component, even Android menus can be customized with the help of attributes like-
1. android: id
It uniquely identifies the item of the menu.
2. android: icon
It sets an icon to represent the item.
3. android: title
It sets the title of the item.
4. android:showAsAction
It specifies when and how this item should appear as an action item in the app bar.
Implementation of Android Menu
Let us now see how easy it is to implement Menu in Android. Below are the steps to implement Android Menu:
1. First, create a new project and name it.
2. Now, create a new xml file with the name it main_menu.xml, and write the following code:
<?xml version="1.0" encoding="utf-8"?>
<menu xmlns:android="http://schemas.android.com/apk/res/android">
   <item
       android:id="@+id/search"
       android:title="Search Here" />
   <item
       android:id="@+id/filter"
       android:title="Apply Filter" />
   <item
       android:id="@+id/wishlist"
       android:title="My Wishlist" />
   <item
       android:id="@+id/MyCart"
       android:title="My Cart" />
   <item
       android:id="@+id/My_account"
       android:title="My Account" />
</menu>
3. After that write the following code in the MainActivity.java file:
package com.DataFlair.mymenu;

import android.os.Bundle;
import android.view.Menu;
import android.view.MenuItem;
import android.widget.Toast;

import androidx.appcompat.app.AppCompatActivity;


public class MainActivity extends AppCompatActivity {
   @Override
   protected void onCreate(Bundle savedInstanceState) {
       super.onCreate(savedInstanceState);
       setContentView(R.layout.activity_main);
   }
// Overriding onCreateoptionMenu() to make Option menu
@Override
   public boolean onCreateOptionsMenu(Menu menu) {
   //Inflating menu by overriding inflate() method of MenuInflater class.
   //Inflating here means parsing layout XML to views.
       getMenuInflater().inflate(R.menu.main_menu, menu);
       return true;
   }
//Overriding onOptionsItemSelected to perform event on menu items
   @Override
   public boolean onOptionsItemSelected(MenuItem menuItem) {
       Toast.makeText(this, "You chose : " + menuItem.getTitle(), Toast.LENGTH_SHORT).show();
       switch (menuItem.getItemId()) {
           case R.id.search:
               //Your code here
               return true;
           case R.id.filter:
               //Your code here
               return true;
           case R.id.wishlist:
               //Your code here
               return true;
           case R.id.MyCart:
               //Your code here
               return true;
           case R.id.My_account:
               //Your code here
               return true;
           default:
               return super.onOptionsItemSelected(menuItem);
       }
   }
}
4. This is the color code of the app, write this in the colors.xml file:
<?xml version="1.0" encoding="utf-8"?>
<resources>
   <color name="colorPrimary">#00796B</color>
   <color name="colorPrimaryDark">#03574D</color>
   <color name="colorAccent">#C2185B</color>
</resources>
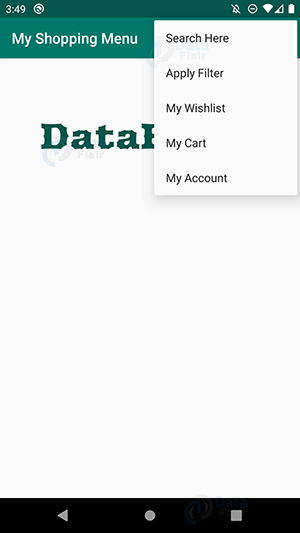
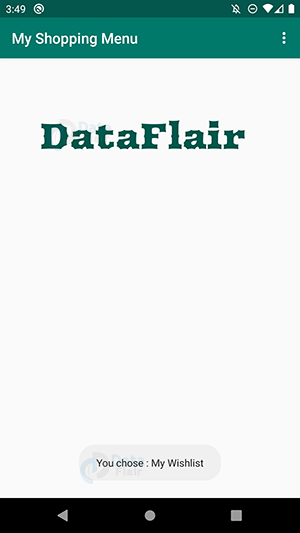
5. After that, the following would be the output:
Below is the app:

This is the Menu:
This is the toast generated that tells the chosen option:
Summary
In this Android tutorial, we have read about Android Menu. We have discussed types of menu in Android and how we can define them. We also saw its implementation in our application and now it is your turn to implement it and learn. Thank You!
I hope you liked this article. Do refer to our sidebar for more Android articles.
Did you like our efforts? If Yes, please give DataFlair 5 Stars on Google


