Android Intent and Intent Filters – Learn to Implement in Android Studio
FREE Online Courses: Transform Your Career – Enroll for Free!
As we know, the core components of Android are Services, Activities, and Broadcast Receivers. Now, for their activation, we use messages known as Intents. Intent in Android enables communication between components of the same as well as different applications.
In other words, we can understand them as asynchronous messages. These messages allow application components to request required functionalities from other components of the application.
Android Intent
Intents are the objects of android.content.intent type. Intent performs the following three tasks mainly:
1. Starting an Activity
An Activity starts/performs a task when we pass the Intent object to the content.startActivity() method. When an intent object is passed to startActivity(), it starts a new activity or an existing one.
2. Starting a Service
An Intent object is passed to the content.startService() method, to start a Service. We can also send a required request to an existing service.
3. Delivering a Broadcast
Passing the Intent object in content.sendBroadcast(), sends messages to broadcast receivers.
Intent Object
Intent objects are nothing, but a lot of information wrapped together. An Intent object basically contains the information to determine the component to start and the actions for them.
Come let’s see what all information an Intent Object contains within.
Any Intent object contains the following six things :
- Component Name
- Action
- Data
- Category
- Extras
- Flag
Now we’ll see these things in detail one by one.
1. Component Name
The intent object holds the name of the component of the Android application. Using component names, the system delivers an intent to a particular application component. At times, we forget to mention the component name, in such cases, the Android system decides it based on the other characters. To set the component name, we use one of the following three methods :
- setComponent()
- setClass()
- setClassName()
If we want to read the component name, we can read it using the getComponent() method.
2. Action
Action defines the general task that is to be performed on components. Now, these actions directly target Activities, Services or Broadcast Receivers. Let’s see a few actions that an intent object stores:
- ACTION_CALL: This is for initiating calls from the user’s device.
- ACTION_EDIT: This is to edit and make changes in the data that is visible to the users.
- ACTION_MAIN: This is an initial activity of a task. It takes no input and returns no output.
- ACTION_DIAL: This is used to display a Dialer to the users.
- ACTION_SYNC: This is to synchronize the user’s data on their device on a server.
- ACTION_HEADSET_PLUG: This displays that a headset is plugged in or taken out.
- ACTION_SCREENON: This is for turning on the screen of the user’s device.
- ACTION_BATTERY_LOW: This is a warning for a low running battery.
- ACTION_VIEW: This displays the data to the users on the screens of their devices.
Actions of an Intent Object are set using setAction() method and read through getAction() method.
3. Data
Data stores and tells the type of the data to the IntentFilters. While creating an Intent, it’s important to specify the type of data in it. While defining the data type that is the MIME type of Data in addition to its URI, the data is expressed as URI (Uniform Resource Identifier).
Different actions are paired with different types of data specifications.
For example – Action_Edit would contain the URI of Document and Action_dial would contain tell: URI.
4. Category
This contains some additional information about what kind of object should hold the intent. An intent object can contain any number of type of categories. This field is optional in an IntentObject.
Some of the categories included are as follows :
- BROWSABLE: The target components can be invoked in browsers to display data or message.
- ALTERNATIVE: This means the component should be added in the list of alternative actions that the user performs on some data.
- GADGET: This activity can be added inside some other components that host the gadgets.
- HOME: This displays the home page of the user’s device.
- LAUNCHER: The target can be an initial task and listed on the top of the application launcher.
To specifically set the Intent Object, the category we use is the addCategory() method. If we like, we can also delete some categories using deleteCatergory(). To get all the lists of categories on a component, we use getCategory().
5. Extras
This is a piece of extended information, in addition to the provided one. This is optional and is used only in case when there is a need to provide some extra information for the component. It is just an extra key-value pair for the component.
6. Flags
Flags are also provided in Intent Objects for different types of tasks. There are various types of flags that can be set using the addFlags() method and the setFlags() method.
Types of Intent in Android
Intents can be of two types as mentioned in the diagram. Now we’ll see both these types one by one.
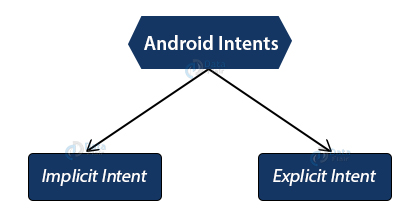
Implicit Intent in Android
Implicit Type of Intents are those that do not mention any component name and only declare the actions.
Implicit Intents specifies these actions that are to be performed. These actions can invoke any application component that can perform these actions. These are useful when your action is important but your application is not capable of performing it.
Let’s check the following so we can learn how to use it:
Intent intent = new Intent();
intent.setAction=(Intent.ACTION_DIAL);
Explicit Intent in Android
Explicit Type are those Intents that specifically mention the component that it targets. The Android system calls these components by explicitly mentioning them. We can use Explicit Intent for the purpose of launching an application component.
Following is an example to implement Explicit Intent:
Intent intent = new Intent(this,MyActivity.class);
intent.putExtra(“Value 1”, “Value one for MyActivity”);
Now that we’ve seen Intents, Intent Objects, their components, and Intent Types, we’ll move towards the next interesting topic that is Intent Filters.
Intent Filters in Android
Intent Filters are expressions in the Manifest file of an Android Application. These are responsible for deciding the behavior of the Intent. Intent filters that we mention in the Manifest file can be nested with the application components.
Basically, Intent Filters can define the behavior of Intents using three Elements, that are-
- <actions> – Action name defines the intent action that it’ll accept.
- <data> – Data defines the data that is acceptable.
- <category> – Category defines the name of the Intent Category that is acceptable.
We’ll see the following example to understand its implementation:
Intent Filter in Manifest.xml:
<activity android:name ``.MainActivity”>
<intent-filter>
<action android:name= “android.intent.action.SEND”>
<category android:name= “android.intent.category.HOME”>
<data android:mimeType= “text/plain”>
</intent-filter>
</activity>
Multiple Intent in Manifest.xml:
Multiple Intent Filters can also be present in a single Manifest file, as follows:
<activity android:name ``.MainActivity”>
<intent-filter>
<action android:name= “android.intent.action.SEND”>
<category android:name= “android.intent.category.HOME”>
<data android:mimeType= “text/plain”>
</intent-filter>
</activity>
<activity android:name ``.MyActivity”>
<intent-filter>
<action android:name= “android.intent.action.EDIT”>
<category android:name= “android.intent.category.ALTERNATIVE”>
<data android:mimeType= “text/plain”>
</intent-filter>
</activity>
Intent Resolution
The intent resolution comes in the role when the system receives an implicit intent. What exactly happens is, Implicit intents do not mention the name of the components. Therefore the system needs to search for the appropriate application component that can perform the actions. This searching process takes place in the following three tests:
1. Action Test
In this, the system checks the Intent action matches with the intents in the intent filter. If it does, it passes this test, otherwise, it fails.
2. Category Test
In this, the system checks the Intent category matches with the categories in the intent filter. If it does, it passes this test, otherwise, it fails.
3. Data Test
In this, the system checks the Intent MIME data matches with the data in the intent filter. If it does, it passes this test, otherwise, it fails.
To understand this see the following:
<intent-filter>

<action android:name= “android.intent.action.EDIT”> // It is matched with the list of actions of Intents.

<category android:name= “android.intent.category.ALTERNATIVE”>// It is matched with the list of categories of Intents.

<data android:mimeType= “text/plain”>// It is matched with the list of MIME data of Intents.
</intent-filter>
Now if these tests are passed, Intents are said to match.This is known as Intent Matching. Intent matching is only said to be successful, if all the actions and categories of Intents match against the filters of theIntentFilter class.
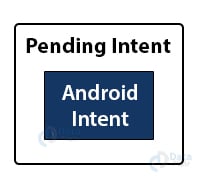
Pending Intent in Android
While studying about Android intents, we should not forget the topic, Pending Intents. Pending Intents are like a protective shield over the Intent objects. It covers them and grants permission to the external applications to access them.
For example – If you have an Intent, which the system should access only at a particular time, you can use Pending Intent.
Implementation of Intent in Android
Now that we’re done with the theory part of Intents, let us implement it in Android Studio. In this application, we’ll take the user from the Activity to the respective URL.
Step 1: First of all, create a new project and fill in the required details.
Step 2: Now, open the main_activity.xml file, and write the following given code there.
<?xml version="1.0" encoding="utf-8"?>
<RelativeLayout
   xmlns:android="http://schemas.android.com/apk/res/android"
   xmlns:tools="http://schemas.android.com/tools"
   android:layout_width="match_parent"
   android:layout_height="match_parent"
   tools:context="com.DataFlair.dataflair_intent.MainActivity">
   <TextView
       android:id="@+id/textView2"
       android:layout_width="wrap_content"
       android:layout_height="wrap_content"
       android:layout_centerHorizontal="true"
       android:layout_marginLeft="100dp"
       android:text="DataFlair "
       android:textColor="@color/colorPrimaryDark"
       android:textSize="50dp" />
   <EditText
       android:layout_width="wrap_content"
       android:layout_height="wrap_content"
       android:id="@+id/urlText"
       android:layout_alignParentTop="true"
       android:layout_centerHorizontal="true"
       android:layout_marginTop="100dp"
       android:layout_marginLeft="50dp"
       android:ems="10" />
   <Button
       android:layout_width="wrap_content"
       android:layout_height="wrap_content"
       android:id="@+id/browse"
       android:layout_below="@+id/urlText"
       android:text="Let's Go"
       android:layout_marginLeft="50dp"
       android:layout_centerHorizontal="true" />
</RelativeLayout>
Step 3: After the above step, write the following code in MainActivity.java file.
package com.DataFlair.dataflair_intent;
import android.content.Intent;
import android.net.Uri;
import androidx.appcompat.app.AppCompatActivity;
import android.os.Bundle;
import android.view.View;
import android.widget.Button;
import android.widget.EditText;
public class MainActivity extends AppCompatActivity {
@Override
protected void onCreate(Bundle savedInstanceState) {
super.onCreate(savedInstanceState);
setContentView(R.layout.activity_main);
final EditText editText = (EditText)findViewById(R.id.urlText);
Button btn = (Button) findViewById(R.id.browse);
btn.setOnClickListener(new View.OnClickListener() {
@Override
public void onClick(View v) {
String url = editText.getText().toString();
Intent intent = new Intent(Intent.ACTION_VIEW, Uri.parse(url));
startActivity(intent);
}
});
}
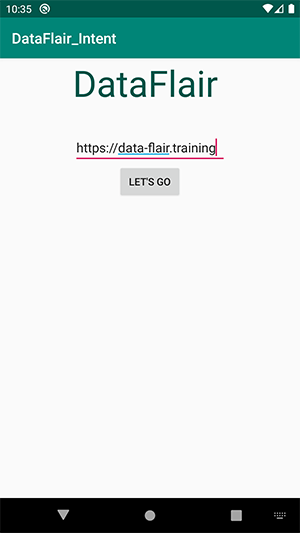
}Step 4: After we’re done with this. The next step is to press the run button. After that the output would be:
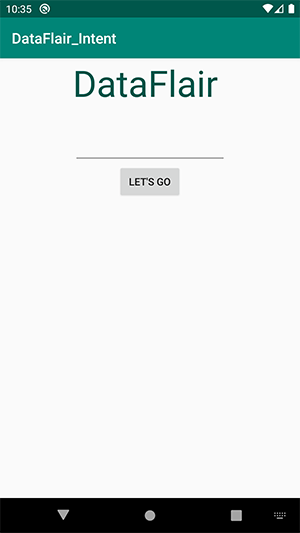
In this, you need to enter the URl that you want to open through the application.

Summary
Now that we’ve now seen Android Intents, we’ve got an idea of what it is. Right? In this article, we’ve studied what is intent and its types. We learned about Intent Filter and Pending Intents. We’ve also studied the main components of Intents and Intent Filter. Coming towards the end, we also implemented Intents. Now I’m hoping that you’ll try it and I’ll see you in the next article.
Do share your views regarding the Android Intent Tutorial in the comment section.
You give me 15 seconds I promise you best tutorials
Please share your happy experience on Google

