Android Audio Manager – Control the audio system of your android app
We offer you a brighter future with FREE online courses - Start Now!!
In this Android audio manager article, we will discuss two important things that are both related to the Audio System of an Android Device. The two topics that we are going to discuss are:
- Audio Manager
- Audio Capture
Let us discuss these two topics one by one.
Android Audio Manager
Audio Manager in general plays and controls the volume and ring of a device. Audio Manager in android is a class that provides access to the volume and modes of the device. Android audio manager helps us adjust the volume and ringing modes of devices based on our requirements. The modes that are well known to us, that are Ringing, Vibration, Loud, Silent, etc. Android provides us with AudioManager class to provide control for them.
Here, to make use of the AndroidManager class, we will first create its object. After we create an object, we can use setRingerMode.
To create its object, we will call the getSystemService() method as follows:
Private AudioManager myAM;
myAM = (AudioManager)getSystemService(Context.AUDIO_SERVICE);
To setRingerMode we will follow the following syntax:
myAudioManager.serRingerMode(AudioManager.RINGER_MODE_SILENT);
Android Audio Manager Modes
This method takes three types of parameters for each mode, the three modes are:
- RINGER_MODE_NORMAL – This mode sets the device in general mode.
- RINGER_MODE_VIBRATE – This mode sets the device at vibrate mode.
- RINGER_MODE_SILENT – This mode sets the device at silent Mode.
Other Methods to Use Android Audio Manager
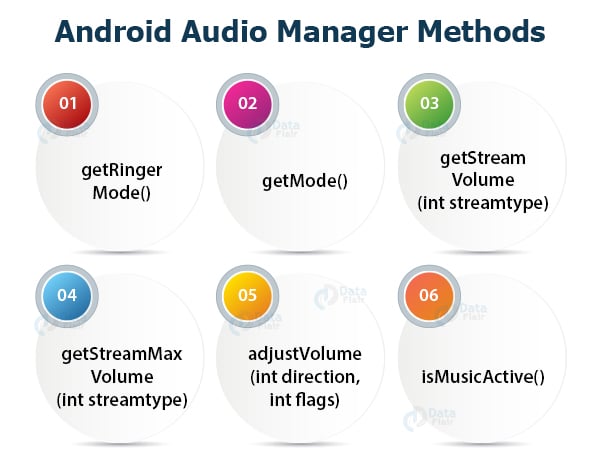
There are some more methods apart from setRingerMode, that we are enlisting below:
- getRingerMode() – This method gets the current mode of the device.
- getMode() – This method gets the current audio mode of the device.
- getStreamVolume(int streamtype) – This method returns the current volume index for a certain stream of the device.
- getStreamMaxVolume(int streamtype) – This method returns the maximum volume index for a certain stream of the device.
- adjustVolume(int direction, int flags) – This method adjusts the volume of the most applicable stream of the device.
- isMusicActive() – This method checks if there is some ongoing music or not.
Now that, we have seen the AudioManager class of Android. We will proceed to learn Audio Capture.
Android Audio Capture
So, Android comes with a built-in microphone through which we communicate over our phone. This microphone can help us capture audio, store it and play it in our devices. We do it with the help of the MediaRecorder class. This class is used to record Audio as well as Video in Android devices. To use this class, we need to create an object of this class. And after creating the object we would need to set the source, format and output file. To create the object and set the source and all, we will do the following:
MediaRecorder myAR= new MediaRecorder(); //instantiating its object
myAR.setAudioSource(MediaRecorder.AudioSource.MIC);//Setting the source
myAR.set(MediaRecorder.OutputFormat.AMR_NB );//Setting the Format
myAR.set(MediaRecorder.OutputFormat.THREE_GPP );
myAR.setOutputFile(outputFile );//Setting the Output File
After we are done with it, we can start the recording using:
myAR.start();
Apart from the start() method, there are some other methods of MediaRecorder class that are: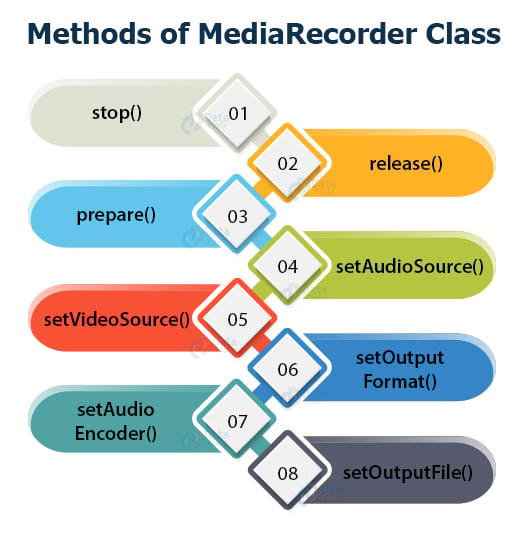
- stop() – This method stops the recording.
- release() – The need for this method is when a recorder instance is required.
- prepare() – This method prepares the recorder before it starts.
- setAudioSource() – This method sets the source from which the Audio is to be recorded.
- setVideoSource() – This method sets the path for the Output File to be stored.
- setOutputFormat() – This method sets the format for Output File.
- setAudioEncoder() – This method sets the encoder for the audio.
- setOutputFile() – This method sets the path for the Output File to be stored.
Any doubts in DataFlair’s Android audio manager article till now? Ask in the comment section.
How to Implement Android AudioManager?
Now we will implement AudioManger in our application as follows:
Step 1: First of all we will create a new project and name it MyAudioManager.
After that, we will open the activity_main.xml file and write the code below:
<?xml version="1.0" encoding="utf-8"?>
<LinearLayout xmlns:android="http://schemas.android.com/apk/res/android"
   android:layout_width="match_parent"
   android:layout_height="match_parent"
   android:orientation="vertical">

   <TextView
       android:id="@+id/textView2"
       android:layout_width="wrap_content"
       android:layout_height="wrap_content"
       android:layout_centerHorizontal="true"
       android:layout_marginLeft="100dp"
       android:layout_marginTop="100dp"
       android:fontFamily="@font/alfa_slab_one"
       android:text="DataFlair "
       android:textColor="#30148F"
       android:textSize="50dp" />

   //Define the buttons with their Id
   <Button
       android:id="@+id/button1"
       android:layout_width="150dp"
       android:layout_height="wrap_content"
       android:layout_marginLeft="130dp"
       android:layout_marginBottom="5dp"
       android:background="@color/colorPrimary"
       android:text="Silent Mode"
       android:textColor="@color/colorWhite" />

   <Button
       android:id="@+id/button2"
       android:layout_width="150dp"
       android:layout_height="wrap_content"
       android:layout_marginLeft="130dp"
       android:layout_marginTop="150dp"
       android:layout_marginBottom="5dp"
       android:background="@color/colorPrimary"
       android:text="Ring Mode"
       android:textColor="@color/colorWhite" />


   <Button
       android:id="@+id/button3"
       android:layout_width="150dp"
       android:layout_height="wrap_content"
       android:layout_marginLeft="130dp"
       android:background="@color/colorPrimary"
       android:text="Vibrate Mode"
       android:textColor="@color/colorWhite" />

</LinearLayout>
Step 2: Now we will write the code for MainActivity.java as follows:
package com.DataFlair.myaudiomanager;
import android.app.Activity;
import android.content.Context;
import android.media.AudioManager;
import android.os.Bundle;
import android.view.View;
import android.widget.Button;
import android.widget.Toast;


public class MainActivity extends Activity {
   Button ring, vibrate, silent;
   private AudioManager myAudioManager;

   // overriding onCreate
   @Override
   protected void onCreate(Bundle savedInstanceState) {
       super.onCreate(savedInstanceState);
       setContentView(R.layout.activity_main);
       silent = findViewById(R.id.button1);
       ring = findViewById(R.id.button2);
       vibrate = findViewById(R.id.button3);
       // instantiating AudiaManager
       myAudioManager = (AudioManager) getSystemService(Context.AUDIO_SERVICE);

       //onClickListener for Vibrate
       vibrate.setOnClickListener(new View.OnClickListener() {
           @Override
           public void onClick(View v) {
               myAudioManager.setRingerMode(AudioManager.RINGER_MODE_VIBRATE);// setting the mode
               Toast.makeText(MainActivity.this, "Currently Vibrate Mode",Toast.LENGTH_LONG).show();
               ring.setBackgroundResource(R.color.colorPrimary);
               silent.setBackgroundResource(R.color.colorPrimary);
               vibrate.setBackgroundResource(R.color.colorAccent);
           }
       });

       //onClickListener for Ring

       ring.setOnClickListener(new View.OnClickListener() {
           @Override
           public void onClick(View v) {
               myAudioManager.setRingerMode(AudioManager.RINGER_MODE_NORMAL);// setting the mode
               Toast.makeText(MainActivity.this, "Currently Ringing Mode",Toast.LENGTH_LONG).show();
               ring.setBackgroundResource(R.color.colorAccent);
               silent.setBackgroundResource(R.color.colorPrimary);
               vibrate.setBackgroundResource(R.color.colorPrimary);
           }
       });


       //onClickListener for Silent
       silent.setOnClickListener(new View.OnClickListener() {
           @Override
           public void onClick(View v) {
               myAudioManager.setRingerMode(AudioManager.RINGER_MODE_SILENT); // setting the mode
               Toast.makeText(MainActivity.this, "Currently silent Mode",Toast.LENGTH_LONG).show();
               ring.setBackgroundResource(R.color.colorPrimary);
               silent.setBackgroundResource(R.color.colorAccent);
               vibrate.setBackgroundResource(R.color.colorPrimary);
           }
       });
   }
}
Step 3: since we have different color themes, we will now set the color values in color.xml. Open res/values/color.xml and write the code below:
<?xml version="1.0" encoding="utf-8"?>
<resources>
   <color name="colorPrimary">#8C6AC9</color>
   <color name="colorPrimaryDark">#020F61</color>
   <color name="colorAccent">#6030B3</color>
   <color name="colorWhite">#E4D8DC</color>
</resources>
Step 4: After writing the code, we will run it, and the following will come:
These will be the three modes:
i) General Mode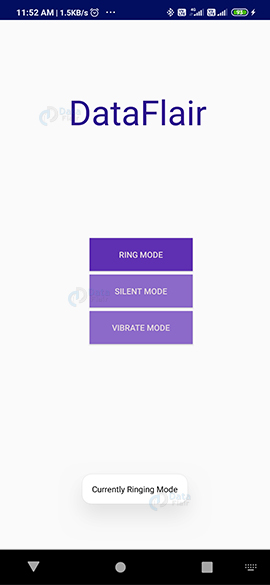
ii) Silent Mode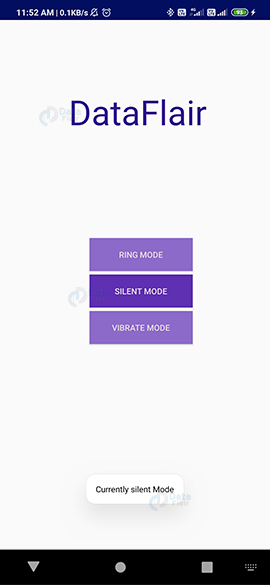
iii) Vibrate Mode
Summary
So in this article, we read about Android Audio Manager and Android Audio Capture. Android Audio Manager deals with the adjusting and setting of Volume and Ringing modes of the device. On the contrary Android Audio Capture deals with recording the audio in a device using MediaRecorder class. We also implemented Android AudioManager in this article.
Happy Learning😃
Your opinion matters
Please write your valuable feedback about DataFlair on Google

