Project in Python – Colour Detection using Pandas & OpenCV
Machine Learning courses with 100+ Real-time projects Start Now!!
Python Project on Color Detection
Today’s project will be exciting and fun to build. We will be working with colors and you will get to learn about many concepts throughout this project. Colour detection is necessary to recognize objects, it is also used as a tool in various image editing and drawing apps.
This is the 10th project in the DataFlair’s series of 20 Python projects. I suggest you to bookmark the previous projects:
- Fake News Detection Python Project
- Parkinson’s Disease Detection Python Project
- Color Detection Python Project
- Speech Emotion Recognition Python Project
- Breast Cancer Classification Python Project
- Age and Gender Detection Python Project
- Handwritten Digit Recognition Python Project
- Chatbot Python Project
- Driver Drowsiness Detection Python Project
- Traffic Signs Recognition Python Project
- Image Caption Generator Python Project
What is Colour Detection?
Colour detection is the process of detecting the name of any color. Simple isn’t it? Well, for humans this is an extremely easy task but for computers, it is not straightforward. Human eyes and brains work together to translate light into color. Light receptors that are present in our eyes transmit the signal to the brain. Our brain then recognizes the color. Since childhood, we have mapped certain lights with their color names. We will be using the somewhat same strategy to detect color names.
About the Python Project
In this color detection Python project, we are going to build an application through which you can automatically get the name of the color by clicking on them. So for this, we will have a data file that contains the color name and its values. Then we will calculate the distance from each color and find the shortest one.
The Dataset
Colors are made up of 3 primary colors; red, green, and blue. In computers, we define each color value within a range of 0 to 255. So in how many ways we can define a color? The answer is 256*256*256 = 16,581,375. There are approximately 16.5 million different ways to represent a color. In our dataset, we need to map each color’s values with their corresponding names. But don’t worry, we don’t need to map all the values. We will be using a dataset that contains RGB values with their corresponding names. The CSV file for our dataset has been taken from this link:
The colors.csv file includes 865 color names along with their RGB and hex values.
Prerequisites
Before starting with this Python project with source code, you should be familiar with the computer vision library of Python that is OpenCV and Pandas.
OpenCV, Pandas, and numpy are the Python packages that are necessary for this project in Python. To install them, simply run this pip command in your terminal:
pip install opencv-python numpy pandas
Steps for Building a Project in Python – Color Detection
Here are the steps to build an application in Python that can detect colors:
1. Download and unzip the zip file
The project folder contains 3 files:
- Color_detection.py – main source code of our project.
- Colorpic.jpg – sample image for experimenting.
- Colors.csv – a file that contains our dataset.
2. Taking an image from the user
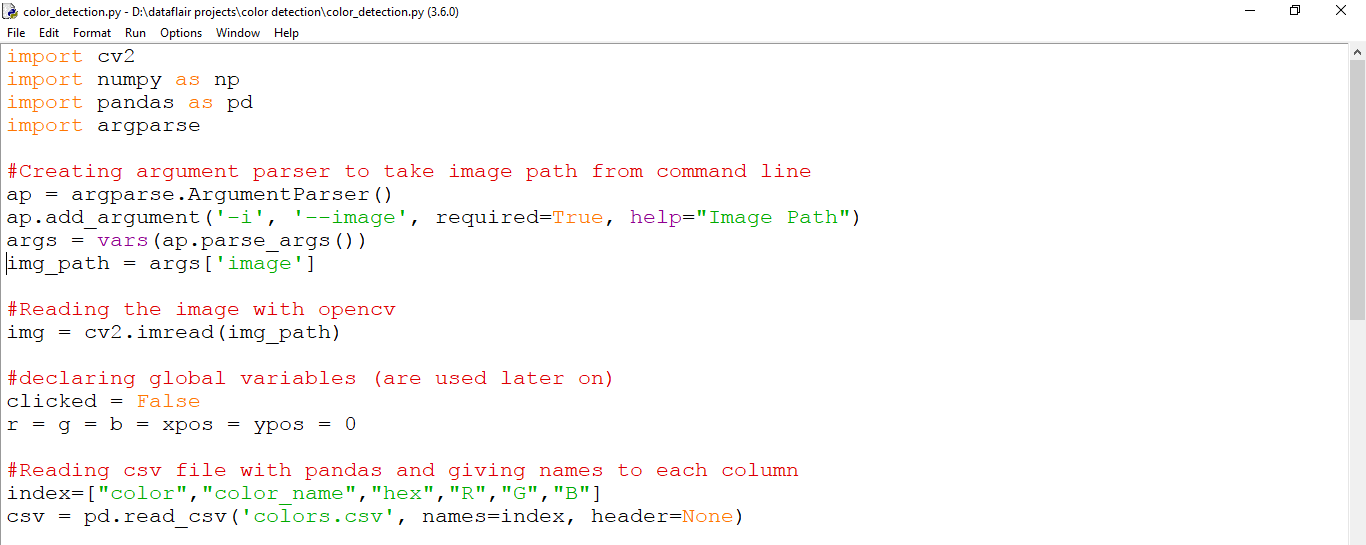
We are using argparse library to create an argument parser. We can directly give an image path from the command prompt:
import argparse

ap = argparse.ArgumentParser()
ap.add_argument('-i', '--image', required=True, help="Image Path")
args = vars(ap.parse_args())
img_path = args['image']
#Reading image with opencv
img = cv2.imread(img_path)
3. Next, we read the CSV file with pandas
The pandas library is very useful when we need to perform various operations on data files like CSV. pd.read_csv() reads the CSV file and loads it into the pandas DataFrame. We have assigned each column with a name for easy accessing.
#Reading csv file with pandas and giving names to each column
index=["color","color_name","hex","R","G","B"]
csv = pd.read_csv('colors.csv', names=index, header=None)
4. Set a mouse callback event on a window
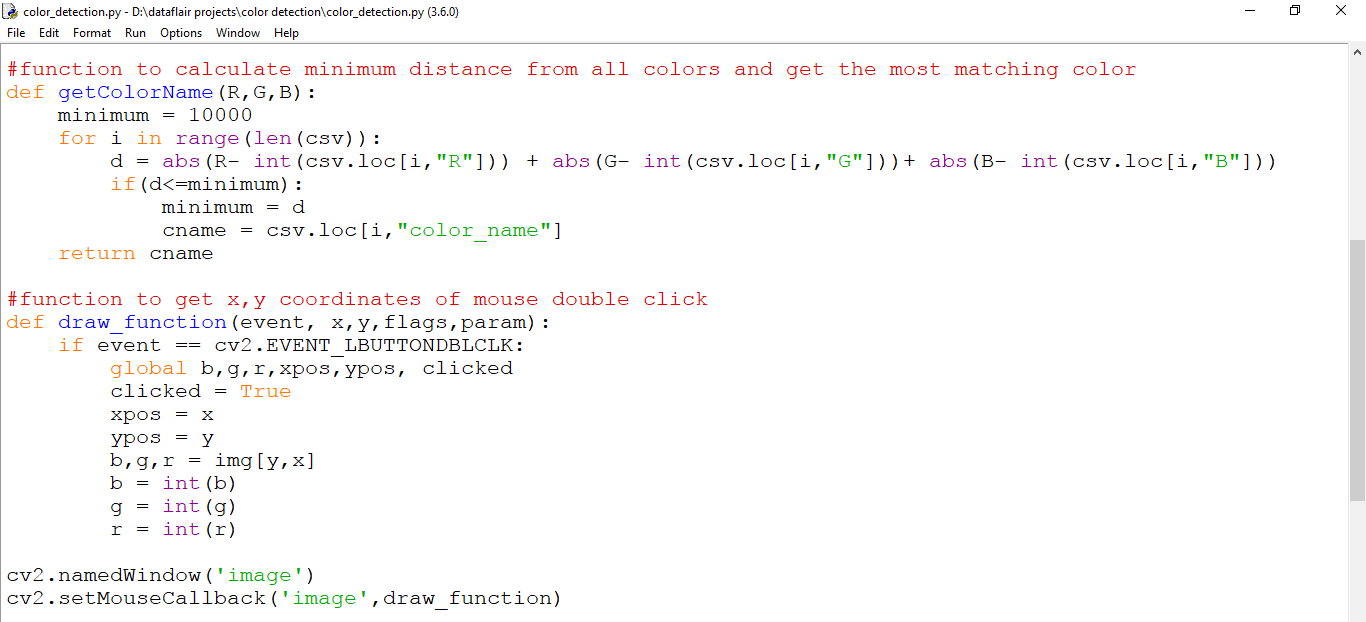
First, we created a window in which the input image will display. Then, we set a callback function which will be called when a mouse event happens.
cv2.namedWindow('image')
cv2.setMouseCallback('image',draw_function)
With these lines, we named our window as ‘image’ and set a callback function which will call the draw_function() whenever a mouse event occurs.
Want to revise the Python concepts?
Check out 270+ Python Tutorials & brush up your basics
5. Create the draw_function
It will calculate the rgb values of the pixel which we double click. The function parameters have the event name, (x,y) coordinates of the mouse position, etc. In the function, we check if the event is double-clicked then we calculate and set the r,g,b values along with x,y positions of the mouse.
def draw_function(event, x,y,flags,param):
    if event == cv2.EVENT_LBUTTONDBLCLK:
        global b,g,r,xpos,ypos, clicked
        clicked = True
        xpos = x
        ypos = y
        b,g,r = img[y,x]
        b = int(b)
        g = int(g)
        r = int(r)
6. Calculate distance to get color name
We have the r,g and b values. Now, we need another function which will return us the color name from RGB values. To get the color name, we calculate a distance(d) which tells us how close we are to color and choose the one having minimum distance.
Our distance is calculated by this formula:
d = abs(Red – ithRedColor) + (Green – ithGreenColor) + (Blue – ithBlueColor)
def getColorName(R,G,B):
    minimum = 10000
    for i in range(len(csv)):
        d = abs(R- int(csv.loc[i,"R"])) + abs(G- int(csv.loc[i,"G"]))+ abs(B- int(csv.loc[i,"B"]))
        if(d<=minimum):
            minimum = d
            cname = csv.loc[i,"color_name"]
    return cname
7. Display image on the window
Whenever a double click event occurs, it will update the color name and RGB values on the window.
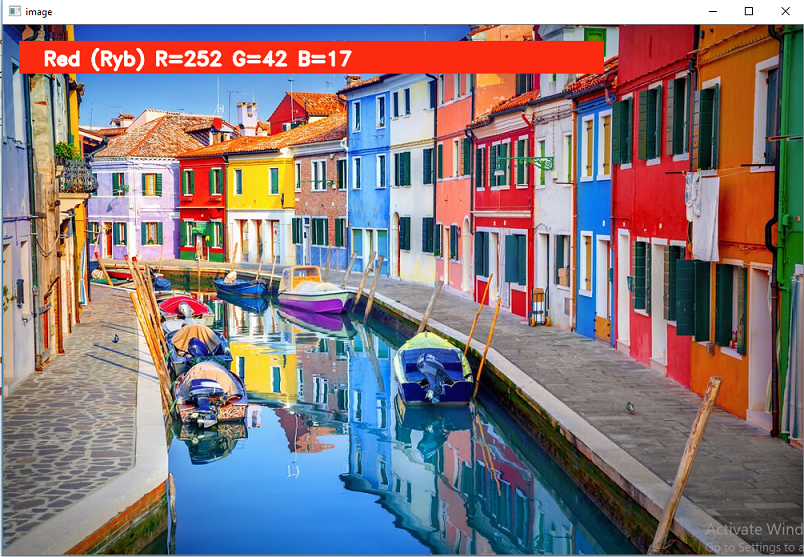
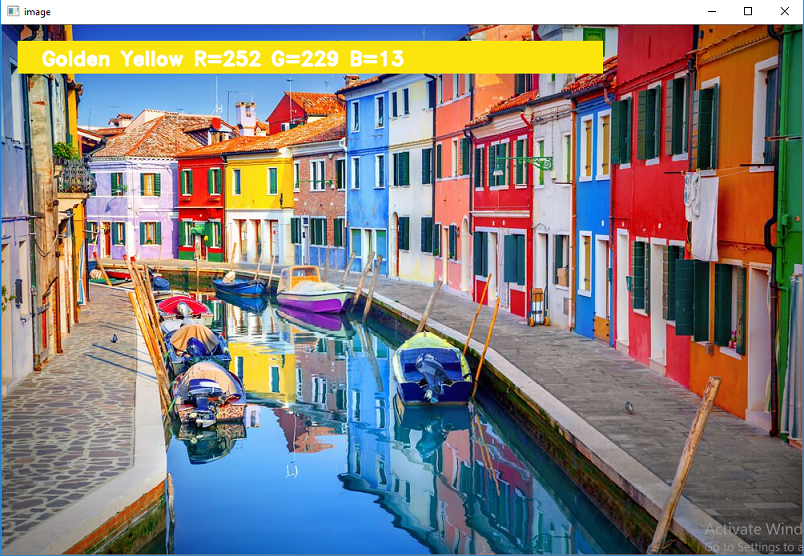
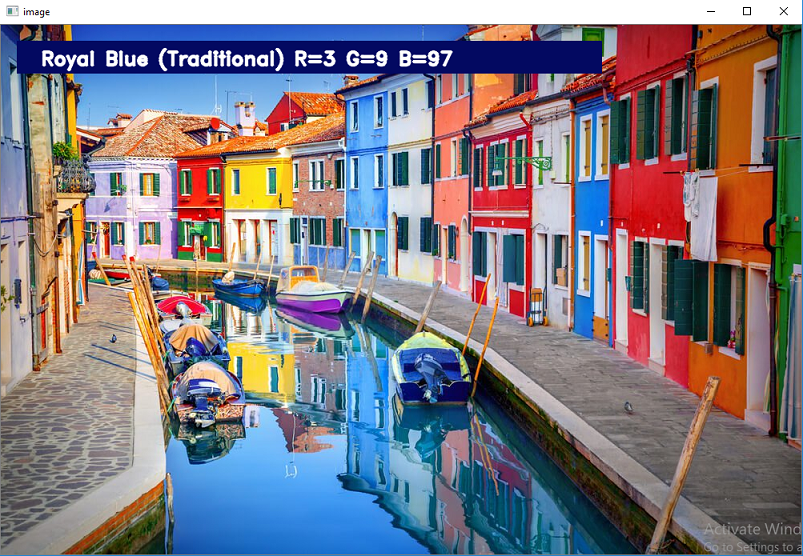
Using the cv2.imshow() function, we draw the image on the window. When the user double clicks the window, we draw a rectangle and get the color name to draw text on the window using cv2.rectangle and cv2.putText() functions.
while(1):
    cv2.imshow("image",img)
    if (clicked):
        #cv2.rectangle(image, startpoint, endpoint, color, thickness) -1 thickness fills rectangle entirely
        cv2.rectangle(img,(20,20), (750,60), (b,g,r), -1)

        #Creating text string to display ( Color name and RGB values )
        text = getColorName(r,g,b) + ' R='+ str(r) + ' G='+ str(g) + ' B='+ str(b)

        #cv2.putText(img,text,start,font(0-7), fontScale, color, thickness, lineType, (optional bottomLeft bool) )
        cv2.putText(img, text,(50,50),2,0.8,(255,255,255),2,cv2.LINE_AA)
  #For very light colours we will display text in black colour
        if(r+g+b>=600):
            cv2.putText(img, text,(50,50),2,0.8,(0,0,0),2,cv2.LINE_AA)

        clicked=False

    #Break the loop when user hits 'esc' key
    if cv2.waitKey(20) & 0xFF ==27:
        break

cv2.destroyAllWindows()
8. Run Python File
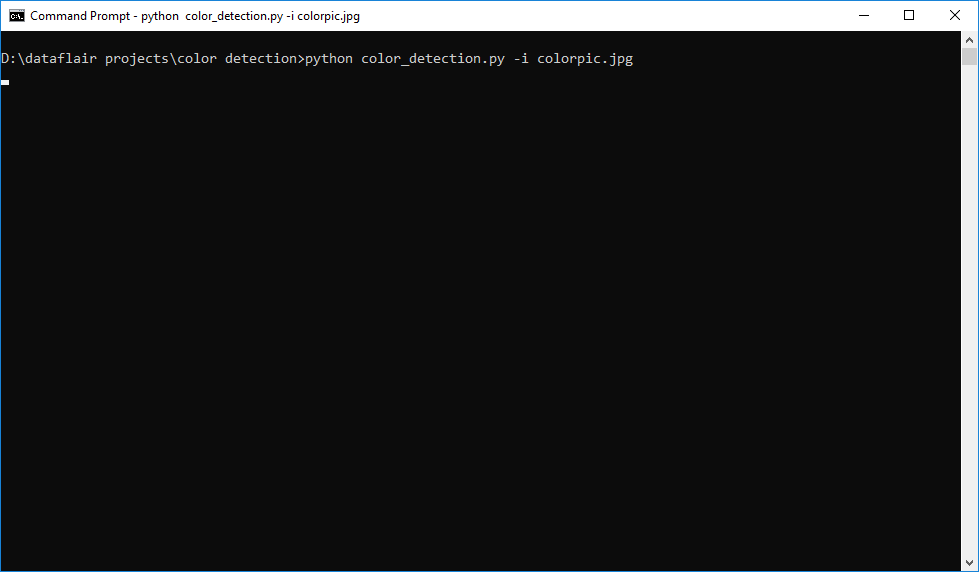
The beginner Python project is now complete, you can run the Python file from the command prompt. Make sure to give an image path using ‘-i’ argument. If the image is in another directory, then you need to give full path of the image:
python color_detection.py -i <add your image path here>
Screenshots:

Output:
Double click on the window to know the name of the pixel color
Summary
Detecting colors from images is useful in design, games, and tools. In this project, we click on any part of an image and it shows the name of the color. It’s built using Python, OpenCV, and a CSV file containing color names.
In this Python project with source code, we learned about colors and how we can extract color RGB values and the color name of a pixel. We learned how to handle events like double-clicking on the window and saw how to read CSV files with pandas and perform operations on data. This is used in numerous image editing and drawing apps.
This project is very useful for creative tools and color pickers. It teaches event handling, color processing, and using CSV data with OpenCV. It’s simple, useful, and perfect for beginners.
Want to prepare for your Python interview?
Practice 150+ Python Interview Questions & get hired as Python expert
Hope you enjoyed building this project and keep visiting for more cool projects.
Your opinion matters
Please write your valuable feedback about DataFlair on Google


Thank you very much .it is very usefull
its giving error.
Traceback (most recent call last):
File “color_detection.py”, line 1, in
import cv2
ModuleNotFoundError: No module named ‘cv2’
Hi Harish,
The following error occurs because your Python cannot find the module you are importing.
To download the OpenCV module, type this in the command line:
pip install opencv-python
it shows invalid syntax for “i” in the install
pip install opencv-python
Hey Saurabh,
The command pip install opencv-python is correct. Make sure you are using the latest version of pip and running the command in a new terminal.
hi in the second step i get some error like this
usage: ipykernel_launcher.py [-h] -i IMAGE
ipykernel_launcher.py: error: the following arguments are required: -i/–image
can you plz help me to solve this plzzzzz
The code is not working it shows error arguments required
In the second step, we have added an argument so that we can feed any image to the program through the command line. So to run the file, we have to provide -i argument along with the image path.
Syntax:
python color_detection.py -i
Example:
python color_detection.py -i “colorpic.jpg”
Hello Jagadish, I too Faced the same problem but I could resolve it.
Simply follow these steps
if you have successfully installed opencv,pandas,numpy,argparse mentioned above
1.Open command prompt
2.paste this code cd C:\Users\karthik\Music\python-project-color-detection(it’s my path)
You paste your folder location.
3.paste this code python color_detection.py -i “colorpic.jpg”
that’s all you need to do
Hi jagadish , I too faced the same problem but I could resolve It,
Just follow these 3 steps if you have successfully installed all the Prerequisites.
1.Open command prompt
2.paste this code cd C:\Users\azeem\Music\python-project-color-detection
(This is where I have the folder) You paste your folder location.
3.paste this code python color_detection.py -i “colorpic.jpg”
Can you send me machine learning project
Hi Abusad,
Refer to this Python Machine Learning Project on Detecting Parkinson’s Disease. It’s an interesting project.
it is because you dont have a opencv installed or it is not detected by IDLE. check some blog on OpenCV installation.
it is very fine.
how to use like this but choose area instead of point?
Hi Redhwan,
To determine the color we only need one point. In an area, there can be more than one color. So you can first get the coordinates of the area and predict color on each pixel with a loop. As a result, you can display only the unique colors.
I am getting no error the image window is opening but on clicking mouse nothing appears, no rectangle containing color information.
Hi Aryaman,
Please provide us the link of your full source code so that we can look into where the problem is.
Hello,
I get below error. Please help
C:\Users\vr42797.IND\PycharmProjects\techbeamers\venv\Scripts\python.exe C:/Users/vr42797.IND/PycharmProjects/data_flair/python-project-color-detection/color_detection.py -i C:\Users\vr42797.IND\PycharmProjects\data_flair\python-project-color-detection
Traceback (most recent call last):
File “C:/Users/vr42797.IND/PycharmProjects/data_flair/python-project-color-detection/color_detection.py”, line 50, in
cv2.imshow(“image”,img)
cv2.error: OpenCV(4.1.2) C:\projects\opencv-python\opencv\modules\highgui\src\window.cpp:376: error: (-215:Assertion failed) size.width>0 && size.height>0 in function ‘cv::imshow’
Hi Vidyesh,
When running the file, you have to provide the full path of the image along with its name. You are only providing the path to your project folder. So you can fix this error by adding the image name.
For example – python ../project folder/colour_detection.py -i “../project folder/colorpic.jpg”
Sir or Madam, want to ask, in this case what method are you using? Thank you very much
DataFlair Team,
Its working now when path with file name is specified.
Your code is amazing!!!
Just 75 lines of well-thought and organized code really does magic.
best regards,
Vidyesh
Hi Vidyesh,
We are glad you liked our code representation. Do share the Python project on social media with your friends and colleagues.
Hello..your project is perfect and working on ubuntu flawlessly but my issue is..The window size of image is so small..is there any way so that i can make that window bigger
will this work on windows operating system?
Hello Prabha,
Yes, this is platform independent so it will work on windows.
Hey Sravan,
The window size is dependent on the image you will open. So if you use a larger image then the window size will be big. Alternatively, You can use the cv2.resize() function to change the dimensions of the image and make it larger.
will this code run only on python 3.6.0 version or all the other versions?
Hey Prabha,
It will probably run on Python 3.3 and above versions. Because the functionalities we have used in our Python Colour Detection project are pretty much the same in all Python 3 latest versions.
AM GETTING THIS ERROR . PLEASE HELP
usage: ipykernel_launcher.py [-h] -i IMAGE
ipykernel_launcher.py: error: the following arguments are required: -i/–image
An exception has occurred, use %tb to see the full traceback.
Hello Prabha,
DataFlair team is here to help!!
To run the program we also have to provide the image path as an argument.
For example –
python color_detection.py -i
The error you are receiving is because you have not specified the image path.
#Creating argument parser to take image path from command line
ap = argparse.ArgumentParser()
ap.add_argument(‘–image’,’-i’, required=True, help=”Image Path”,default=”C:/Users/Stany/Desktop/2020/data flair/dataflair project/colorpic.jpg”)
args = vars(ap.parse_args())
img_path = args[‘image’]
Still same error:
usage: color_detection.py [-h] –image IMAGE
color_detection.py: error: the following arguments are required: –image/-i
An exception has occurred, use %tb to see the full traceback.
but where to specified image path….please tell me its urgent
An error is occuring saying that
Import error numpy core multiarray failed to import .can you plzz tell what to do?
I get an error of File “color_detection.py”, line 1, in
import cv2
ModuleNotFoundError: No module named ‘cv2
I was able to download the required libraries. How do I fix this?
Great! project at beginner level i have learned lot of thing..
But i am facing an error when I run the program ,please resolve it
error: OpenCV(4.1.2) C:\projects\opencv-python\opencv\modules\highgui\src\window.cpp:376: error: (-215:Assertion failed) size.width>0 && size.height>0 in function ‘cv::imshow’
AM GETTING THIS ERROR:
Traceback (most recent call last):
File “C:\Users\administrator\Desktop\color_detection.py”, line 1, in
import cv2
File “C:\Users\administrator\AppData\Local\Programs\Python\Python36-32\lib\site-packages\cv2\__init__.py”, line 3, in
from .cv2 import *
ImportError: DLL load failed: The specified module could not be found.
No module named ‘pandas’
sowing this error how to solve this
When run these it display error
Traceback (most recent call last):
File “C:\Users\root\Downloads\color_detection.py”, line 1, in
import cv2
ModuleNotFoundError: No module named ‘cv2’
C:\Users\root\Downloads>colorpic.jpg
it display error
‘pip’ is not recognized as an internal or external command,
operable program or batch file.
Traceback (most recent call last):
File “color_detection.py”, line 46, in
“execution_count”: null,
NameError: name ‘null’ is not defined
I am getting a very long error that is unrelated to any of the libraries imported
dyld: warning, LC_RPATH @executable_path/…QtWidgets being ignored in restricted program because of @executable_path (Codesign main executable with Library Validation to allow @ paths)
I have six errors like this with different Qt operations like GUI , Test etc.
at the end i ge this qt.qpa.plugin: Could not find the Qt platform plugin “cocoa” in “”
This application failed to start because no Qt platform plugin could be initialized. Reinstalling the application may fix this problem.
I am not really sure how to fix this and what seems to be causing the issue. I am pretty new to programming so help is appreciated thank you!
which algorithm used in color detection???
code is running for me, but click event is not working, tried to print the clicked event but could not see the output. in short double click is not working when clicking on image.
cv2.EVENT_LBUTTONDBLCLK event is not wokring for me
am getting always image,img_path is not defined at argparse code.could you kindly find the answer and post here.
thanking you .
Thankyou so much #Data-flair team. Finally I could execute the project..
A small help needed:
Whenever I tried giving new image as input it’s getting too much scaled (zoom), How to get Image fit to window…
Please reply…
same issue can you help
Traceback (most recent call last):
File “G:\AI\projects\color_detection\col_det.py”, line 15, in
cv2.setMouseCallback(‘image’,draw_function)
NameError: name ‘draw_function’ is not defined
Traceback (most recent call last):
File “G:\AI\projects\color_detection\col_det.py”, line 15, in
cv2.setMouseCallback(‘image’,draw_function)
NameError: name ‘draw_function’ is not defined
please help
I’m getting this error. please help.
usage: ipykernel_launcher.py [-h] -i I
ipykernel_launcher.py: error: the following arguments are required: -i
An exception has occurred, use %tb to see the full traceback.
SystemExit: 2
thank’s its works