Calculator Program in Python – Python Calculator Project
Master Python with 70+ Hands-on Projects and Get Job-ready - Learn Python
NWork on Python Calculator Project and get ready for a boost in your career
The calculator is one application that we all use in our day to day lives. If you are trying to get your hands dirty with programming in python, Calculator is a project which is easy and useful at the same time. Today, we are going to build a Python Calculator using Tkinter with easy to understand steps.
What is Tkinter?
Python offers various utilities to design the GUI wiz Graphical User Interface, and one such utility is Tkinter which is most commonly used. It is indeed one of the fastest and easiest ways to build GUI application. Moreover, Tkinter is cross-platform, hence the same code works on macOS, Windows, and Linux.
Python Calculator Project
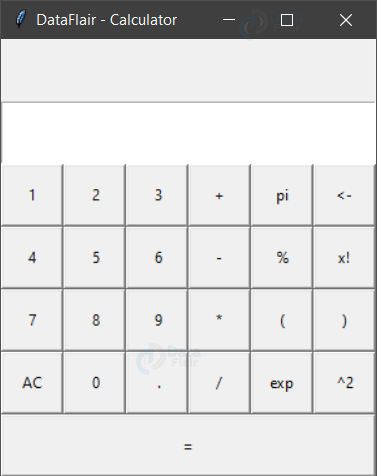
The python calculator which we are going to build will look something like this:
Download Python Calculator Project:
Before proceeding ahead, please download the source code of calculator program in Python: Python Calculator Project
Step 1: Importing the necessary modules
To use the Tkinter we need to import the Tkinter module. We are also going to import the function factorial from math module.
Code:
from tkinter import *
import parser
from math import factorial
Step 2: Making a window for our calculator
Now we are going to draft the window for our calculator which will accommodate the buttons.
Code:
root = Tk()
root.title('DataFlair - Calculator')
root.mainloop()
Explanation:
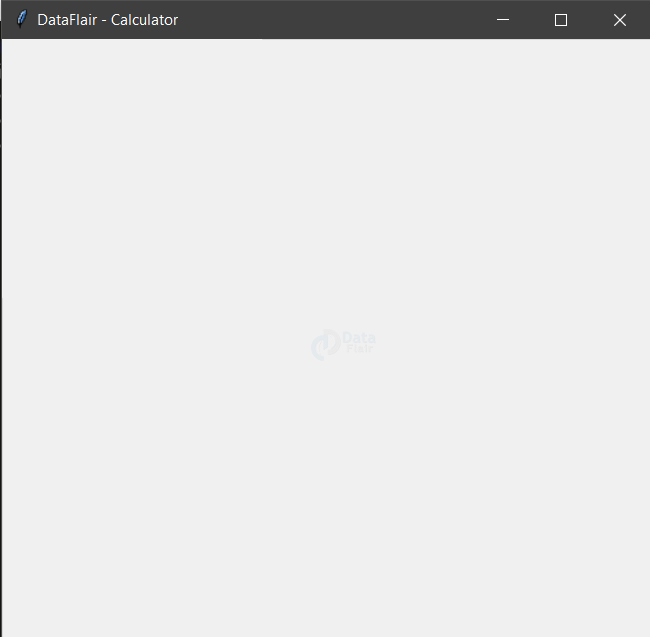
The above code sets the title of python calculator window as ‘DataFlair – Calculator’. When you run the above code, you will get a window like this.
Output:
Step 3: Designing the buttons
Now let’s quickly design the buttons for our calculator and put them on our application window.
Code:
#adding the input field
display = Entry(root)
display.grid(row=1,columnspan=6,sticky=N+E+W+S)

#Code to add buttons to the Calculator
Button(root,text="1",command = lambda :get_variables(1)).grid(row=2,column=0, sticky=N+S+E+W)
Button(root,text=" 2",command = lambda :get_variables(2)).grid(row=2,column=1, sticky=N+S+E+W)
Button(root,text=" 3",command = lambda :get_variables(3)).grid(row=2,column=2, sticky=N+S+E+W)

Button(root,text="4",command = lambda :get_variables(4)).grid(row=3,column=0, sticky=N+S+E+W)
Button(root,text=" 5",command = lambda :get_variables(5)).grid(row=3,column=1, sticky=N+S+E+W)
Button(root,text=" 6",command = lambda :get_variables(6)).grid(row=3,column=2, sticky=N+S+E+W)

Button(root,text="7",command = lambda :get_variables(7)).grid(row=4,column=0, sticky=N+S+E+W)
Button(root,text=" 8",command = lambda :get_variables(8)).grid(row=4,column=1, sticky=N+S+E+W)
Button(root,text=" 9",command = lambda :get_variables(9)).grid(row=4,column=2, sticky=N+S+E+W)

#adding other buttons to the calculator
Button(root,text="AC",command=lambda :clear_all()).grid(row=5,column=0, sticky=N+S+E+W)
Button(root,text=" 0",command = lambda :get_variables(0)).grid(row=5,column=1, sticky=N+S+E+W)
Button(root,text=" .",command=lambda :get_variables(".")).grid(row=5, column=2, sticky=N+S+E+W)


Button(root,text="+",command= lambda :get_operation("+")).grid(row=2,column=3, sticky=N+S+E+W)
Button(root,text="-",command= lambda :get_operation("-")).grid(row=3,column=3, sticky=N+S+E+W)
Button(root,text="*",command= lambda :get_operation("*")).grid(row=4,column=3, sticky=N+S+E+W)
Button(root,text="/",command= lambda :get_operation("/")).grid(row=5,column=3, sticky=N+S+E+W)

# adding new operations
Button(root,text="pi",command= lambda :get_operation("*3.14")).grid(row=2,column=4, sticky=N+S+E+W)
Button(root,text="%",command= lambda :get_operation("%")).grid(row=3,column=4, sticky=N+S+E+W)
Button(root,text="(",command= lambda :get_operation("(")).grid(row=4,column=4, sticky=N+S+E+W)
Button(root,text="exp",command= lambda :get_operation("**")).grid(row=5,column=4, sticky=N+S+E+W)

Button(root,text="<-",command= lambda :undo()).grid(row=2,column=5, sticky=N+S+E+W)
Button(root,text="x!", command= lambda: fact()).grid(row=3,column=5, sticky=N+S+E+W)
Button(root,text=")",command= lambda :get_operation(")")).grid(row=4,column=5, sticky=N+S+E+W)
Button(root,text="^2",command= lambda :get_operation("**2")).grid(row=5,column=5, sticky=N+S+E+W)
Button(root,text="^2",command= lambda :get_operation("**2")).grid(row=5,column=5, sticky=N+S+E+W)
Button(root,text="=",command= lambda :calculate()).grid(columnspan=6, sticky=N+S+E+W)
Explanation:
In this calculator program in python, the “Entry” function helps in making a text input field and we use .grid() method to define the positioning associated with the button or input field. We use the button method to display a button on our application window.
- root – the name with which we refer to our window
- text – text to be displayed on the button
- row – row index of the grid
- column – column index of the grid
- columnspan – spans or combines the number of columns
- sticky – If the resulting cell is larger than the widget then sticky defines how to expand the widget. The combination of constants used S, N, E, and W, or NW, NE, SW, and SE are analogous to the directions in compass. N+E+W+S means that the widget should be expanded in all directions
When you run the above code, you will get calculator output like this.
NOTE:
If you have noticed an error such as no function get_variable() found, then do not worry. We are just defining an action function associated with each button. Since we have just called and not declared them yet hence the error. Now, lets defined those functions.
To connect the digit button to the get_variable() function, we use the “command” parameter. Here we pass ‘1’ as an argument to the get_variable() function when button ‘1’ is pressed.
Step 4: Mapping the buttons to their functionalities
Mapping the digits
Code:
# i keeps the track of current position on the input text field
i = 0
# Receives the digit as parameter and display it on the input field
def get_variables(num):
    global i
    display.insert(i,num)
    i+=1
Explanation:
The get_variable() function receives the digit as parameter. The digit is inserted to the input field with .insert() method with parameters ‘i’ and ‘num’. The global variable i is incremented each time to get updated with the position to insert the next digit or next operator.
- i – the position to insert the digit
- num – the digit
Mapping the operator buttons
Code:
def get_operation(operator):
    global i
    length = len(operator)
    display.insert(i,operator)
    i+=length
Explanation:
The get_operation() function receives the operator as a parameter which is then inserted to the text field at the ith position of python calculator.
Mapping the AC button
Code:
def clear_all():
    display.delete(0,END)
Explanation:
We use the .delete() method to remove characters in the text field. It accepts the start and end position as the parameter.
- 0 – start position
- END – end position
Mapping the undo button
Code:
def undo():
    entire_string = display.get()
    if len(entire_string):
        new_string = entire_string[:-1]
        clear_all()
        display.insert(0,new_string)
    else:
        clear_all()
        display.insert(0,"Error")
Explanation:
We use the .get() method to fetch the string present on the input field. If there is really a string present, we slice out the last character, clear the input field and push the new string back to the input field which does not contain the last character.
Mapping the ‘= ’ button
Code:
def calculate():
    entire_string = display.get()
    try:
        a = parser.expr(entire_string).compile()
        result = eval(a)
        clear_all()
        display.insert(0,result)
    except Exception:
        clear_all()
        display.insert(0,"Error")
Explanation:
We fetch the string present on the input field using the .get() method. Now we use the parse module to scan the string with the help of .expr() method which accepts the string as a parameter. We basically leave it to the parser to build an abstract syntax tree of the string which is evaluated using the eval() function.
Once we get the result, we push it to the input field after clearing it.
Mapping the factorial key
Code:
def fact():
    entire_string = display.get()
    try:
        result = factorial(int(entire_string))
        clear_all()
        display.insert(0,result)
    except Exception:
        clear_all()
        display.insert(0,"Error")
Explanation:
We fetch the string from the input field. We convert the string to type int and pass it to the factorial function which we imported in the beginning. After that we clear the input field and push the result to the input field. We deal with any exception by clearing the input field followed by pushing an error message on the input field.
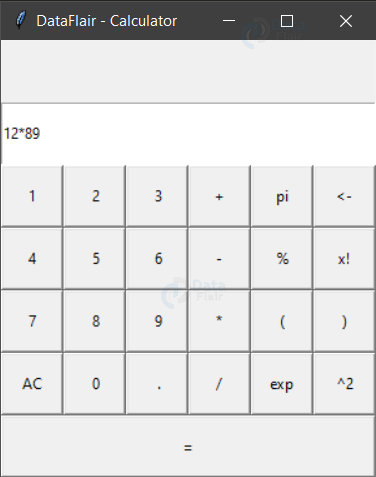
Final Screens of Python Calculator
When you execute this calculator program in python you will get following screens:
Summary
Hooray! We have successfully completed out python project of calculator using tkinter. This means that you have a better understanding of the way tkinter is used to build GUI applications. Apart from this, you can now take a step forward to extend the project by making a history tab which keeps track of the previous calculations or adding a background image to the calculator.
Make many more such projects to become the master of the technology Python which is the future of IT industry.
We work very hard to provide you quality material
Could you take 15 seconds and share your happy experience on Google


there could be some changes i would like to update to the above code…….
Please comment your recommendations, we will do the the needful.
i have problem with installing package of parser
Could you please explain what type of error you are encountering while installing the parser package in Python?
got a blank screen
It’s good for me
Why… I don´t get it… but it does NOT work. Something out of place… something missing ? I studied the amazing line of thinking the problem in your code, copied all and in this order AND… NOTHING ! Only appears the DOS window saying:
“.” is not recognized as a command or a batch file………
Well, nice coding, BUT…
I’ll try other projects, because I think your site as something special.
Amazing work, yours.
We shall see…
Thanks
Please send me the full project pdf
It’s a great article.
Helped me to learn Tkinter.
Hey..there.. How do I Increase the size of the digits..?
Thanks in Advance.
This code gives a blank window
can i get the synopsis for this project as soon as possible
I keep getting the following error message:
ModuleNotFoundError: No module named ‘parser’
Any suggestions?
Thanks.
me too get the same..any one found fix? Is this because this code does not support latest versions?
Hello, this happens because parser got remove from python latest versions, I don’t have idea of how to make it work without it though because I’m also new to python.
Hi bro , Button ‘%’ have error
Can you edit the code?
Thanks bro👍
It doesn’t work, it only shows error.
It doesn’t work, it only shows error.
It will be quiet good for me to understand that which type of error you are encountering?
In order to function this part of the code must be at the end “root.mainloop()”.
And also we need to change parser module with ast module, and correspondingly change code for “=” button:
def calculate():
entire_string = display.get()
try:
a = ast.parse(entire_string, mode=”eval”)
result = eval(compile(a, “”, mode=”eval”))
clear_all()
display.insert(0,result)
except Exception:
clear_all()
display.insert(0,”Error”)
And also we need to change parser module with ast module, and correspondingly change the code for “=” button:
def calculate():
entire_string = display.get()
try:
a = ast.parse(entire_string, mode=”eval”)
result = eval(compile(a, “”, mode=”eval”))
clear_all()
display.insert(0,result)
except Exception:
clear_all()
display.insert(0,”Error”)
thank you, respect
Good Job, but it is better to add a more detailed explanation because it is useful for absolute beginners like me
me too get the same..any one found fix? Is this because this code does not support latest versions?