Learn How to Create Address Book in Python
Python course with 57 real-time projects - Learn Python
A contact book or address book is an application that stores the information (name, address, contact no, etc.) of people that you save in it. You can also edit and delete the contact.
Address Book Python Project
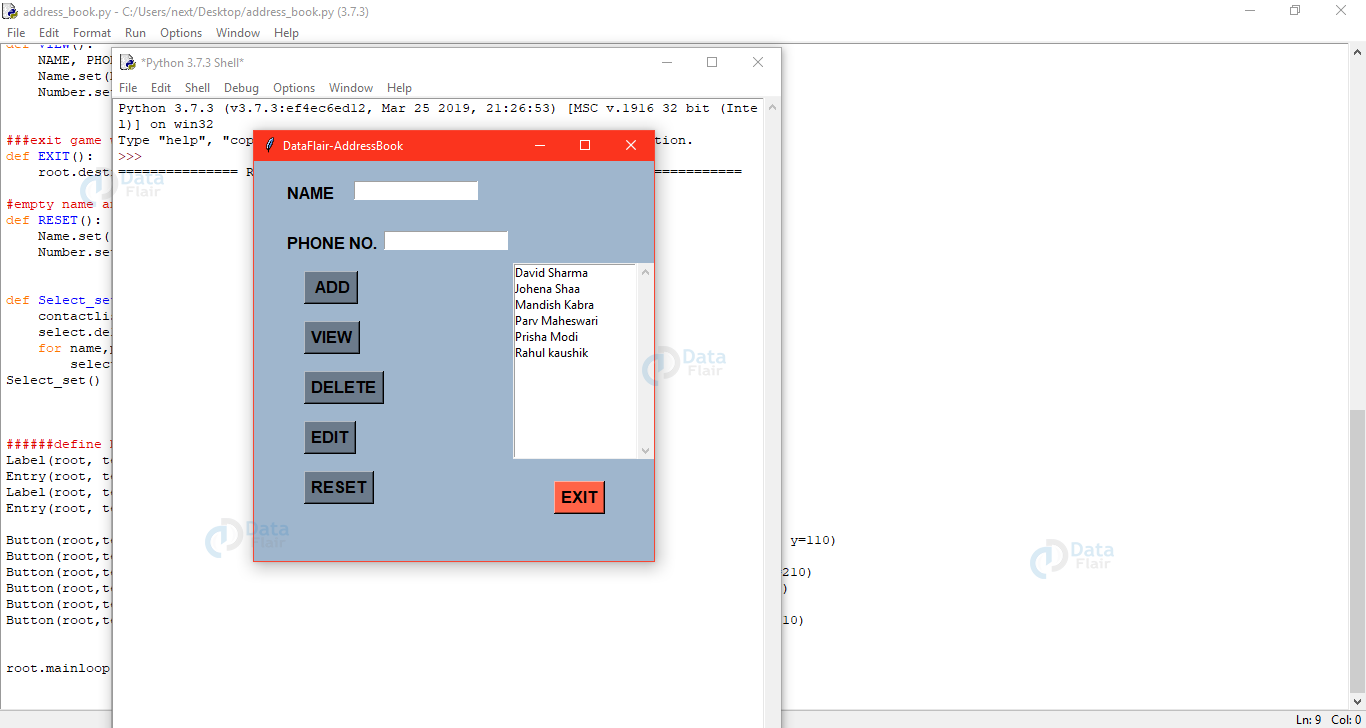
The objective of this project is to create an Address book using python in which the user can add a new contact, edit and delete existing contact and view all the contact.
In this python project for beginners, the user has to click on a button which functions the user wants to access eg – To edit a contact, the user has to first select a contact then click on view button then edit the contact and then click on edit button. To add a new contact user has to click on the add button.
Project prerequisite
We build the address book project with the help of Tkinter module and basic python concept.
Tkinter is a standard GUI library for rendering graphics
To install the library we use the pip install command in the command prompt:
pip install tkinter
Download Address Book Python Code
Please download the source code of address book project: Address book source code
Project File Structure
These are the step to build a contact book python project:
- Importing module
- Initializing window
- Define buttons
- Define functions
Let’s start building the project
1. Importing module
from tkinter import *
Technology is evolving rapidly!
Stay updated with DataFlair on WhatsApp!!
In this step we import libraries. Here, we need to import tkinter module
2. Initializing window
root = Tk()
root.geometry('400x400')
root.config(bg = 'SlateGray3')
root.resizable(0,0)
root.title('DataFlair-AddressBook')

contactlist = [
    ['Parv Maheswari',  '0176738493'],
    ['David Sharma',  '2684430000'],
    ['Mandish Kabra',   '4338354432'],
    ['Prisha Modi','6834552341'],
    ['Rahul kaushik',   '1234852689'],
    ['Johena Shaa' , '2119876543'],
    ]

Name = StringVar()
Number = StringVar()

frame = Frame(root)
frame.pack(side = RIGHT)

scroll = Scrollbar(frame, orient=VERTICAL)
select = Listbox(frame, yscrollcommand=scroll.set, height=12)
scroll.config (command=select.yview)
scroll.pack(side=RIGHT, fill=Y)
select.pack(side=LEFT,  fill=BOTH, expand=1)
- Tk() use to initialized tkinter
- geometry() sets the window width and height
- title() used to set window’s tiltle
- resizable(0,0) this command stop window to resize
- bg use to set the background color of the window
- Contacts’ information is stored in contactlist
- Frame is like a container that is used to organized widgets
- Here Scrollbar widget and Listbox widget is used to allow users to select from many options
3. Define functions
def Selected():
    return int(select.curselection()[0])

def AddContact():
    contactlist.append([Name.get(), Number.get()])
    Select_set()

def EDIT():
    contactlist[Selected()] = [Name.get(), Number.get()]
    Select_set()


def DELETE():
    del contactlist[Selected()]
    Select_set()

def VIEW():
    NAME, PHONE = contactlist[Selected()]
    Name.set(NAME)
    Number.set(PHONE)

def EXIT():
    root.destroy()

def RESET():
    Name.set('')
    Number.set('')

def Select_set() :
    contactlist.sort()
    select.delete(0,END)
    for name,phone in contactlist :
        select.insert (END, name)
Select_set()
- Selected() function used to return selected value
- Addcontact() function used to add new contact
- EDIT() function will edit existing contact
- DELETE() function will delete selected contact
- VIEW() function will view selected contact
- EXIT() used to destroy mainloop
- RESET() will set the name and number field to empty string
- Select_set() will sort the manage the contactlist and also used in other functions
4. Define buttons and labels
Label(root, text = 'NAME', font='arial 12 bold', bg = 'SlateGray3').place(x= 30, y=20)
Entry(root, textvariable = Name).place(x= 100, y=20)

Label(root, text = 'PHONE NO.', font='arial 12 bold',bg = 'SlateGray3').place(x= 30, y=70)
Entry(root, textvariable = Number).place(x= 130, y=70)

Button(root,text=" ADD", font='arial 12 bold',bg='SlateGray4', command = AddContact).place(x= 50, y=110)
Button(root,text="EDIT", font='arial 12 bold',bg='SlateGray4',command = EDIT).place(x= 50, y=260)

Button(root,text="DELETE", font='arial 12 bold',bg='SlateGray4',command = DELETE).place(x= 50, y=210)
Button(root,text="VIEW", font='arial 12 bold',bg='SlateGray4', command = VIEW).place(x= 50, y=160)

Button(root,text="EXIT", font='arial 12 bold',bg='tomato', command = EXIT).place(x= 300, y=320)
Button(root,text="RESET", font='arial 12 bold',bg='SlateGray4', command = RESET).place(x= 50, y=310)

root.mainloop()
- Label() widget used when we want to display text
- Entry() widget used when we want to create an input text field.
- Button() widget used to display button
- root is the name of our window
- text which display on the label as title of that label
- font in which form the text will be write
- textvariable used to retrieve the text to entry widget
- place() – place widgets at specific position
- command called the specific function when the button will clicked
Project Output
Summary
We successfully develop the Address book in python. We use tkinter library for rendering graphics. We use a random library to generate random choices.
We learn how to create buttons widget and also learn how to call the function using buttons. In this way, we created Address book project using python. I hope you enjoyed.
Did you know we work 24x7 to provide you best tutorials
Please encourage us - write a review on Google


This would be a lot better if you used a layout manager instead of absolute placement, which is way too hard to calculate, and used classes for your contacts. In addition, your use of all caps function names and button labels is not the conventional style. All caps usually means a constant, and functions are usually named in lowercase. The program fails if you click on View without selecting a name, and if you click on Add after viewing a name, it adds another copy of that name. I would use classes and a Mediator pattern to handle these problems, and disable the buttons to prevent this.
Can someone add login form for this project??
How do i precent adding blanks in address book
Plzzz provide the report of this project
The source code can be obtained by just clicking on the above mentioned download link.
Very very good course. Clear and professional. I’m very glad
How do i save contacts in dictionaries plz help
Enter the name of the person then simply click on add button, your contact will be saved.