Deep Learning Project – Handwritten Digit Recognition using Python
Machine Learning courses with 100+ Real-time projects Start Now!!
Python Deep Learning Project
To make machines more intelligent, the developers are diving into machine learning and deep learning techniques. A human learns to perform a task by practicing and repeating it again and again so that it memorizes how to perform the tasks. Then the neurons in his brain automatically trigger and they can quickly perform the task they have learned. Deep learning is also very similar to this. It uses different types of neural network architectures for different types of problems. For example – object recognition, image and sound classification, object detection, image segmentation, etc.
This is the 11th project in the DataFlair’s series of 20 Python projects. I suggest you to bookmark the previous projects:
- Fake News Detection Python Project
- Parkinson’s Disease Detection Python Project
- Color Detection Python Project
- Speech Emotion Recognition Python Project
- Breast Cancer Classification Python Project
- Age and Gender Detection Python Project
- Handwritten Digit Recognition Python Project
- Chatbot Python Project
- Driver Drowsiness Detection Python Project
- Traffic Signs Recognition Python Project
- Image Caption Generator Python Project
What is Handwritten Digit Recognition?
The handwritten digit recognition is the ability of computers to recognize human handwritten digits. It is a hard task for the machine because handwritten digits are not perfect and can be made with many different flavors. The handwritten digit recognition is the solution to this problem which uses the image of a digit and recognizes the digit present in the image.
About the Python Deep Learning Project
In this article, we are going to implement a handwritten digit recognition app using the MNIST dataset. We will be using a special type of deep neural network that is Convolutional Neural Networks. In the end, we are going to build a GUI in which you can draw the digit and recognize it straight away.
Prerequisites
The interesting Python project requires you to have basic knowledge of Python programming, deep learning with Keras library and the Tkinter library for building GUI.
Install the necessary libraries for this project using this command:
pip install numpy, tensorflow, keras, pillow,
The MNIST dataset
This is probably one of the most popular datasets among machine learning and deep learning enthusiasts. The MNIST dataset contains 60,000 training images of handwritten digits from zero to nine and 10,000 images for testing. So, the MNIST dataset has 10 different classes. The handwritten digits images are represented as a 28×28 matrix where each cell contains grayscale pixel value.
Download the full source code for the project
Building Python Deep Learning Project on Handwritten Digit Recognition
Below are the steps to implement the handwritten digit recognition project:
1. Import the libraries and load the dataset
First, we are going to import all the modules that we are going to need for training our model. The Keras library already contains some datasets and MNIST is one of them. So we can easily import the dataset and start working with it. The mnist.load_data() method returns us the training data, its labels and also the testing data and its labels.
import keras
from keras.datasets import mnist
from keras.models import Sequential
from keras.layers import Dense, Dropout, Flatten
from keras.layers import Conv2D, MaxPooling2D
from keras import backend as K

# the data, split between train and test sets
(x_train, y_train), (x_test, y_test) = mnist.load_data()

print(x_train.shape, y_train.shape)
2. Preprocess the data
The image data cannot be fed directly into the model so we need to perform some operations and process the data to make it ready for our neural network. The dimension of the training data is (60000,28,28). The CNN model will require one more dimension so we reshape the matrix to shape (60000,28,28,1).
x_train = x_train.reshape(x_train.shape[0], 28, 28, 1)
x_test = x_test.reshape(x_test.shape[0], 28, 28, 1)
input_shape = (28, 28, 1)

# convert class vectors to binary class matrices
y_train = keras.utils.to_categorical(y_train, num_classes)
y_test = keras.utils.to_categorical(y_test, num_classes)

x_train = x_train.astype('float32')
x_test = x_test.astype('float32')
x_train /= 255
x_test /= 255
print('x_train shape:', x_train.shape)
print(x_train.shape[0], 'train samples')
print(x_test.shape[0], 'test samples')
3. Create the model
Now we will create our CNN model in Python data science project. A CNN model generally consists of convolutional and pooling layers. It works better for data that are represented as grid structures, this is the reason why CNN works well for image classification problems. The dropout layer is used to deactivate some of the neurons and while training, it reduces offer fitting of the model. We will then compile the model with the Adadelta optimizer.
batch_size = 128
num_classes = 10
epochs = 10

model = Sequential()
model.add(Conv2D(32, kernel_size=(3, 3),activation='relu',input_shape=input_shape))
model.add(Conv2D(64, (3, 3), activation='relu'))
model.add(MaxPooling2D(pool_size=(2, 2)))
model.add(Dropout(0.25))
model.add(Flatten())
model.add(Dense(256, activation='relu'))
model.add(Dropout(0.5))
model.add(Dense(num_classes, activation='softmax'))

model.compile(loss=keras.losses.categorical_crossentropy,optimizer=keras.optimizers.Adadelta(),metrics=['accuracy'])
4. Train the model
The model.fit() function of Keras will start the training of the model. It takes the training data, validation data, epochs, and batch size.
It takes some time to train the model. After training, we save the weights and model definition in the ‘mnist.h5’ file.
hist = model.fit(x_train, y_train,batch_size=batch_size,epochs=epochs,verbose=1,validation_data=(x_test, y_test))
print("The model has successfully trained")

model.save('mnist.h5')
print("Saving the model as mnist.h5")
5. Evaluate the model
We have 10,000 images in our dataset which will be used to evaluate how good our model works. The testing data was not involved in the training of the data therefore, it is new data for our model. The MNIST dataset is well balanced so we can get around 99% accuracy.
score = model.evaluate(x_test, y_test, verbose=0)
print('Test loss:', score[0])
print('Test accuracy:', score[1])
6. Create GUI to predict digits
Now for the GUI, we have created a new file in which we build an interactive window to draw digits on canvas and with a button, we can recognize the digit. The Tkinter library comes in the Python standard library. We have created a function predict_digit() that takes the image as input and then uses the trained model to predict the digit.
Then we create the App class which is responsible for building the GUI for our app. We create a canvas where we can draw by capturing the mouse event and with a button, we trigger the predict_digit() function and display the results.
Here’s the full code for our gui_digit_recognizer.py file:
from keras.models import load_model
from tkinter import *
import tkinter as tk
import win32gui
from PIL import ImageGrab, Image
import numpy as np

model = load_model('mnist.h5')

def predict_digit(img):
    #resize image to 28x28 pixels
    img = img.resize((28,28))
    #convert rgb to grayscale
    img = img.convert('L')
    img = np.array(img)
    #reshaping to support our model input and normalizing
    img = img.reshape(1,28,28,1)
    img = img/255.0
    #predicting the class
    res = model.predict([img])[0]
    return np.argmax(res), max(res)

class App(tk.Tk):
    def __init__(self):
        tk.Tk.__init__(self)

        self.x = self.y = 0

        # Creating elements
        self.canvas = tk.Canvas(self, width=300, height=300, bg = "white", cursor="cross")
        self.label = tk.Label(self, text="Thinking..", font=("Helvetica", 48))
        self.classify_btn = tk.Button(self, text = "Recognise", command =         self.classify_handwriting)
        self.button_clear = tk.Button(self, text = "Clear", command = self.clear_all)

        # Grid structure
        self.canvas.grid(row=0, column=0, pady=2, sticky=W, )
        self.label.grid(row=0, column=1,pady=2, padx=2)
        self.classify_btn.grid(row=1, column=1, pady=2, padx=2)
        self.button_clear.grid(row=1, column=0, pady=2)

        #self.canvas.bind("<Motion>", self.start_pos)
        self.canvas.bind("<B1-Motion>", self.draw_lines)

    def clear_all(self):
        self.canvas.delete("all")

    def classify_handwriting(self):
        HWND = self.canvas.winfo_id() # get the handle of the canvas
        rect = win32gui.GetWindowRect(HWND) # get the coordinate of the canvas
        im = ImageGrab.grab(rect)

        digit, acc = predict_digit(im)
        self.label.configure(text= str(digit)+', '+ str(int(acc*100))+'%')

    def draw_lines(self, event):
        self.x = event.x
        self.y = event.y
        r=8
        self.canvas.create_oval(self.x-r, self.y-r, self.x + r, self.y + r, fill='black')

app = App()
mainloop()
Screenshots:
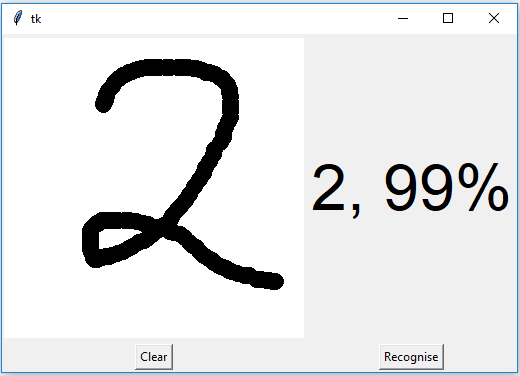
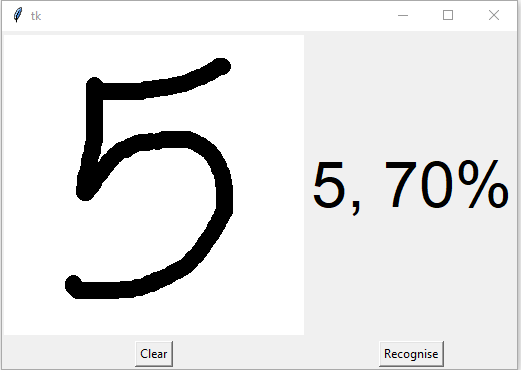
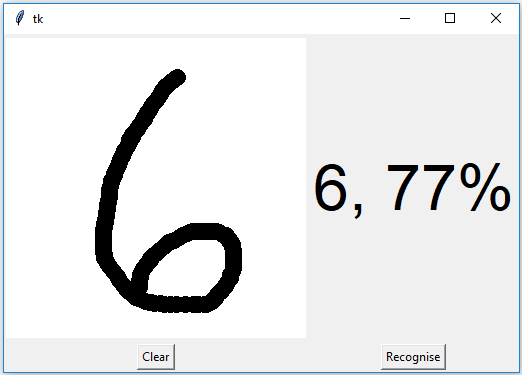
Summary
In this article, we have successfully built a Python deep learning project on handwritten digit recognition app. We have built and trained the Convolutional neural network which is very effective for image classification purposes. Later on, we build the GUI where we draw a digit on the canvas then we classify the digit and show the results.
Want to get hired as a Python expert? Practice the 150+ Python Interview Questions by DataFlair
Do share your views regarding the intermediate Python project in the comment section.
We work very hard to provide you quality material
Could you take 15 seconds and share your happy experience on Google


Hy which create database
Traceback (most recent call last):
File “C:\Users\Asus\PycharmProjects\pythonProject3\app.py”, line 19, in
y_train = keras.utils.to_categorical(y_train, num_classes)
NameError: name ‘num_classes’ is not defined
put default value for num_classes 10
sir i have tried your program but its showing error it and the error is num_classes is not define
at ur first line num_classes=0
thats it
beta thoda class me dhyan diya karo na tooooo
Traceback (most recent call last):
File “C:\Users\Asus\PycharmProjects\pythonProject3\app.py”, line 19, in
y_train = keras.utils.to_categorical(y_train, num_classes)
NameError: name ‘num_classes’ is not defined
what to do sir now please tell me fast
Traceback (most recent call last):
File “C:\Users\Asus\PycharmProjects\pythonProject3\app.py”, line 19, in
y_train = keras.utils.to_categorical(y_train, num_classes)
NameError: name ‘num_classes’ is not defined
Step 3 comes bevor step 2. The Declaration for ‘num_classes’
I have implemented the code but the model is predicting 2 for all the digits
yes exactly same for me also , its even displaying close value
even i am getting the same issue its showing 2 for all type of input
change
img = img/255.0
to
img = (255-img)/255.0
change img = img/255.0 to img = (255-img)/255.0
what is this “img”? x_train? x_test?
hey what are the technology that are used for this project
Test loss: 2.3086345195770264
Test accuracy: 0.1088000014424324
why accuracy is 0.10 for me 🙂
sir I tired this n got no module named win32gui error ..please help
try pip install pywin32
Ilyas
where we ahve to try this project is google colab ok with this
I tried this, and I’m not getting very accurate results. For example, in the GUI, I draw a 1 and it interprets it as a 0. Or I draw a 2 and it thinks it’s a 5. I also noticed that after running the program, there is no file with the filename “mnist.h5”. When the system executes the line model.save(“mnist.h5”), shouldn’t it create that file in the working directory? And then gui_digit_recognizer.py reads that file? If anyone can shed light on this I would appreciate it.
sir the accuracy of the number prediction is very bad. how do i solve it ?
Set the EPOCHS
set epochs 50
good
Tried to run and it says, no module named win32gui error. Where is win32gui ? Thanks.
Where is
try pip install pywin32
Copied and pasted, and got – Test loss: 0.741
Test accuracy: 0.8409
But when I run it it keeps saying 5, no matter the number drawn. Any ideas?
prediction not correct how to improve?
ModuleNotFoundError: No module named ‘win32gui’
can i get complete folder
can i get complete folder of project
Download the full source code for the project TRY FIND IT ON THE PAGE AND CLICK IT
be dobajennn
be dobajennnsz
I run the sample code but it’s not working well.
SET EPOCH 50-100AND RETRAIN THE MNIST
nil…..here