Real-Time Face Mask Detector with Python, OpenCV, Keras
Machine Learning courses with 100+ Real-time projects Start Now!!
During pandemic COVID-19, WHO has made wearing masks compulsory to protect against this deadly virus. In this tutorial we will develop a machine learning project – Real-time Face Mask Detector with Python.
Real-Time Face Mask Detector with Python
We will build a real-time system to detect whether the person on the webcam is wearing a mask or not. We will train the face mask detector model using Keras and OpenCV.
Download the Dataset
The dataset we are working on consists of 1376 images with 690 images containing images of people wearing masks and 686 images with people without masks.
Download the dataset: Face Mask Dataset
Download the Project Code
Before proceeding ahead, please download the project source code: Face Mask Detector Project
Install Jupyter Notebook
In this machine learning project for beginners, we will use Jupyter Notebook for the development. Let’s see steps for the installation and configuration of Jupyter Notebook.
Using pip python package manager you can install Jupyter notebook:
pip3 install notebook
And that’s it, you have installed jupyter notebook
After installing Jupyter notebook you can run the notebook server. To run the notebook, open terminal and type:
jupyter notebook
It will start the notebook server at http://localhost:8888
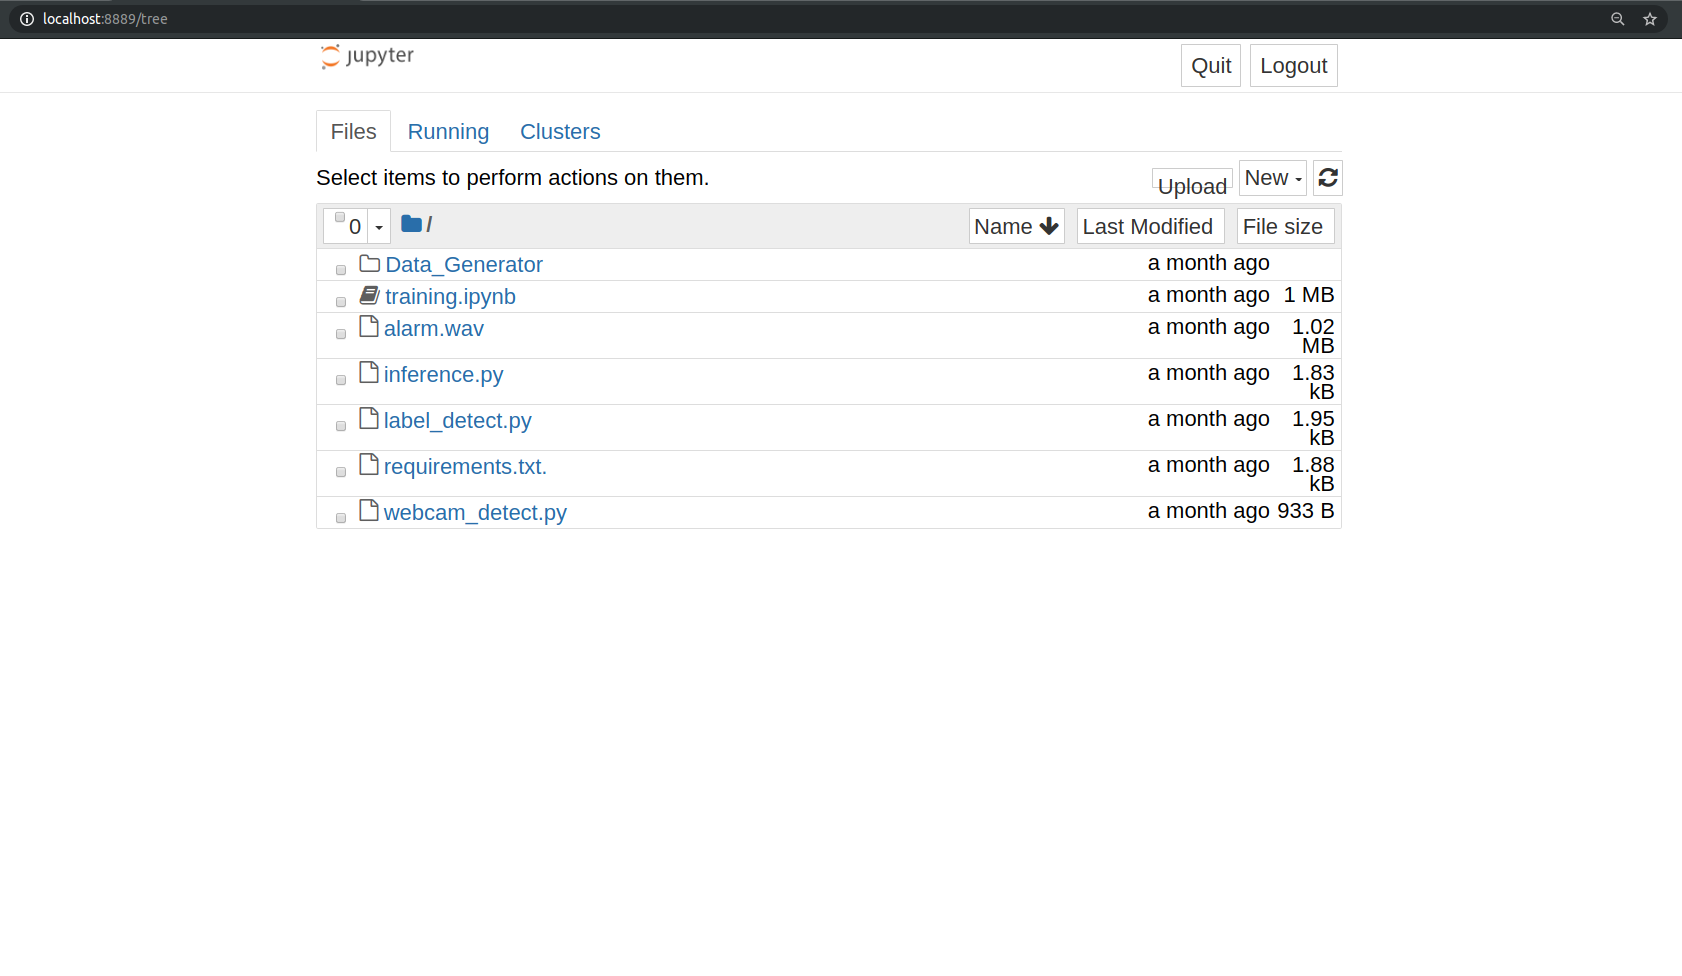
To create a new project click on the “new” tab on the right panel, it will generate a new .ipynb file.
Create a new file and write the code which you have downloaded
Let’s dive into the code for face mask detector project:
We are going to build this project in two parts. In the first part, we will write a python script using Keras to train face mask detector model. In the second part, we test the results in a real-time webcam using OpenCV.
Make a python file train.py to write the code for training the neural network on our dataset. Follow the steps:
1. Imports:
Import all the libraries and modules required.
from keras.optimizers import RMSprop
from keras.preprocessing.image import ImageDataGenerator
import cv2
from keras.models import Sequential
from keras.layers import Conv2D, Input, ZeroPadding2D, BatchNormalization, Activation, MaxPooling2D, Flatten, Dense,Dropout
from keras.models import Model, load_model
from keras.callbacks import TensorBoard, ModelCheckpoint
from sklearn.model_selection import train_test_split
from sklearn.metrics import f1_score
from sklearn.utils import shuffle
import imutils
import numpy as np
2. Build the neural network:
This convolution network consists of two pairs of Conv and MaxPool layers to extract features from the dataset. Which is then followed by a Flatten and Dropout layer to convert the data in 1D and ensure overfitting.
And then two Dense layers for classification.
model = Sequential([
    Conv2D(100, (3,3), activation='relu', input_shape=(150, 150, 3)),
    MaxPooling2D(2,2),

    Conv2D(100, (3,3), activation='relu'),
    MaxPooling2D(2,2),

    Flatten(),
    Dropout(0.5),
    Dense(50, activation='relu'),
    Dense(2, activation='softmax')
])
model.compile(optimizer='adam', loss='binary_crossentropy', metrics=['acc'])
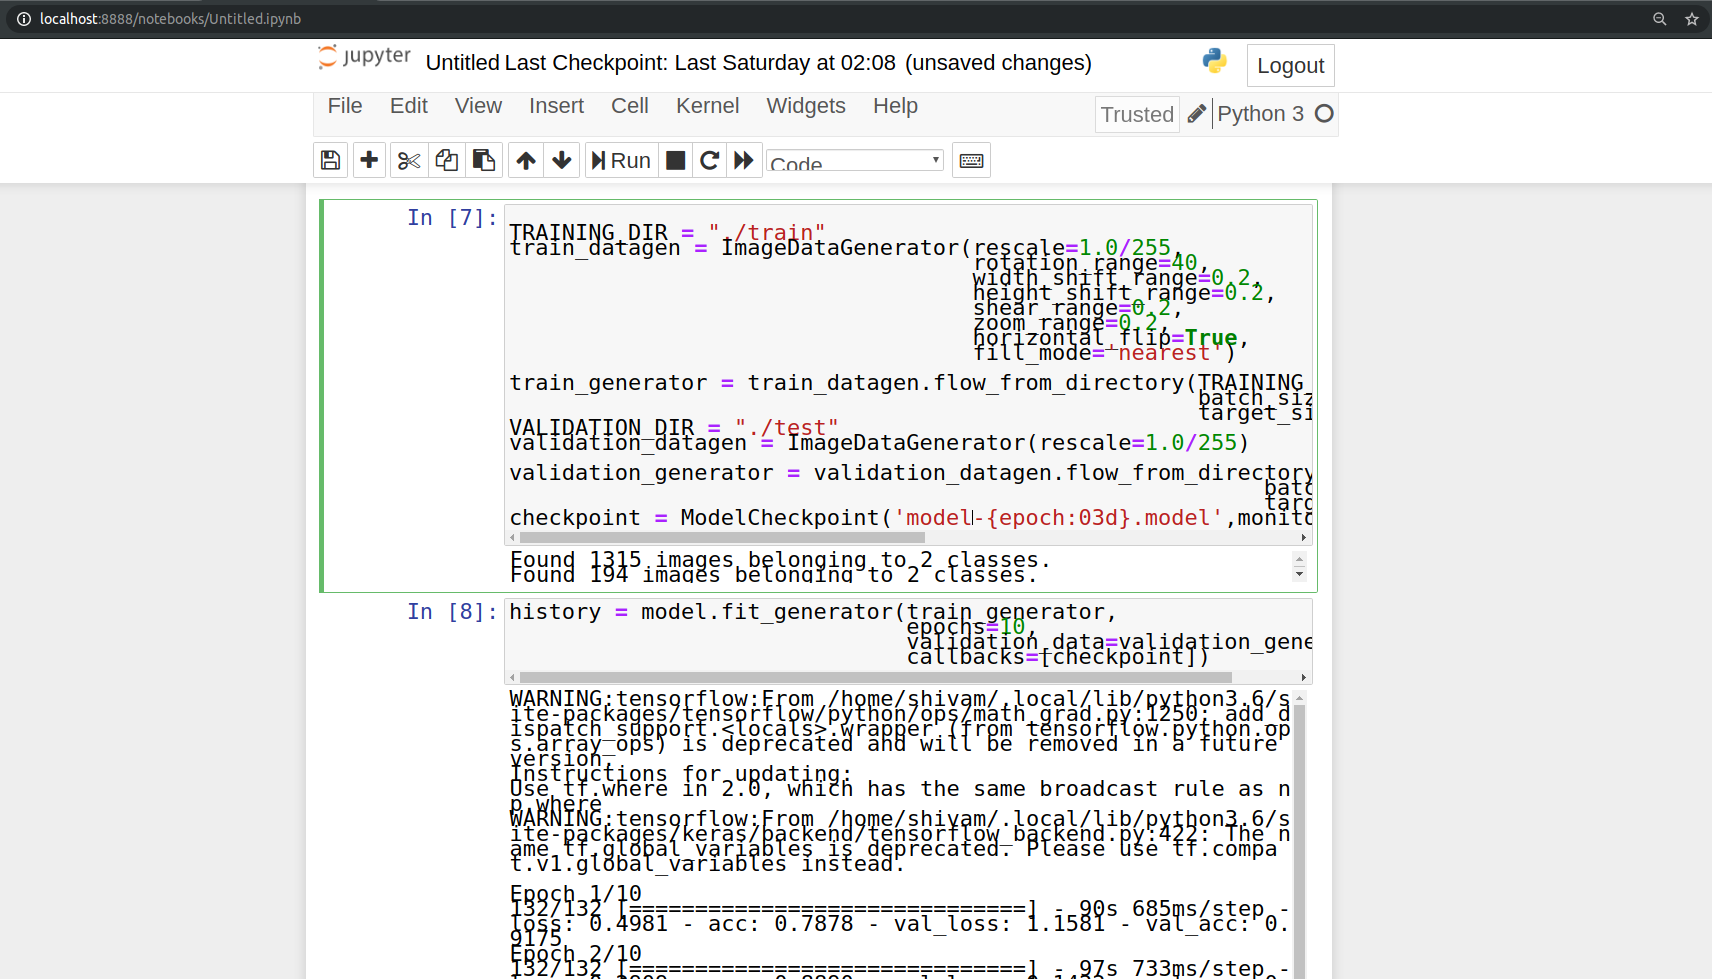
3. Image Data Generation/Augmentation:
TRAINING_DIR = "./train"
train_datagen = ImageDataGenerator(rescale=1.0/255,
                                   rotation_range=40,
                                   width_shift_range=0.2,
                                   height_shift_range=0.2,
                                   shear_range=0.2,
                                   zoom_range=0.2,
                                   horizontal_flip=True,
                                   fill_mode='nearest')

train_generator = train_datagen.flow_from_directory(TRAINING_DIR,
                                                    batch_size=10,
                                                    target_size=(150, 150))
VALIDATION_DIR = "./test"
validation_datagen = ImageDataGenerator(rescale=1.0/255)

validation_generator = validation_datagen.flow_from_directory(VALIDATION_DIR,
                                                         batch_size=10,
                                                         target_size=(150, 150))
4. Initialize a callback checkpoint to keep saving best model after each epoch while training:
checkpoint = ModelCheckpoint('model2-{epoch:03d}.model',monitor='val_loss',verbose=0,save_best_only=True,mode='auto')
5. Train the model:
history = model.fit_generator(train_generator,
                              epochs=10,
                              validation_data=validation_generator,
                              callbacks=[checkpoint])
Now we will test the results of face mask detector model using OpenCV.
Make a python file “test.py” and paste the below script.
import cv2
import numpy as np
from keras.models import load_model
model=load_model("./model-010.h5")

results={0:'without mask',1:'mask'}
GR_dict={0:(0,0,255),1:(0,255,0)}

rect_size = 4
cap = cv2.VideoCapture(0)


haarcascade = cv2.CascadeClassifier('/home/user_name/.local/lib/python3.6/site-packages/cv2/data/haarcascade_frontalface_default.xml')

while True:
    (rval, im) = cap.read()
    im=cv2.flip(im,1,1)


    rerect_size = cv2.resize(im, (im.shape[1] // rect_size, im.shape[0] // rect_size))
    faces = haarcascade.detectMultiScale(rerect_size)
    for f in faces:
        (x, y, w, h) = [v * rect_size for v in f]

        face_img = im[y:y+h, x:x+w]
        rerect_sized=cv2.resize(face_img,(150,150))
        normalized=rerect_sized/255.0
        reshaped=np.reshape(normalized,(1,150,150,3))
        reshaped = np.vstack([reshaped])
        result=model.predict(reshaped)


        label=np.argmax(result,axis=1)[0]

        cv2.rectangle(im,(x,y),(x+w,y+h),GR_dict[label],2)
        cv2.rectangle(im,(x,y-40),(x+w,y),GR_dict[label],-1)
        cv2.putText(im, results[label], (x, y-10),cv2.FONT_HERSHEY_SIMPLEX,0.8,(255,255,255),2)

    cv2.imshow('LIVE',   im)
    key = cv2.waitKey(10)

    if key == 27:
        break

cap.release()

cv2.destroyAllWindows()
Run the project and observe the model performance.
python3 test.py
Summary
After the COVID-19 pandemic, wearing a face mask became important. This project uses machine learning to detect if a person is wearing a mask or not in real-time. Using OpenCV, Keras, and a webcam, we can alert people if they are without a mask. This project is great for public safety systems.
In this project, we have developed a deep learning model for face mask detection using Python, Keras, and OpenCV. We developed the face mask detector model for detecting whether person is wearing a mask or not. We have trained the model using Keras with network architecture. Training the model is the first part of this project and testing using webcam using OpenCV is the second part.
This is a nice project for beginners to implement their learnings and gain expertise.
Your opinion matters
Please write your valuable feedback about DataFlair on Google


what is line code mean??? rerect_size = cv2.rerect_size(im, (im.shape[1] // rect_size, im.shape[0] // rect_size))
It is cv2.resize() to resize different im object in a specific dimension.
Hey there! I want to implement your technology in Turkey for commercial use. We can discuss about it if you send me an email.
what is ./model-010.h5/{saved_model.pbtxt|saved_model.pb}
Using ModelCheckpoint we are saving the best model and its weights are every 3 epochs. model-010.h5 specifies the model weights saved after 10th epoch. You can train the model further for more epochs.
2020-08-09 17:04:56.870378: W tensorflow/stream_executor/platform/default/dso_loader.cc:55] Could not load dynamic library ‘cudart64_101.dll’; dlerror: cudart64_101.dll not found
2020-08-09 17:04:56.881178: I tensorflow/stream_executor/cuda/cudart_stub.cc:29] Ignore above cudart dlerror if you do not have a GPU set up on your machine.
Traceback (most recent call last):
File “d:\Python\Projects\Face Mask Detector\faceDetect.py”, line 5, in
model = load_model(“/model-010.h5”)
File “C:\Python38\lib\site-packages\tensorflow\python\keras\saving\save.py”, line 189, in load_model
loader_impl.parse_saved_model(filepath)
File “C:\Python38\lib\site-packages\tensorflow\python\saved_model\loader_impl.py”, line 110, in parse_saved_model
raise IOError(“SavedModel file does not exist at: %s/{%s|%s}” %
OSError: SavedModel file does not exist at: /model-010.h5/{saved_model.pbtxt|saved_model.pb}
I am getting this error while loading the model
Traceback (most recent call last):
File “/Users/dushmantakumar/face-mask-detector-project/test.py”, line 4, in
model=load_model(“./model-010.h5”)
File “/Users/dushmantakumar/env/lib/python3.7/site-packages/tensorflow/python/keras/saving/save.py”, line 186, in load_model
loader_impl.parse_saved_model(filepath)
File “/Users/dushmantakumar/env/lib/python3.7/site-packages/tensorflow/python/saved_model/loader_impl.py”, line 113, in parse_saved_model
constants.SAVED_MODEL_FILENAME_PB))
OSError: SavedModel file does not exist at: ./model-010.h5/{saved_model.pbtxt|saved_model.pb}
what is the solution?
Did you get any solution? I am also facing the same problem.
i cant find model-010.h5 file in your downloads files where can i download it
or guide me to solve this problem
i enconter this error
OSError: Unable to open file (unable to open file: name = ‘./model-010.h5’, errno = 2, error message = ‘No such file or directory’, flags = 0, o_flags = 0)
tnx
I believe I am getting a similar error. Is model-10.h5 something that should already be created, or something we need to do?
My error:
File “C:\Users\user.name\AppData\Roaming\Python\Python38\site-packages\tensorflow\python\saved_model\loader_impl.py”, line 110, in parse_saved_model
raise IOError(“SavedModel file does not exist at: %s/{%s|%s}” %
OSError: SavedModel file does not exist at: ./model-010.h5/{saved_model.pbtxt|saved_model.pb}
Getting this error after using model.fit_generator
ValueError: Error when checking target: expected activation_12 to have shape (2,) but got array with shape (1,)
You need to use the h5 file created on your device. The name might be different and it might be placed in a different directory
Hi arsh, thanks for your reply!
I searched through my file structure after training the model and was not able to find and file with a .h5 file extension. I do have several folders with names like “model2-009.model” which have a saved_model.pb file and a folder for assets and variables. Are any of these files usable? Any help would be much appreciated thanks!
ImportError Traceback (most recent call last)
in
2 epochs=10,
3 validation_data=validation_generator,
—-> 4 callbacks=[checkpoint])
~\.conda\envs\tensorflow\lib\site-packages\keras\legacy\interfaces.py in wrapper(*args, **kwargs)
89 warnings.warn(‘Update your `’ + object_name + ‘` call to the ‘ +
90 ‘Keras 2 API: ‘ + signature, stacklevel=2)
—> 91 return func(*args, **kwargs)
92 wrapper._original_function = func
93 return wrapper
~\.conda\envs\tensorflow\lib\site-packages\keras\engine\training.py in fit_generator(self, generator, steps_per_epoch, epochs, verbose, callbacks, validation_data, validation_steps, validation_freq, class_weight, max_queue_size, workers, use_multiprocessing, shuffle, initial_epoch)
1730 use_multiprocessing=use_multiprocessing,
1731 shuffle=shuffle,
-> 1732 initial_epoch=initial_epoch)
1733
1734 @interfaces.legacy_generator_methods_support
~\.conda\envs\tensorflow\lib\site-packages\keras\engine\training_generator.py in fit_generator(model, generator, steps_per_epoch, epochs, verbose, callbacks, validation_data, validation_steps, validation_freq, class_weight, max_queue_size, workers, use_multiprocessing, shuffle, initial_epoch)
183 batch_index = 0
184 while steps_done 185 generator_output = next(output_generator)
186
187 if not hasattr(generator_output, ‘__len__’):
~\.conda\envs\tensorflow\lib\site-packages\keras\utils\data_utils.py in get(self)
623 except Exception:
624 self.stop()
–> 625 six.reraise(*sys.exc_info())
626
627
~\.conda\envs\tensorflow\lib\site-packages\six.py in reraise(tp, value, tb)
701 if value.__traceback__ is not tb:
702 raise value.with_traceback(tb)
–> 703 raise value
704 finally:
705 value = None
~\.conda\envs\tensorflow\lib\site-packages\keras\utils\data_utils.py in get(self)
608 try:
609 future = self.queue.get(block=True)
–> 610 inputs = future.get(timeout=30)
611 except mp.TimeoutError:
612 idx = future.idx
~\.conda\envs\tensorflow\lib\multiprocessing\pool.py in get(self, timeout)
655 return self._value
656 else:
–> 657 raise self._value
658
659 def _set(self, i, obj):
~\.conda\envs\tensorflow\lib\multiprocessing\pool.py in worker(inqueue, outqueue, initializer, initargs, maxtasks, wrap_exception)
119 job, i, func, args, kwds = task
120 try:
–> 121 result = (True, func(*args, **kwds))
122 except Exception as e:
123 if wrap_exception and func is not _helper_reraises_exception:
~\.conda\envs\tensorflow\lib\site-packages\keras\utils\data_utils.py in get_index(uid, i)
404 The value at index `i`.
405 “””
–> 406 return _SHARED_SEQUENCES[uid][i]
407
408
~\.conda\envs\tensorflow\lib\site-packages\keras_preprocessing\image\iterator.py in __getitem__(self, idx)
63 index_array = self.index_array[self.batch_size * idx:
64 self.batch_size * (idx + 1)]
—> 65 return self._get_batches_of_transformed_samples(index_array)
66
67 def __len__(self):
~\.conda\envs\tensorflow\lib\site-packages\keras_preprocessing\image\iterator.py in _get_batches_of_transformed_samples(self, index_array)
228 color_mode=self.color_mode,
229 target_size=self.target_size,
–> 230 interpolation=self.interpolation)
231 x = img_to_array(img, data_format=self.data_format)
232 # Pillow images should be closed after `load_img`,
~\.conda\envs\tensorflow\lib\site-packages\keras_preprocessing\image\utils.py in load_img(path, grayscale, color_mode, target_size, interpolation)
106 color_mode = ‘grayscale’
107 if pil_image is None:
–> 108 raise ImportError(‘Could not import PIL.Image. ‘
109 ‘The use of `load_img` requires PIL.’)
110 img = pil_image.open(path)
ImportError: Could not import PIL.Image. The use of `load_img` requires PIL.
I am getting the same error, could u please tell how u fixed it?
I am facing an error in the train model step because of the statement
callback = [checkpoint]
Someone please help me
To those getting an error about the .h5 file. I changed “model=load_model” to use this path. “model=load_model(“D:\\Repos\\face-mask-detector-project\\model2-009.model”)”. I’m not sure if this is correct, but at least it got rid of my error and allowed the application to run.
According to the model 0 means mask 1 means without mask
But how in detection we keep 0 as without mask and 1 as mask yet it shows the correct output
I am getting this error can someone help
UnknownError: UnidentifiedImageError: cannot identify image file
I am getting this error can someone explain
UnknownError: UnidentifiedImageError: cannot identify image file
plz, tell us how to use the file h5 in our file
This TensorFlow binary is optimized with oneAPI Deep Neural Network Library (oneDNN)to use the following CPU instructions in performance-critical operations: AVX2 FMA
I tensorflow/core/platform/cpu_feature_guard.cc:142] This TensorFlow binary is optimized with oneAPI Deep Neural Network Library (oneDNN)to use the following CPU instructions in performance-critical operations: AVX2 FMA
To enable them in other operations, rebuild TensorFlow with the appropriate compiler flags.
2020-09-14 15:36:09.057326: I tensorflow/compiler/xla/service/service.cc:168] XLA service 0x7fb966faf770 initialized for platform Host (this does not guarantee that XLA will be used). Devices:
2020-09-14 15:36:09.057359: I tensorflow/compiler/xla/service/service.cc:176] StreamExecutor device (0): Host, Default Version
zsh: abort /usr/local/bin/python3
getting this error how to resolve it
what is this?
haarcascade = cv2.CascadeClassifier(‘/home/user_name/.local/lib/python3.6/site-packages/cv2/data/haarcascade_frontalface_default.xml’)
Hi everybody, im facing some things i don´t understand, for example when you try to import cv2 and imutils , from where r you trying to import, and what code that files have in it ?
I appreciate all your answers, thank you !
Once your model is been trained it will save the model with .pb extension in directories. Multiple directory will get create as model saves the checkpoint. .pb extension to save model in tensorflow way where as .h5 is method of keras. You need to convert .pb file to h5 file.
Use the below code to so
———————————————————————————————————-
import tensorflow as tf
from tensorflow.keras.models import save_model, Sequential
model_path = “model2-009.model”
model = tf.keras.models.load_model(model_path)
save_model(model,model_path + r”model-010.h5″, save_format=’h5′)
————————————————————————————————————
Then check your working directory h5 file will get created.
place same file in testing code
model=load_model(“model2-009.modelmodel-010.h5”)
I hope your problem will get resolve going so.
Thank you
Data Scientist – Shubham Kotal
model_path is showing INVALID SYNTAX error.
Very bad not working..
What is the test folder you are using and what is the train folder?
import cv2
import numpy as np
from keras.models import load_model
model=load_model(“model2-001.model”)
results={0:’without mask’,1:’mask’}
GR_dict={0:(0,0,255),1:(0,255,0)}
rect_size = 4
cap = cv2.VideoCapture(0)
haarcascade = cv2.CascadeClassifier(‘/home/user/.local/lib/python3.6/site-packages/cv2/data/haarcascade_frontalface_default.xml’)
while True:
(rval, im) = cap.read()
im=cv2.flip(im,1,1)
if rval:
assert not isinstance(im,type(None)), ‘image not found’
rerect_size = cv2.resize(im, (im.shape[1] // rect_size, im.shape[0] // rect_size))
faces = haarcascade.detectMultiScale(rerect_size)
for f in faces:
(x, y, w, h) = [v * rect_size for v in f]
face_img = im[y:y+h, x:x+w]
rerect_sized=cv2.resize(face_img,(150,150))
normalized=rerect_sized/255.0
reshaped=np.reshape(normalized,(1,150,150,3))
reshaped = np.vstack([reshaped])
result=model.predict(reshaped)
label=np.argmax(result,axis=1)[0]
cv2.rectangle(im,(x,y),(x+w,y+h),GR_dict[label],2)
cv2.rectangle(im,(x,y-40),(x+w,y),GR_dict[label],-1)
cv2.putText(im, results[label], (x, y-10),cv2.FONT_HERSHEY_SIMPLEX,0.8,(255,255,255),2)
cv2_imshow(im)
key = cv2.waitKey(10)
if key == 27:
break
cap.release()
cv2.destroyAllWindows()
With mask, the following of detecting face function can not work.
faces = haarcascade.detectMultiScale(rerect_size)
Whether with or without mask decision is worked after detecting face.
I finally got the code running but it says face mask for both mask on and mask off when camera is on. Am I missing something on the test run? or is it only training the “with facemask”
module ‘keras.optimizers’ has no attribute ‘TFOptimizer’
PIL.UnidentifiedImageError: cannot identify image file
anyone with this problem?