Face Recognition with Python [source code included]
Free Machine Learning courses with 130+ real-time projects Start Now!!
Python can detect and recognize your face from an image or video
Face Detection and Recognition is one of the areas of computer vision where the research actively happens.
The applications of Face Recognition include Face Unlock, Security and Defense, etc. Doctors and healthcare officials use face recognition to access the medical records and history of patients and better diagnose diseases.
About Python Face Recognition
In this python project, we are going to build a machine learning model that recognizes the persons from an image. We use the face_recognition API and OpenCV in our project.
Tools and Libraries
- Python – 3.x
- cv2 – 4.5.2
- numpy – 1.20.3
- face_recognition – 1.3.0
To install the above packages, use the following command.
pip install numpy opencv-python
To install the face_recognition, install the dlib package first.
pip install dlib
Now, install face_recognition module using the below command
pip install face_recognition
Download Face Recognition Python Code
Please download the source code of python face recognition project: Face Recognition Project Code
Project Dataset
We can do this face recognition project using our own dataset. For this project, let’s take the cast of the popular American web series “Friends” as the dataset. The dataset is included with face recognition project code, which you downloaded in the previous section.
Steps to develop face recognition model
Before moving on, let’s know what face recognition and detection are.
Face recognition is the process of identifying or verifying a person’s face from photos and video frames.
Face detection is defined as the process of locating and extracting faces (location and size) in an image for use by a face detection algorithm.
Face recognition method is used to locate features in the image that are uniquely specified. The facial picture has already been removed, cropped, scaled, and converted to grayscale in most cases. Face recognition involves 3 steps: face detection, feature extraction, face recognition.
OpenCV is an open-source library written in C++. It contains the implementation of various algorithms and deep neural networks used for computer vision tasks.
1. Prepare the dataset
Create 2 directories, train and test. Pick an image for each of the cast from the internet and download it onto our “train” directory. Make sure that the images you’ve selected show the features of the face well enough for the classifier.
For testing the model, let’s take a picture containing all of the cast and place it onto our “test” directory.
For your comfort, we have added training and testing data with the project code.
2. Train the model
First import the necessary modules.
import face_recognition as fr
import cv2

import numpy as np
import os
The face_recognition library contains the implementation of the various utilities that help in the process of face recognition.
Now, create 2 lists that store the names of the images (persons) and their respective face encodings.
path = "./train/"

known_names = []
known_name_encodings = []

images = os.listdir(path)
Face encoding is a vector of values representing the important measurements between distinguishing features of a face like the distance between the eyes, the width of the forehead, etc.
We loop through each of the images in our train directory, extract the name of the person in the image, calculate its face encoding vector and store the information in the respective lists.
for _ in images:
image = fr.load_image_file(path + _)
image_path = path + _
encoding = fr.face_encodings(image)[0]

known_name_encodings.append(encoding)
known_names.append(os.path.splitext(os.path.basename(image_path))[0].capitalize())
3. Test the model on the test dataset
As mentioned above, our test dataset only contains 1 image with all of the persons in it.
Read the test image using the cv2 imread() method.
test_image = "./test/test.jpg"

image = cv2.imread(test_image)
The face_recognition library provides a useful method called face_locations() which locates the coordinates (left, bottom, right, top) of every face detected in the image. Using those location values we can easily find the face encodings.
face_locations = fr.face_locations(image)

face_encodings = fr.face_encodings(image, face_locations)
We loop through each of the face locations and its encoding found in the image. Then we compare this encoding with the encodings of the faces from the “train” dataset.
Then calculate the facial distance meaning that we calculate the similarity between the encoding of the test image and that of the train images. Now, we pick the minimum valued distance from it indicating that this face of the test image is one of the persons from the training dataset.
Now, draw a rectangle with the face location coordinates using the methods from the cv2 module.
for (top, right, bottom, left), face_encoding in zip(face_locations, face_encodings):
   matches = fr.compare_faces(known_name_encodings, face_encoding)
   name = ""

   face_distances = fr.face_distance(known_name_encodings, face_encoding)
   best_match = np.argmin(face_distances)

   if matches[best_match]:
       name = known_names[best_match]

   cv2.rectangle(image, (left, top), (right, bottom), (0, 0, 255), 2)
   cv2.rectangle(image, (left, bottom - 15), (right, bottom), (0, 0, 255), cv2.FILLED)

   font = cv2.FONT_HERSHEY_DUPLEX
   cv2.putText(image, name, (left + 6, bottom - 6), font, 1.0, (255, 255, 255), 1)
Display the image using the imshow() method of the cv2 module.
cv2.imshow("Result", image)
Save the image to our current working directory using the imwrite() method.
cv2.imwrite("./output.jpg", image)Release the resources that weren’t deallocated(if any).
cv2.waitKey(0)
cv2.destroyAllWindows()
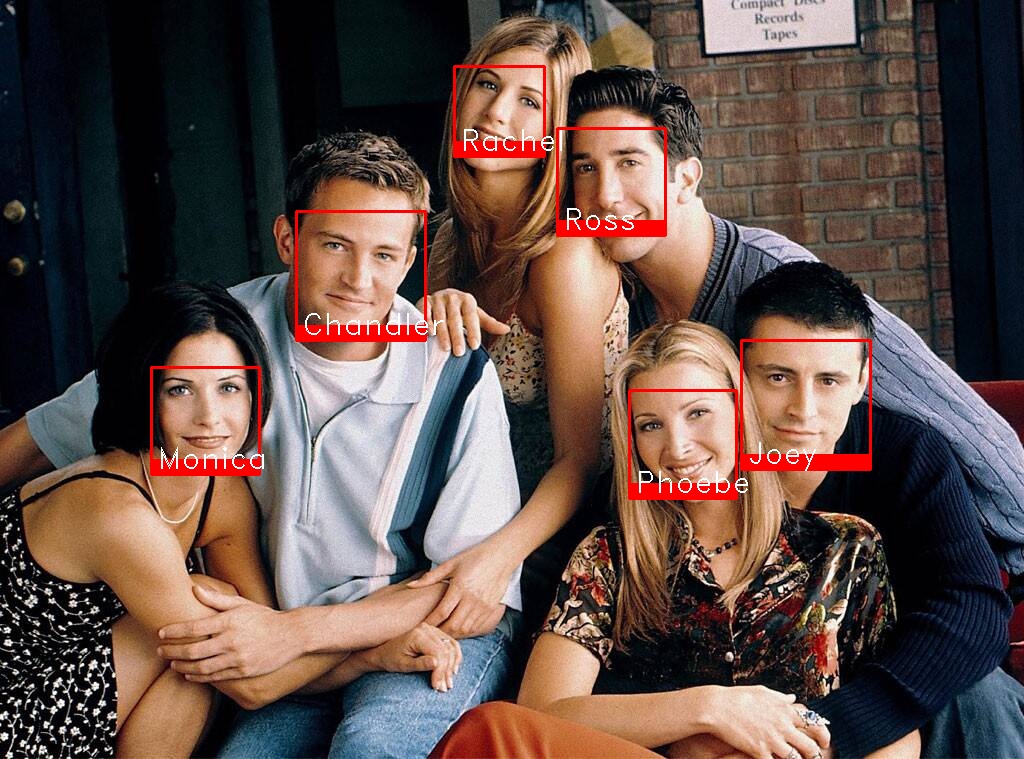
Python Face Recognition Output
Let’s see the output of the model.
Summary
In this machine learning project, we developed a face recognition model in python and opencv using our own custom dataset.
Did we exceed your expectations?
If Yes, share your valuable feedback on Google


Sir, can I use Camera here! Sir please say me code snippet for to! As I am New to CV2! Please Sir! It’s urgent….
please refer: Face Recognition using Camera
In what compiler we have to run this code. Can I use pycharm?
Can you give me the full code of the above article?
How can we implement the same if the input given is a small video clipping?