Python Video to Audio Converter Project
Master Python with 70+ Hands-on Projects and Get Job-ready - Learn Python
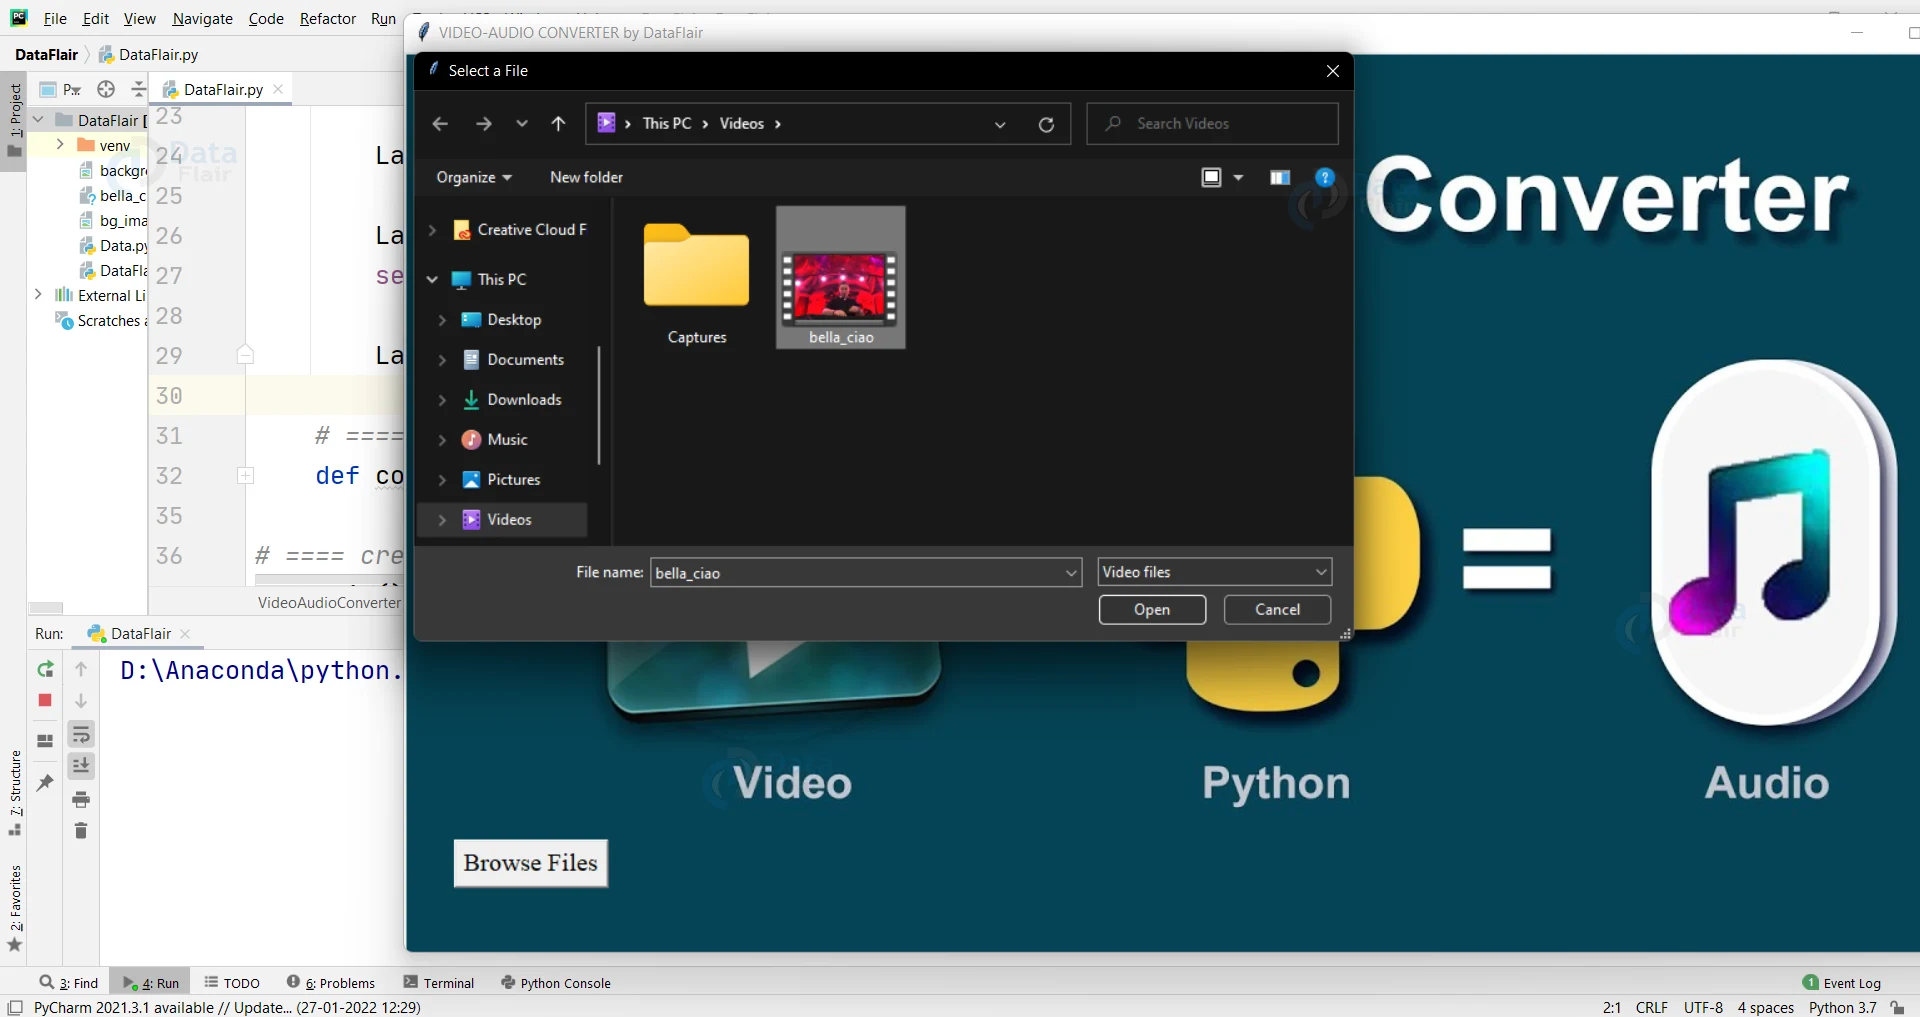
Video to audio converter is an application that allows you to convert your video to audio and video to mp3. In this application, you have to select a file and when you are done with selecting your video file just press the convert button. This video to audio converter application will then start converting video to audio and your audio file will be available in the same folder. Let’s develop Video to Audio Converter project using Python.
About Python Video to Audio Converter Project
The objective of the project is to convert a video into audio. In this project with the help of different libraries in python we’ll convert a video(.mp file) into an audio(.mp3).
Project Prerequisites
To develop this project we need a basic knowledge of some models like tkinter, os, PIL and moviepy.
1. tkinter – for use Interface(UI)
2. os – provides functions for creating and removing a directory (folder), fetching its contents, changing and identifying the current directory, etc.
3. moviepy – MoviePy is a Python module for video editing, which can be used for basic operations (like cuts, concatenations, title insertions), video compositing (a.k.a. non-linear editing), video processing, or to create advanced effects.
4. PIL – Pillow is the friendly PIL fork by Alex Clark and Contributors. PIL is the Python Imaging Library by Fredrik Lundh and Contributors.
Download Video Audio Converter Source Code
Please download the full source code of Python video to audio converter: Video to Audio Converter Project Source Code
Steps to Build Video to Audio Converter
- Let’s see the step to Build Video to Audio Converter
- First import all the necessary modules.
- Create a user interface window for our converter.
- After the user selects the file, create a function that will process the file and convert the video into audio.
- File will automatically get saved in the same folder.
Project File Structure
- Importing modules
- Creating display function
- Defining Functions
- Calling main function
1. Importing Modules
We will first import all the necessary libraries required for this project.
# ==== Importing all the necessary libraries for Python Video to Audio Converter project
from tkinter import *
from tkinter import filedialog
import os
from PIL import ImageTk
import moviepy.editor as mp
2. Create Display Window
First, create a main class name as VideoAudioConverter, pass the root in an initiator function in which we will set the title, frames, background images and buttons for the interface.
# ==== creating main class
class VideoAudioConverter:
   # ==== creating gui window
   def __init__(self, root):
       self.root = root
       self.root.title("VIDEO-AUDIO CONVERTER by DataFlair")
       self.root.geometry('1280x720')
       self.bg = ImageTk.PhotoImage(file="bg_image.jpg")
       Label(self.root, image=self.bg).place(x=0, y=0)

       Button(self.root,text="Browse Files",font=("times new roman", 15),command=self.browse).place(x=40, y=630)
3. Defining functions
In this part we’ll discuss all the necessary functions which are required to complete our projects. We’ll see the use of each function separately and how it’ll work.
i. browse()
This function will browse the video files from the user and then process it using the convert function to convert the format of a file i.e., from .mp4 to .mp3.
After converting the file it will show completed on the user interface.
# ==== browse data from system
  def browse(self):
      self.file_name = filedialog.askopenfilename(title="Select a File", filetypes=(("Video files", "*.mp4*"),))

      Label(self.root, text=os.path.basename(self.file_name), font=("times new roman", 20), bg="blue").place(x=200, y=630)

      Label(self.root, text='Processing...', font=("times new roman", 30)).place(x=600, y=630)
      self.convert(os.path.basename(self.file_name))

      Label(self.root, text='Completed!!', font=("times new roman", 30)).place(x=1000, y=630)
ii. convert()
This function will take the path of a file as an input and with the help of the VideoFileClip function of moviepy library it will read the video file and with the audio.write_audiofile function it will convert the video file into an audio file.
# ==== convert video to audio
 def convert(self, path):
     clip = mp.VideoFileClip(r'{}'.format(path))
     clip.audio.write_audiofile(r'{}mp3'.format(path[:-3]))
4. Creating main function
In the final step, we’ll create a main function. In this function we declare the root and also create an object for our main class. Then we’ll call this main function to execute our project.
# ==== creating main function of python Video to Audio Converter
def main():
   # ==== create tkinter window
   root = Tk()
   # === creating object for class VideoAudioConverter
   obj = VideoAudioConverter(root)
   # ==== start the gui
   root.mainloop()

if __name__ == "__main__":
   # ==== calling main function
   main()
Python Video to Audio Converter Project Output
Summary
YAY!! We have successfully developed the video to audio converter in python. We learn how to use tkinter to make GUI, os, moviepy, and PIL modules. Also we learned how to convert an .mp4 file to an .mp3 format. In order to make things easy, this tutorial is divided into various tasks.
I hope you enjoyed building this project using this tutorial at DataFlair.!!
Your 15 seconds will encourage us to work even harder
Please share your happy experience on Google


