Spin a Yarn Game in Python
Master Python with 70+ Hands-on Projects and Get Job-ready - Learn Python
We all love to listen to or read stories. It would be more fun when we contribute by adding to it. I think you would have understood that I am talking about the Spin a Yarn game. Yes! We will be building it using Python. So, let’s get started.
What is Spin a Yarn?
It is a multiplayer game in which a beginning line(s) will be given and the player has to complete it. It not only lets the player increase creativity but also entertains other interesting stories.
Spin a Yarn using Python
We will be using the Tkinter module for building the GUI to display and take the story. And we also use the pyttsx3 module to read out the final story. In this game, we show three starting storylines. Based on your comfort, you can add any number.
Download Spin a Yarn Project Source Code
Please download the source code for Spin the Yarn game using the link: Spin a Yarn Project
Project Prerequisites
The developer should have prior knowledge of Python and the Tkinter module to build this project.
If not installed, the Tkinter and pyttsx3 module can be installed by using the below command.
pip install tk
pip install pyttsx3
Also, you need to know about creating storylines. Lol!
Steps to build Spin a Yarn Project using Python
We will be following the below steps to build Spin the Yarn:
1. First, import the module and build the main window
2. Then add different buttons based on the number of stories
3. Build a window to show the storyline and take input of the rest of the story
4. After this, create a function to show the complete story.
1. Importing the module
Here we are importing the Tkinter and the pyttsx3 modules we discussed above.
import tkinter as tk
from tkinter import *
import pyttsx3
2. Creating the main window
Now we create an empty window and add the properties, title, size and color.
wn = Tk()
wn.title("DataFlair Spin Yarn")
wn.configure(bg='mint cream')
wn.minsize(width=500,height=500)
wn.geometry("300x300")
3. Creating global variables
We create the following global variables:
a. Choices hold the story number chosen by the player
b. newStory holds the storyline
c. modifiedStroy has the final story by the player
d. stories is the list having all the storylines
choice=0
newStory=''
modifiedStory=''
stories=["Ben is very good at yarning a good story. But the story he wrote yesterday ...",
"One day at night I was bored and started watching a horror movie. After an hour or so ...",
"Me and my friends planned to go on a trip last week. We started with a very ..."]
story=StringVar()
4. Adding components to window
In this, we add the heading and three buttons for the three stories. Each button takes the user to a different story line based on the function given to it.
headingLabel = Label(wn, text="DataFlair Spin Yarn", fg='black', font = ('Courier',15,'bold'))
headingLabel.place(x=100,y=10)

# Instructions to add words
label= Label(wn, text ="Please select one of the stores by clicking one of the buttons",fg='black',bg="mint cream",font = ('Calibre',12))
label.place(x=30,y=80)

storyEntry=Entry(wn,font = ('Calibre',10))
label2 = Label(wn,textvariable=story, bg="mint cream",fg='black',font = ('Calibre',10))
#Add Button

Btn1 = tk.Button(wn,text="Story 1",bg='#d1ccc0', fg='black',font = ('Calibre',12),command=story1)
Btn1.place(x=200,y=130)

#Add Button
Btn2 = tk.Button(wn,text="Story 2",bg='#d1ccc0', fg='black',font = ('Calibre',12),command=story2)
Btn2.place(x=200,y=180)

#Add Button
Btn3 = tk.Button(wn,text="Story 3",bg='#d1ccc0', fg='black',font = ('Calibre',12),command=story3)
Btn3.place(x=200,y=230)
wn.mainloop()
5. Adding functions to the buttons
Here are the three functions for the buttons that set the choice to the respective number based on the story chosen and called the mainWin() function, which we will discuss in the next step.
def story1():
    global choice
    choice=0
    mainWin()

def story2():
    global choice
    choice=1
    mainWin()

def story3():
    global choice
    choice=2
    mainWin()
6. Creating a function to create a window for the taking story input
This is the mainWin() function which creates a new window. This window displays the story line and takes the input of the story continuation. And on clicking the Done button, it runs the function show_read_story()
def mainWin():
    global choice,stories,cnt,story,storyEntry,newStory,label2,Btn3,wn
    wn.destroy()
    wn = Tk()
    wn.title("DataFlair Spin Yarn")
    wn.configure(bg='mint cream')
    wn.minsize(width=500,height=500)
    wn.geometry("300x300")

    headingLabel = Label(wn, text="DataFlair Spin Yarn", fg='black', font = ('Courier',15,'bold'))
    headingLabel.place(x=120,y=10)

    newStory=stories[choice]

    label1= Label(wn, text ="Here is the starting line of the story",fg='black',bg="mint cream",font = ('Calibre',12))
    label1.place(x=30,y=50)
    storyline=StringVar()
    storyline.set(newStory)
    label2 = Label(wn,textvariable=storyline, bg="mint cream",fg='black',font = ('Calibre',10))
    label2.place(x=30,y=80)

    #Takes x and y values of a point
    storyEntry = tk.Text(wn, width=50, height=10)
    storyEntry.place(x=50,y=120)

    Btn3 = tk.Button(wn,text="Done",bg='gray', fg='white',font = ('Calibre',12),command=show_read_story)
    Btn3.place(x=200,y=300)

    wn.mainloop()
7. Creating a function show the final story and read it out
In this, the function read() converts the final story into voice and reads it out. We created the WritableStringVar class to show the story in different lines to fit to the window.
And the function show_read_story(), gets the story entered by the player. Then we combine it with the storyline.
Then we create a new window to show the final story on the label created as the object of the class WritableStringVar. Finally, add the button to read out the story by running the function read().
def read():
    global modifiedStory
    voiceEngine = pyttsx3.init('sapi5')
    voices = voiceEngine.getProperty('voices')
    voiceEngine.setProperty('voice', voices[1].id)
    voiceEngine.say("Here is your story")
    voiceEngine.say(modifiedStory)

class WritableStringVar(tk.StringVar):
    def write(self, added_text):
        new_text = self.get() + added_text
        self.set(new_text)

    def clear(self):
        self.set("")

def show_read_story():
    global cnt,newStory,storyEntry,label2,wn,modifiedStory
    modifiedStory=storyEntry.get("1.0", "end-1c")

    modifiedStory=newStory[:-3] + modifiedStory

    print(modifiedStory)

    Btn3["state"] = DISABLED

    wn = Tk()
    wn.title("DataFlair Spin Yarn")
    wn.configure(bg='mint cream')
    wn.minsize(width=500,height=500)
    wn.geometry("300x300")

    headingLabel = Label(wn, text="DataFlair Spin Yarn", fg='black', font = ('Courier',15,'bold'),wraplength=300)
    headingLabel.place(x=100,y=10)

    story= WritableStringVar(wn)
    label = Label(wn,textvariable=story, bg="mint cream",fg='black',font = ('Calibre',12))
    label.place(x=50,y=70)
    l=len(modifiedStory)
    i=0
    while(i<(l//50 +1) ):
        start=i*50
        end=(i+1)*50
        if((i+1)*50 >l):
            end=l
        i+=1
        print( modifiedStory[start:end] , file=story)

    Btn = tk.Button(wn,text="Read the Story",bg='gray', fg='white',font = ('Calibre',12),command=read)
    Btn.place(x=200,y=300)
    wn.mainloop()
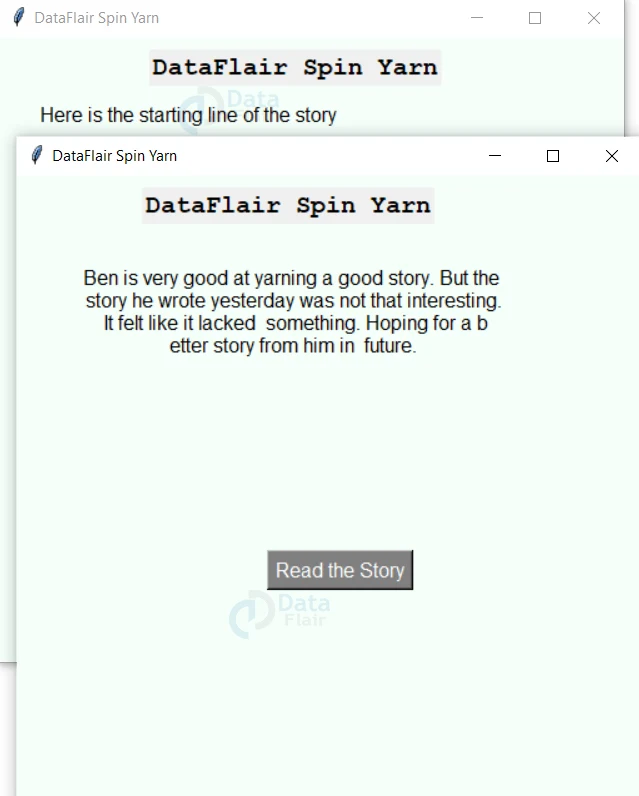
Output of Spin a Yarn project
Spin a Yarn Project Window
Summary
Hurray! We have successfully built the spin the yarn story, We learned to create a window, take multiline input, display, and read it. Hope you enjoyed building this project with us. Happy coding!
Your 15 seconds will encourage us to work even harder
Please share your happy experience on Google


It is successful!
We are glad to hear that you have successfully made spin a yarn project. Also, don’t forget to check out more python games projects. They can offer exciting opportunities for exploring and learning.
I love it!!