Python Screen Recorder Project with Source Code
Master Python with 70+ Hands-on Projects and Get Job-ready - Learn Python
There are many screen recording apps for different operating systems. With the help of these screen recording apps, we can record a screen while playing a video game, composing a specific code, researching something online, and much more. Let’s build a screen recorder project in python.
What is the Screen Recorder?
Screen recorder is software that captures content and activities that take place on a computer screen. Screen recorder is useful during tasks such as creating video tutorials, recording screen content, etc.
Python Screen Recorder Project
Here we have made a screen recorder project in python to capture our screen. We have made a GUI. We are able to see previews after clicking on the preview button. By clicking on the rec button the screen gets recorded and the video is saved in the particular folder.
Screen Recorder Project Prerequisite
This project requires good knowledge of python programming language and cv2, numpy, tkinter, PIL, modules as well as datetime and threading modules. The Cv2 module is used for capturing the screen.
Download Screen Recorder Python Code
Please download the source code of Python Screen Recorder Project from the following link: Screen Recorder Project
Steps to Build a Python Screen Recorder
- Import modules
- Initializing screen
- Function for display and reset time
- Function for screen recording
- Function to start recording
- Function for recording button
- Making labels and buttons
Step 1- Importing Modules
#DataFlair - Importing modules
import numpy as np
import cv2
from PIL import ImageGrab
from tkinter import *
import threading
import datetime
Code Explanation-
- numpy – Numpy library used for mathematical calculations.
- cv2 – OpenCV is the name of this library used for image processing and to perform computer vision tasks.
- PIL import ImageGrab – This library used to capture screens or to take snapshots.
- Tkinter – Tkinter is the standard interface in python for creating a GUI that is Graphical User Interface.
- threading – this module creates and controls thread in python.
- datetime – Datetime module provides classes to work with date and time.
Step 2- Initializing window
# Initializing window
window = Tk()
window.title('Screen Recorder')
window.geometry('200x200')
window.resizable(width=False, height=False)
window.configure(bg='black')

frame = Frame(window)
frame.configure(bg='black')
frame.pack()
Code Explanation-
- Tk – Initializing the tkinter window of the screen recorder.
- .title – Use to set title to window.
- .geometry – For setting dimensions of a window in pixels.
- resizable() – Used to change the size of the tkinter root window according to the user’s need.
- .config – Used to configure attributes to the window, such as background color.
- .pack() – Pack method packs the widget relative to the earlier widget.
Step 3- Function for display and reset time
def Display_T():
    global Recorded, Secs, Mins, Hrs
    if Recorded:
        if Secs == 60:
            Secs = 0
            Mins += 1
        elif Mins == 60:
            Mins = 0
            Hrs += 1

        TimeCounter_Label.config(text=str(Hrs) + ':' + str(Mins) + ':' + str(Secs))
        Secs += 1
        TimeCounter_Label.after(1000, Display_T)

def Resetting_T():
    global Secs, Mins, Hrs
    Secs = 0
    Mins = 0
    Hrs = 0
Code Explanation-
- Time_Display() – Function for displaying time.
- Declare global variables recorded, mins, secs, hrs.
- After we start screen recording it will show the time on screen in H:M:S manner.
- Time_Reset() – Function to reset time.
- After completion one recording it will be set to zero.
Step 4- Function to start recording
def Starts_Recording():
    global Recorded
    Recorded = not Recorded
    Resetting_T()

    Button_Rec_thread = threading.Thread(target=Recording)
    Thread_Counter = threading.Thread(target=Display_T)
    Thread_Screen = threading.Thread(target=Screen_Recording)

    if Recorded:
        Button_Rec_thread.start()
        Thread_Counter.start()
    if Target == 'screen':
        Thread_Screen.start()
Code Explanation-
- Starts_Recording() – Function to start screen recording.
- Declare a global variable recorded and call time_reset function for resetting the time.
- .Thread – Thread used to separate the flow of execution.
Step 5- Function for screen recording
# Function for Screen Recording
Recorded = False
Target = 'screen'
Show_Preview = True

def Screen_Recording():
    global Show_Preview, Recorded
    name = 'screen'
    Now = datetime.datetime.now()
    date = Now.strftime("%H%M%S")
    FileFormat = 'mp4'
    filename = name + str(date) + '.' + FileFormat
    FeetPerSec = 24
    Resolutions = (1366, 768)
    Thumb_Resolutions = (342, 192)

    Four_Char_Code = cv2.VideoWriter_fourcc(*'XVID')
    writer = cv2.VideoWriter(filename, Four_Char_Code, FeetPerSec, Resolutions)

    while True:
        IMG = ImageGrab.grab()
        np_IMG = np.array(IMG)
        frame = cv2.cvtColor(np_IMG, cv2.COLOR_BGR2RGB)
        writer.write(frame)
        if Show_Preview:
            Thumb = cv2.resize(frame, dsize=Thumb_Resolutions)
            cv2.imshow('Preview - Screen Recorder', Thumb)
        if cv2.waitKey(1) == 27:
            Recorded = False
            Label_Message['text'] = 'Video was saved as ' + filename
            Recording()
            break

    writer.release()
    cv2.destroyAllWindows()
Code Explanation-
- Screen_Record() – Function for screen recording.
- Declare global variables recorded and show_preview. And variables name, now, date, FileFormat, filename, FeetPerSec.
- Set file format as mp4. And set file name in format of name +date +. +mp4
- Four_Char_Code – four character code objects for video writers.
- ImageGrab.grab() – For taking a snapshot of the screen.
- np.array – Convert image to numpy array.
- cv2.cvtColor – Convert color space from BGR to RGB.
- .write – Write frame to video writer.
- cv2.waitkey() – This is a function from the cv2 library which allows users to show a window until the esc key is pressed.
- After pressing ESC key message will show on the screen Video was saved with the particular file name.
- destroyAllWindows() – This function will destroy all windows.
Step 6- Function for recording button
# Function for recording button
def Recording():
    global Recorded
    if Recorded:
        Button_Rec['state'] = DISABLED
        Label_Message['text'] = 'Press ESC to quit.'
    else:
        Button_Rec['state'] = NORMAL
Code Explanation-
- Update_Rec_Button() – Function for recording button.
- Declare a global variable recorded.
- If we press the record button screen recording will start and if we want to stop we can press esc button. After pressing the rec button message will be shown on screen ‘press ESC to quit.’
Step 7- Making labels and buttons
# Making labels and buttons

Button_Rec = Button(frame, text='REC', command=Starts_Recording, font=("Times new roman",30,"bold"),bg='#e50914',  activebackground='#ab070f')
Button_Rec.grid(row=20 , column=2)

TimeCounter_Label = Label(frame, text='0:0:0',font=("Times new roman",18,"bold"), bg='black', fg='white')
TimeCounter_Label.grid(row=1, column=3)

Frame_message = Frame(window)
Frame_message.configure(bg='black')
Frame_message.pack()
Label_Message = Label(Frame_message, width=3 * 14, bg='black', fg='white')
Label_Message.pack()

window.mainloop()
Code Explanation-
- label – In this variable, we use the label widget for displaying the box in which we give text. Then call configure to set font, font size, and background color.
- Create three buttons: Screen, Rec and preview using button widget. And assign them text, command, background color, font, font size etc.
- Also make one message frame for showing messages.
Python Screen Recorder Output
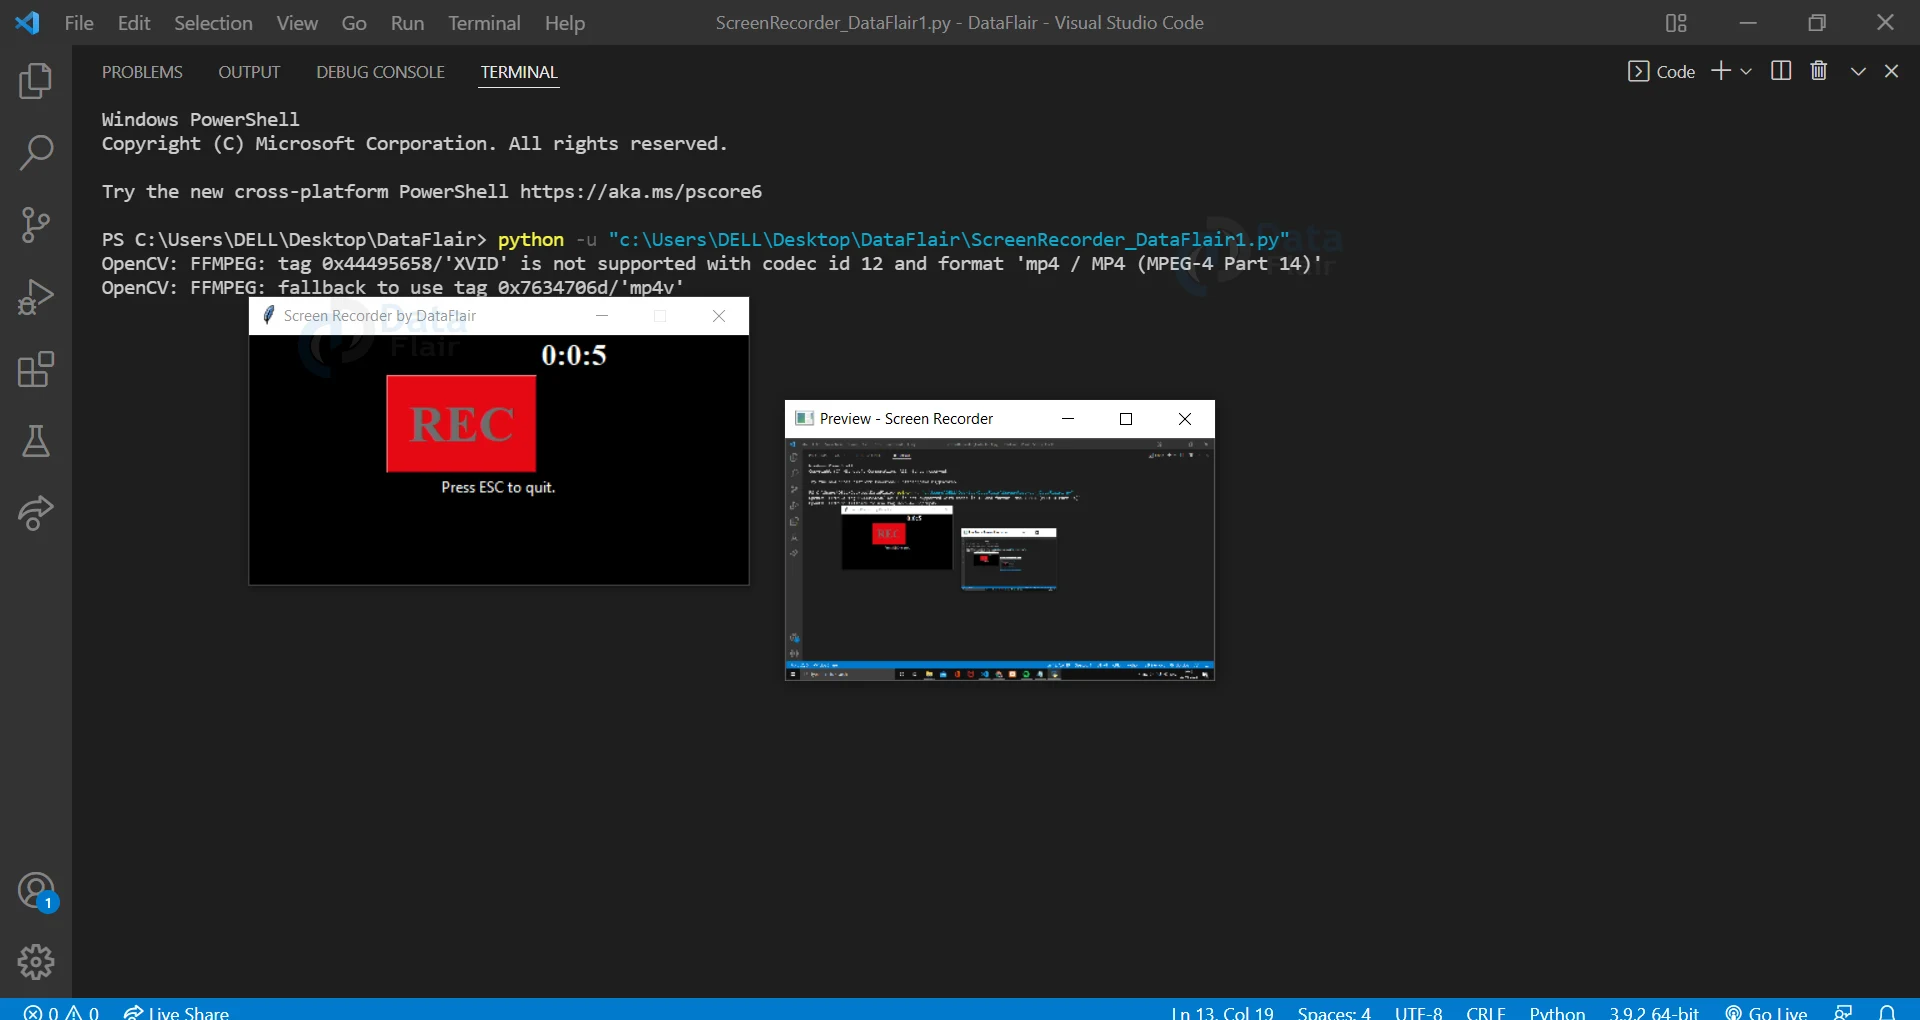
Summary
We have successfully created a screen recorder in python using the Graphical user Interface(GUI). We have learned about the Numpy, PIL Tkinter, cv2 modules.
Your 15 seconds will encourage us to work even harder
Please share your happy experience on Google


Hi Sir, Nice Job Thankyou
We greatly appreciate your positive feedback. If our course project has captured your interest, please do remember to share with as many people you can