Django Database – How to Connect MySQL Database with Django Project
Master Python with 70+ Hands-on Projects and Get Job-ready - Learn Python
Job-ready Online Courses: Dive into Knowledge. Learn More!
In the previous tutorial, we learned the concept of Django Models, now, we will discuss the process to connect database with Django project.
Whenever we are creating a web project or any kind of project, we want some kind of input by our end-users or consumers. All that data/ input is handled by a Database. In today’s scenario, whenever we are developing a website, we will need a database, whether it’s a blog site or highly interactive ones like Instagram which is based on Django.
To achieve that you would need some software, which can store that data efficiently and also some middleware which can let you communicate with the database.

Connecting Databases with Django Project
By default, when we made our first app and started the server you must have seen a new file in your project directory, named as ‘db.sqlite3’. The file is database file where all the data that you will be generating will be stored. It is a local file as Django is a server-side framework and it treats your computer as the host when you actually run the server in command line/terminal.

This file is generated automatically because Django has a default setting of the database set to the SQLite, which is although fine for testing and provides lots of features but if you want your website to be scalable, you need to change it to any other efficient database.
In our case, we will be using MySQL and this tutorial will help you to integrate your project with MySQL.
In the Django Installation tutorial, we installed Xampp, it’s a great tool and is a prerequisite for MySQL.
Don’t worry you won’t need to learn SQL for that, all the backend code will be done in python, that is the advantage of Django Model.
1. DATABASES Dictionary Indexes
Firstly, open the settings.py file of your web-application/ project and there find this part.
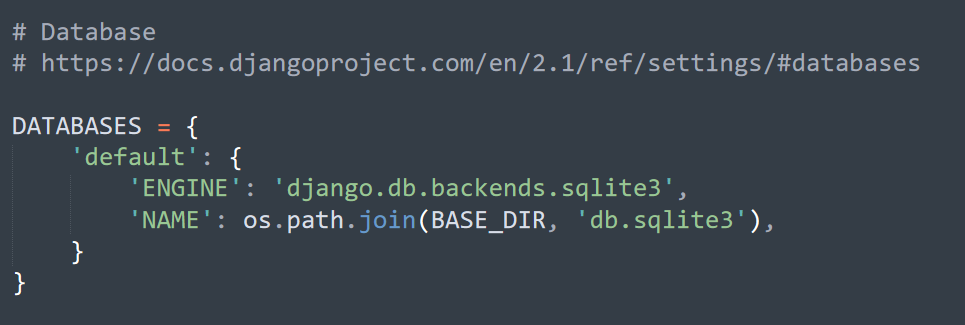
This partition has information regarding the connection to the database.
DATABASES is a pre-defined dictionary in Django Framework with the ‘default’ as an index having the value for the main database where all the data is to be stored.
There can be multiple databases as we need data backups too but there is only one default database, although we won’t be adding multiple databases now.
The default is holding a dictionary where there are 2 indexes:
- ENGINE
It specifies the library to be used when connected to a certain website. In the value, we have to put the file, “django.db.backends.sqlite3”, which is the python library for sqlite3 database and will translate your python code to the database language.
Thus, you won’t need to learn any new database language, every code is in Python.
- NAME
Here you will have a name of the database that you are using and the location of your database. This parameter changes according to the type of database you are using. Here you can experiment with the database file.
In this, we are also passing the name of the database file or if the file is not present, this will create the db.sqlite3 file. If you change the name to db1.sqlite3 or anything of your choice it will create that file in your root directory every time you run server again.
Here, in this, we have changed the name to ‘dataflair.sqlite3’.
Now execute these two commands:
python manage.py migrate
python manage.py runserver
As we can see, a new database file is created and it is such an easy process to create a database with Django framework. Just like this, every database has some attributes which actually become the default dictionaries indexes which you can change/ create according to the database you are connecting to.
We will be connecting the MySQL database with our project.
Learn to perform Python Database Access
2. MySQL and Django – Connecting MySQL Database with Django Project
MySQL is a very powerful database providing you with tons of features and flexibility. We are not going to discuss its functionality now, we will just integrate it with our project.
Here are the steps to integrate Django project with MySQL:
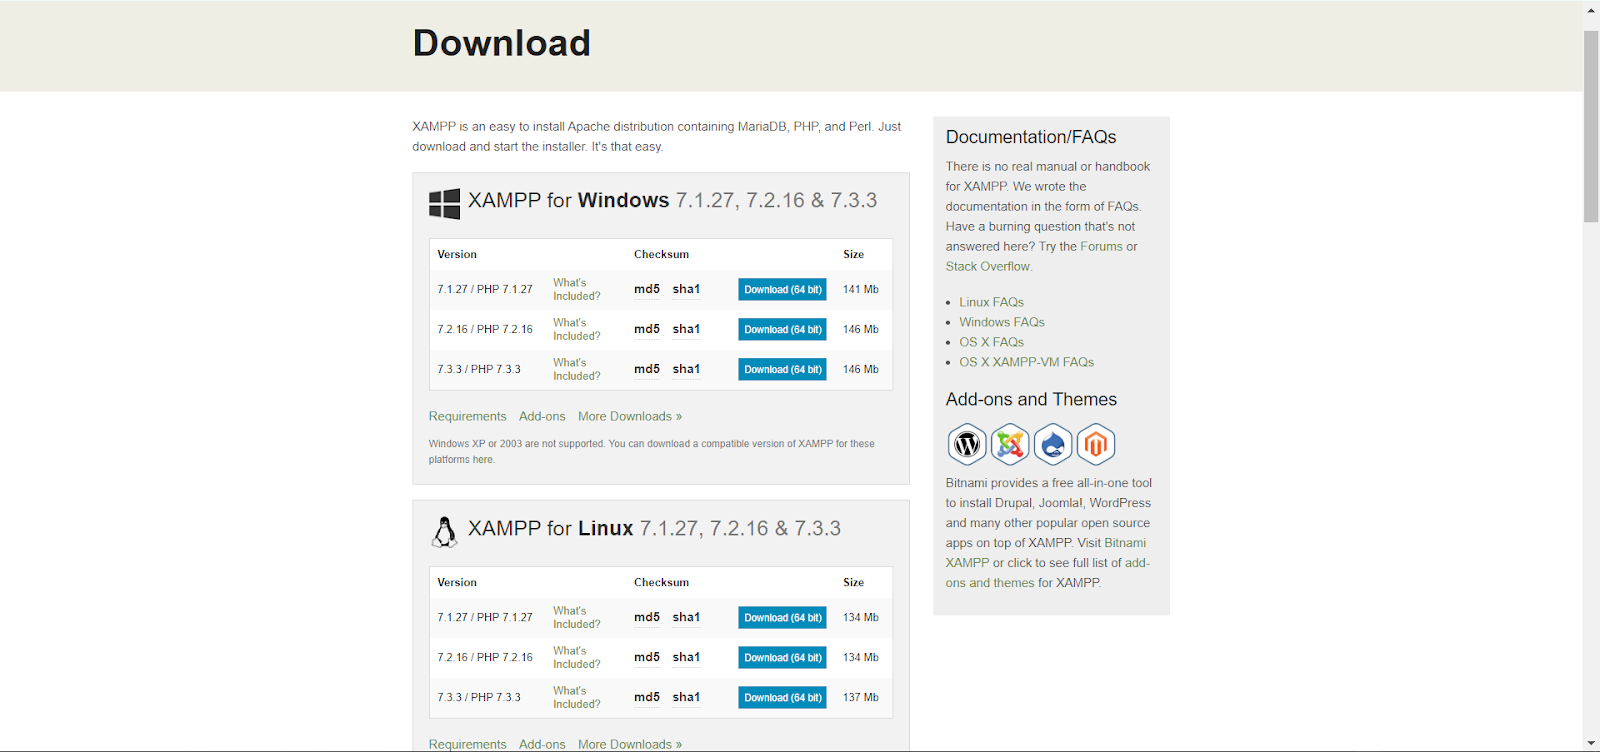
i. Install Xampp
Xampp is a free opensource tool which provides you with the Apache server and phpMyAdmin which is the best source for beginner programmers to work with MySQL.
You can download the Xampp according to your system from here:
https://www.apachefriends.org/download.html
Explore Django Features in detail
ii. Run Xampp Control Panel
Now, after installation, you will have to run the Xampp Control Panel and just start 2 services there, Apache and MySQL.
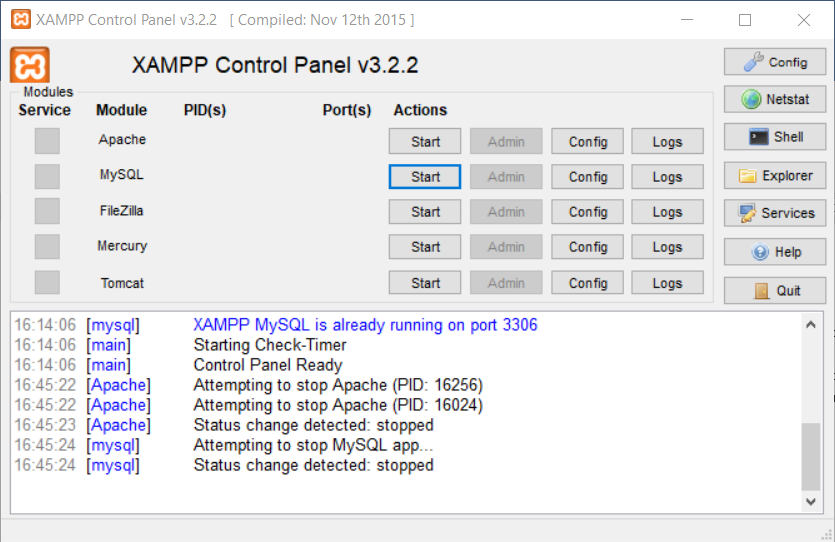
Note:
Start the Apache Server First and then the MySQL server.
Just click on start action, and after starting it should look like this image.

Now, click on the Admin of the MySQL Service, that should open a webpage(offline) looking like this.

This is the main page where we will be observing our database.
The main advantage of Xampp is that it provides you a very interactive environment and when we will be deploying our models, that too will be done in this.
So, we get a very powerful database with an interactive dashboard and one of the world’s best framework with the easiest and most powerful programming language out there.
Don’t forget to check SQL RDBMS Database
iii. Creating a SQL database:
On the webpage phpMyAdmin, we will have to create a database for our project. That’s very easy.
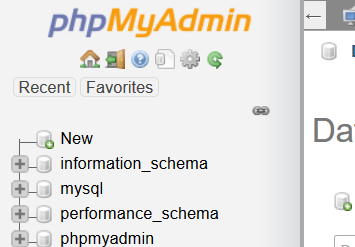
Just Click on the New button as shown here. Then, just fill the desired name of your database and click on create button.
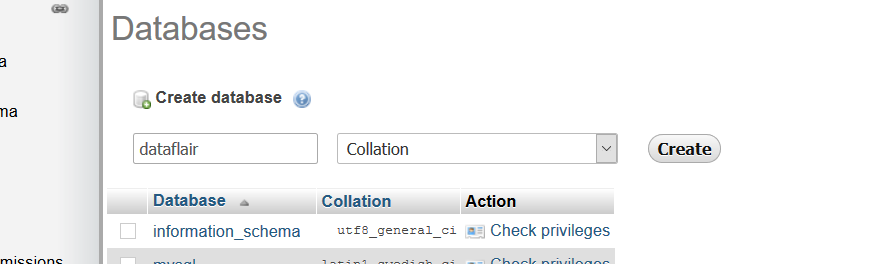
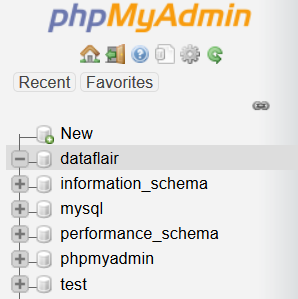
That will add your database in the list.
That’s it, now we don’t need to do anything here. We will be only interacting with python and the models component of Django will prepare everything for us.

The database we created is empty right now. After the 4th step, there will be lots of tables here holding different information.
Understand the components of Django MTV Architecture
iv. Modifying settings.py
In this last step, we will be changing the DATABASE dictionary in our main projects settings.py.
First, install this file via command line:
pip install mysqlclient
It will install the Django code for connecting the MySQL Database.
After that exchange this code with the DATABASE dictionary in settings.py.
DATABASES = {
'default': {
'ENGINE': 'django.db.backends.mysql',
'NAME': 'dataflair',
'USER': 'root',
'PASSWORD': “”,
'HOST': “”,
'PORT': “”,
'OPTIONS': {
'init_command': "SET sql_mode='STRICT_TRANS_TABLES'"
}
}
}
Here the attributes greater in number as MySQL provides us more features from the sqlite3. The Engine here is “django.db.backends.mysql” which as the name suggests is a python library for MySQL.
We would recommend though, that you should keep the PASSWORD empty as filling it can produce an error for some users.
Here, the HOST is the host server, but left blank means by default is localhost.
The OPTIONS is a bit interesting attribute, in this, we are actually passing the SQL as a string through Python which then the SQL server parses itself.
Here we have to write:
SET sql_mode = ‘STRICT_TRANS_TABLES’
It is essentially SQL, being passed on as a string.
For the last steps just run these two commands:
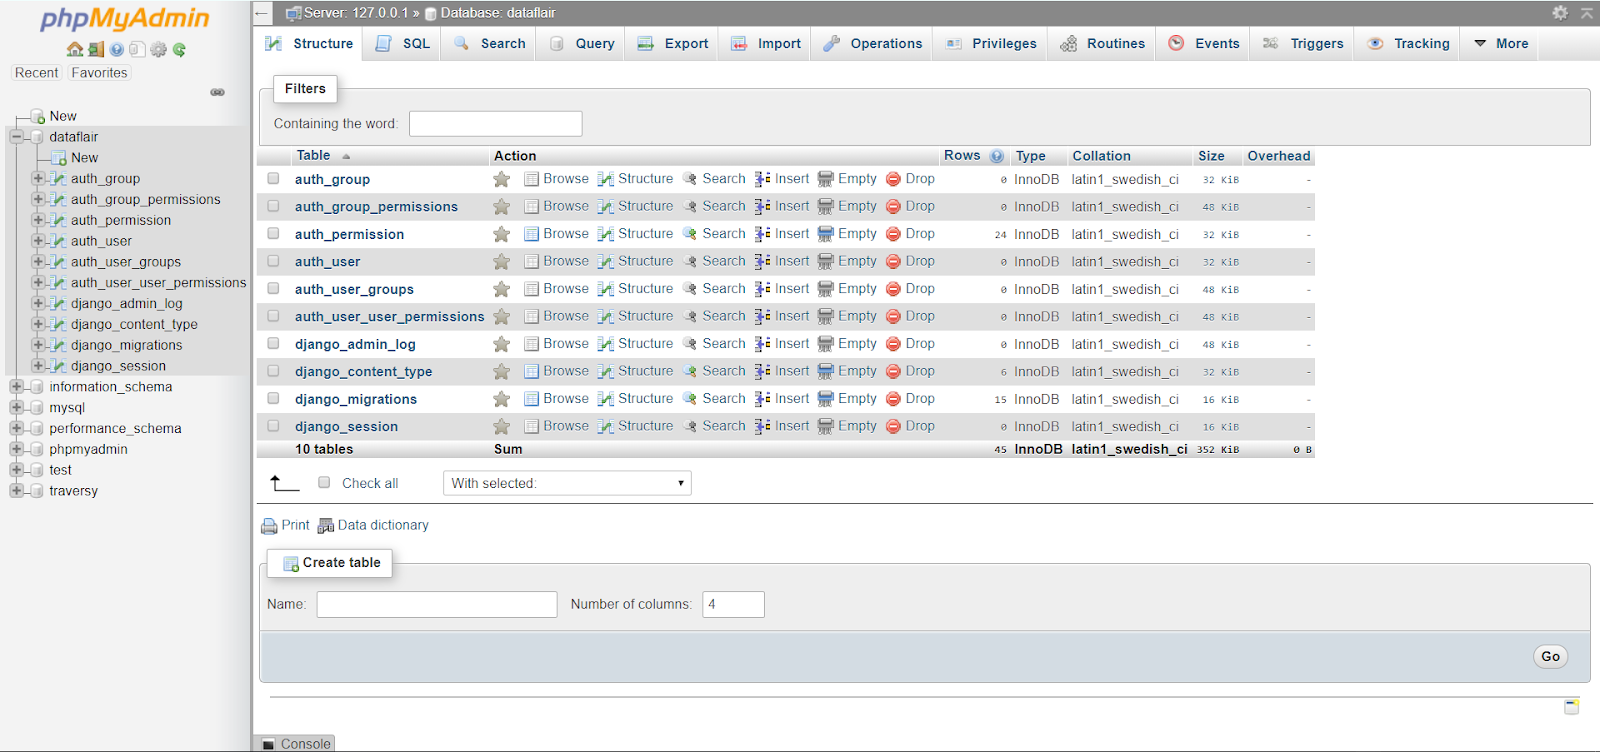
python manage.py migrate
python manage.py runserver
Now, refresh the phpMyAdmin page and you will get some tables created with just doing this much.
That’s it, you have now all the things ready for your website, all the components, and development setup is finally complete.
Check out Django Project Layout & Files Structure
Summary
We learned how to add the MySQL database to our project and also understood the DATABASE dictionary of the Django Framework.
Also, we learned that Django has middleware and libraries for almost all the important databases out there. And, you won’t need to learn a new database language for that, Django does all that work for you.
Furthermore, if you have come across with any queries, just enter in the comment section.
Did we exceed your expectations?
If Yes, share your valuable feedback on Google


django.core.exceptions.ImproperlyConfigured: Error loading MySQLdb module.
Did you install mysqlclient?
sempre parado neste erro
very useful
It shows error message please guide me thank you
6:22:15 PM [Apache] Error: Apache shutdown unexpectedly.
6:22:15 PM [Apache] This may be due to a blocked port, missing dependencies,
6:22:15 PM [Apache] improper privileges, a crash, or a shutdown by another method.
6:22:15 PM [Apache] Press the Logs button to view error logs and check
6:22:15 PM [Apache] the Windows Event Viewer for more clues
6:22:15 PM [Apache] If you need more help, copy and post this
6:22:15 PM [Apache] entire log window on the forums
I’ve experimented troubles to instal ‘pip install mysqlclient’ for my system. The problem is that not are availabe library compatible for me. And the solution comes with download the apropiate compiled file from this site: https://www.lfd.uci.edu/~gohlke/pythonlibs/#mysqlclient. Download to my computher and then install it with this command
pip install c:\mysqlclient‑1.3.13‑cp36‑cp36m‑win_amd64.whl
The file for you maybe different depending of your system and downloaded from the web mentioned. Hope this can be usefull, for me works fine
where to run these two lines of code?? please help.
python manage.py migrate
python manage.py runserver
A little late, but maybe usefull for others.
You need to run these in your Terminal or CMD depending on your OS.
Run it in the root folder of your django app, you should see the file “manage.py” if you inspect the folder.
On Windows with python 3 you need to type “py -3” instead of “python”
I have never been able to get this and similar things to run on Mac using PyCharm with both Mac OS Catalina and Big Sur. I get errors with it not finding _mysql when I get to the ‘migrate’. However, it all worked very smoothly on Windows 10. Anyone know about this or have similar problems? There seem to be similar things posted on Stack Overflow.
Hi, I have successfully connected Django to my database. Now I want to un-connect it and want to delete all the Django created tables from my database.
like i have three applications inside one project have been using database for one which has been submitted and working well, and now, i want another application to be submitting database, using the same setting.py in the same project… please what should i do?
yes i have the same error pls help
how to connect the html form which is created in python to db table
it is bater than any i know before
You have tutorial w postgresql with Django auth?
Hello, I’m trying to connect mysql in vsc but, I cannot do it. It is up to two weeks now I have been trying to connect. I need help anyone who has the idea how to go about it.
It is really, frustrating.