Django Forms Handling & Django Form Validation – Master the Concept
Master Python with 70+ Hands-on Projects and Get Job-ready - Learn Python
Job-ready Online Courses: Click for Success - Start Now!
These days websites have become highly personalized resulting to some awesome applications for users. This personalization is an impact of user-data on the server. And, that data is highly valuable for you as it is used to provide a better user experience and more functionality. But, it also has some serious security consequences and legal issues. Therefore, when designing any user-input, keep in mind that user-data is highly valuable.
So the question that should arise in your mind, how do we take user input and utilize the same? The answer is simple through forms.
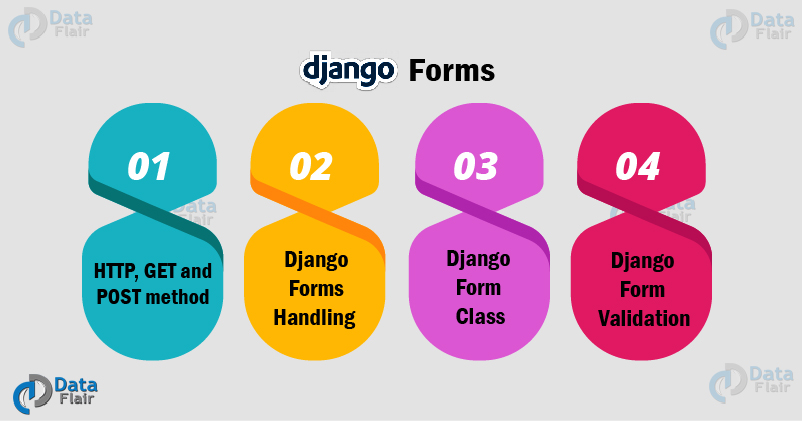
After completing this Django forms tutorial, you will have a great command over these concepts:
- Forms
- HTTP, GET & POST Method
- Django Forms
- Django Form Class
- Django Form Validation
Now, let’s quickly start the tutorial.
What are Forms?
Forms are a collection of HTML elements to take input from the user. In simple words, whenever you give any kind of instruction or input on web, that is known as a form.
The input elements come inside <form></form> tags. It is collectively called as HTML form. All the websites use forms each having different use-cases.
Some daily examples of forms can include:
- Google search
- Facebook posts and stories
- Online registrations
- Online Quizzes, tests, etc
There are too many examples. Forms have become an essential part of web applications.
We use them to structure and transmit user-data over HTTP. They provide all kinds of input options to be taken from the user.
What is HTTP?
HTTP is an acronym for HyperText Transfer Protocol. It is the set of rules which all the computers on a network follow to transmit data to other computers. All client/server architectures are based on this protocol.
There are different methods to transmit data over HTTP. The 2 very popular methods among all of them are GET and POST.
1. GET
We use this method for user-data which will not be changing the state of the website. GET is a method of transmitting form data via URL.
Google search is the best example of the same. We use this method for transmitting data which doesn’t make changes in the database.
GET method comes in handy when we want to bookmark pages as our search query becomes part of the URL.
GET method is often limited by the size of the URL. Anything more than URL size cannot be transmitted. That means we can only send text requests.
2. POST
This method is used for sensitive data and it changes the state of the website. POST is a method of transmitting data as collective structure over HTTP. It is sent as a different request from client alongside URL request, like cookies.
POST data is not a cookie, it is just a different type of resource. This method is more secure than getting because the data is not in URL. The POST method also has a greater size limit, allowing for file uploads.
This method is used on all the registration forms and quizzes.
HTML Forms
The <form> tag has two important attributes to be specified:
1. Action
This attribute specifies where to submit the form data. It can be left blank but in that case, the data will be sent to the same URL. Otherwise, you can specify a URL. This attribute just tells the form where to submit the data.
2. Method
This attribute specifies how to submit data. There are GET and POST values for the same. You should use capital values for this attribute.
They will function as explained in the previous section.
Django Forms Handling
First, we have to understand how the server responds with forms and where do the forms fit in all the client/ server architecture?
When a form is rendered in Django, these steps are involved:
1. Render the Form in its Initial State
When client requests form for the first time, the server responds with an empty form. The form fields can have initial values and help texts at that point. The initial state can consist data which may or may not be changed by the user.
2. Receive the Form Data & Validate the Information
When the users has a completely filled form, they submit it. The data received by the server needs to be validated.
Here, validation means all kinds of things. Like,
- If it is a valid email or not.
- The passwords match with re-entered passwords or not.
There are 2 different types of validations:
- Custom validations
- Built-in validations
Their use depends on developer and project requirements.
3. If the Received Data is not Valid, Response is a Bounded Form
When you validate the form data, the function will either result in true or false. That means user either entered valid data or invalid data. In the latter case, we will have the server to return the form again, but this time form is bounded.
A bounded form has user data in form fields. For example – when you sign-in on the website, at the time wrong password submission, the page does not reset your whole information rather it returns all the values in corresponding fields, filled by you and highlights only those fields where data is invalid.
That response is a bounded form.
4. If the Received Data is Valid, a Success Response will generate
When your form data is validated, then response is a redirect or any success page. This part is also different for different websites.
When the client/ browser requests for form for the first time, we receive a GET request, that’s how we check whether a request has been made for the first time. Then, the server responds with a default form, with initial values.
In the second phase, the user completes and submits the form. This time the sumission was via the POST method. It will make the server recognize this request and perform validation checks.
After that, you have to validate the form data . If the data is valid, we provide some kind of success response to our user. Otherwise, we respond with a bounded form stating that something was wrong in data, highlighting that particular field of data.
Again, this process is repeated until the data becomes validated.
Django Form Class
Forms are implemented via Django form class. Some built-in tasks which Django provides you are:
- Rendering Form
- Form Validation
And there are many more but we will be covering these 2 in our tutorial as these are the major ones.
Django form class is very similar to the Django models class. Django form class provides you lots of functionality with forms and their validations. This class has many built-in forms which you can use directly to render HTML. You can also define forms, just like models and render the same.
Have you checked? – Django Models Tutorial
1. Rendering the Form
Let’s understand the forms class by creating a simple registration form.
1.1. Environment Setup
We will be creating a new application for this tutorial in our existing Django Project.
In the command line, enter:
python manage.py startapp registration
This will create a registration application in your Django Project.
Now, install that in settings.py file.
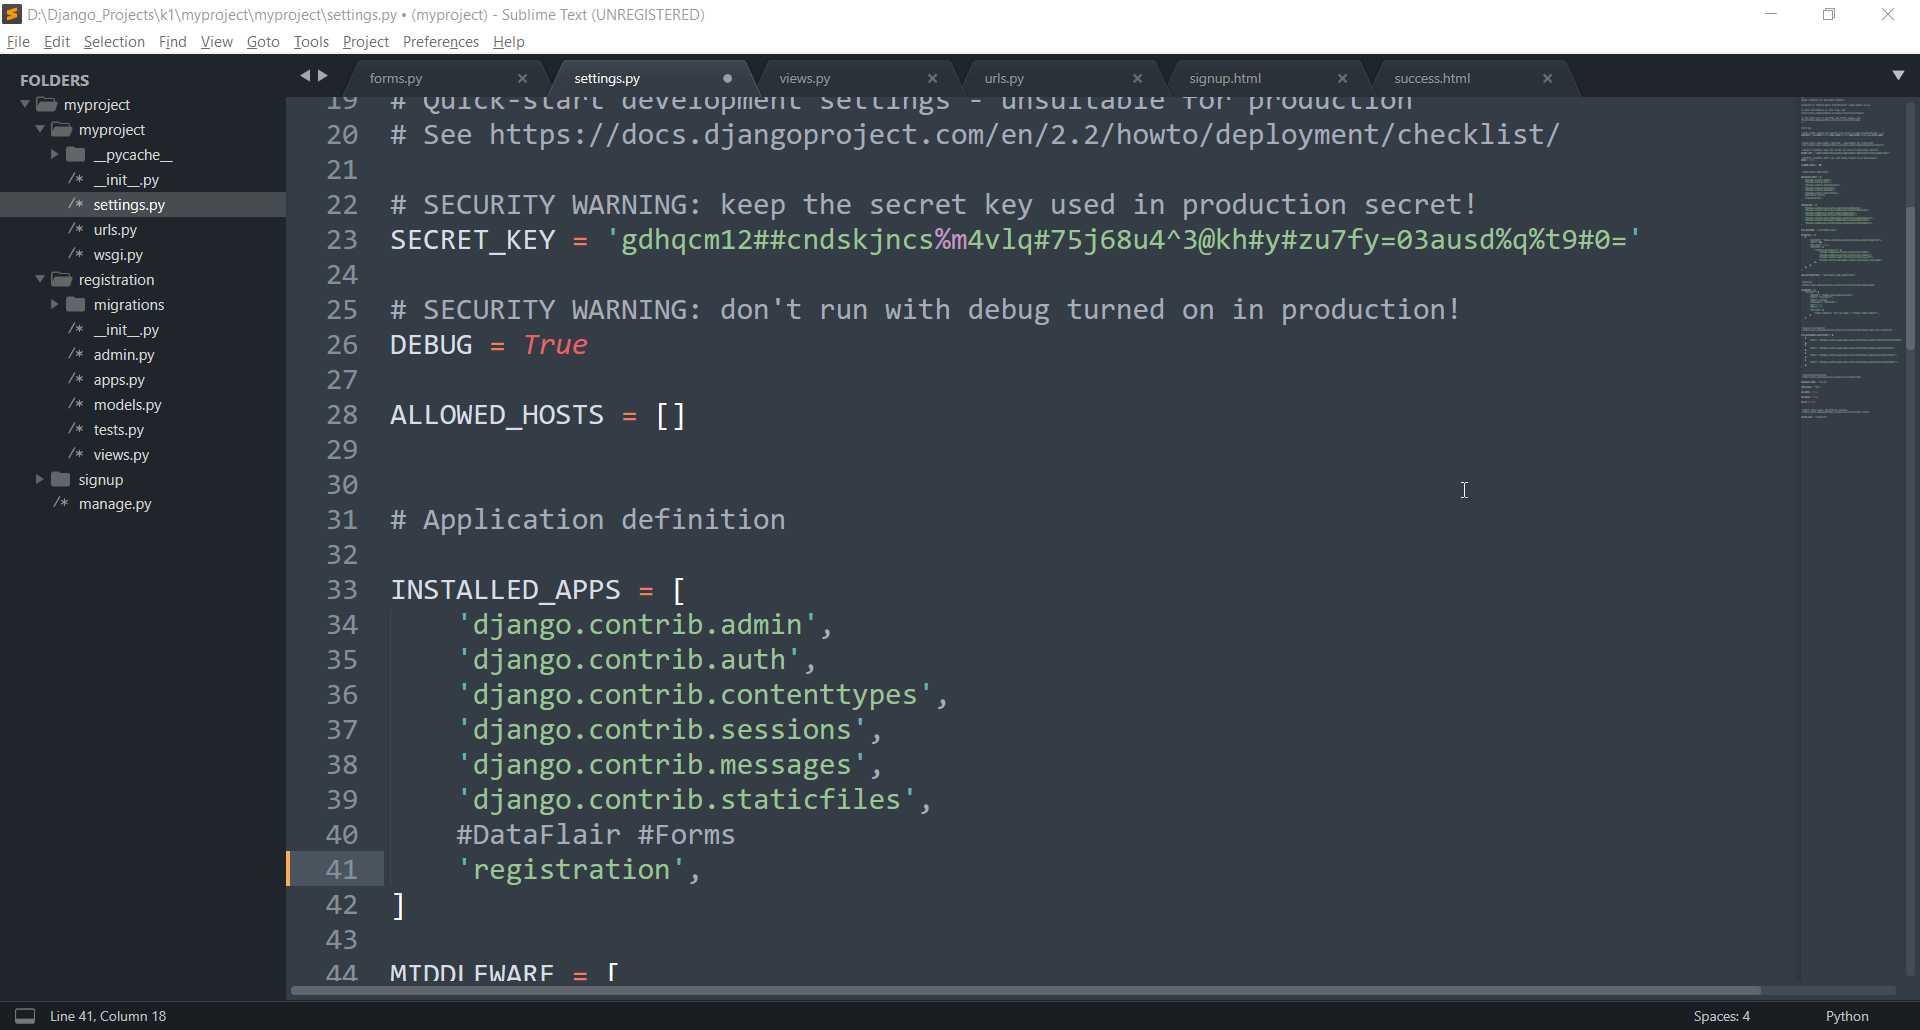
Our environment setup is complete.
1.2. Creating forms.py
Inside your registration app, create a new python file named forms.py. This file is where you will define your form.
Code:
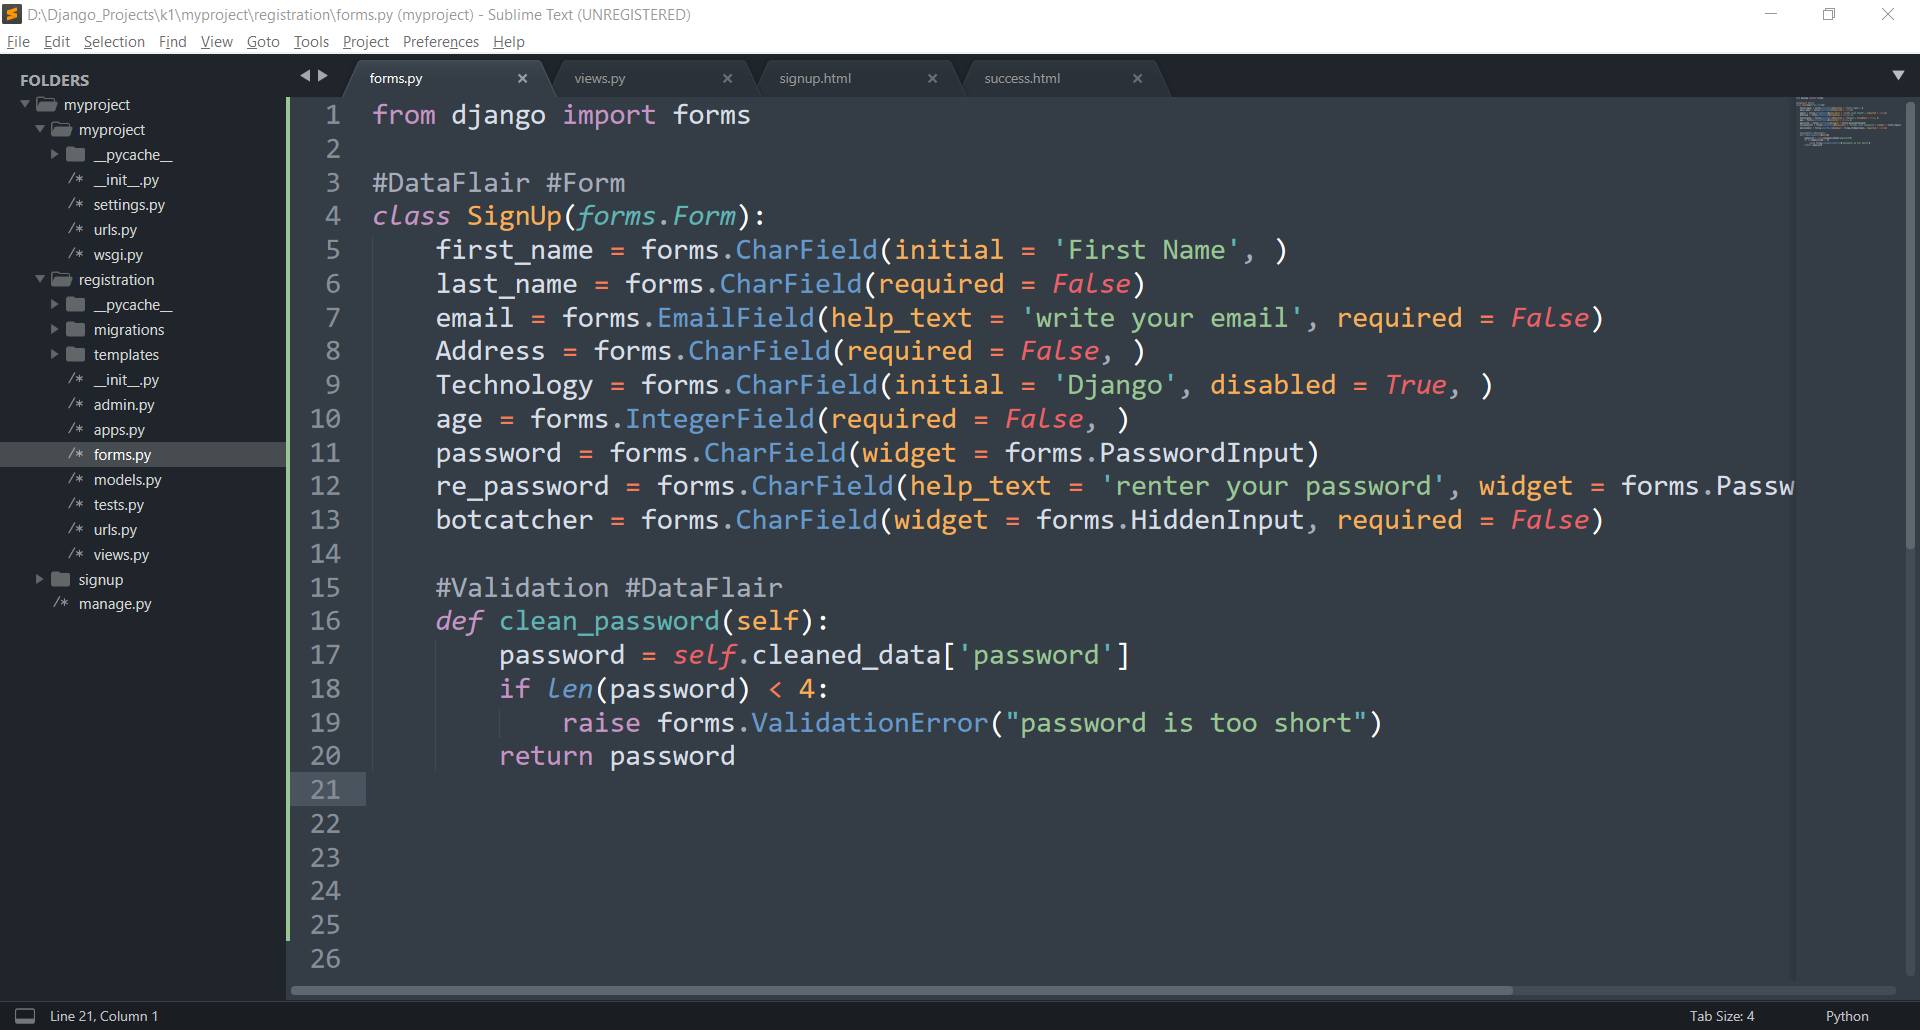
from django import forms

#DataFlair #Form
class SignUp(forms.Form):
    first_name = forms.CharField(initial = 'First Name', )
    last_name = forms.CharField()
    email = forms.EmailField(help_text = 'write your email', )
    Address = forms.CharField(required = False, )
    Technology = forms.CharField(initial = 'Django', disabled = True, )
    age = forms.IntegerField()
    password = forms.CharField(widget = forms.PasswordInput)
    re_password = forms.CharField(help_text = 'renter your password', widget = forms.PasswordInput)
Code Display:
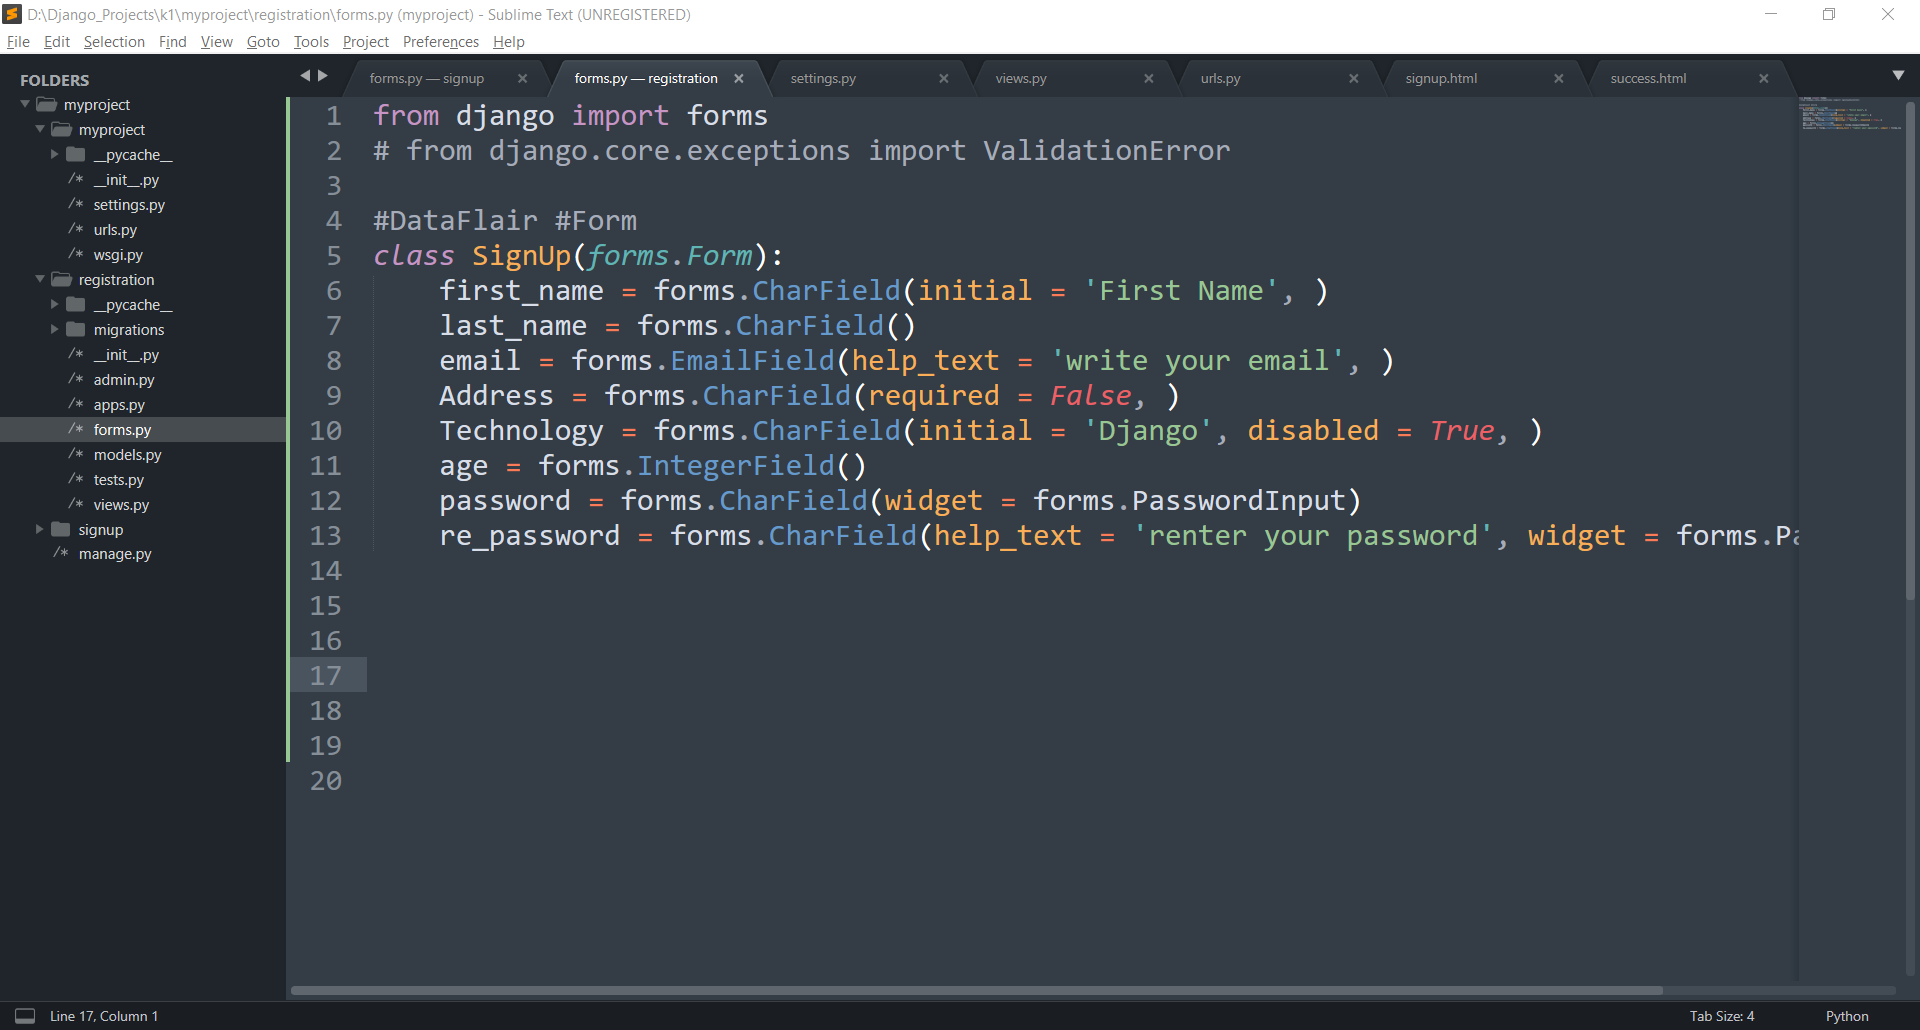
Understand the code:
Here in line 1, we imported a form class from Django. Then we created class SignUp. It is a sub-class of form class. Just like models, we defined different fields. It is almost similar to models class.
These fields are going to become different types of input elements when we render them in the HTML file. There are multiple fields for different input elements in Django.
Some types of fields in Django:
- BooleanField
- CharField
- ChoiceField
- DateField
- DecimalField
- EmailField
- FileField, etc.
Some common attributes to these fields can be used for more control. These attributes come in handy when validating data. They provide a more constrained selection of data.
Required:
It takes value true or false. By default, it is true and makes necessary to fill the field. You can declare it false to change that.
Initial:
It provides the fields an initial value like textboxes come filled with some generic text. That is the initial argument.
Help-text:
If you want to display some instructions regarding that field, we use help-text. This attribute will display the string you pass in it.
Disabled:
Many times, we don’t want the user to change certain fields. In that case, we use the disabled parameter. It takes in true or false python Boolean. It will make the field static, i.e. the user cannot modified it .
Widget:
There are certain fields which can imitate different kinds of input. Like we have to use CharField for all text-related inputs including passwords. We can use widget attribute with Django’s built-in widgets like we used PasswordInput widget.
Validators:
This attribute will come in handy when we are using validations on data. There are built-in validators and we can also make custom ones.
Label:
This need not be defined if you want your field name to be displayed as the same as form. The label takes in a string and will display in front of the corresponding form field.
There are more attributes, but these are common to most of the fields.
1.3. Creating View functions
Now, we need to repeat the process, the same as performed with models. The form will be rendered automatically when passed to HTML. In your views.py add this code:
Code:
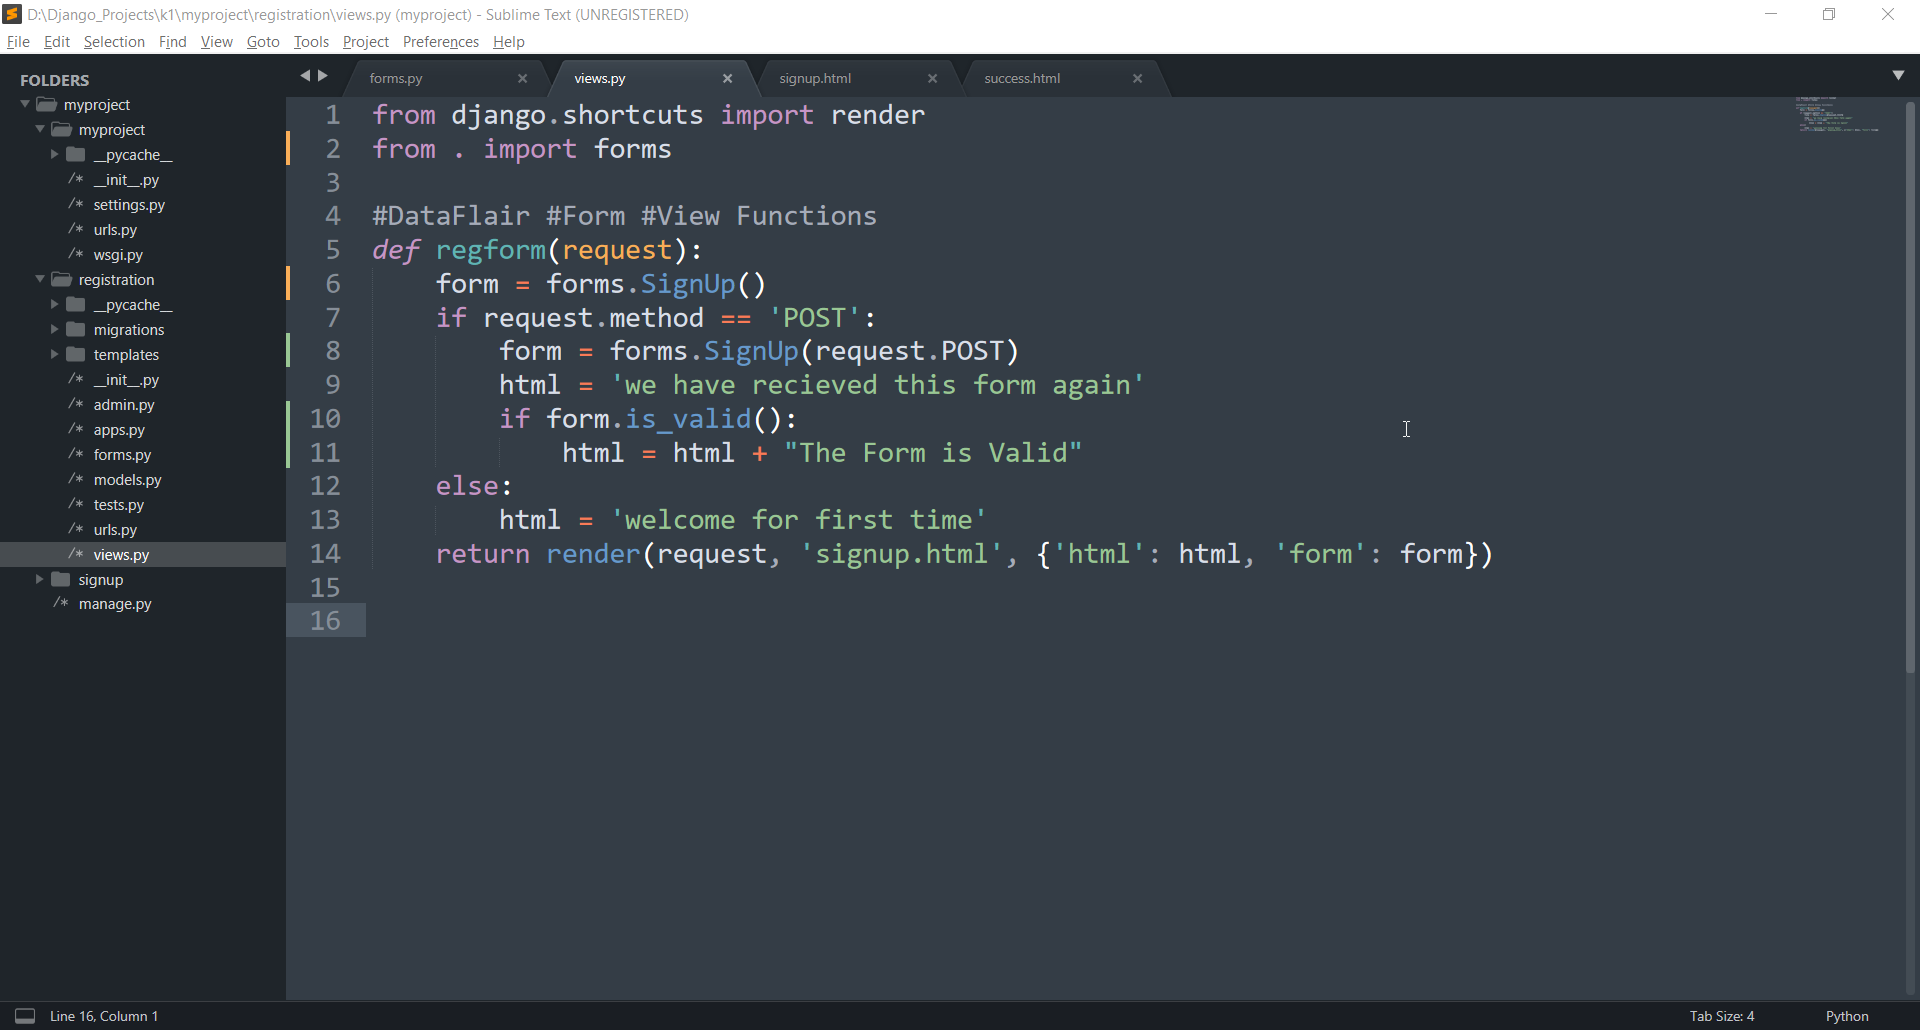
from django.shortcuts import render
from . import forms

#DataFlair #Form #View Functions
def regform(request):
    form = forms.SignUp()
    if request.method == 'POST':
        form = forms.SignUp(request.POST)
        html = 'we have recieved this form again'
    else:
        html = 'welcome for first time'
    return render(request, 'signup.html', {'html': html, 'form': form})
Code Display:
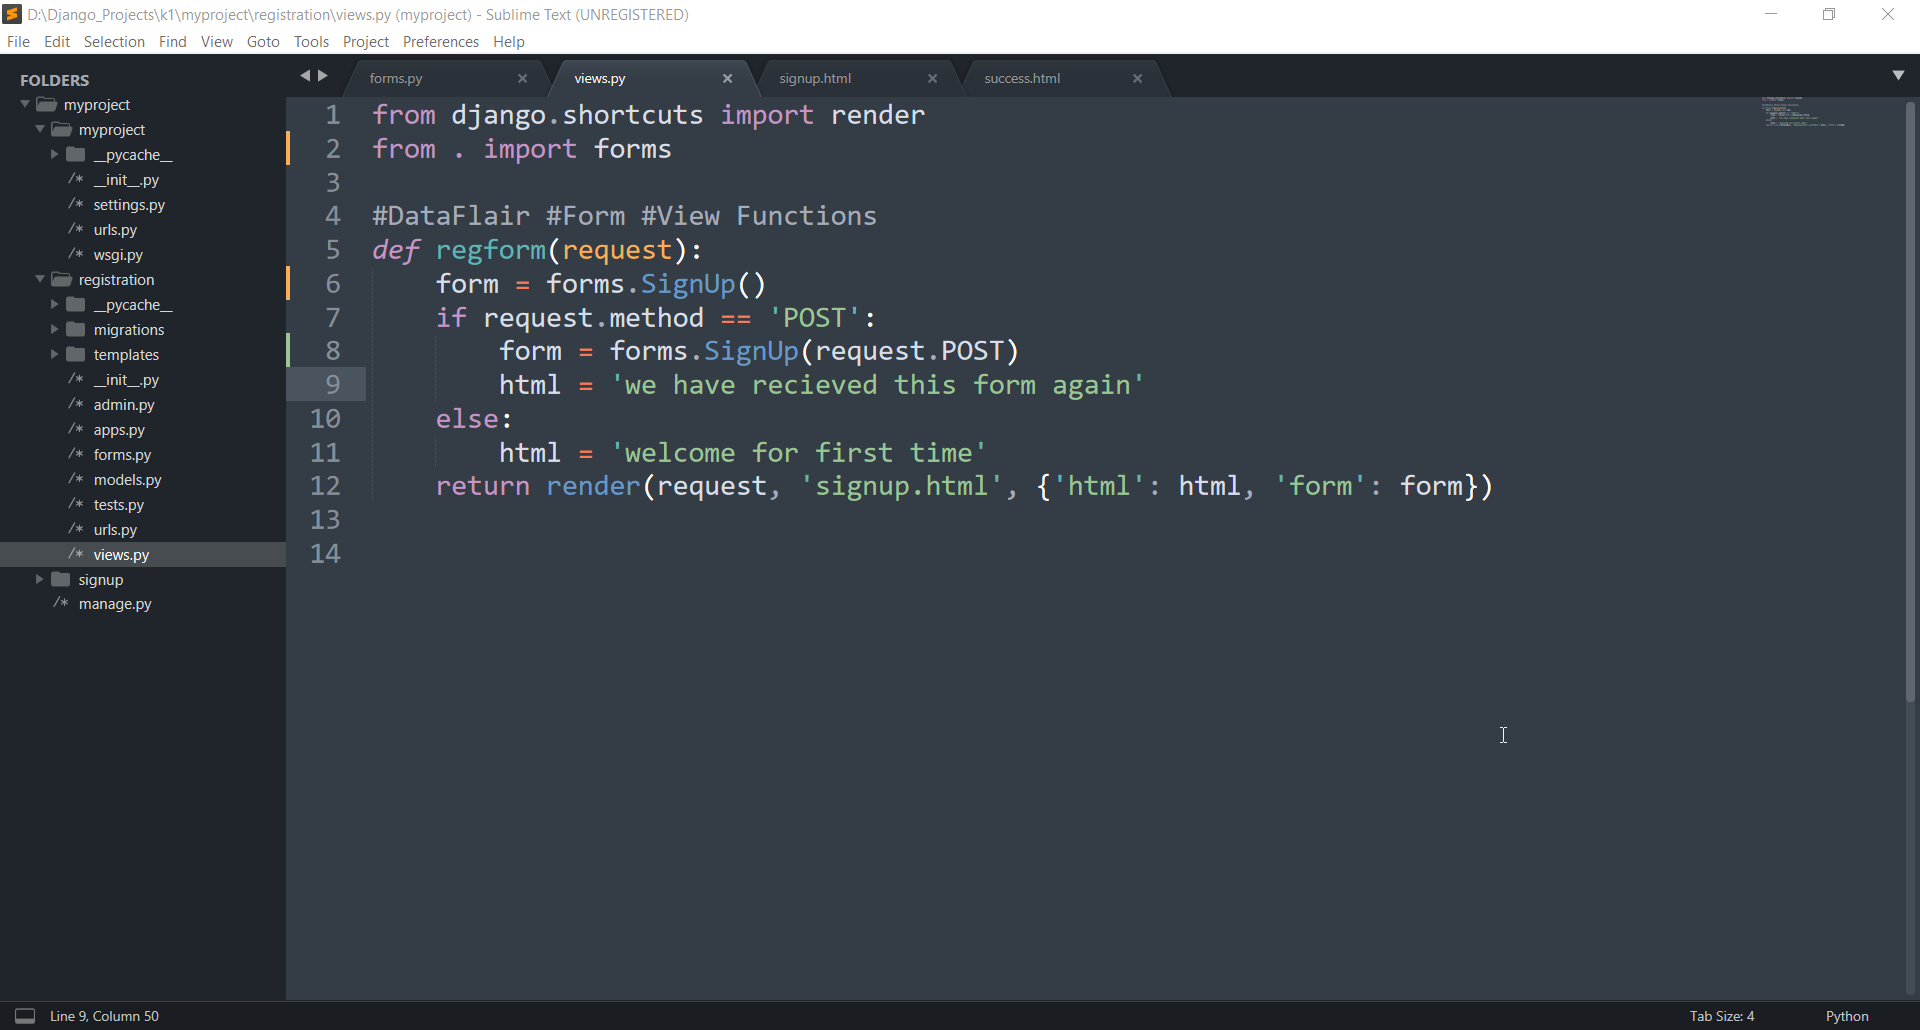
Understanding the Code:
In above view function, we have declared forms the same as we declared models. We created a new instance of form class. Then we checked by which method we are receiving our form, whether, it’s POST method or any other method.
This condition is important. It will check whether the user is requesting the form for the first time or has filled data before. When a user demands form for the first time, we receive a GET request but when a user submits data in form, it will happen through POST request. Thus, we will send the right response.
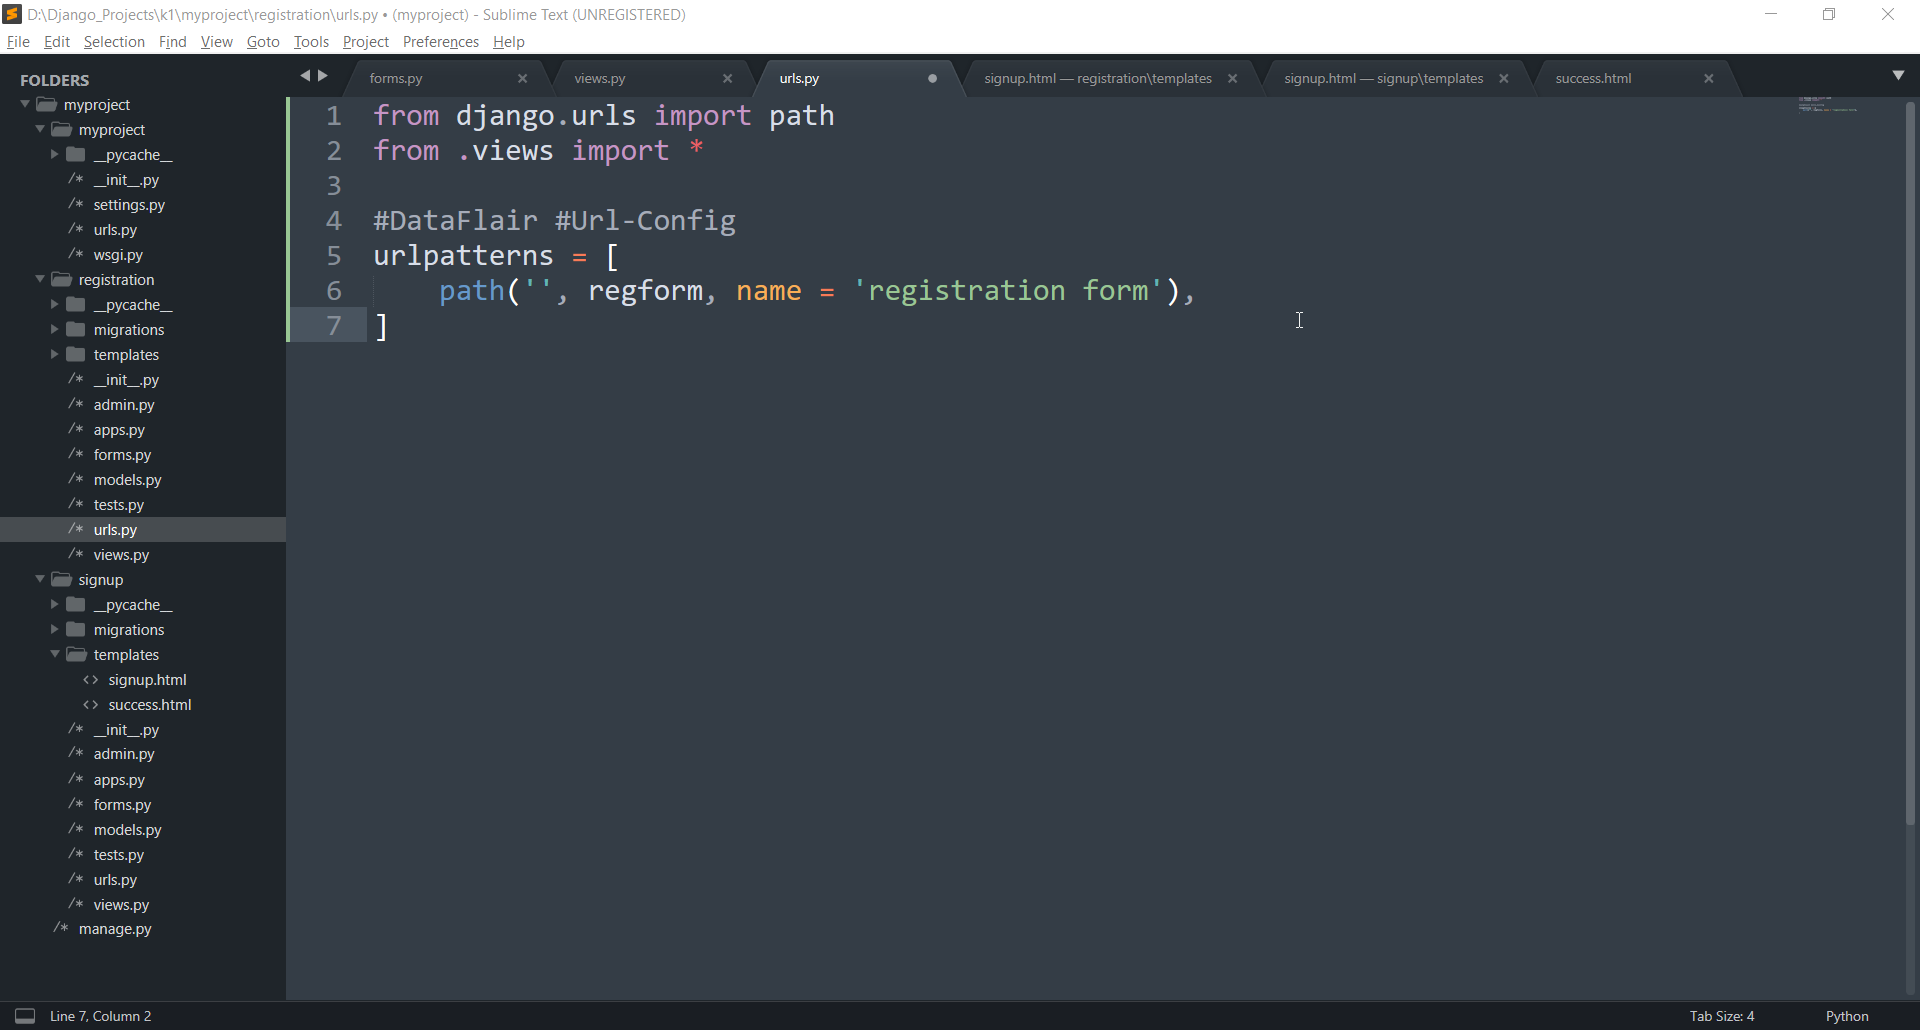
1.4. URL Configuration
Now, we will need to create a new file in the registration directory. urls.py should be the name. In that file, add this code:
Code:
from django.urls import path
from .views import *

#DataFlair #Url-ConfigWhen we validate our form data, we are actually c
urlpatterns = [
path('', regform, name = 'registration form'),
]
Code Display:
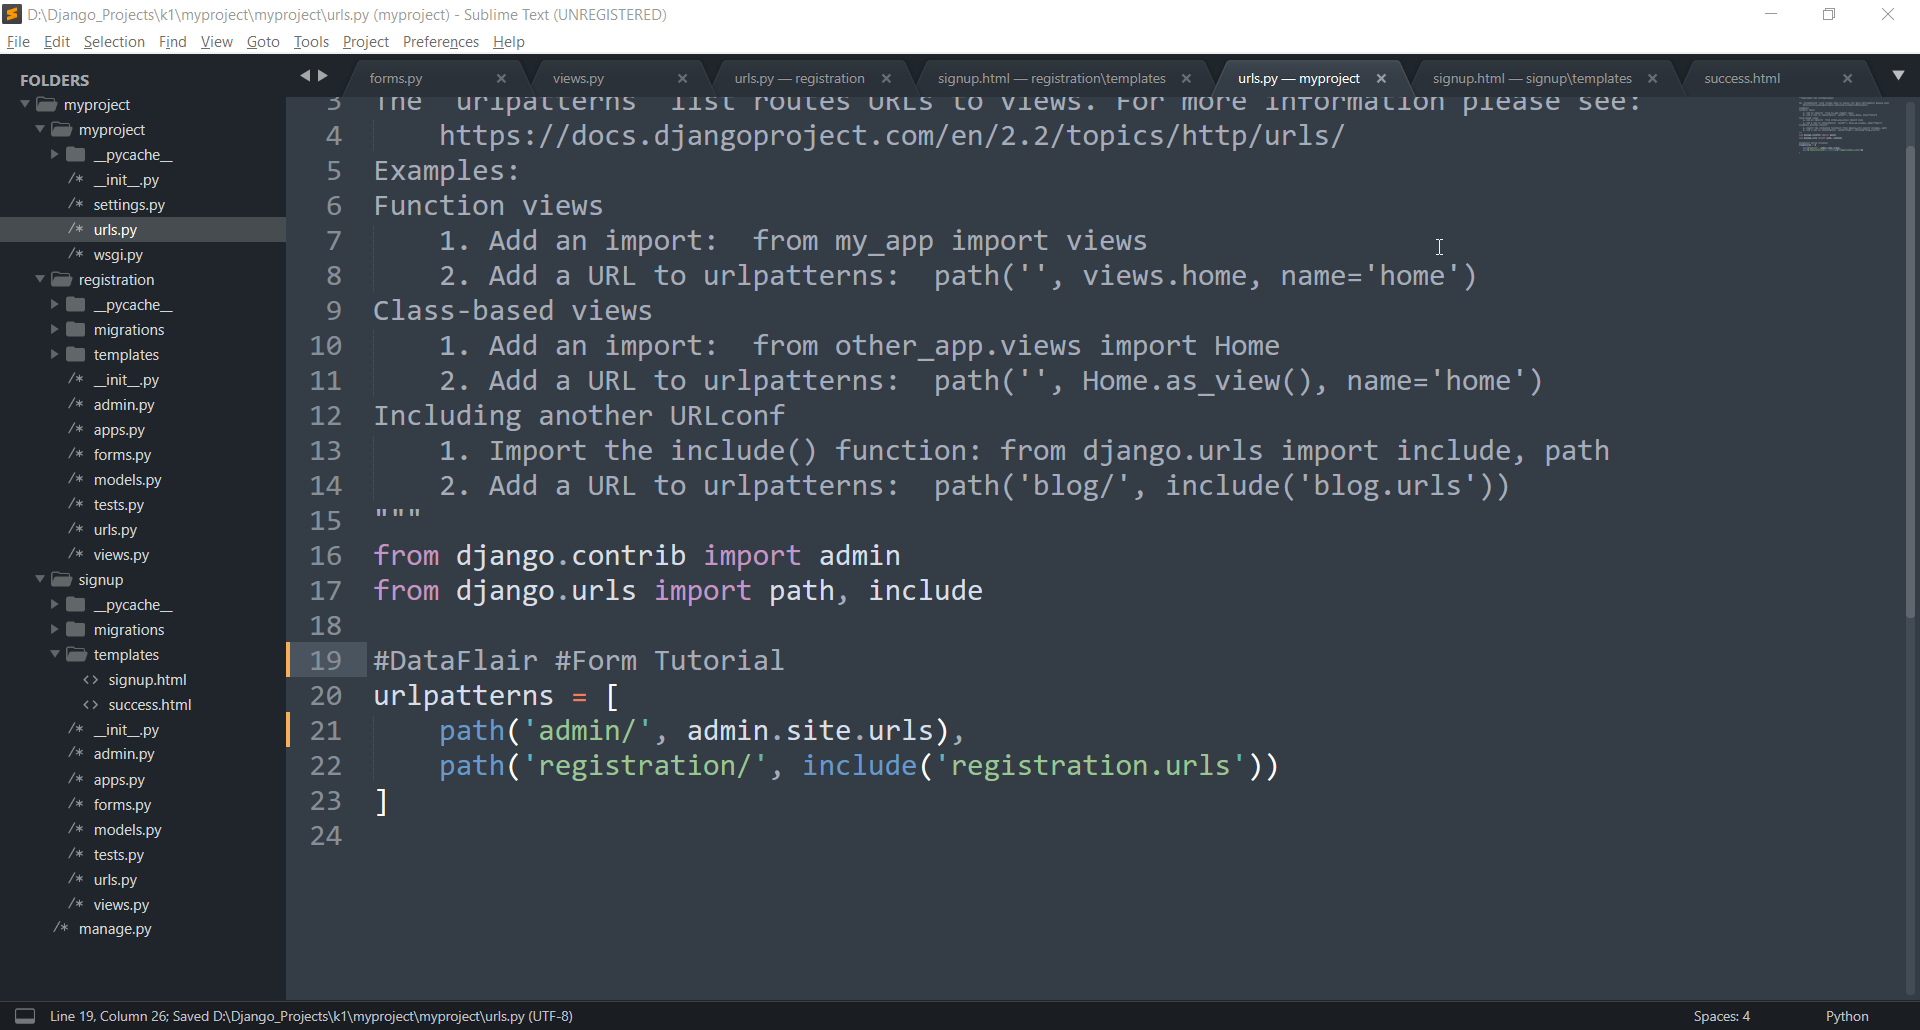
Then edit your main urls-config file.
Add this path to your urlpatterns list.
Code:
# path('registration/',

      include('registration.urls')),

#
Code Display:
Learn to map URL pattern to view functions
1.5. Creating HTML templates
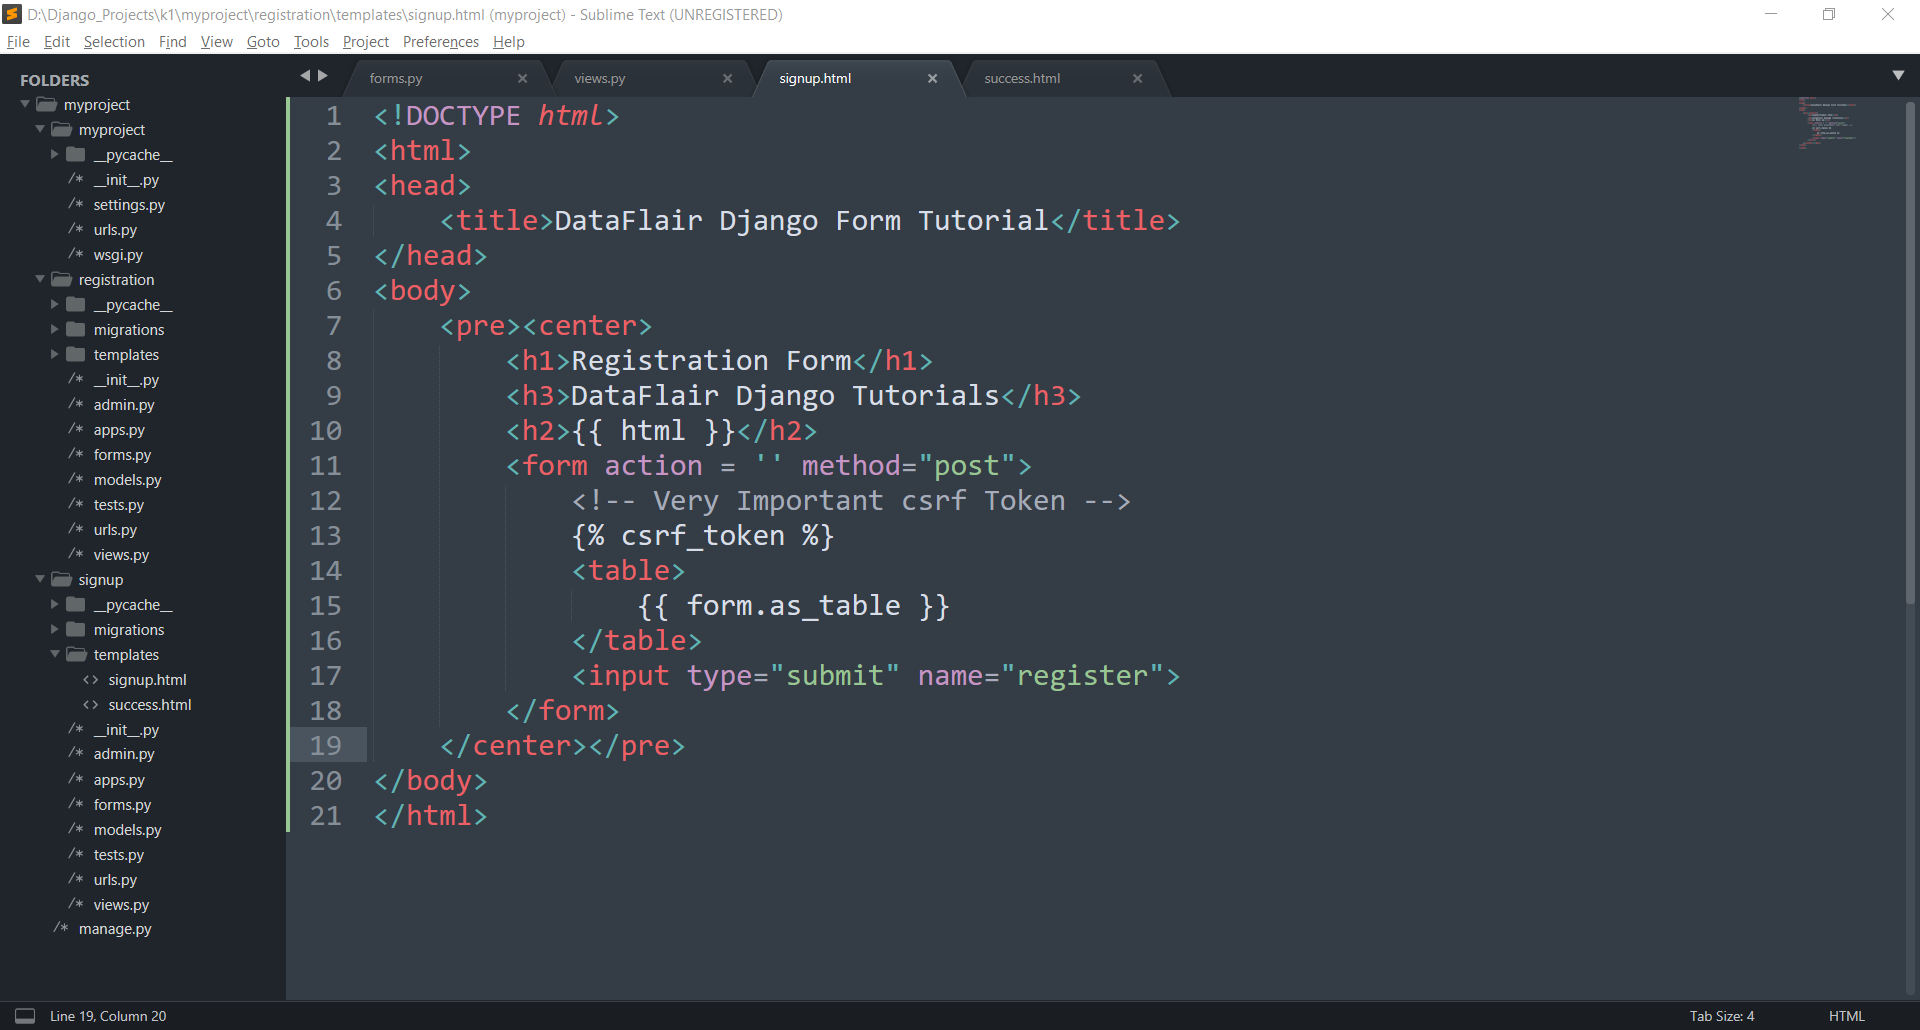
Now, we can proceed to render our forms. Create a new folder in your registration directory named templates. In that folder, create a new file named signup.html.
Insert this code in signup.html
Code:
<!DOCTYPE html>
<html>
<head>
<title>DataFlair Django Form Tutorial</title>
</head>
<body>
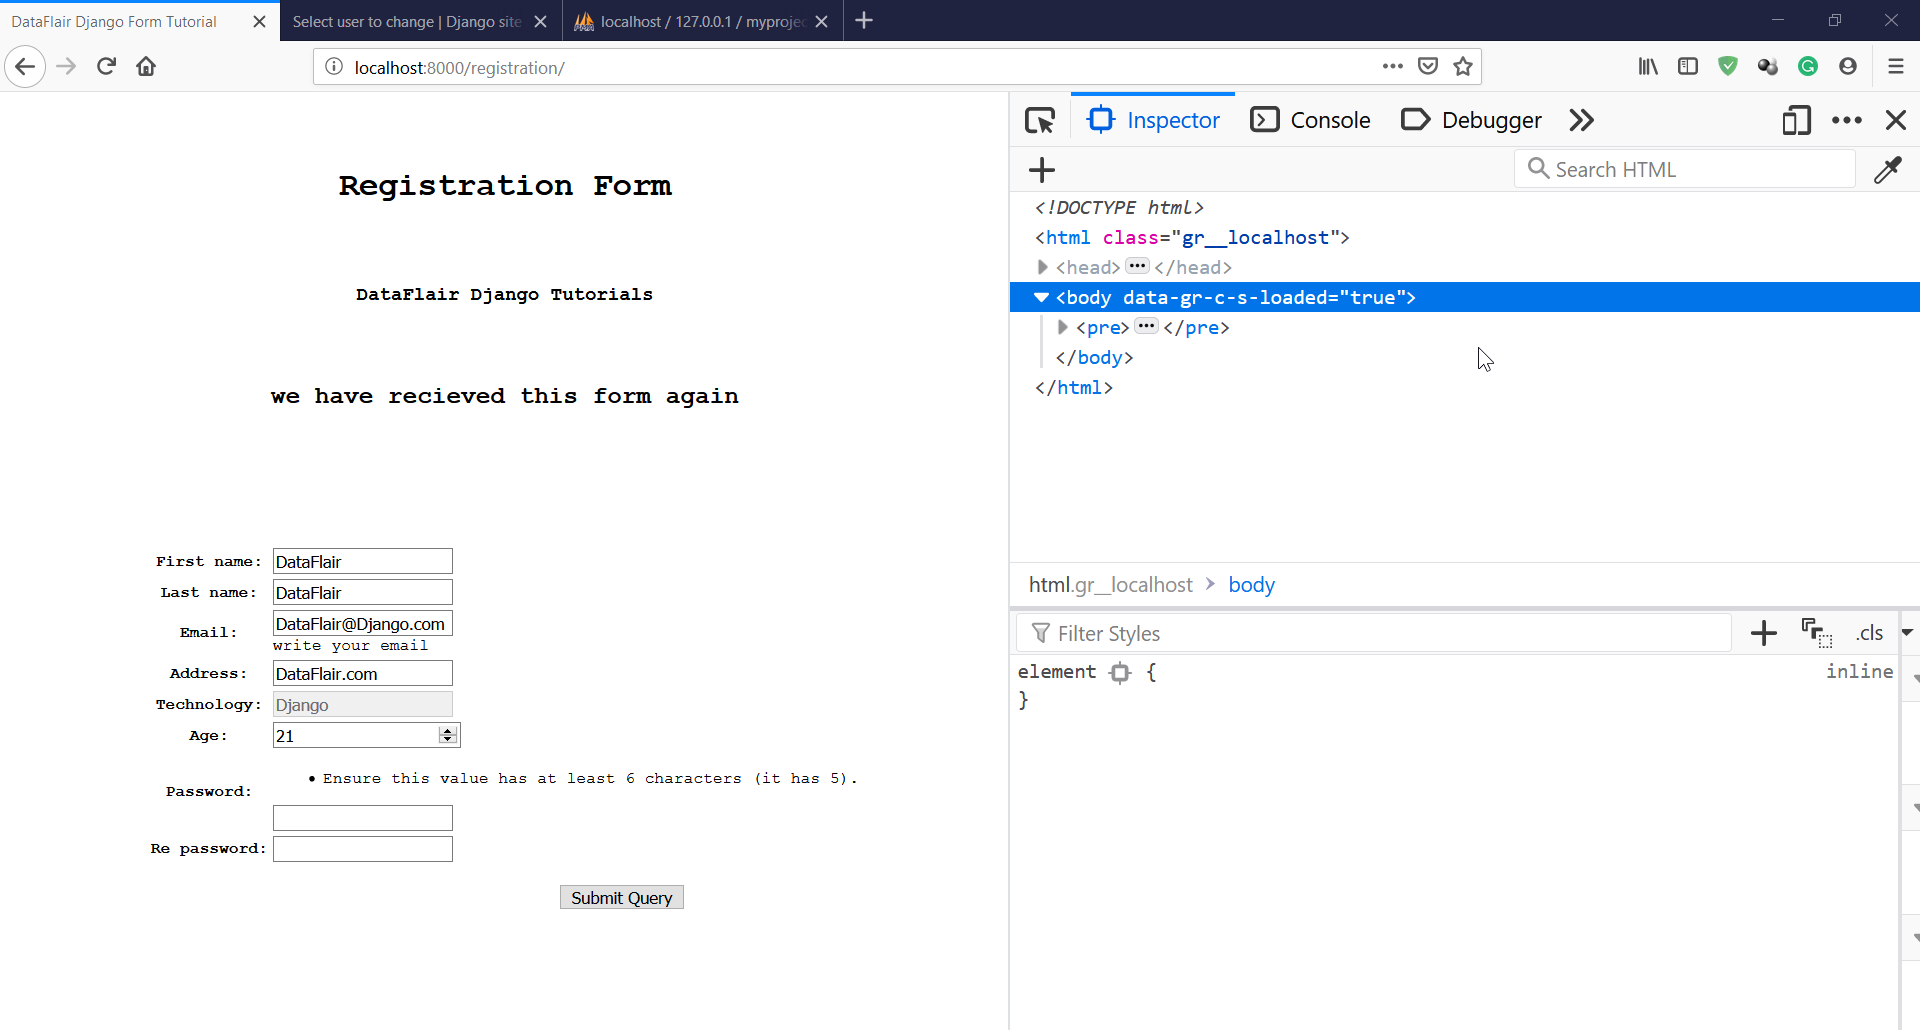
<pre><center>
<h1>Registration Form</h1>
<h3>DataFlair Django Tutorials</h3>
<h2>{{ html }}</h2>
<form action = '' method="post">
<!-- Very Important csrf Token -->
{% csrf_token %}
<table>
{{ form.as_table }}
</table>
<input type="submit" name="register">
</form>
</center></pre>
</body>
</html>Code Display:
Understanding the Code:
Here we have a general HTML file. The main difference starts in <form> tags. We have two attributes of the form tag: the action which is blank, which means the view function of this page will handle the response and the method, we have specified as the post. If some error arises, try using uppercase POST value.
Then we have used {% csrf_token %}. This is the first time we are using any security features of Django.
CSRF stands for Cross-site Request Forgery and is a type of security threat to websites taking form data. Django provides you built-in support for this, by making it necessary to use this token.
Without CSRF token, your website forms can be filled by bots. But, your web data is at potential risk of going to other websites.
The CSRF token prevents this situation. This field has some value which is randomly generated by your server and that value shall match with your server when the form is submitted. That particular value is also not acceptable by other servers. Thus, web data remains where it should be.
After that, we used <table> tags. Inside that we declared {{ form.as_table }}. This is Django’s built-in way of form templating. We can declare this as paragraph and more options are available.
Then we declared a submit button. Clicking this button will submit our form.
Don’t forget to check the Django Templates Tutorial
1.6. Test
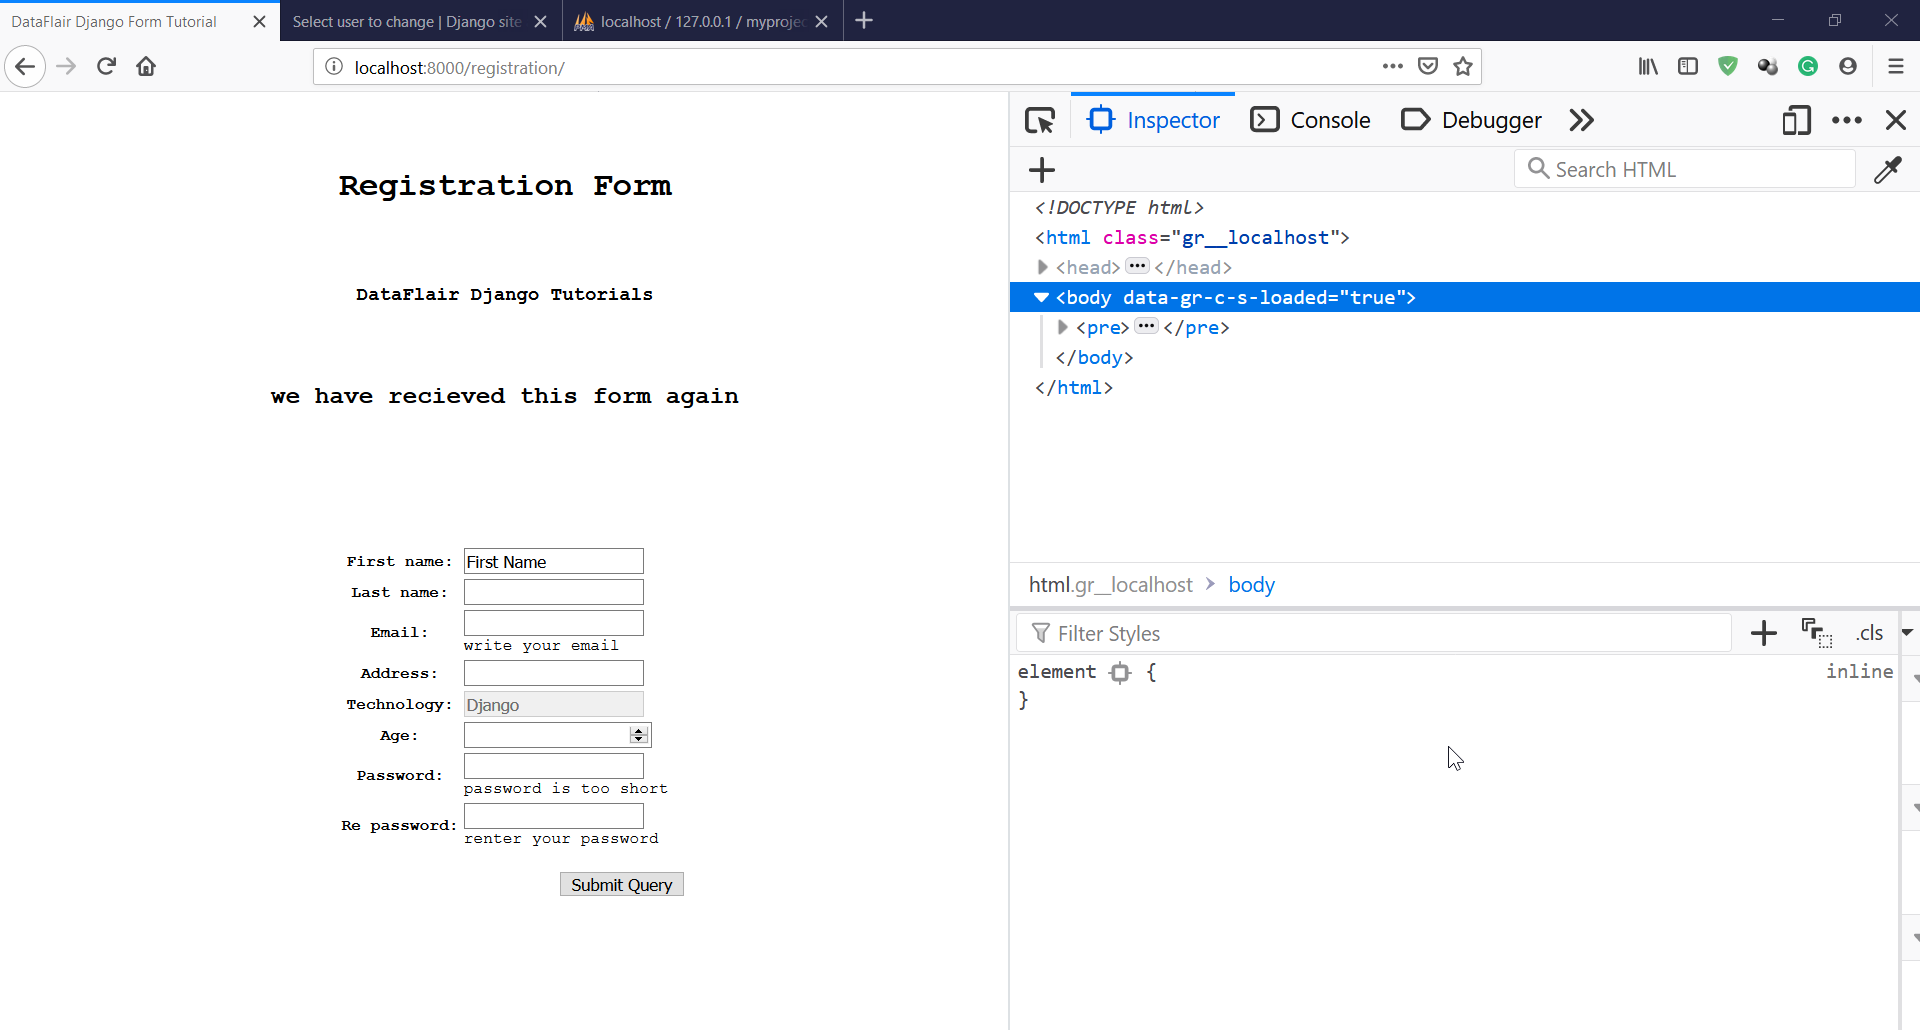
Now, let’s run our project. Search for registration/ in URL bar.
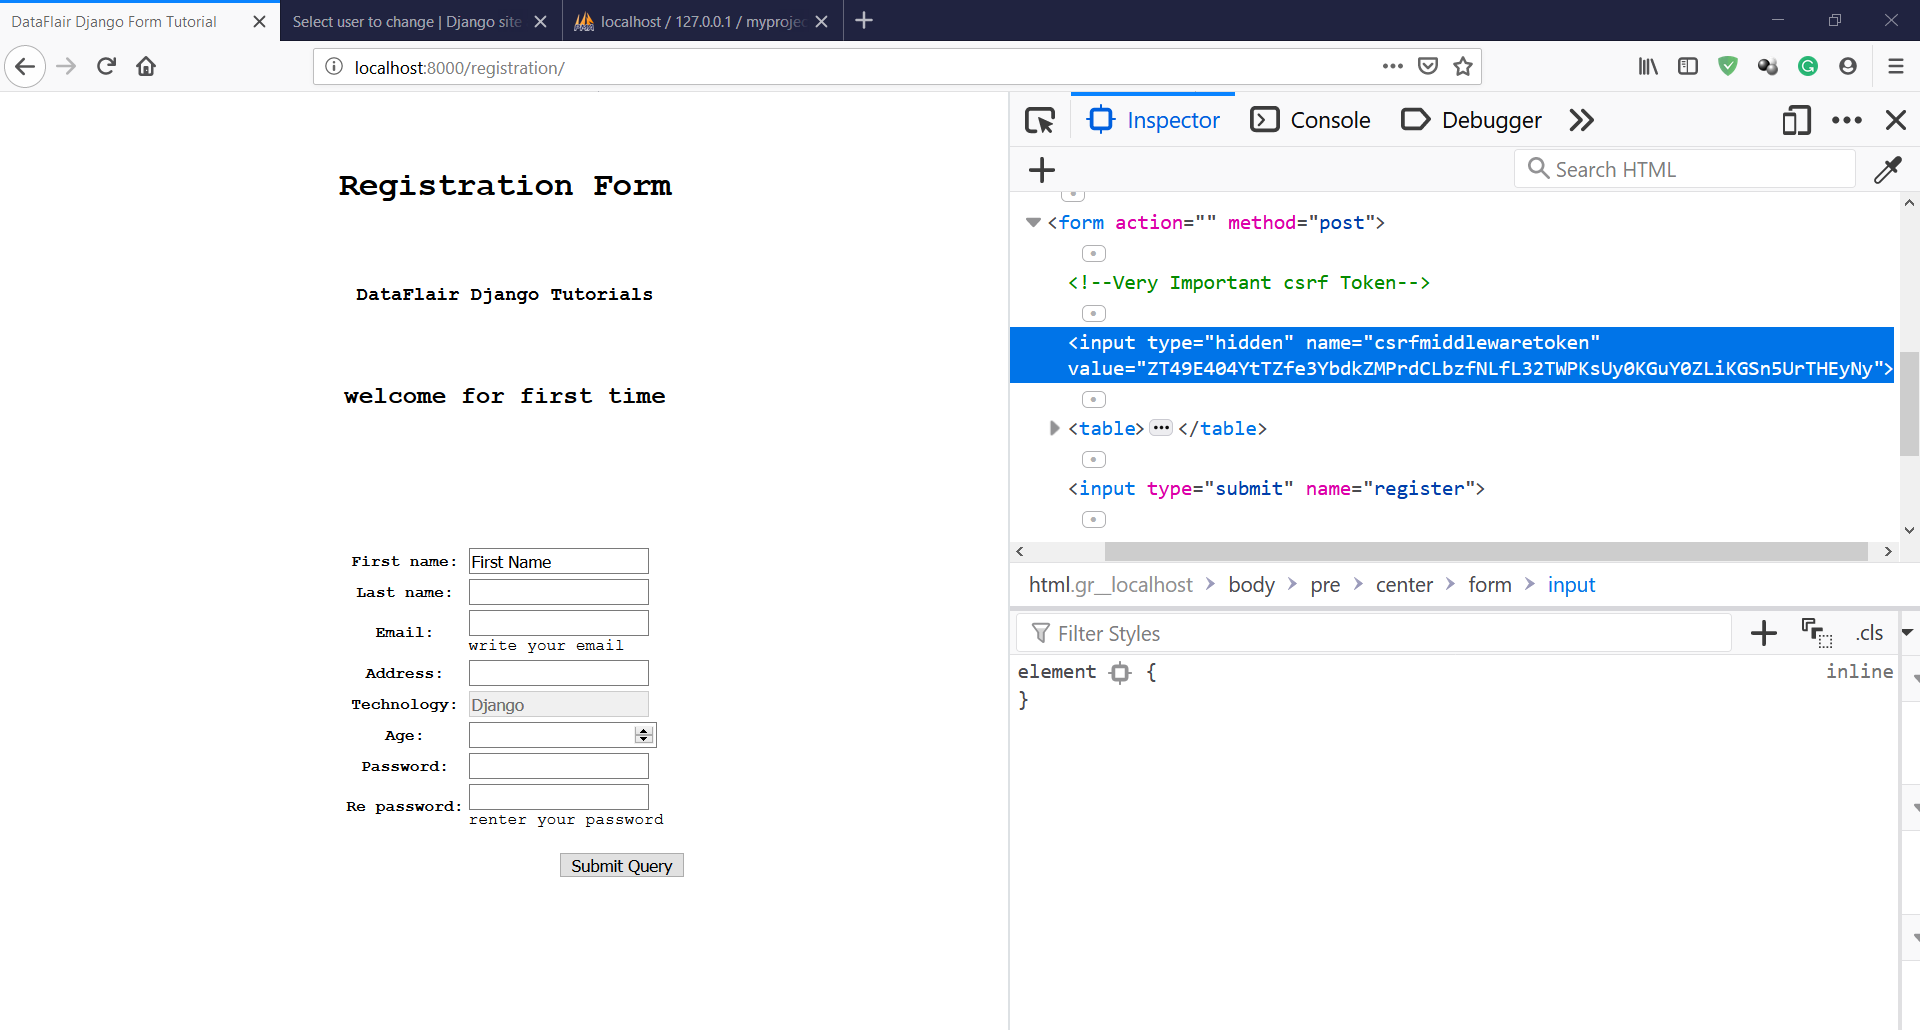
This shall be the output. Here note that blue highlight. That is a hidden field of CSRF token.
Django Forms Validation
Form validation means verification of form data. Form validation is an important process when we are using model forms. When we validate our form data, we are actually converting them to python datatypes. Then we can store them in the database.
This validation is necessary since it adds that layer of security where unethical data cannot harm our database.
NOTE:
There are certain JavaScript Validation methods too, that can be easier to implement, but they are not preferred at all as JavaScript is client-side scripting. If the client browser does not have JavaScript enabled, the data will not be validated. And, it causes some serious issues for developers.
Therefore, data validation on the server side is always necessary. Though, you can have JavaScript validation on the client side.
There are different ways of form validation we can use.
1. Validation of a Particular Field
When we want certain fields to be validated, this method is used. We have to follow some Django conventions at this point to define our methods and other things.
In our forms.py file, add these lines of code:
Code:
#Validation #DataFlair
def clean_password(self):
  password = self.cleaned_data['password']
  if len(password) < 4:
      raise forms.ValidationError("password is too short")
  return password
This is a method of your form class.
Some important points to note:
- The name of the function is special. You have to define it for each field you want to validate.
Syntax:
clean_fieldname()
- Then we used self.cleaned_data[‘field_name’]
This is also specific to a particular field. This list contains the cleaned data received from the form. The cleaned data means its in python data-type format. It allows us to use python functions on the data we stored in a variable.
- After that, we used some conditions. The more important part is that we raised an error. The error messages can be customized.
ValidationErrors are built in methods and subclasses of Django. They are used in models too.
- Always remember to return the data. It doesn’t matter if the data is changing or not, this function should always return the data on which it is operated. That data may or may not be changed.
You can run this code, but it is highly not recommended for professional use. This method requires much more code, which is actually against the Django principles. We have alternatives which are much more efficient.
This shall be the output.
2. Using is_valid()
You can use is_valid() when required to validate complete form-data. This validation will check for Python-datatypes. This function will return True or False (Python Data Types) in return.
Let’s edit our view function a little bit to demonstrate that.
Code:
from django.shortcuts import render
from . import forms
#DataFlair #Form #View Functions
def regform(request):
form = forms.SignUp()
if request.method == 'POST':
form = forms.SignUp(request.POST)
html = 'we have recieved this form again'
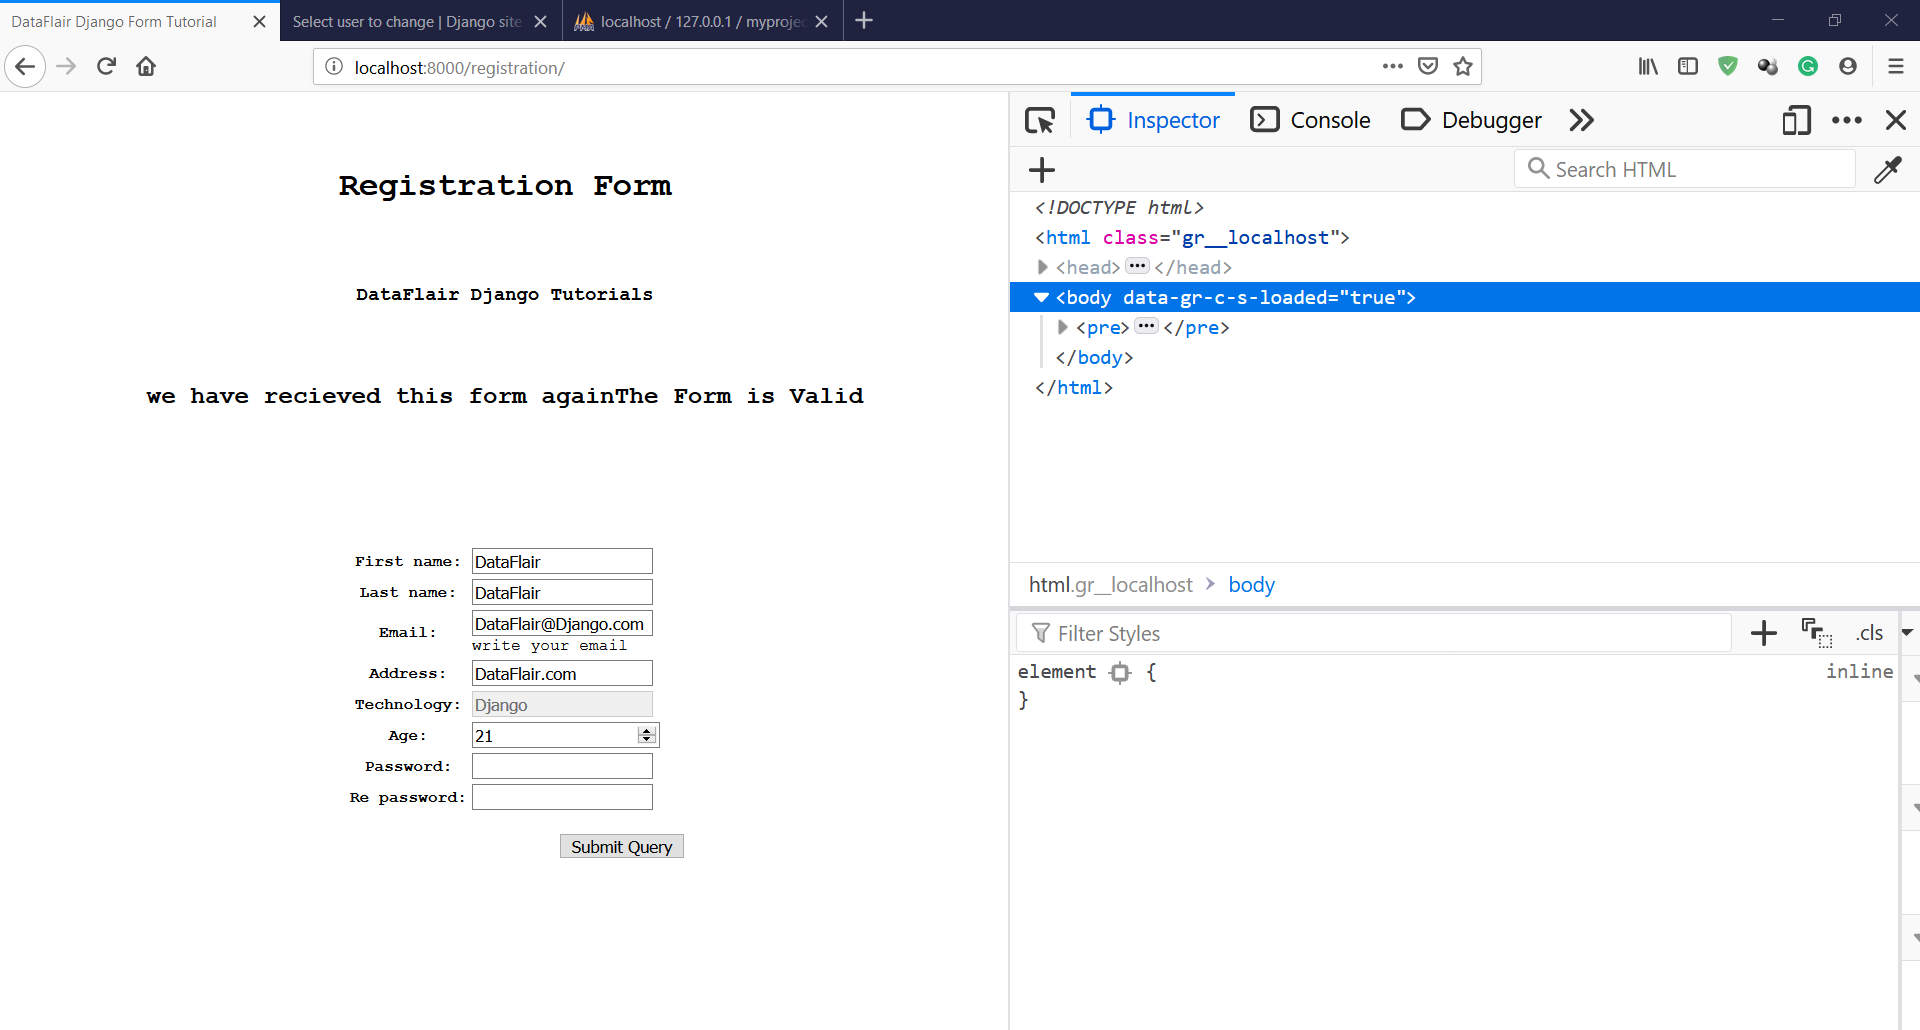
if form.is_valid():
html = html + "The Form is Valid"
else:
html = 'welcome for first time'
return render(request, 'signup.html', {'html': html, 'form': form})Code Display:
We often use this method when we just want our data to be python type. It validates all data. We use is_valid() in view functions as it returns values directly as True and False.
The output of the above code shall be this when your form data is valid.
3. Validation using Validators
We will now learn a professional way of form validation. It is very easy to use and provide much more control over fields.
Let’s modify our forms.py again.
Code:
from django import forms
from django.core import validators
#DataFlair #Form
class SignUp(forms.Form):
  first_name = forms.CharField(initial = 'First Name', )
  last_name = forms.CharField(required = False)
  email = forms.EmailField(help_text = 'write your email', required = False)
  Address = forms.CharField(required = False, )
  Technology = forms.CharField(initial = 'Django', disabled = True)
  age = forms.IntegerField(required = False, )
  password = forms.CharField(widget = forms.PasswordInput, validators = [validators.MinLengthValidator(6)])
  re_password = forms.CharField(widget = forms.PasswordInput, required = False)
Code Display:
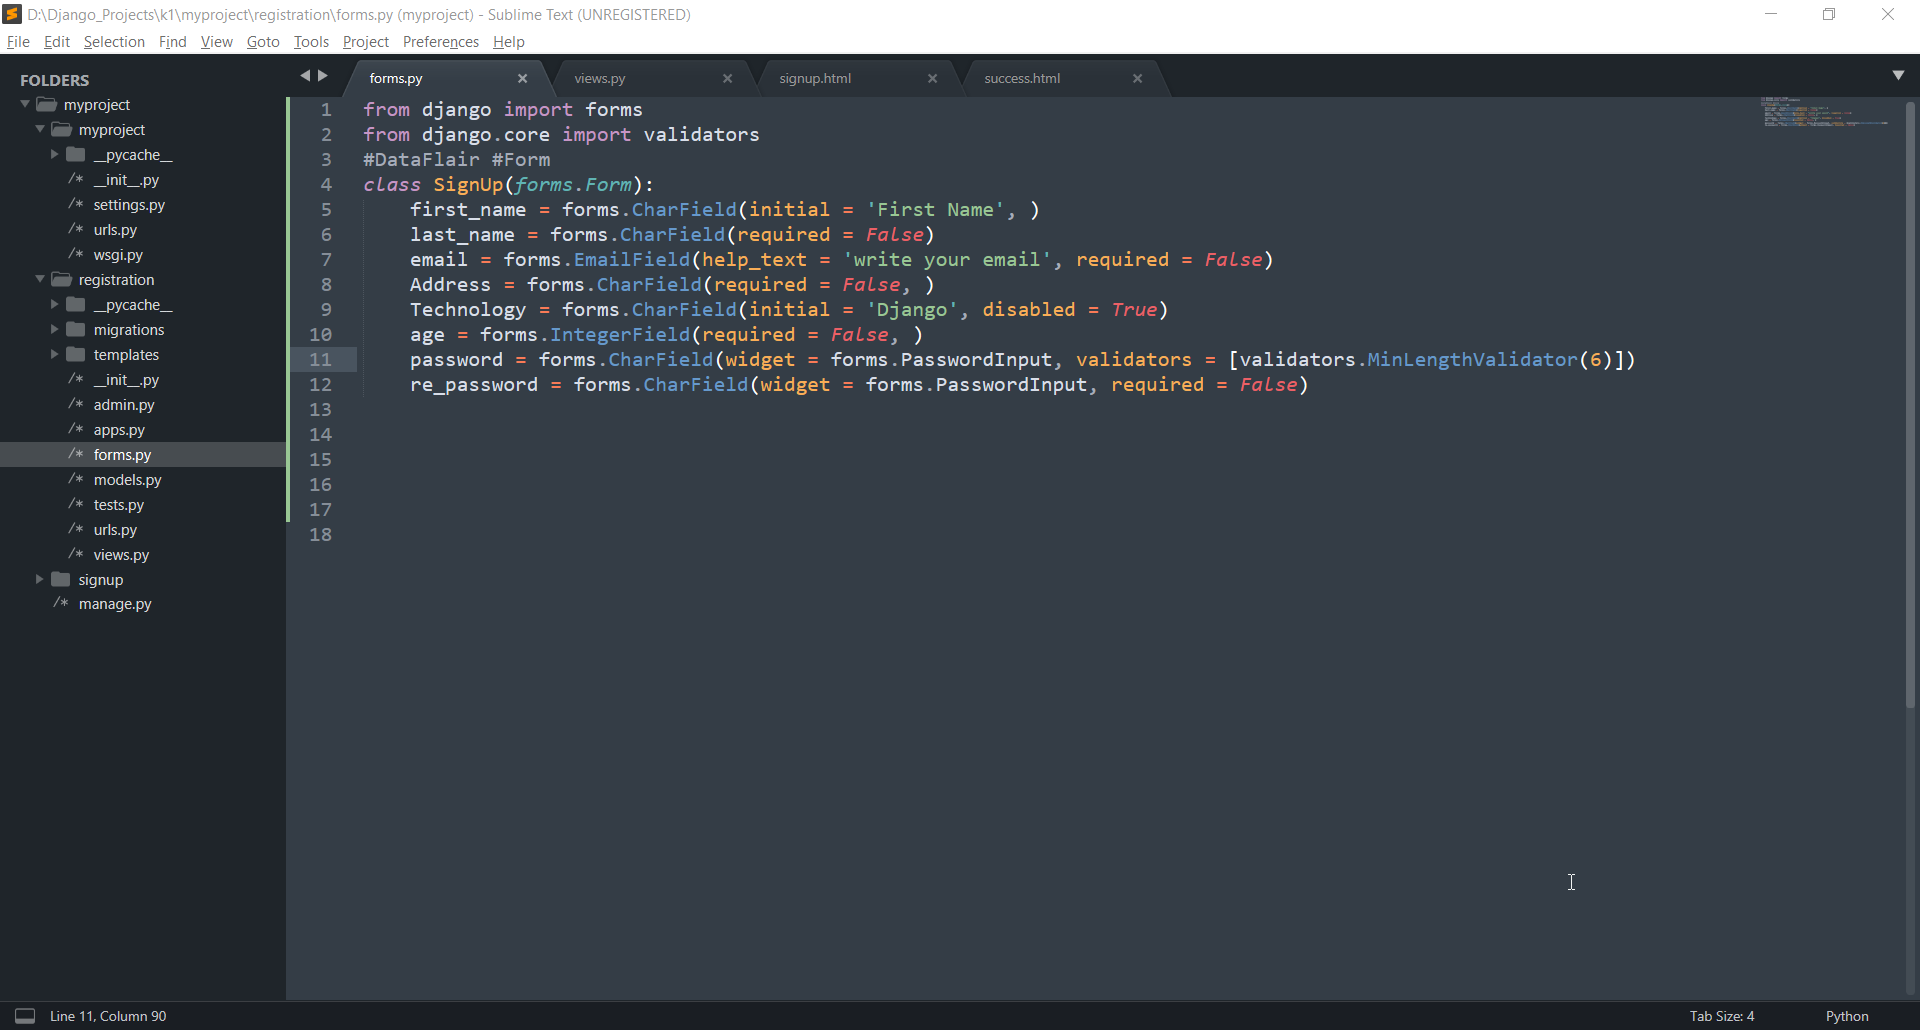
Here we used something called validators. A validator is like a function which is callable. We basically use them to raise ValidationErrors if some conditions aren’t fulfilled.
Validators is a general attribute to all the fields. There are certain validators for each field. Here we are using MinLengthValidator and passed an argument which is 6.
This makes our password fields size to be at least 6 characters.
That error is also user-friendly and shows detailed information.
4. Custom Validators
Suppose you have some fields which you want to validate and there may be no built-in validator of your use-case. Then, you can create your own custom validators.
- Just declare a function with the parameter value. The parameter name shall be that.
- Then, perform your desired validations on value. When value satisfies any criteria raise a ValidationError
- Add that function_name in validators argument of the chosen field, just as we used validators.
For example, edit your forms.py
Code:
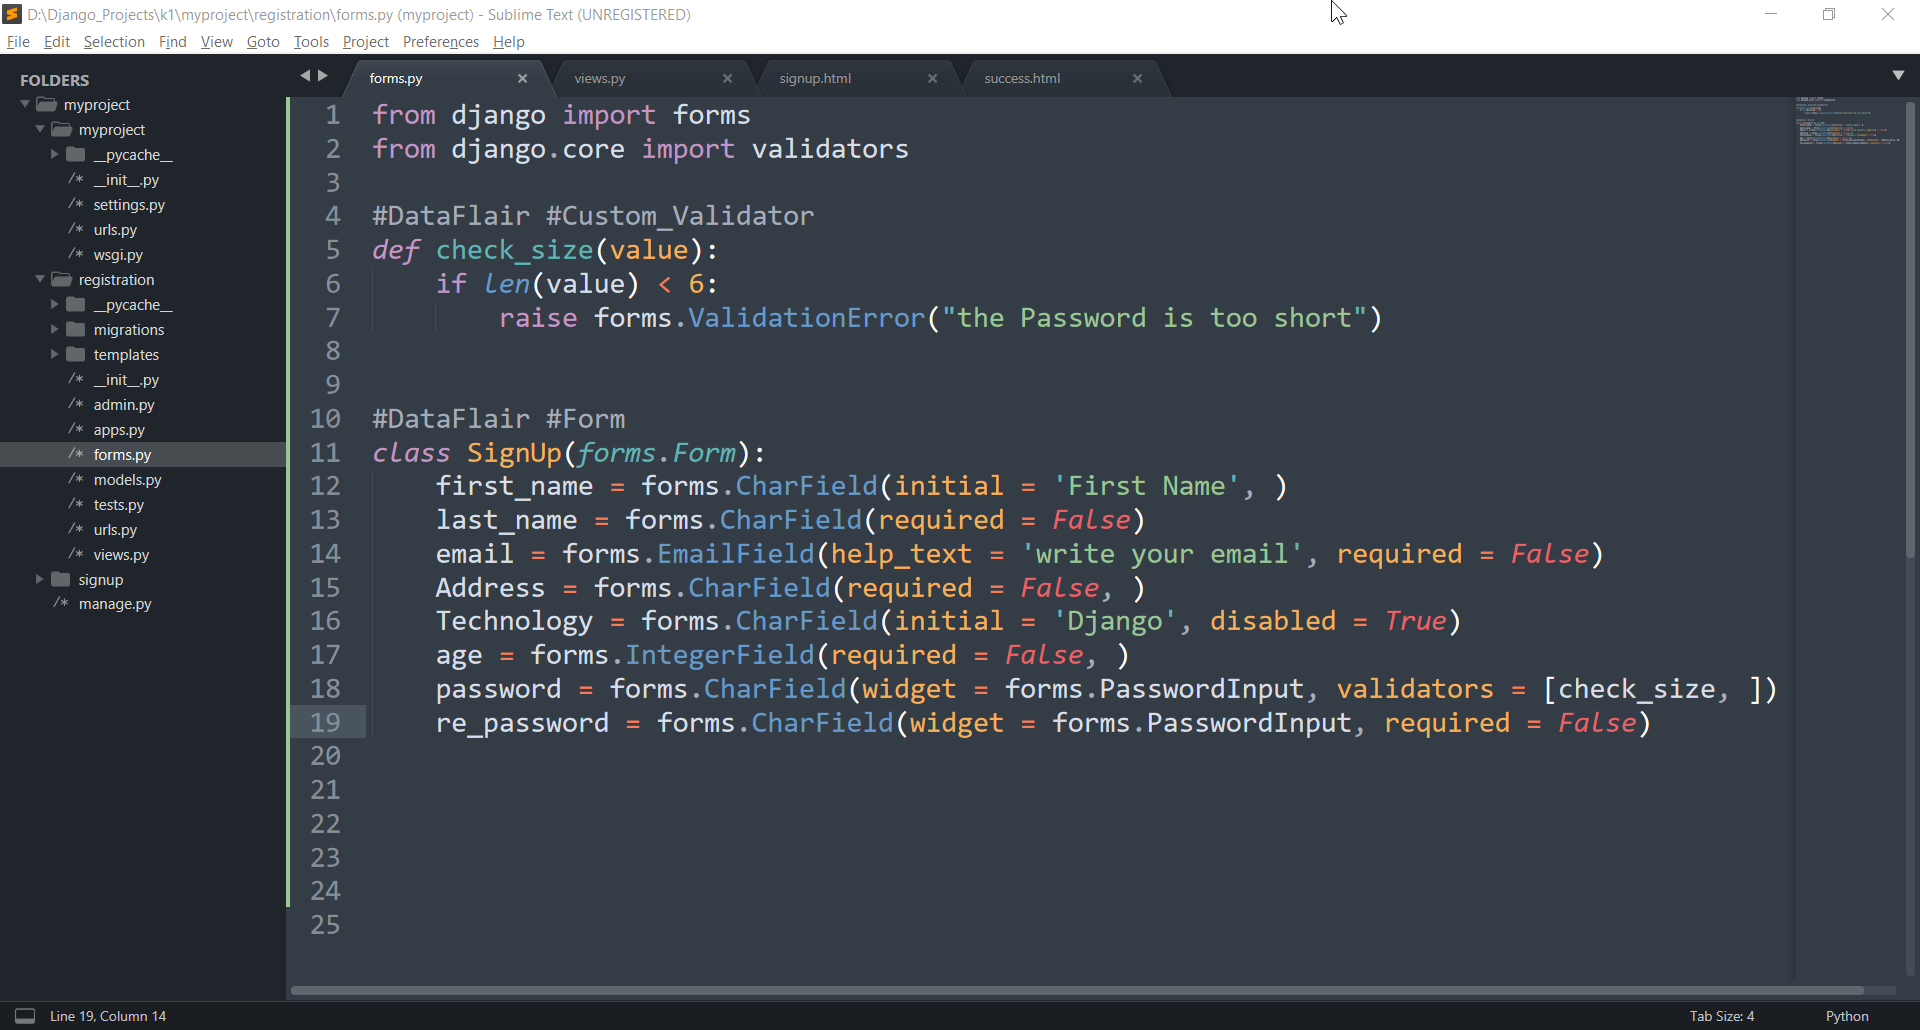
from django import forms
from django.core import validators
#DataFlair #Custom_Validator
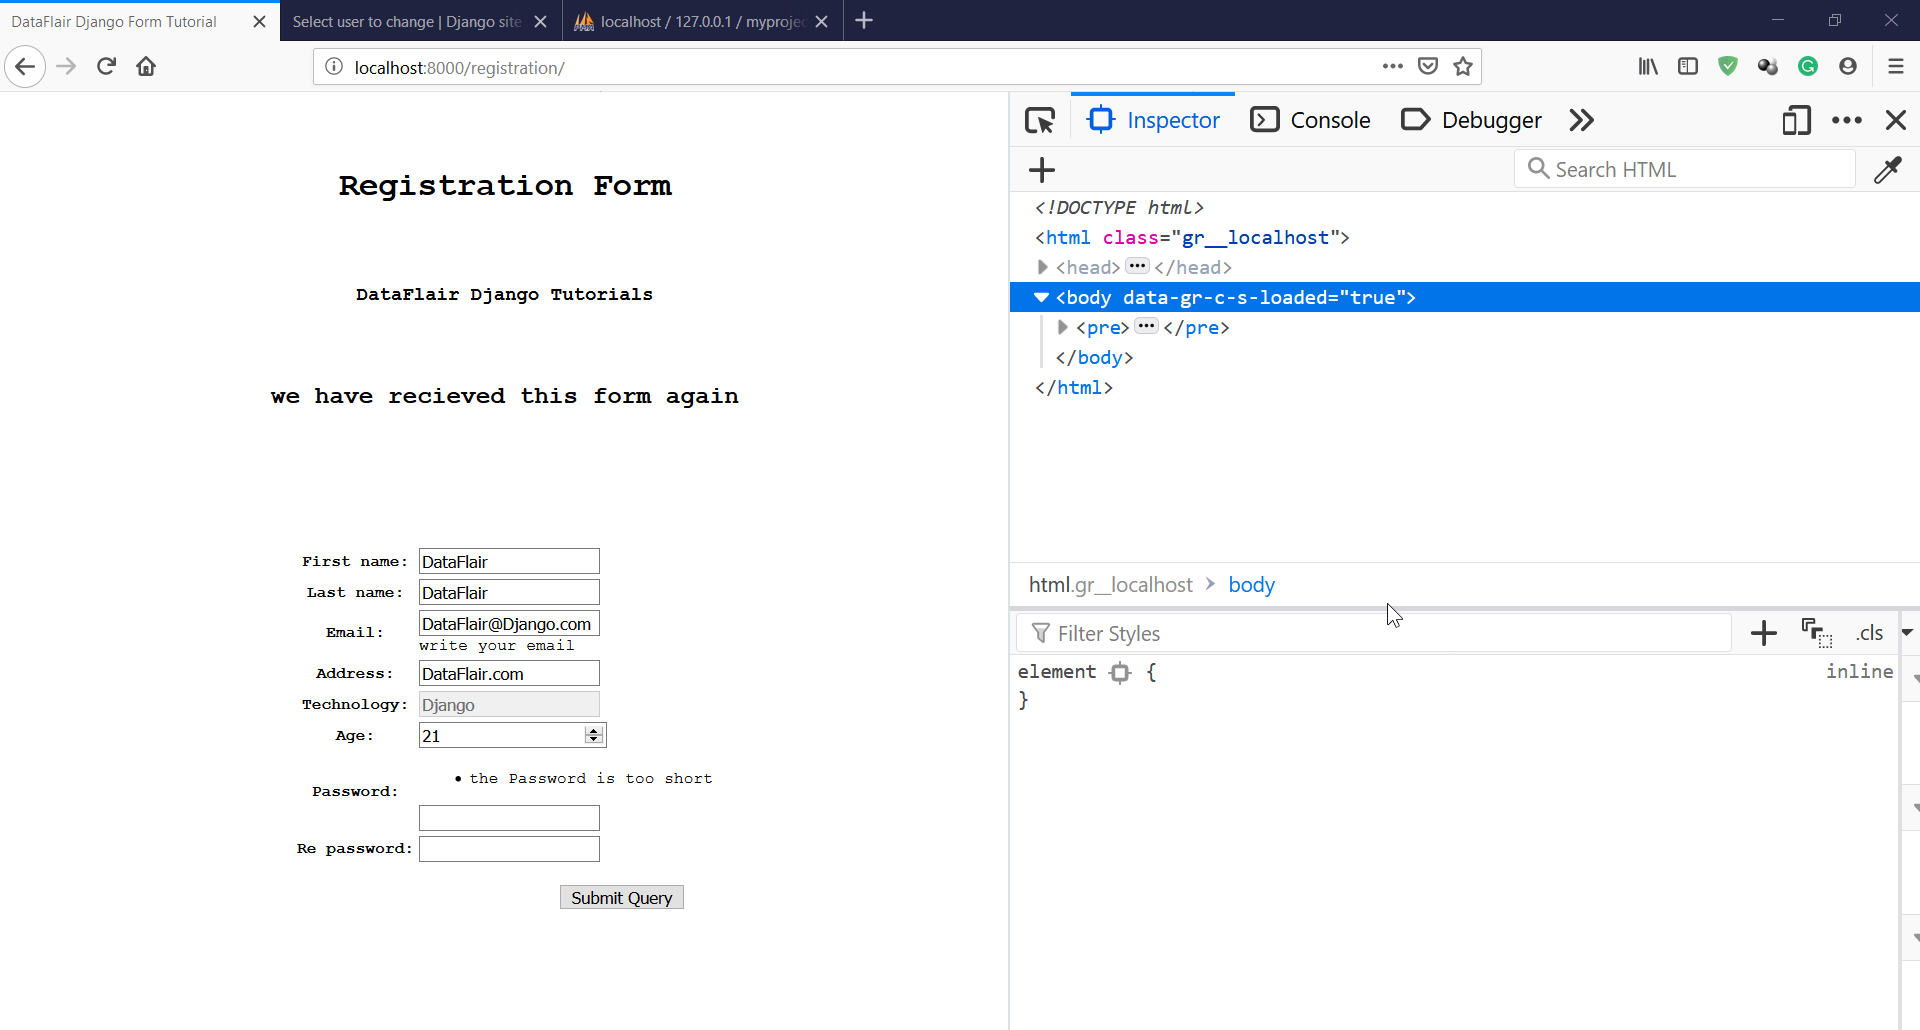
def check_size(value):
if len(value) < 6:
raise forms.ValidationError("the Password is too short")
#DataFlair #Form
class SignUp(forms.Form):
first_name = forms.CharField(initial = 'First Name', )
last_name = forms.CharField(required = False)
email = forms.EmailField(help_text = 'write your email', required = False)
Address = forms.CharField(required = False, )
Technology = forms.CharField(initial = 'Django', disabled = True)
age = forms.IntegerField(required = False, )
password = forms.CharField(widget = forms.PasswordInput, validators = [check_size, ])
re_password = forms.CharField(widget = forms.PasswordInput, required = False)Code Display:
This shall generate this output:
This comes to the end of Django forms tutorial.
Summary
Now, you can generate all the forms with ease and take different types of input from the user. Forms are pretty powerful elements on a webpage. They also raise many ethical questions as they contain user-data. Therefore, always design forms in a secure manner which are following international rules.
We have learned all the ways to validate our forms, but the last 2 are actually preferred over others.
Forms can do much more than this. There are different built-in forms for each task. Now, you can actually prepare a web-application on your own. Work on that, it will be fun.
Still, if you have any confusion in Django forms concept, feel free to ask your query in the comment section. We will be glad to help you.
Prepare for your Django interview with the Best Django Interview Guide.
Did you like our efforts? If Yes, please give DataFlair 5 Stars on Google


muito bom
Thank you
You had missed out a couple of things i think the views from should look like this for it to work in the first instance
def regform(request):
form = Signup()
if request.method == ‘POST’:
form = Signup(request.POST)
html = ‘we have recieved this form again’
else:
html = ‘welcome for first time’
return render(request, ‘registration/signup.html’, {‘html’: html, ‘form’: form})
i think you created a registration folder inside your template folder , well you don’t need to, just create a template folder and in this folder put your signup.html file (make sure to create this template folder inside your registration application)
for example:
registration(your main app)>templates>signup.html
Nice article! Please, how can I compare user input token to the stored token in the database?
If you are talking about JWT authentication, it can be done using the Django REST Framework. DRF provides functions to generate and validate JWTs. You can get resources for JWT in its docs.
If not, then it’s the same as checking the password and other user fields. You will just need to write a function to generate a random token for the user and store it in the database.
‘we have recieved this form again’ *recieved -> received?
Hey,
Thanks for the tutorial.
The form fields are to spaced out or to far apart from one another when I load the registration/ page. In other words the gaps between the field of First Name, Last Name, Email and etc are to big. How to I reduce them to make it look like they are on your screenshot “https://data-flair.training/blogs/wp-content/uploads/sites/2/2019/05/Django-registration-form-4.png” please?
thanks
i am also facing same issue , does any one have solution for it.
y this type UI is displayed.
you can delete this one, my bad
I found the answer, dont worry in responding 😀