Django Sessions – How to Create, Use and Delete Sessions
Master Python with 70+ Hands-on Projects and Get Job-ready - Learn Python
We offer you a brighter future with industry-ready online courses - Start Now!!
After learning about Django Cookies in the previous article, we will move on to understand Django sessions.
As we have seen in the previous tutorial, HTTP is a stateless protocol, where every request made is always new to the server. The request on the server is always treated as if the user is visiting the site for the first time. This poses some problems like you can’t implement user login and authentication features. These problems were actually solved by Cookies.
Now, let’s revise the concept of cookies in brief and check some of its drawbacks.
What are Cookies?
Cookies are small text files stored and maintained by the browser. It contains some information about the user and every time a request is made to the same server, the cookie is sent to the server so that the server can detect that the user has visited the site before or is a logged in user.
The cookies also have their drawbacks and a lot of times they become a path for the hackers and malicious websites to damage the target site.
Drawbacks of Cookies
Since cookies store locally, the browser gives control to the user to accept or decline cookies. Many websites also provide a prompt to users regarding the same.
Cookies are plain text files, and those cookies which are not sent over HTTPS can be easily caught by attackers. Therefore, it can be dangerous for both the site and the user to store essential data in cookies and returning the same again and again in plain text.
These are some of the more common problems that web developers were facing regarding cookies.
What are Sessions?
After observing these problems of cookies, the web-developers came with a new and more secure concept, Sessions.
The session is a semi-permanent and two-way communication between the server and the browser.
Let’s understand this technical definition in detail. Here semi means that session will exist until the user logs out or closes the browser. The two-way communication means that every time the browser/client makes a request, the server receives the request and cookies containing specific parameters and a unique Session ID which the server generates to identify the user. The Session ID doesn’t change for a particular session, but the website generates it every time a new session starts.
Generally, Important Session Cookies containing these Session IDs deletes when the session ends. But, this won’t have any effect on the cookies which have fix expire time.
Making and generating sessions securely can be a hefty task, and now we will look at Django’s implementation of the same.
Django Sessions
Django considers the importance of sessions over the website and therefore provides you with middleware and inbuilt app which will help you generate these session IDs without much hassle.
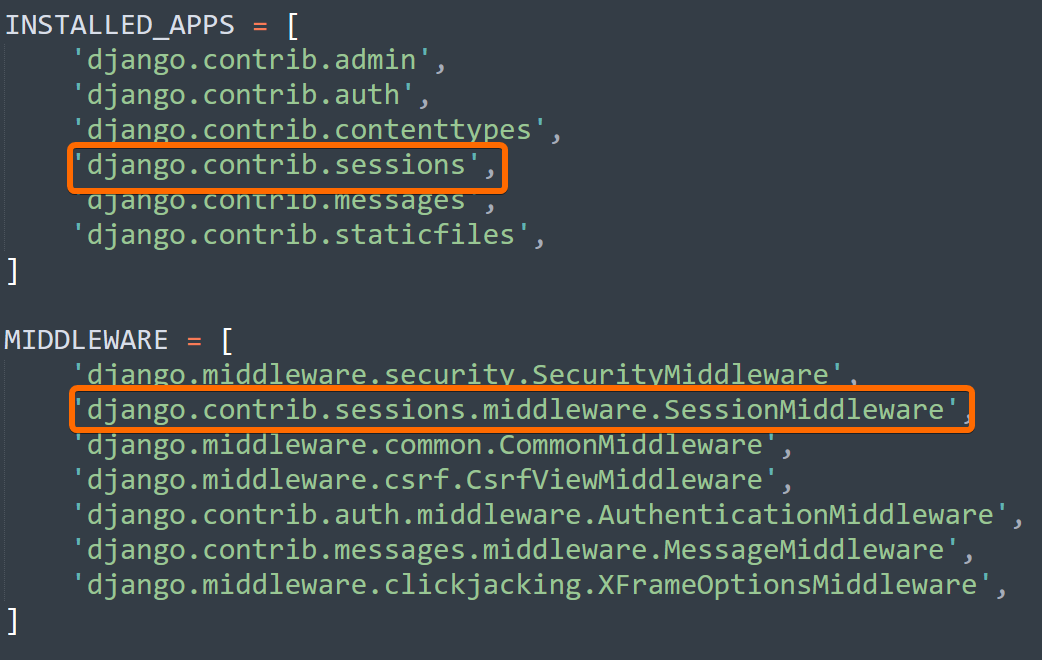
django.contrib.sessions is an application which works on middleware.SessionMiddleware and is convenient to work.
The middleware.SessionMiddleware is responsible for generating your unique Session IDs. You will also require django.contrib.sessions application, if you want to store your sessions on the database.
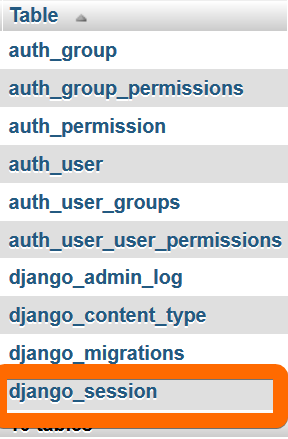
When we migrate the application, we can see the django_session table in the database.
The django.contrib.sessions application is present in the list of INSTALLED_APPS in settings.py file.
For working on sessions, you will need to check whether your browser supports cookies or not.
Well, of course, you can go to the settings and quickly check that, but let’s make some view functions and URLs to understand the concepts in a better way. Ultimately, you will have to go to the browser settings if something went wrong.
Do you know? – How to create view for Django project
Checking Cookies on Browser
For adding view functions in our views.py file, enter:
Code:
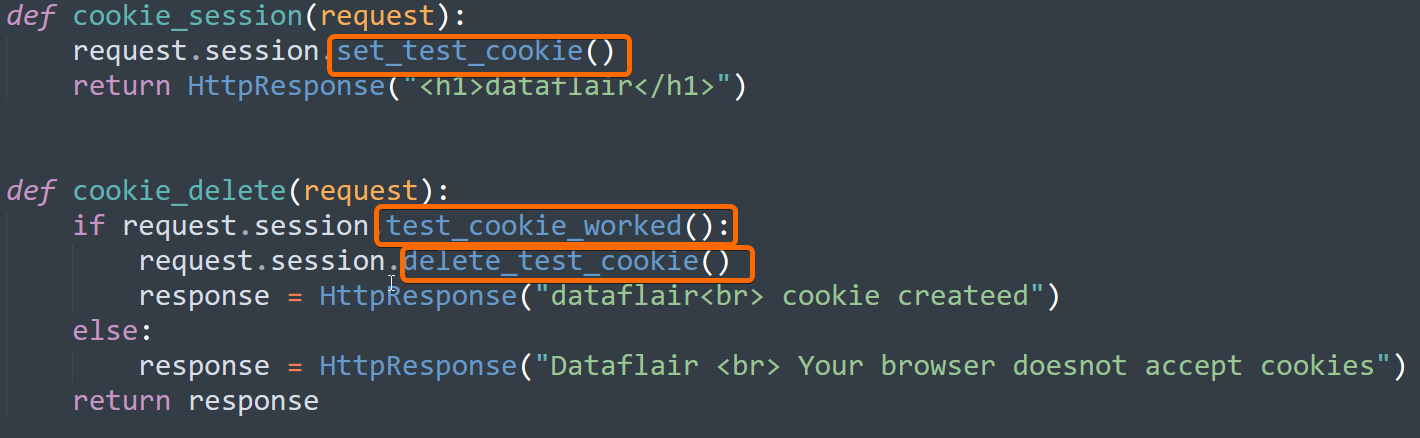
def cookie_session(request):
    request.session.set_test_cookie()
    return HttpResponse("<h1>dataflair</h1>")
def cookie_delete(request):
    if request.session.test_cookie_worked():
        request.session.delete_test_cookie()
        response = HttpResponse("dataflair<br> cookie createed")
    else:
        response = HttpResponse("Dataflair <br> Your browser doesnot accept cookies")
    return response
Now, we will understand the methods used in the above code:
set_test_cookie()
We use this method to create a test cookie when your browser requests or makes a request for this webpage.
test_cookie_worked()
This method returns a boolean value as True after the browser accepts the cookie. Otherwise, it’s false
delete_test_cookie()
This method deletes the test cookie.
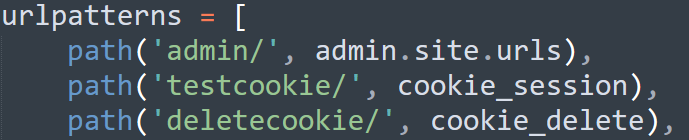
Now, add the urls to urlpatterns.
Code:
    path('testcookie/', cookie_session),
    path('deletecookie/', cookie_delete),
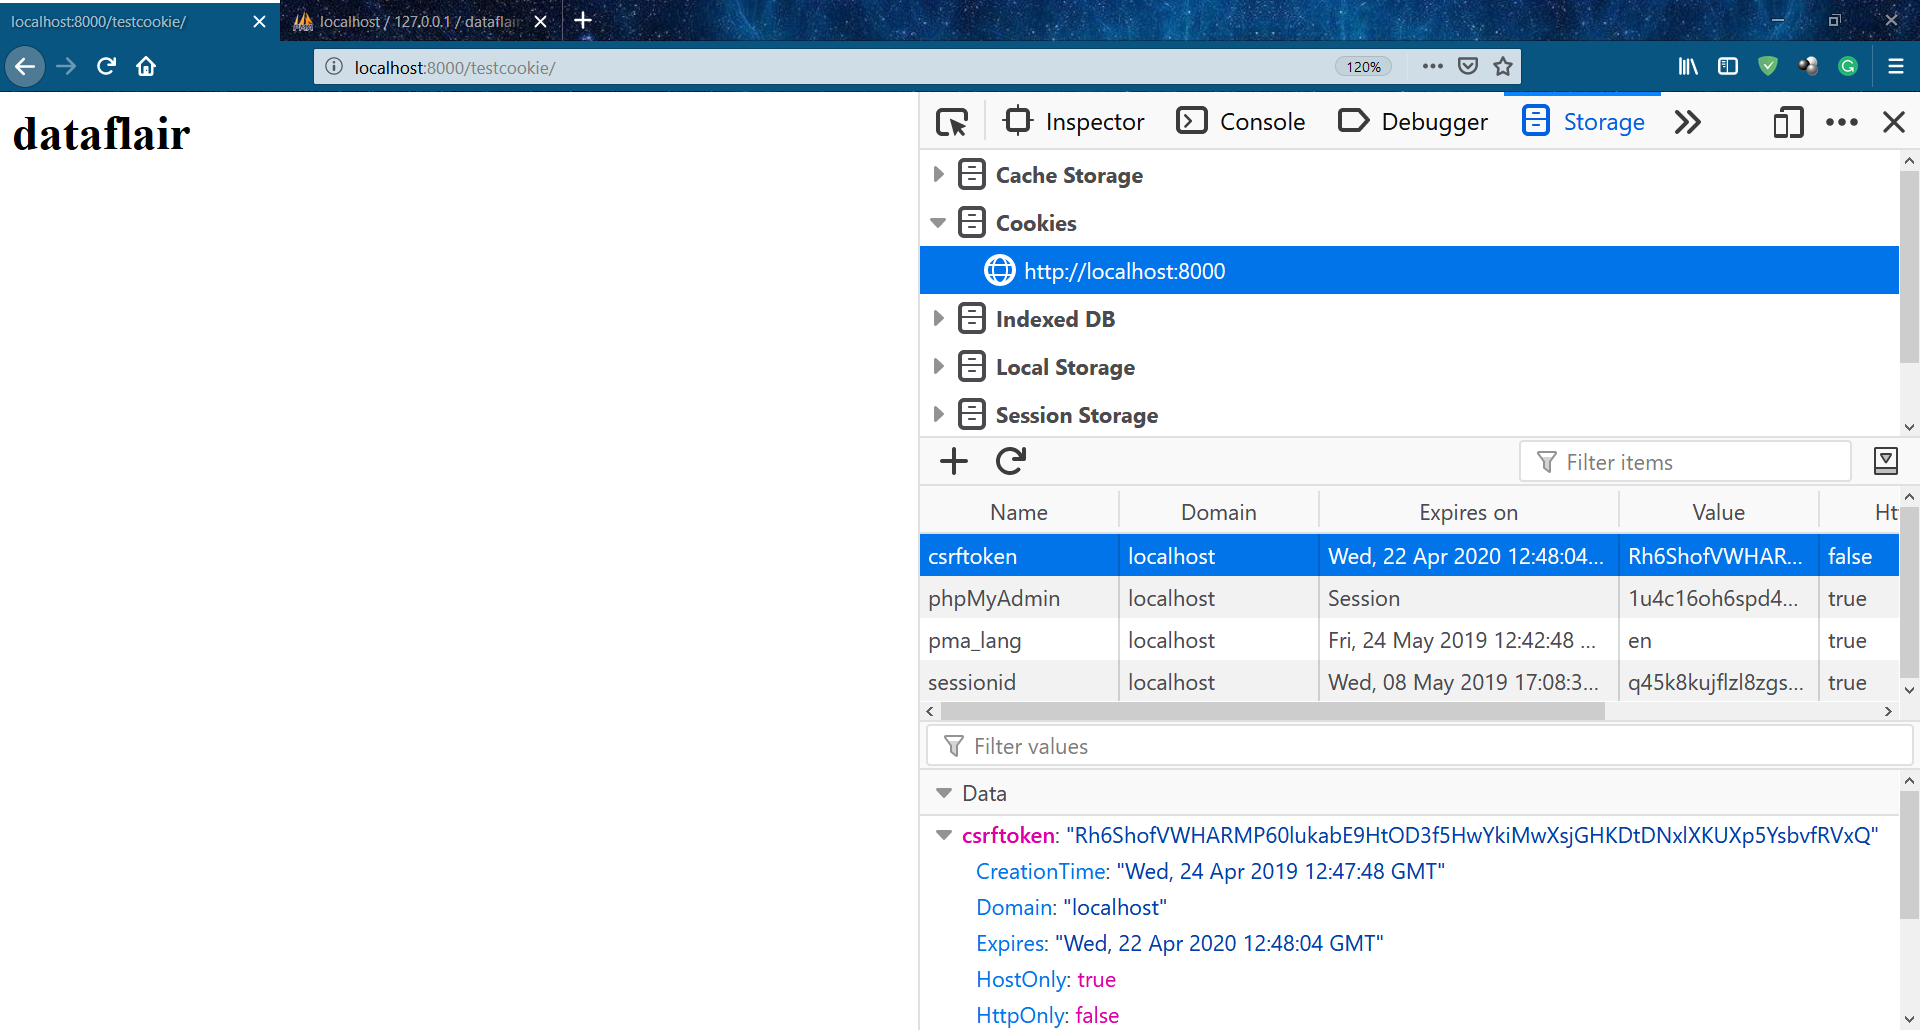
After running this code:
1. search for testcookie/
2. search for deletecookie/
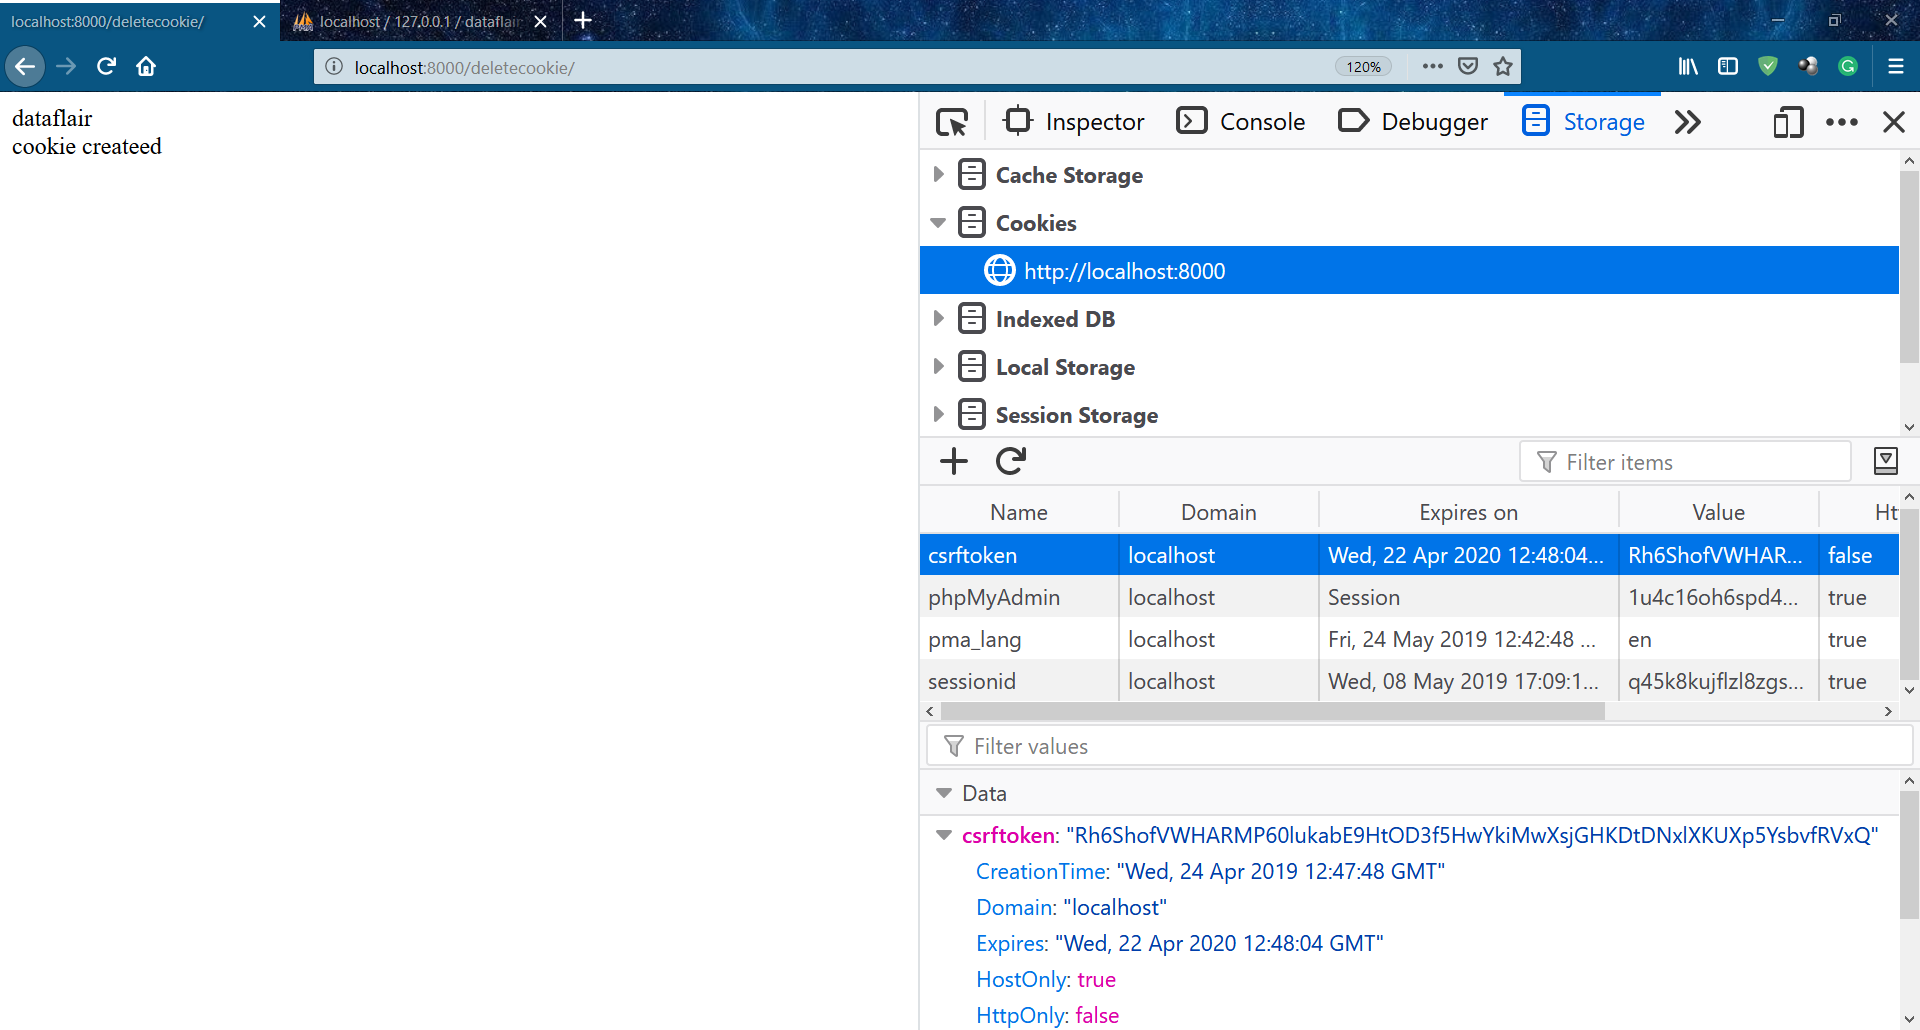
If you get this message, then your browser accepts cookies; otherwise, the browser will produce a different result.
If the result is not similar to the above images then enable your browser to accept cookies; otherwise, you won’t be able to implement this tutorial.
Creating & Accessing Django Sessions
Django allows you to easily create session variables and manipulate them accordingly.
The request object in Django has a session attribute, which creates, access and edits the session variables. This attribute acts like a dictionary, i.e., you can define the session names as keys and their value as values.
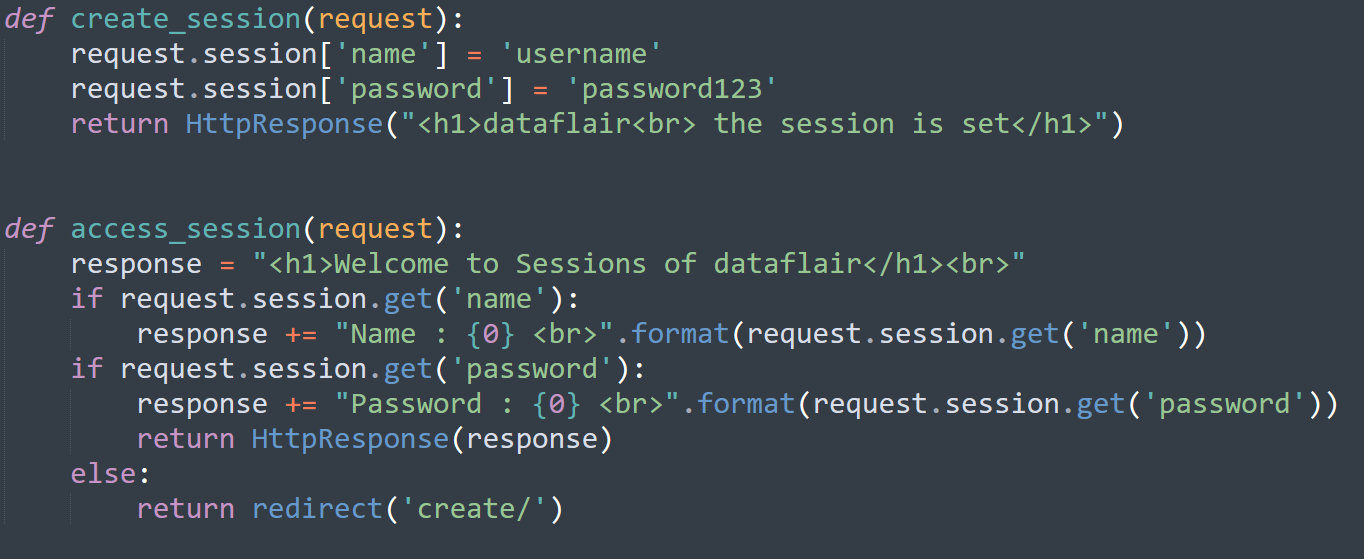
Step 1. We will start by editing our views.py file. Add this section of code.
Code:
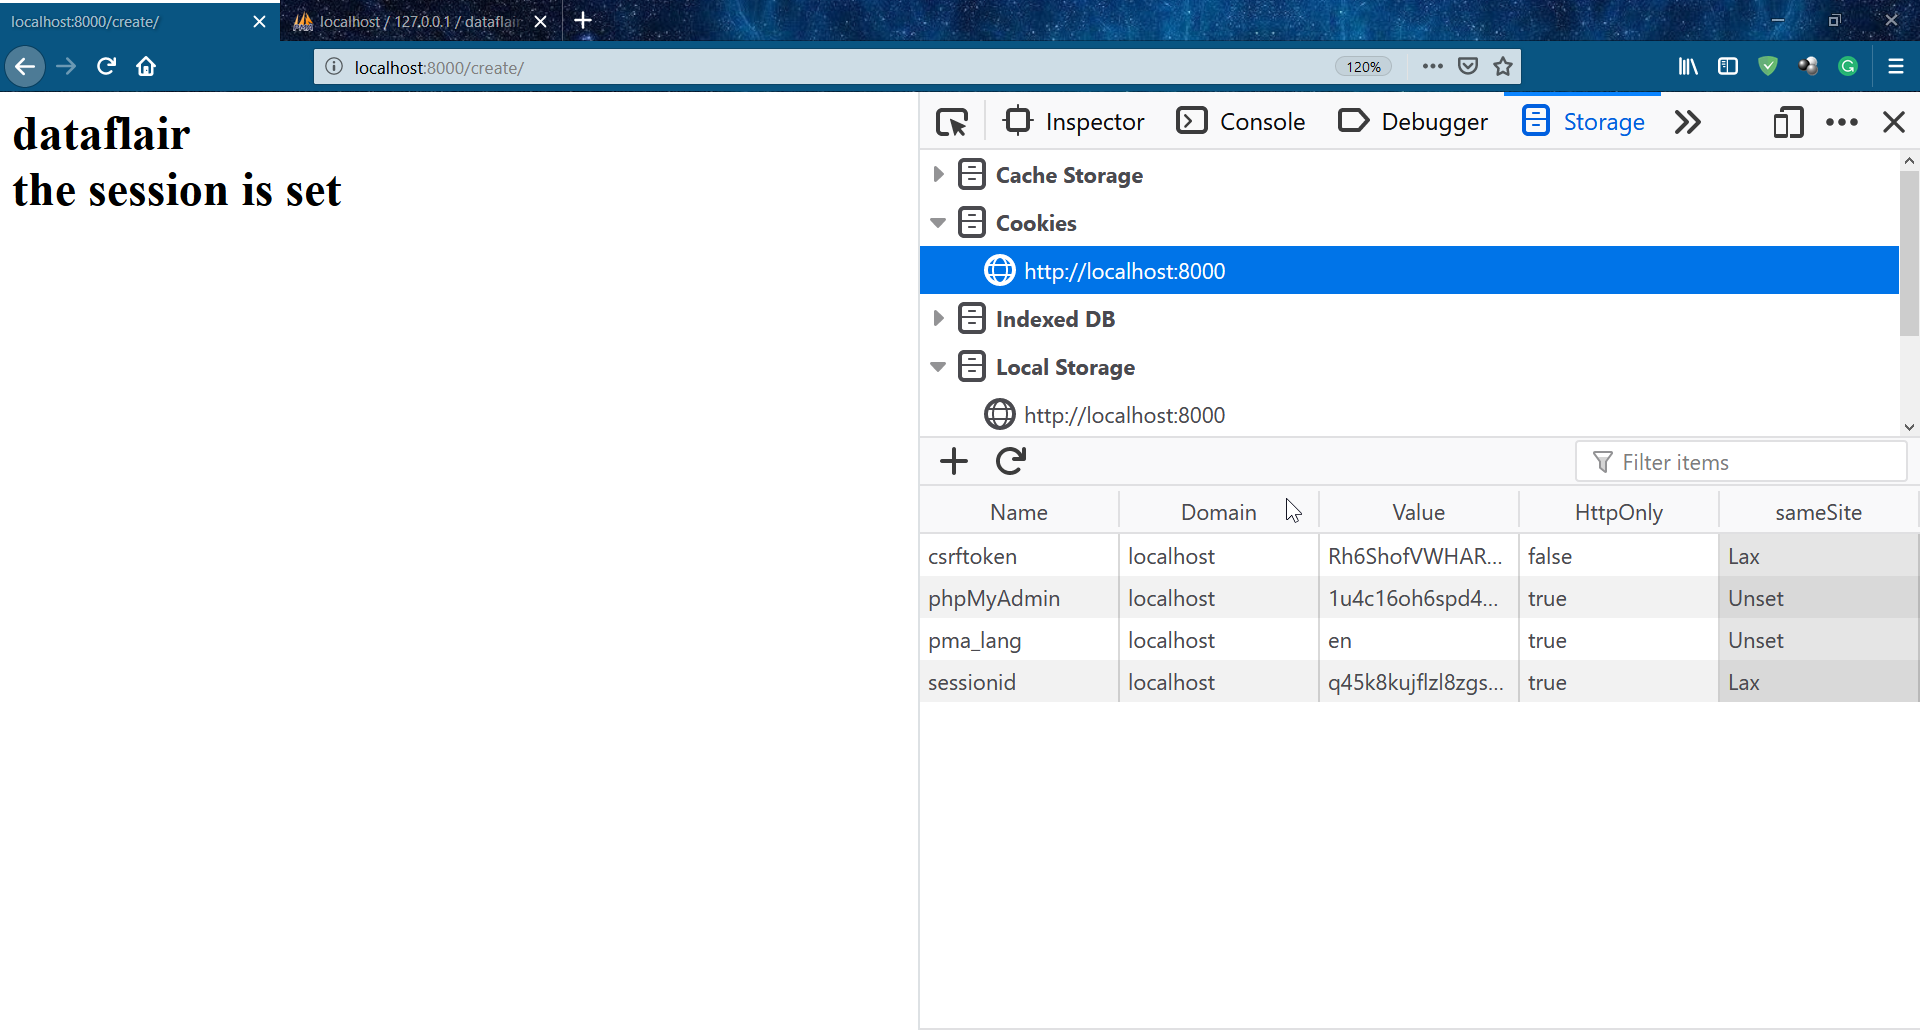
def create_session(request):
request.session['name'] = 'username'
request.session['password'] = 'password123'
return HttpResponse("<h1>dataflair<br> the session is set</h1>")
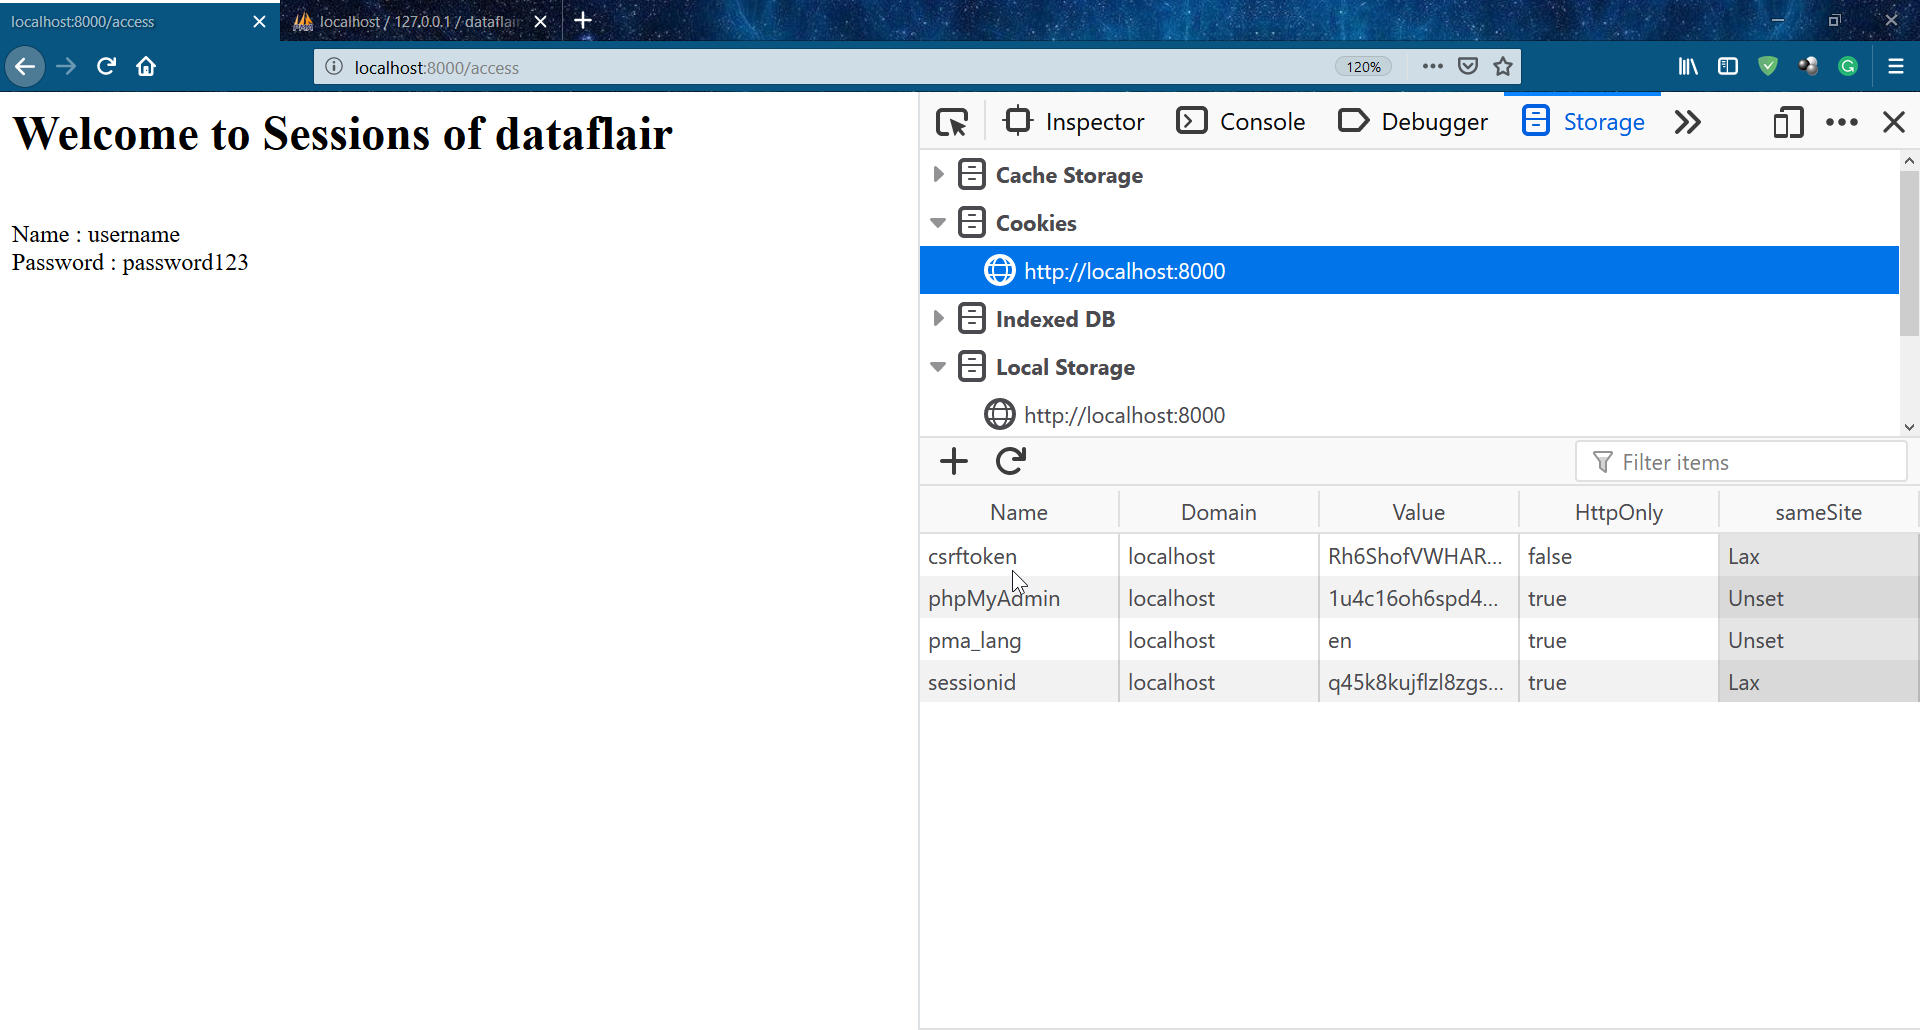
def access_session(request):
response = "<h1>Welcome to Sessions of dataflair</h1><br>"
if request.session.get('name'):
response += "Name : {0} <br>".format(request.session.get('name'))
if request.session.get('password'):
response += "Password : {0} <br>".format(request.session.get('password'))
return HttpResponse(response)
else:
return redirect('create/')
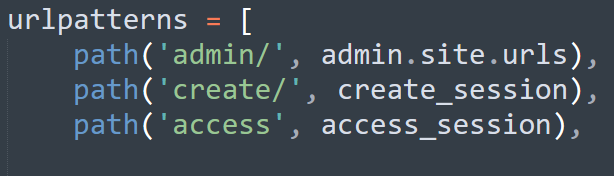
Step 2. Add the urls in urlpatterns list.
Code:
    path('create/', create_session),
    path('access', access_session),
Must learn – How to map URL patterns with view functions?
Step 3. Now run this code:
1. search for access/
2. search for access/ again
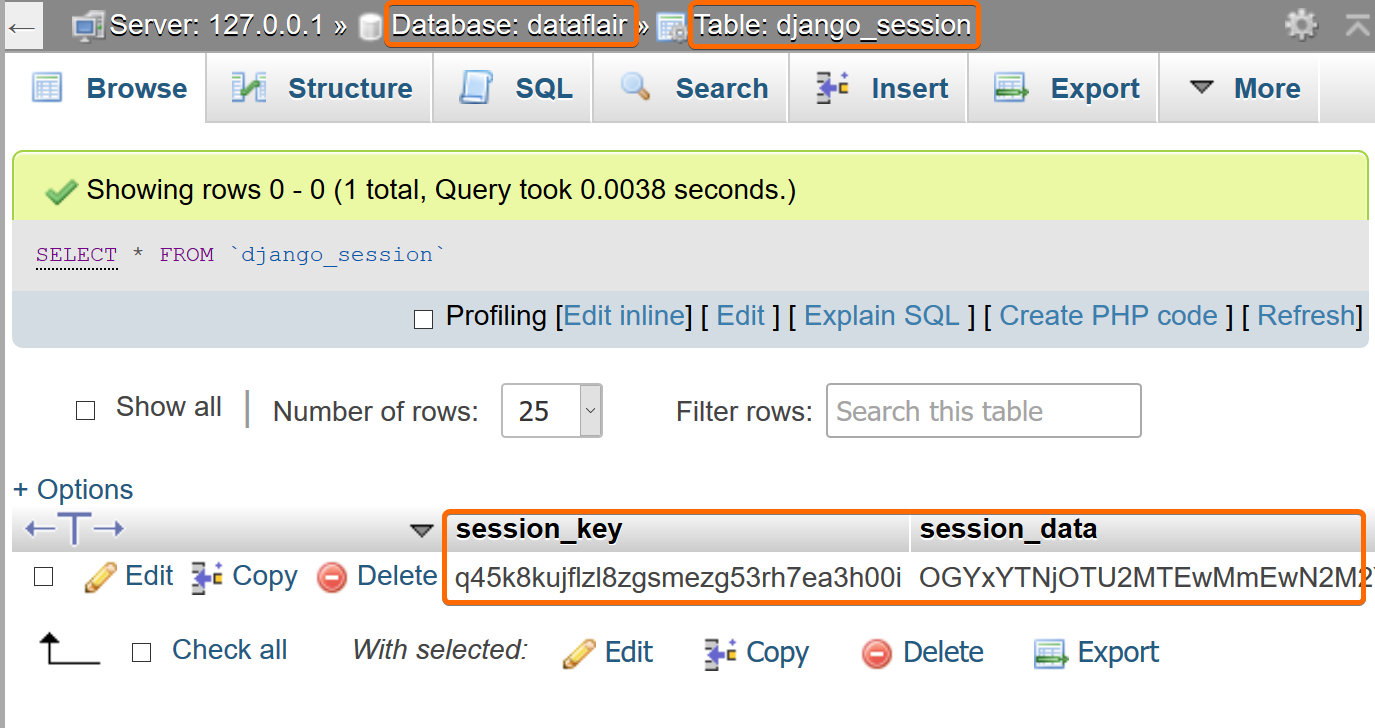
In the database, you will see the key and the data which has high encryption.
Understanding the Code:
The code follows basic python, but the variables we are using have some complex python coding behind them.
When you request for access/ URL without running the create/ request, you redirect to the create/ automatically if you have no cookie generated previously.
Now, when the create/ URL is sent, the SessionsMiddleware runs and generates a unique SessionID which is stored locally on the browser as a cookie for the user.
This cookie is now sent to the server every time alongside with the request and sessions. The application does the work of matching the SessionID with one in the database. It also stores some values and variables which we have created in the create_session() view function.
The request object has a session attribute and when the server runs that code, the session middleware, and sessions application automatically works together.
request.session[] act as a python dictionary data-structure, and therefore, you can store the values alongside with their keys having meaningful names.
In the access_session() function, we have used get() alongside request.session and passed the value of the key.
Thus, you can access the sessions easily.
Therre are many methods that associate with session argument of the HttpRequest object.
Deleting Django Sessions
After completing the sessions work, you can delete them quite easily.
Just include this view function inside views.py file.
Code:
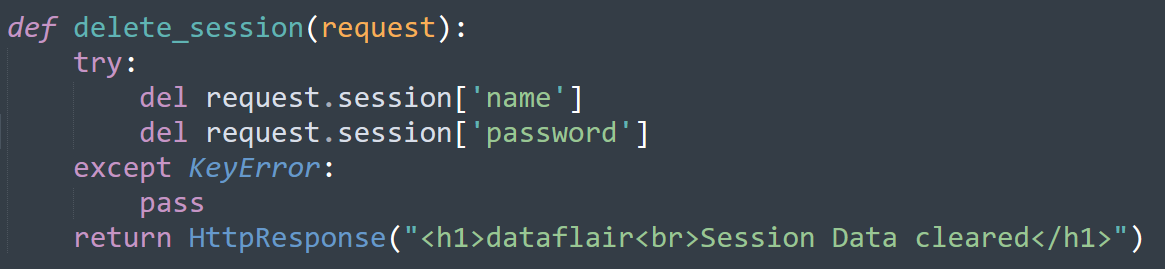
def delete_session(request):
try:
del request.session['name']
del request.session['password']
except for KeyError:
pass
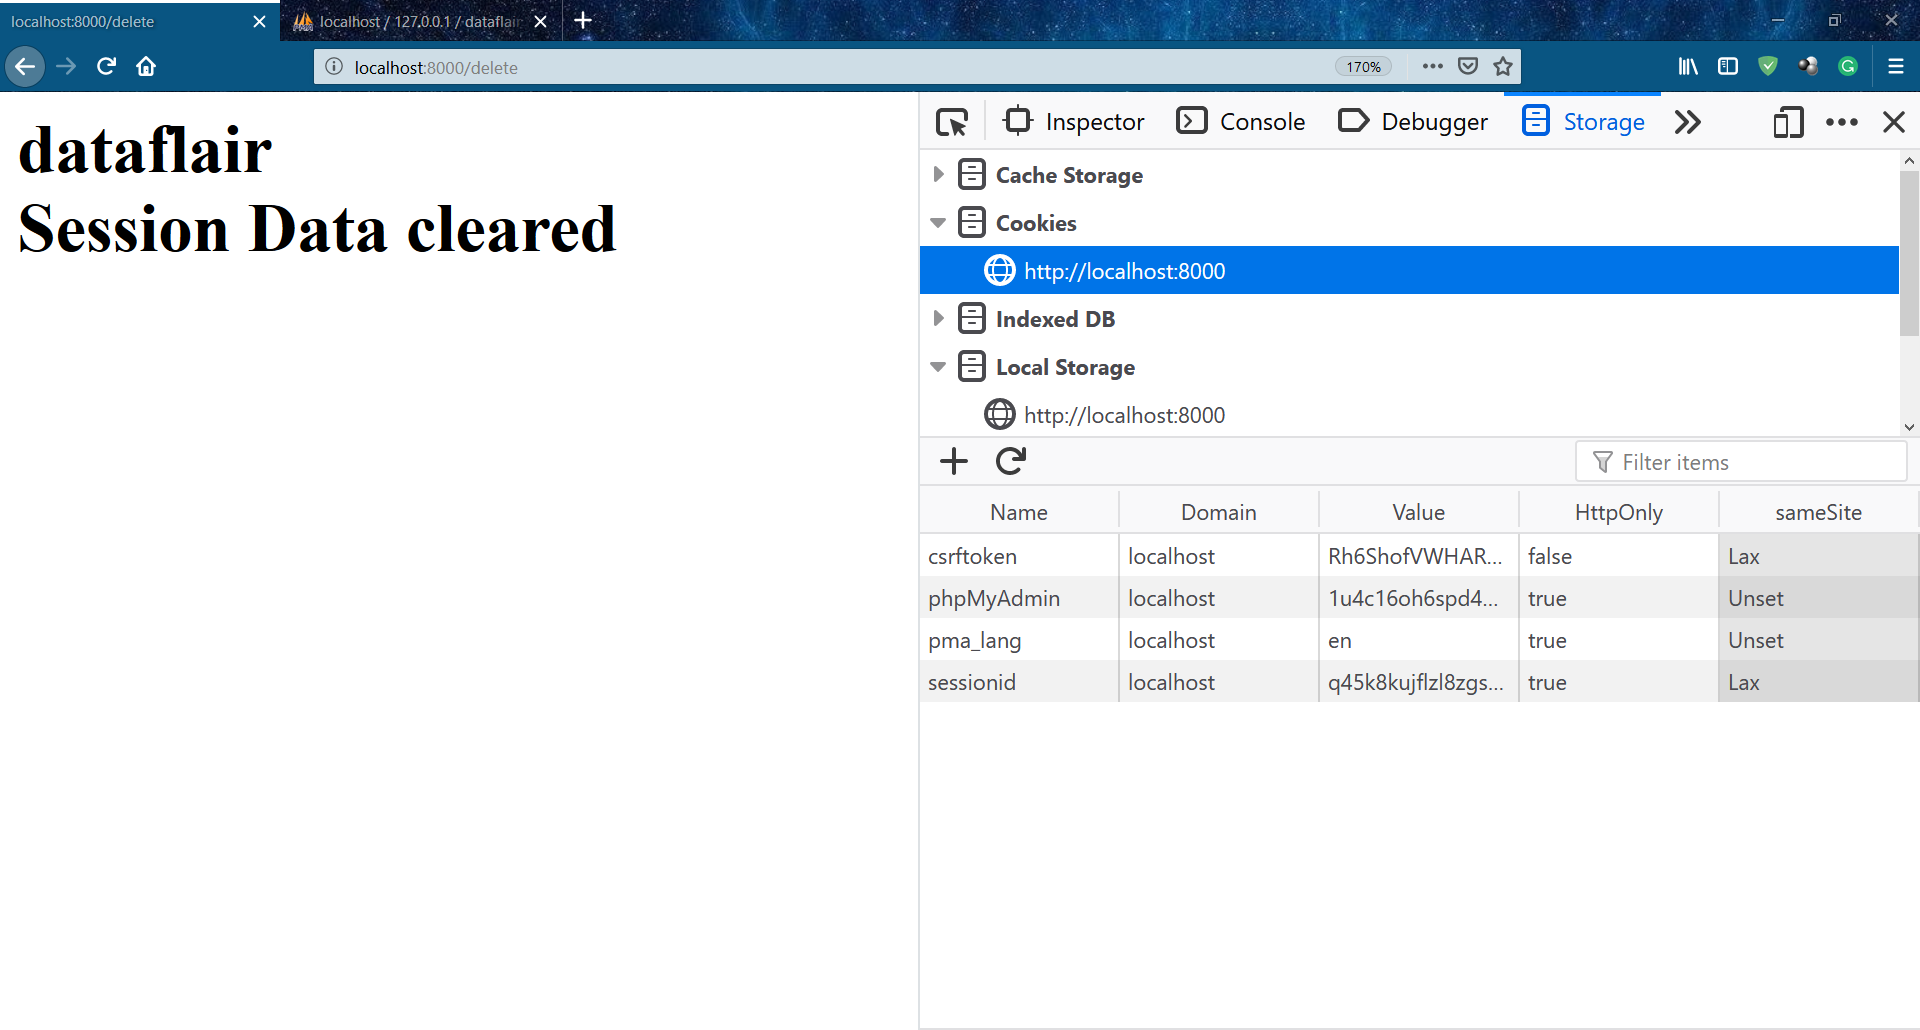
return HttpResponse("<h1>dataflair<br>Session Data cleared</h1>")
This code also follows pure python; we just used some exception handling.
To delete a session or any particular key of that session, we can use del.
del request.session[‘key_name’]
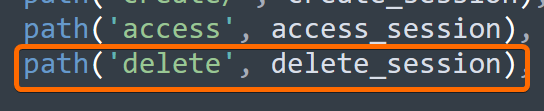
Now, to run this code add this to the urlpatterns:
path(‘delete/’, delete_session)
The output will look like this and don’t worry if your cookie didn’t delete because we use this method only to delete your data in the Django database and not the session ID and cookie itself.
To delete the session related cookies completely, we use the flush() function, although sessions delete when the browser is closed.
Configuring Session Engine
There are many ways by which you can configure sessions engine. It is an important decision where storage options can provide you better speed and response time.
Django lets you choose between these options but doesn’t limit your choices. If you want another storage method, you can find it on djangopackages.org
1. By Database-backed Sessions
We have used this method until now, as we have django.contrib.sessions application inside our INSTALLED_APPS list in settings.py file.
This is standard implementation and covers many security loopholes. It also provides you with lots of features to use them directly with view functions and models in Django framework.
2. By Cached Sessions
If you want to improve the performance of the website, you can use cache-based sessions. There are several practices which you can perform here, like setting up multiple caches.
For this purpose, Django provides you with more session engines:
django.contrib.sessions.backends.cache
Above engine stores data directly into the cache.
django.contrib.sessions.backends.cache_db
This engine, on the other hand, is used when you want persistent sessions data with your server using write-through cache. It means that everything written to the cache will also be written to the database.
Both methods improve your performance drastically, but the first one is faster than the second one.
3. By File-based Sessions
When you want to store your sessions data in a file-based system, then you can use this engine that Django provides.
django.contrib.sessions.backends.file
You will also need to check whether your web server has permission to read/ write the directory in which you are keeping your sessions file.
4. By Cookie-based Sessions
We don’t recommend this one as sessions were made for not storing data in cookies in the first place, but still, developers use it according to their need.
django.contrib,sessions.backends.signed_cookies
This allows your session data to store with the help of Django’s cryptographic signing tool and the secret key.
It poses all the problems of cookies, the major one is that the session_cookies are signed but not encrypted; therefore they can be read by the client.
Also, it has performance issues as the cookie size does affect the request size.
Summary
Django provides some very intuitive ways to implement sessions and lets you work with them easily.
In this tutorial, we covered these topics:
- Drawbacks of cookies
- Concept of sessions
- How does Django implement sessions
- Using sessions in views
- Configuring sessions
Django has provided lots of options to make the web project as dynamic and rapidly developed as you want.
We will cover the topics of caching and other related concepts in future articles as they are different topics altogether.
Any suggestions or queries? We will be glad to hear from you in the comment section.
Crack your Django interview by practicing Django interview questions
If you are Happy with DataFlair, do not forget to make us happy with your positive feedback on Google


Cum veniam ipsum molestiae magna architecto cum provident quos mollit esse in vel porro exercitationem consectetur