Django Static Files Handling made Simple – Even your Kids can do it!
Master Python with 70+ Hands-on Projects and Get Job-ready - Learn Python
Expert-led Courses: Transform Your Career – Enroll Now
Today, websites have become much more interactive than ever. They contain tons of CSS and JavaScript Code to make our experience smoother.
There are lots of graphics involved on websites too. Our Python Tutorials Home Page is the best example. There are outputs and screenshots and these images are important for the blog. So, from this, we can state that there are multiple files on a webpage.
Important point is that none of these files can be modified by the server. It means these files are transmitted as it is, without any modification.
What are Static files?
Static files are those files which can not be processed, generated or modified by the server.
In the previous section, we learned about the concept of static files. There is a catch here. Images, JavaScript files, etc are types of content or static files. Static files contain all kinds of file types – from .mpeg, .jpeg to .pdf, etc.
There is a simple concept of working with static files. When a user requests for a webpage, the server will generate the HTML. Then the server will collect all the corresponding static files related to that page. Lastly, this whole data is served.
You can see that process in this flow-diagram. Also, we can say that static websites are much faster than dynamic websites.

Benefits of Static Files
- They are static: These files don’t change until the developer replace them with a new one. Thus, the server just fetches them from the disk, taking a minimum amount of time.
- Static files are easier to cache: They don’t change and are not modified by the server. That makes the performance faster.
- Static files are energy efficient: Static files are fetched from the disk when required. They require no processing which saves the processing overhead and website response becomes fast.
Let’s understand one more important topic, i.e. Template Inheritance.
What is Template Inheritance?
Static files improve the performance of the website. Developers use it more efficiently with template inheritance method and it is one of Django’s key features.
The basic concept is that: We define the common parts of a webpage, such as navigation bars and About section. All these parts are essentially HTML and some static files. Majority of webpages will contain similar sections.
The problem is that when there are lots of webpages, the modification becomes complex. Suppose we want to modify the About section. Then, the developer will have to change the code on every single page. That will lead to chaos and will definitely generate bugs.
Django templating solves this problem, by inheritance. It provides us with the modularity of developing different sections of a webpage. Like we can define a base template, which contains nav bars and About section. Then inherit this page and just add the unique part in other webpages.
Now, let’s implement template inheritance in a project.
Making a Project
1. Create a New Django application
First, we will create a new Django application. For that, start your virtual environment in command prompt. Then go to the root folder. After that, execute this command in terminal/ PowerShell.
Code:
python manage.py startapp home
This application will contain all the templates. We will practice on this application in further sections of this article.
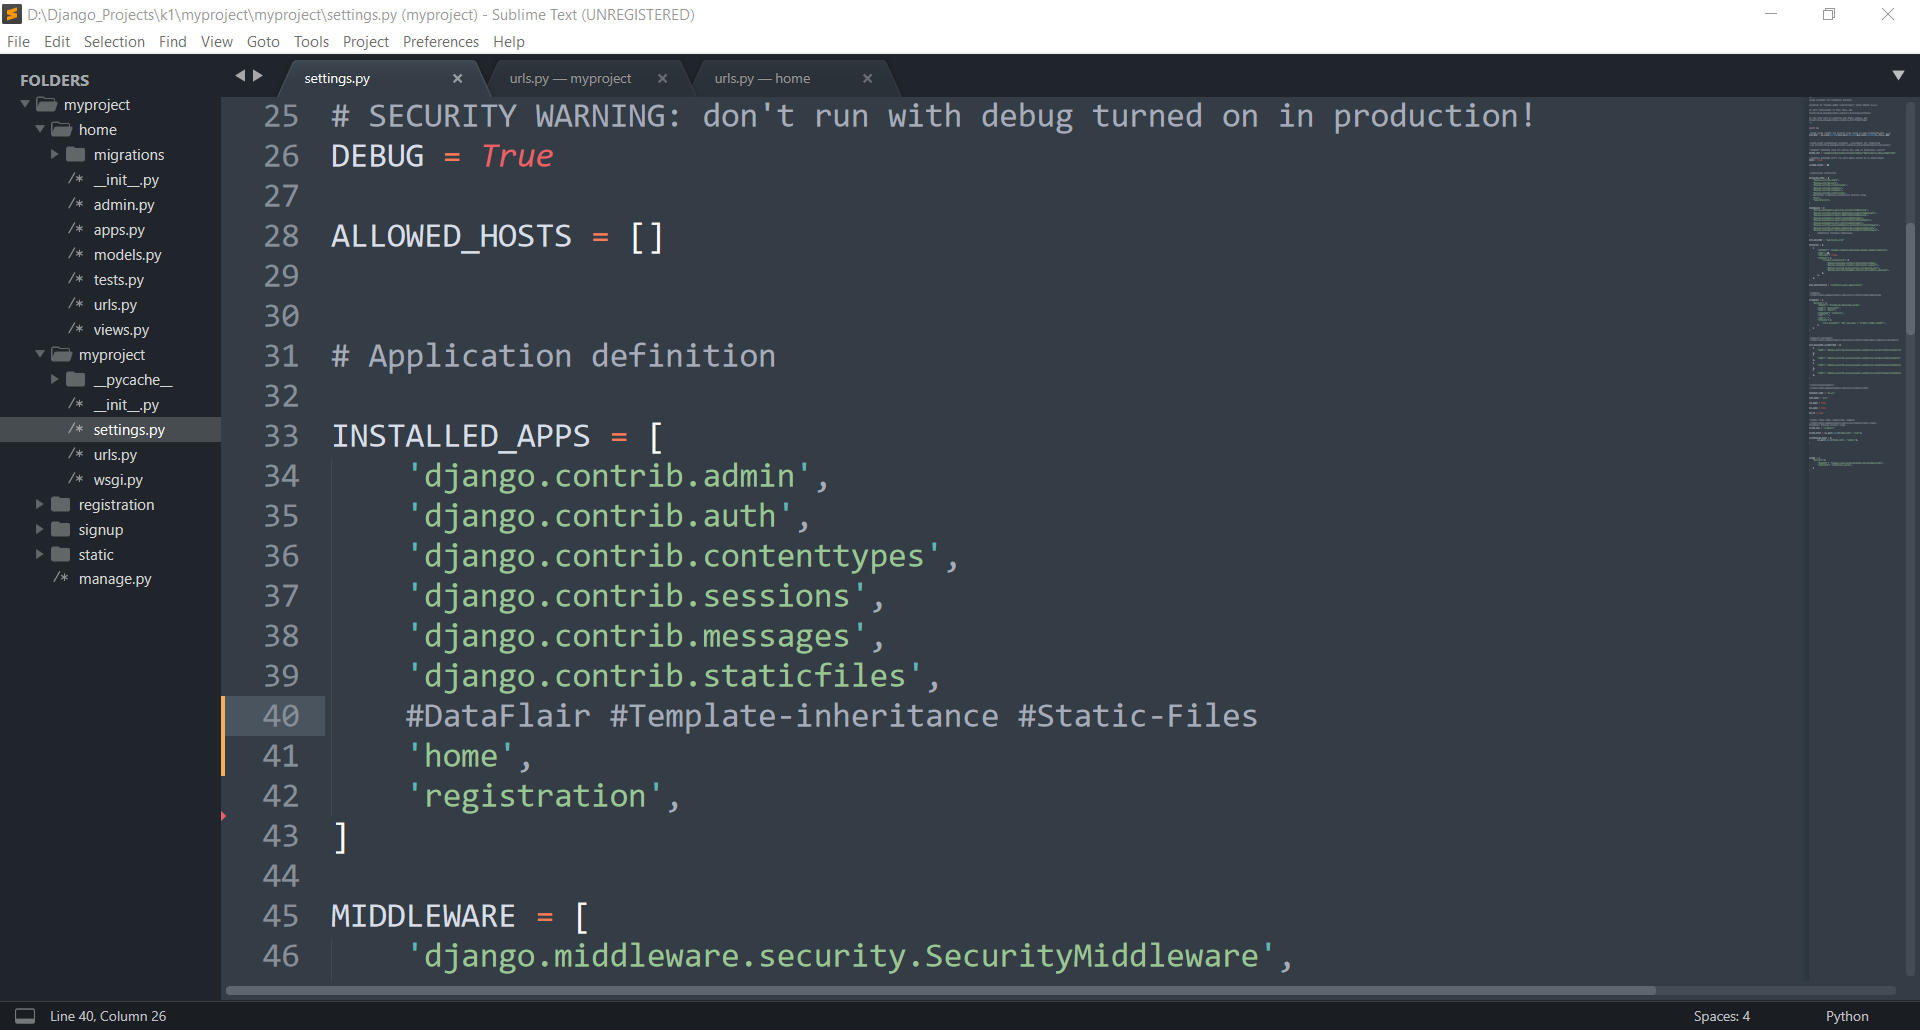
Now, install that application in your Django project.
Add this name to INSTALLED_APPS list.
2. Define Some View Functions
Let’s define some view functions for this project. Add this code to your home/views.py file.
Code:
from django.shortcuts import render

#DataFlair #Views #TemplateInheritance
# Create your views here.
def home(request):
    return render(request, 'base.html')

def other(request):
    context = {
    'k1': 'Welcome to the Second page',
    }
    return render(request, 'others.html', context)
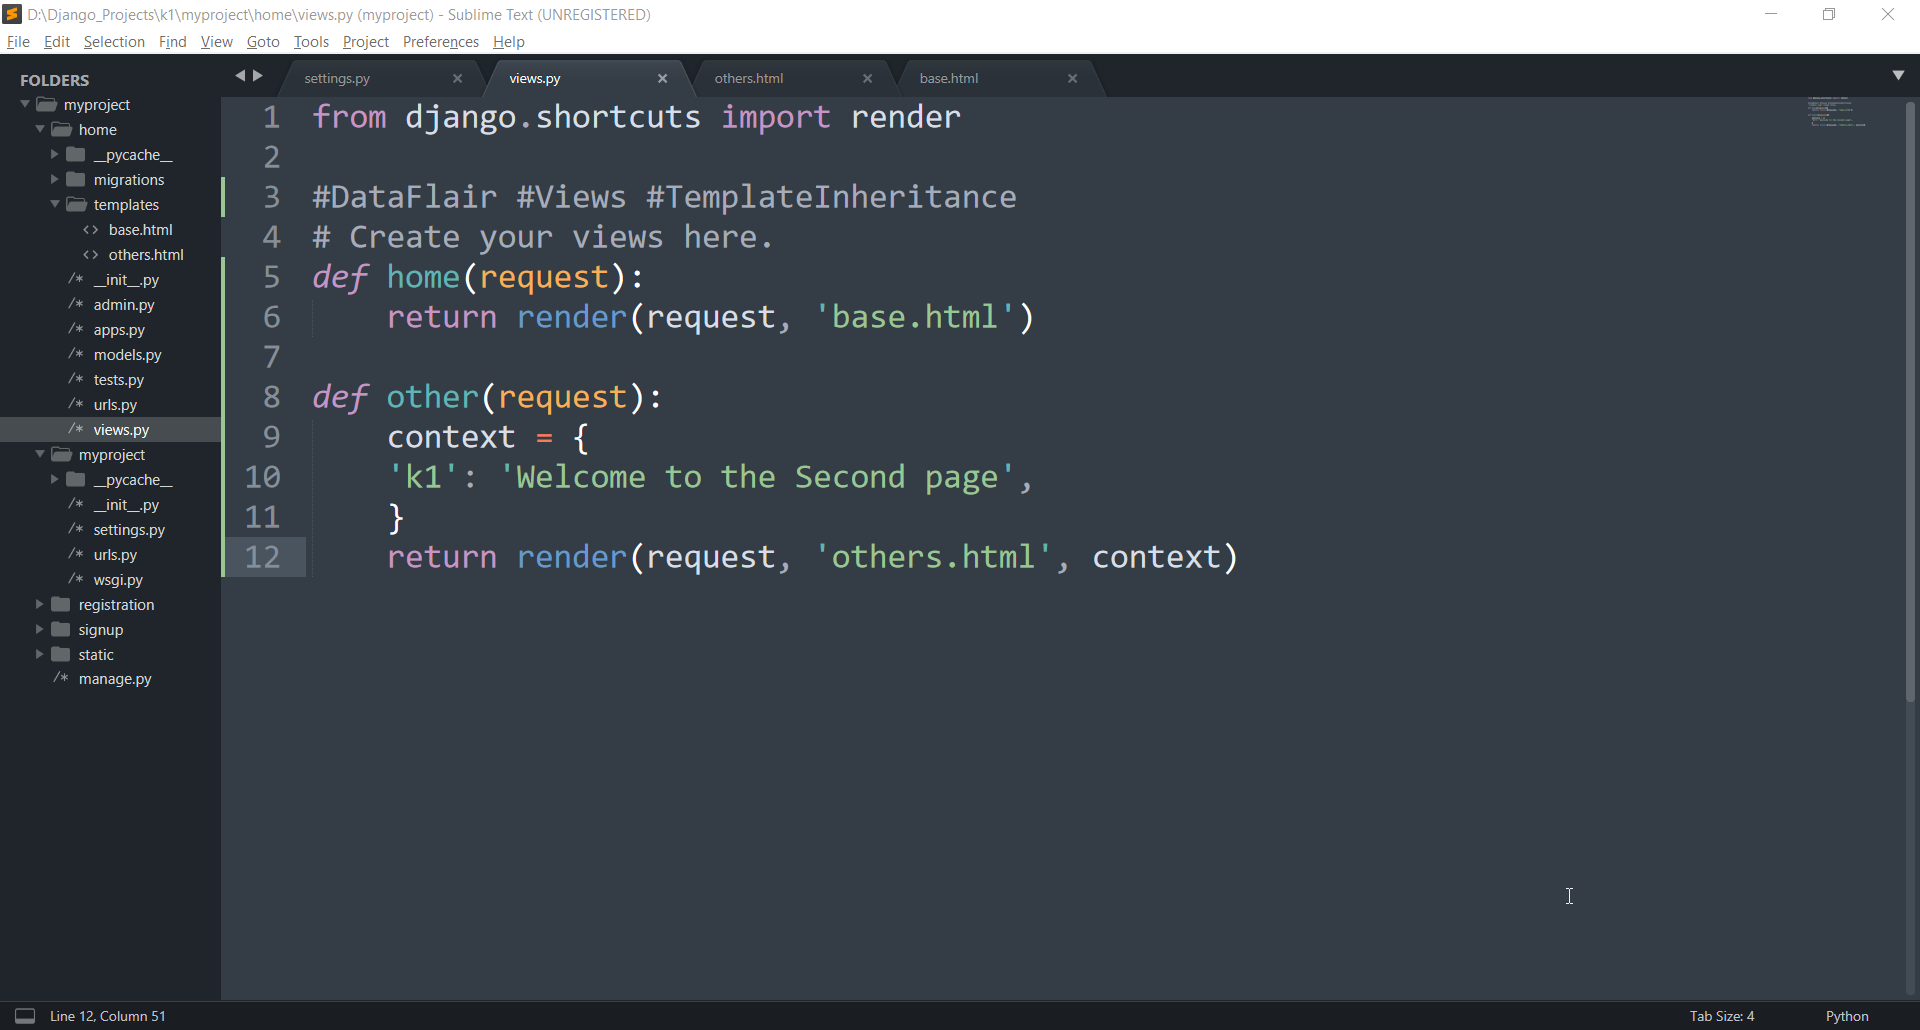
These are some simple view functions.
3. Defining Templates
Now, we can define our templates. First, create a new folder template in the home app. Inside that folder, create two new files, base.html, and others.html.
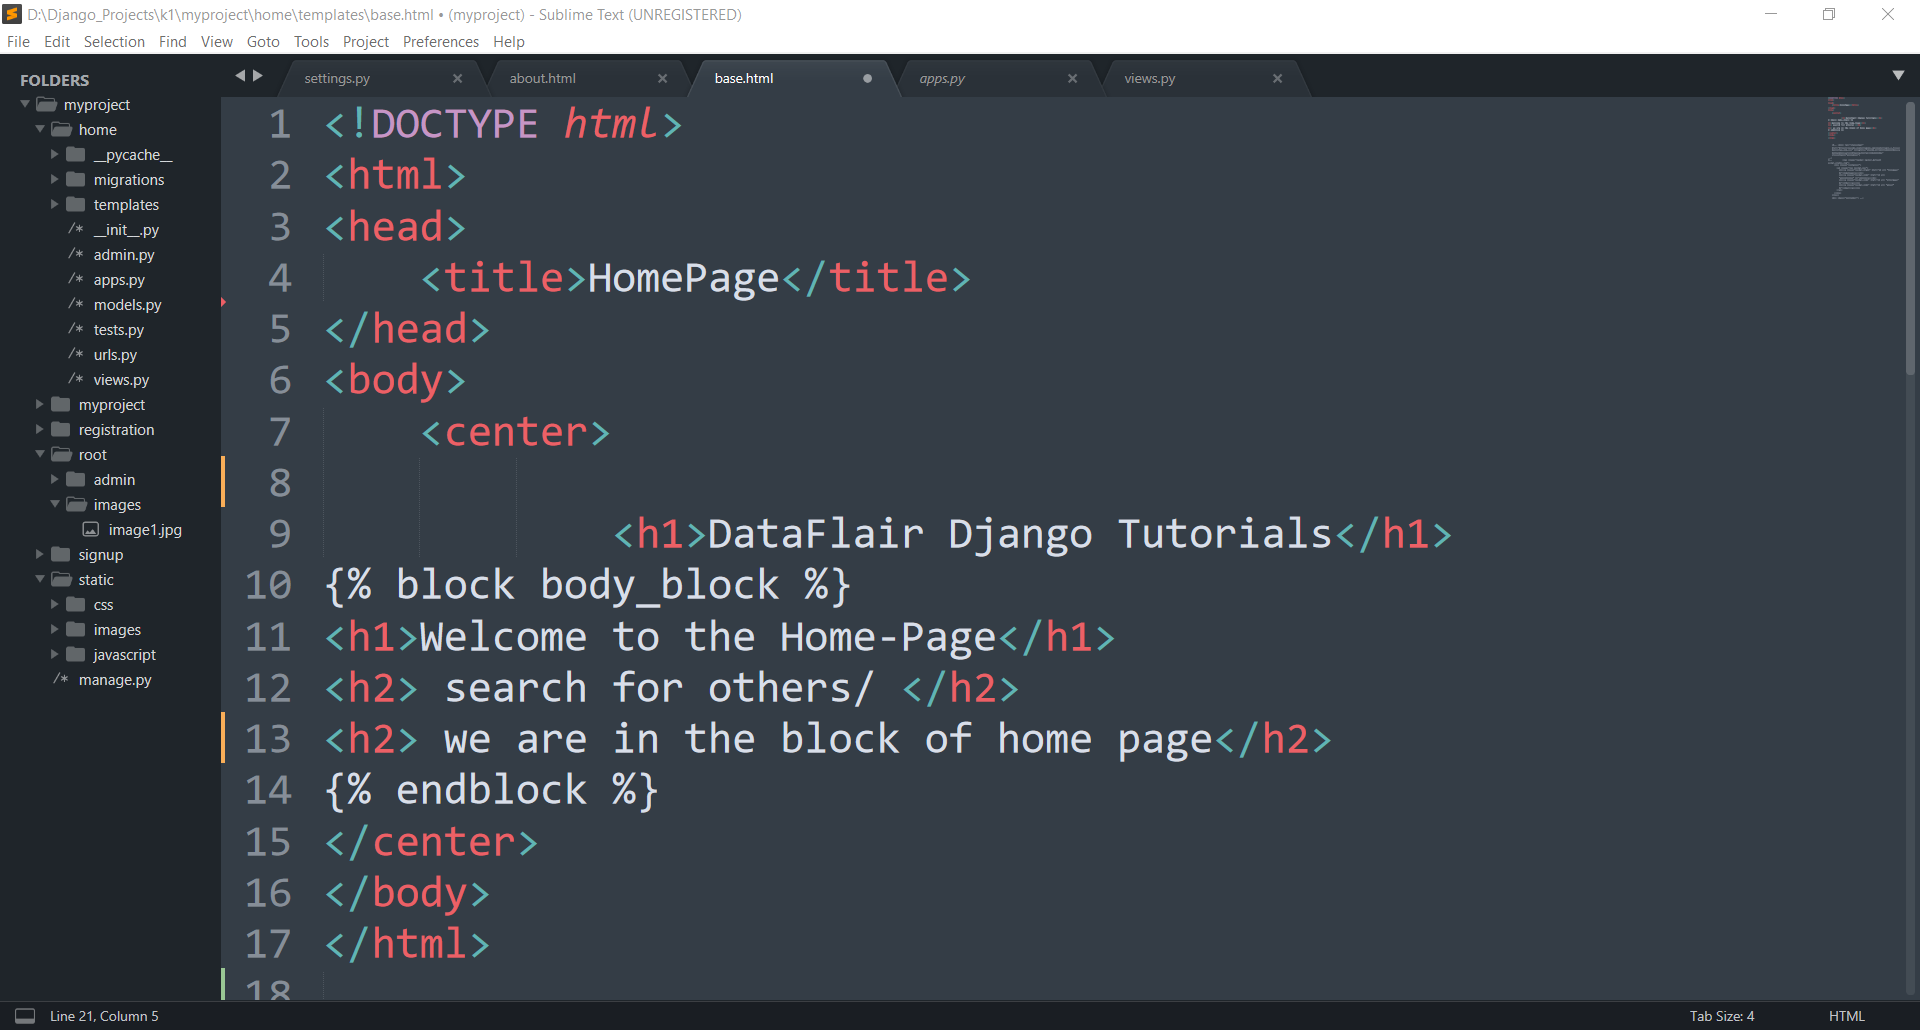
Then just paste this code in base.html
Code:
<!DOCTYPE html>
<html>
<head>
    <title>HomePage</title>
</head>
<body>
    <center>
    <h1>DataFlair Django Tutorials</h1>
{% block body_block %}
<h1>Welcome to the Home-Page</h1>
<h2> search for others/ </h2>
      <h2> we are in the block of home page</h2>
{% endblock %}
</center>
</body>
</html>
Don’t forget to check the Django Template Tutorial
Understand the Code:
In this code, you must be noticing that we used some new template tags. The tag, {% block body_block %} is used for template inheritance. We are actually replacing this section of code between {% block body_block %} …. {% endblock %}. The name body_block can be of your choice.
There can be multiple blocks of this type. It’s up to you to change them or use them as it is.
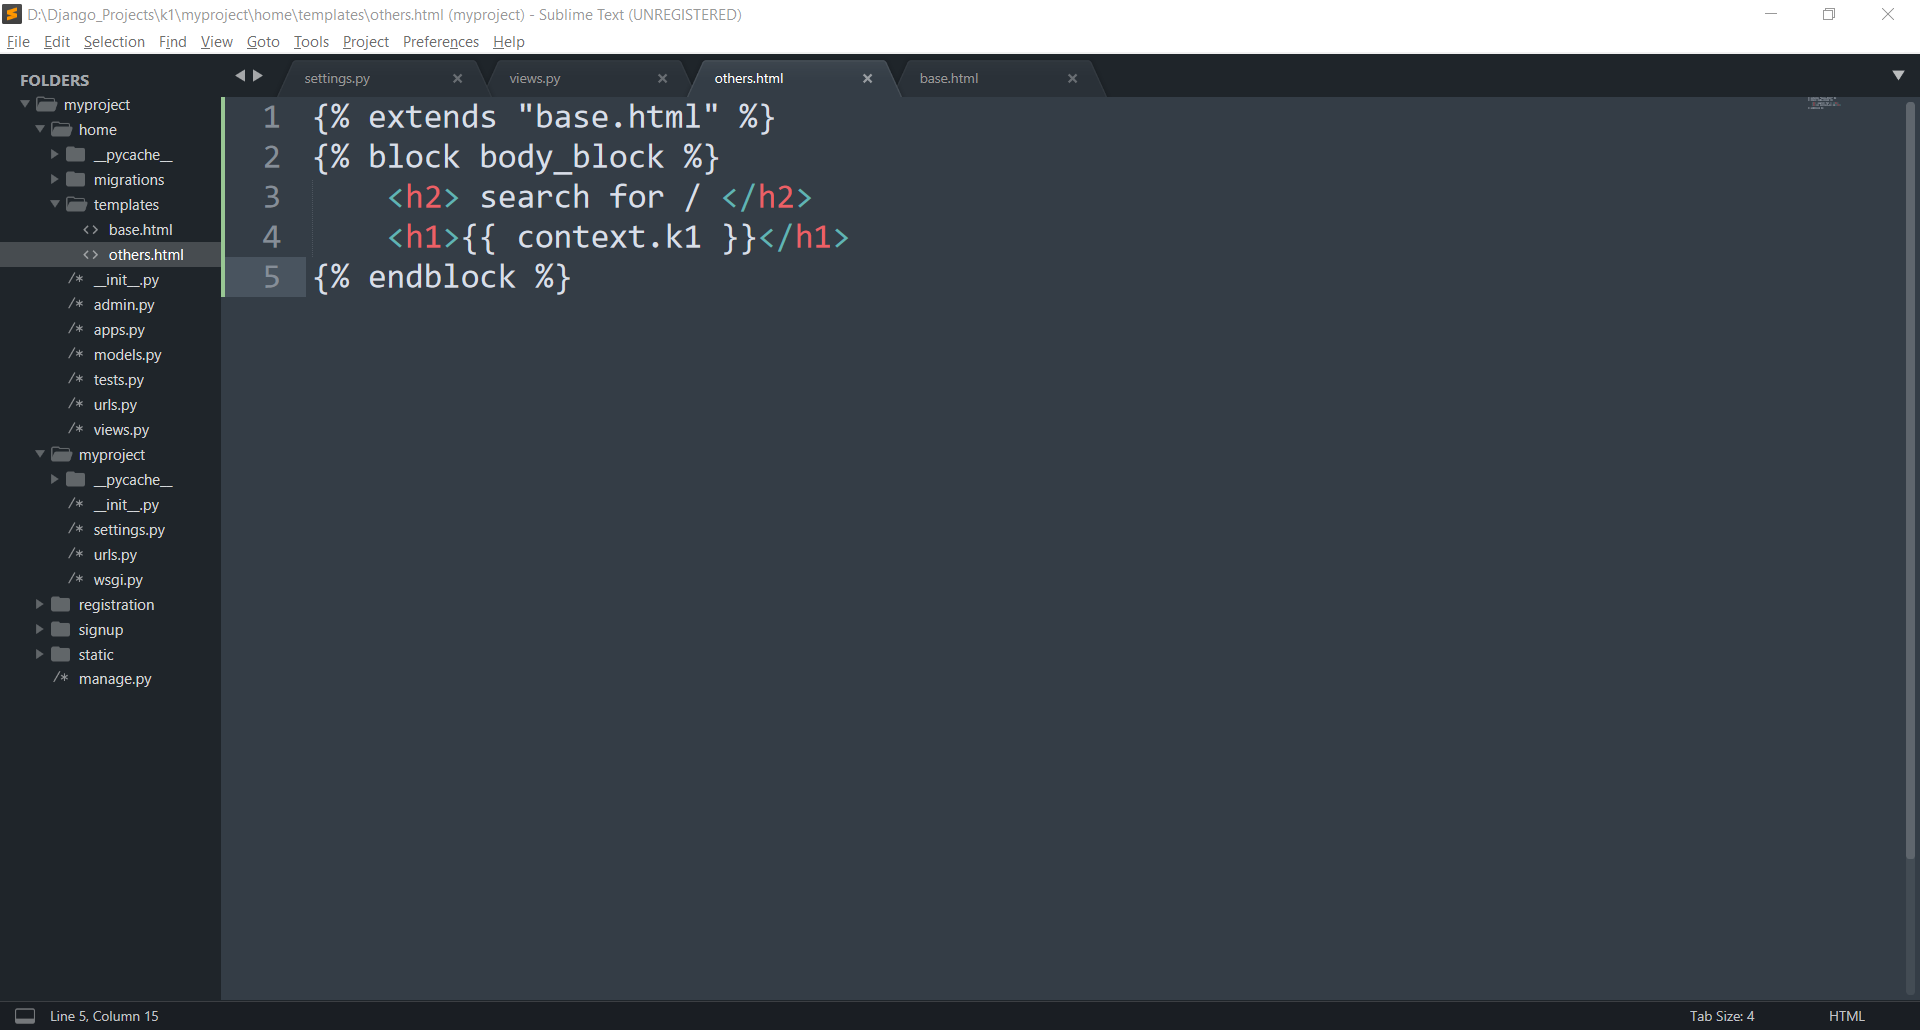
Now, paste this code in others.html
Code:
{% extends "base.html" %}
{% block body_block %}
    <h2> search for / </h2>
    <h1>{{ context.k1 }}</h1>
{% endblock %}
Understand the code:
Here, we used a new tag at the beginning. {% extends ‘base.html’ %} is clear in itself. This tag will inform Django to add base.html code in others.html. After that we used {% block body_block %} …. {% endblock %}, which contains this page’s unique content. This block is swapped with the block in base.html.
4. URL Mappings
We have to connect our views and urls. So, edit the urls file.
Make a new urls-config in the home app.
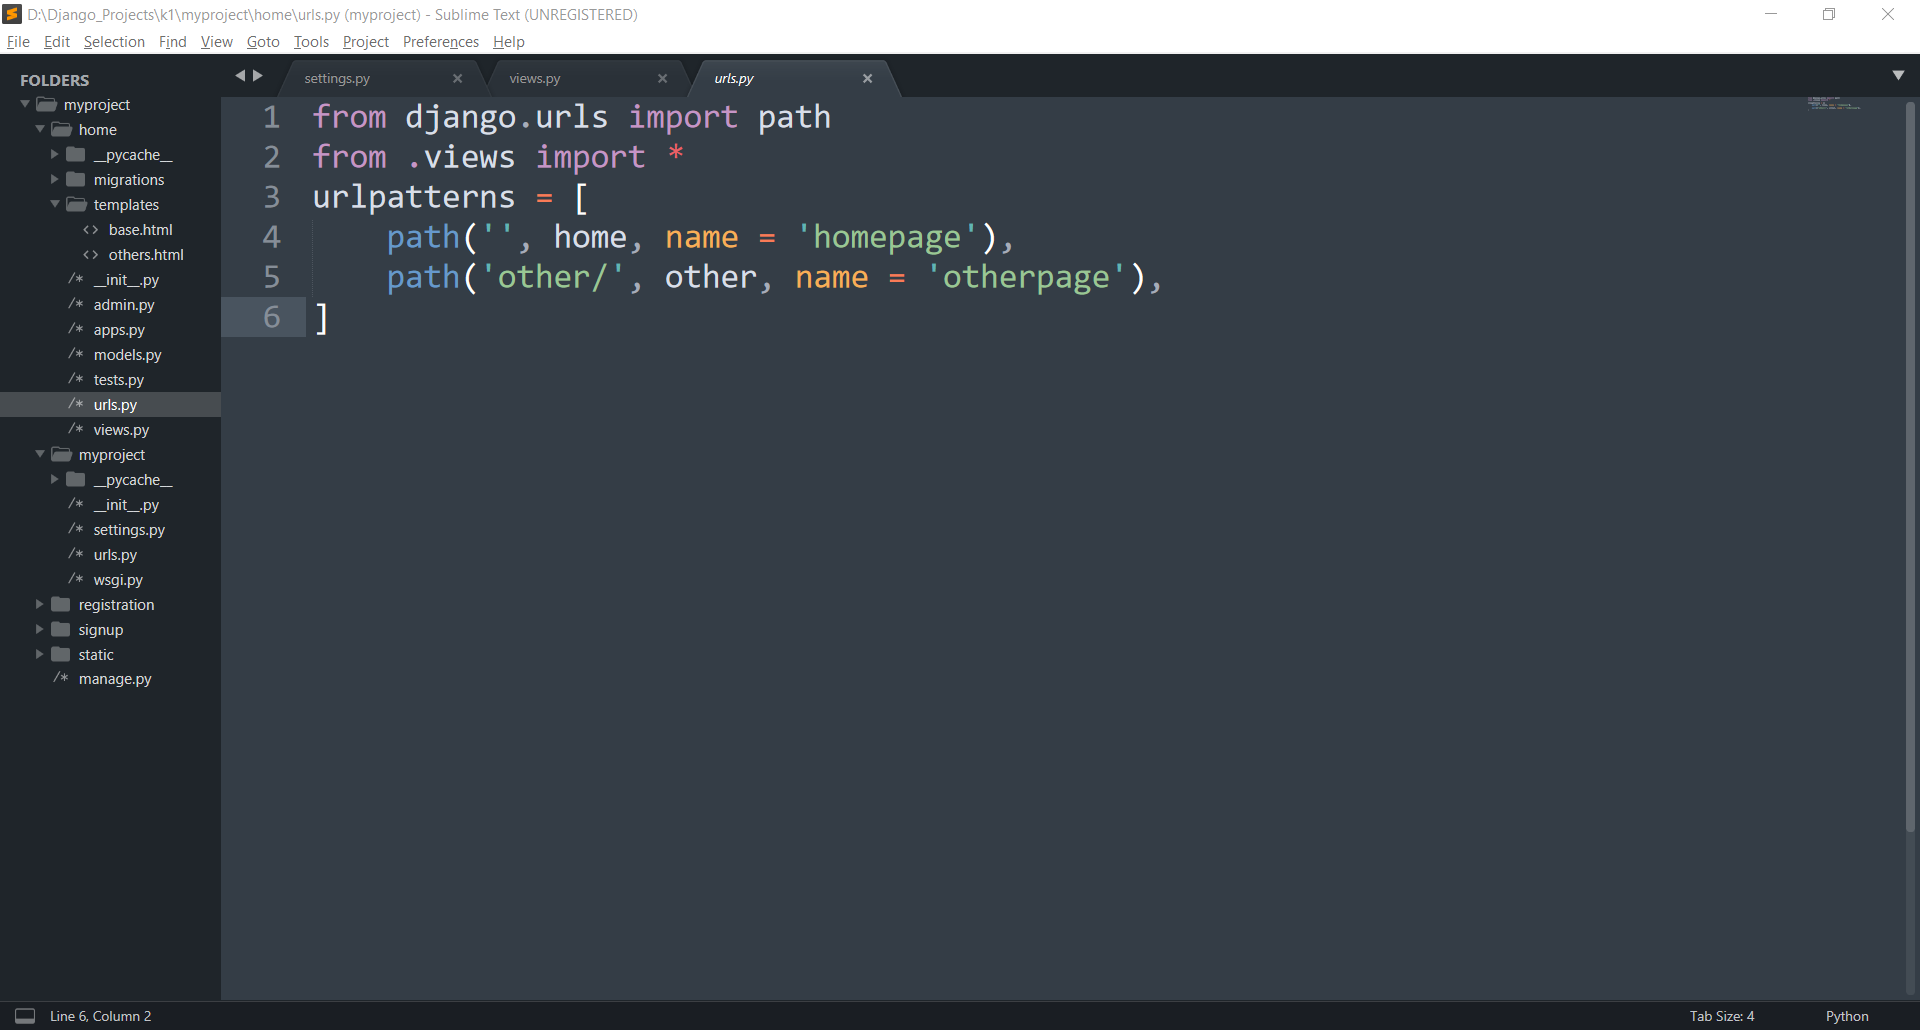
Inside home/urls.py file, paste this
Code:
from django.urls import path
from .views import *
urlpatterns = [
    path('', home, name = 'homepage'),
    path('other/', other, name = 'otherpage'),
]
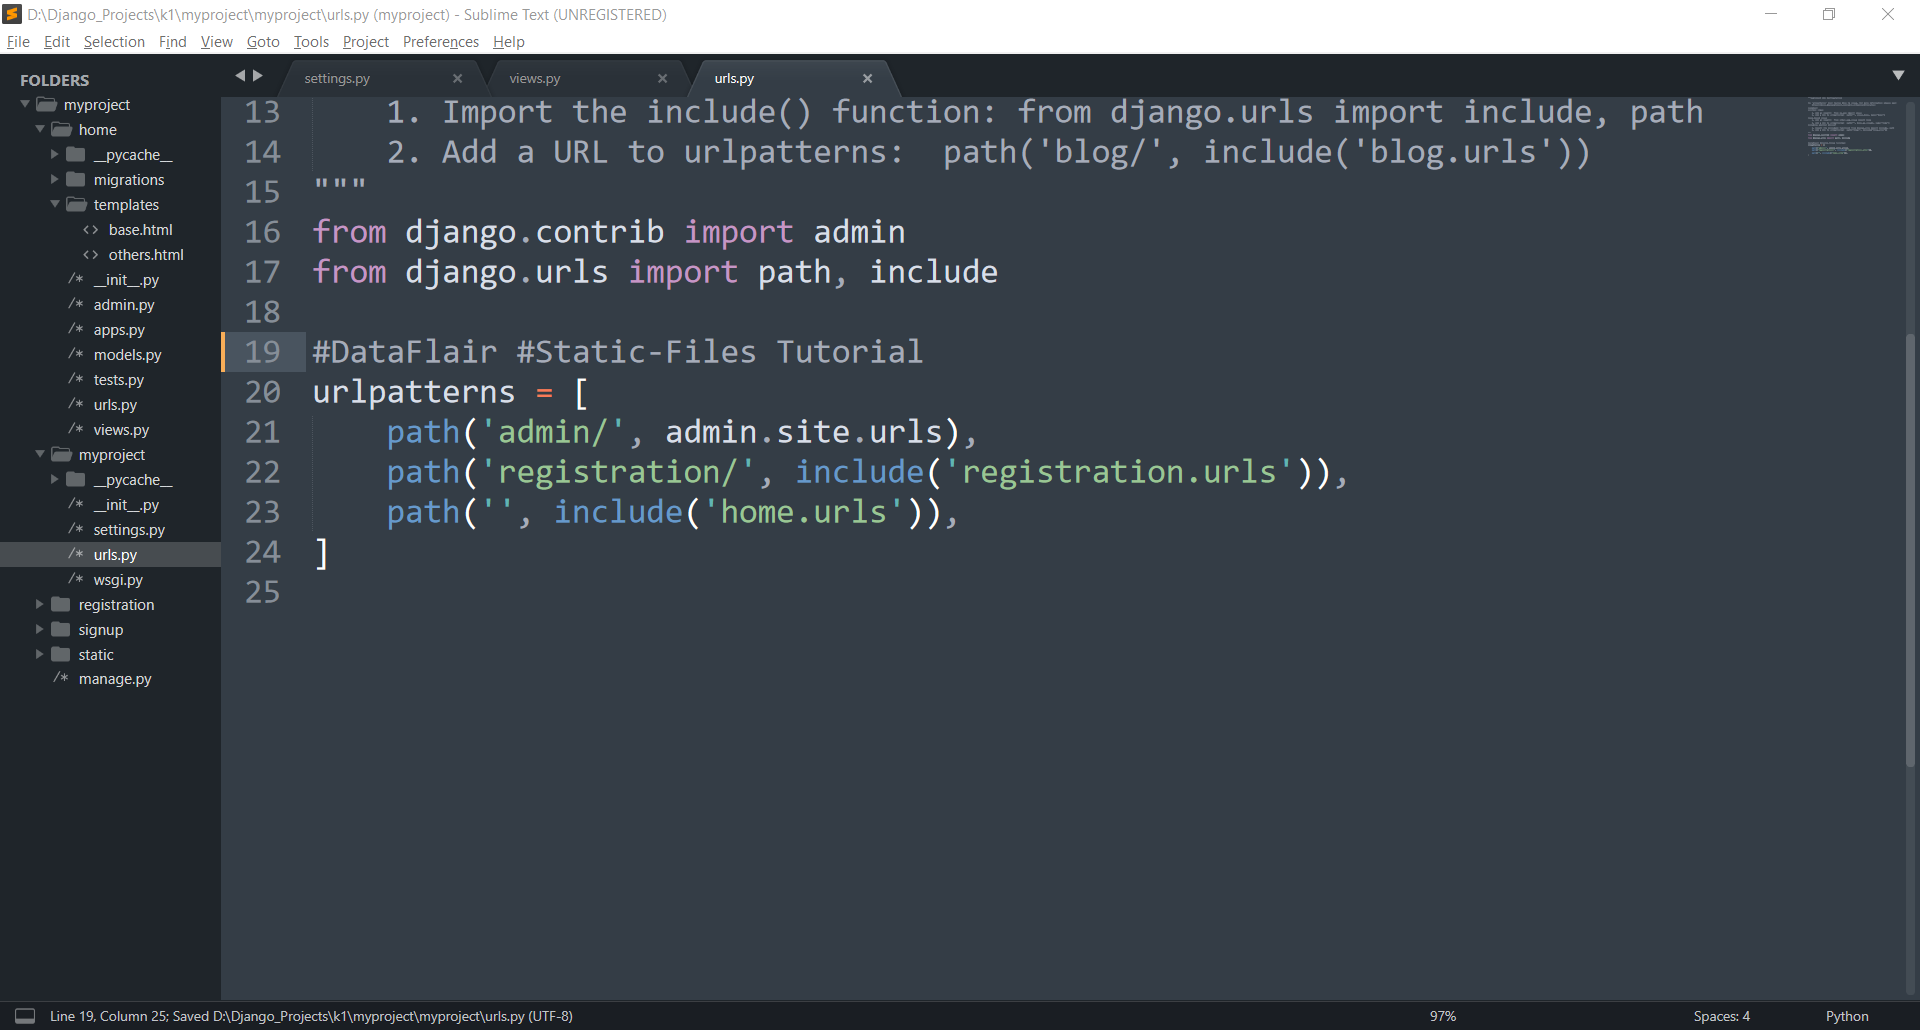
Now, add this variable in your main urls-config-
urls.py, in root folder
Code:
path('', include('home.urls')),
Must Learn – How to map URL patterns to view functions
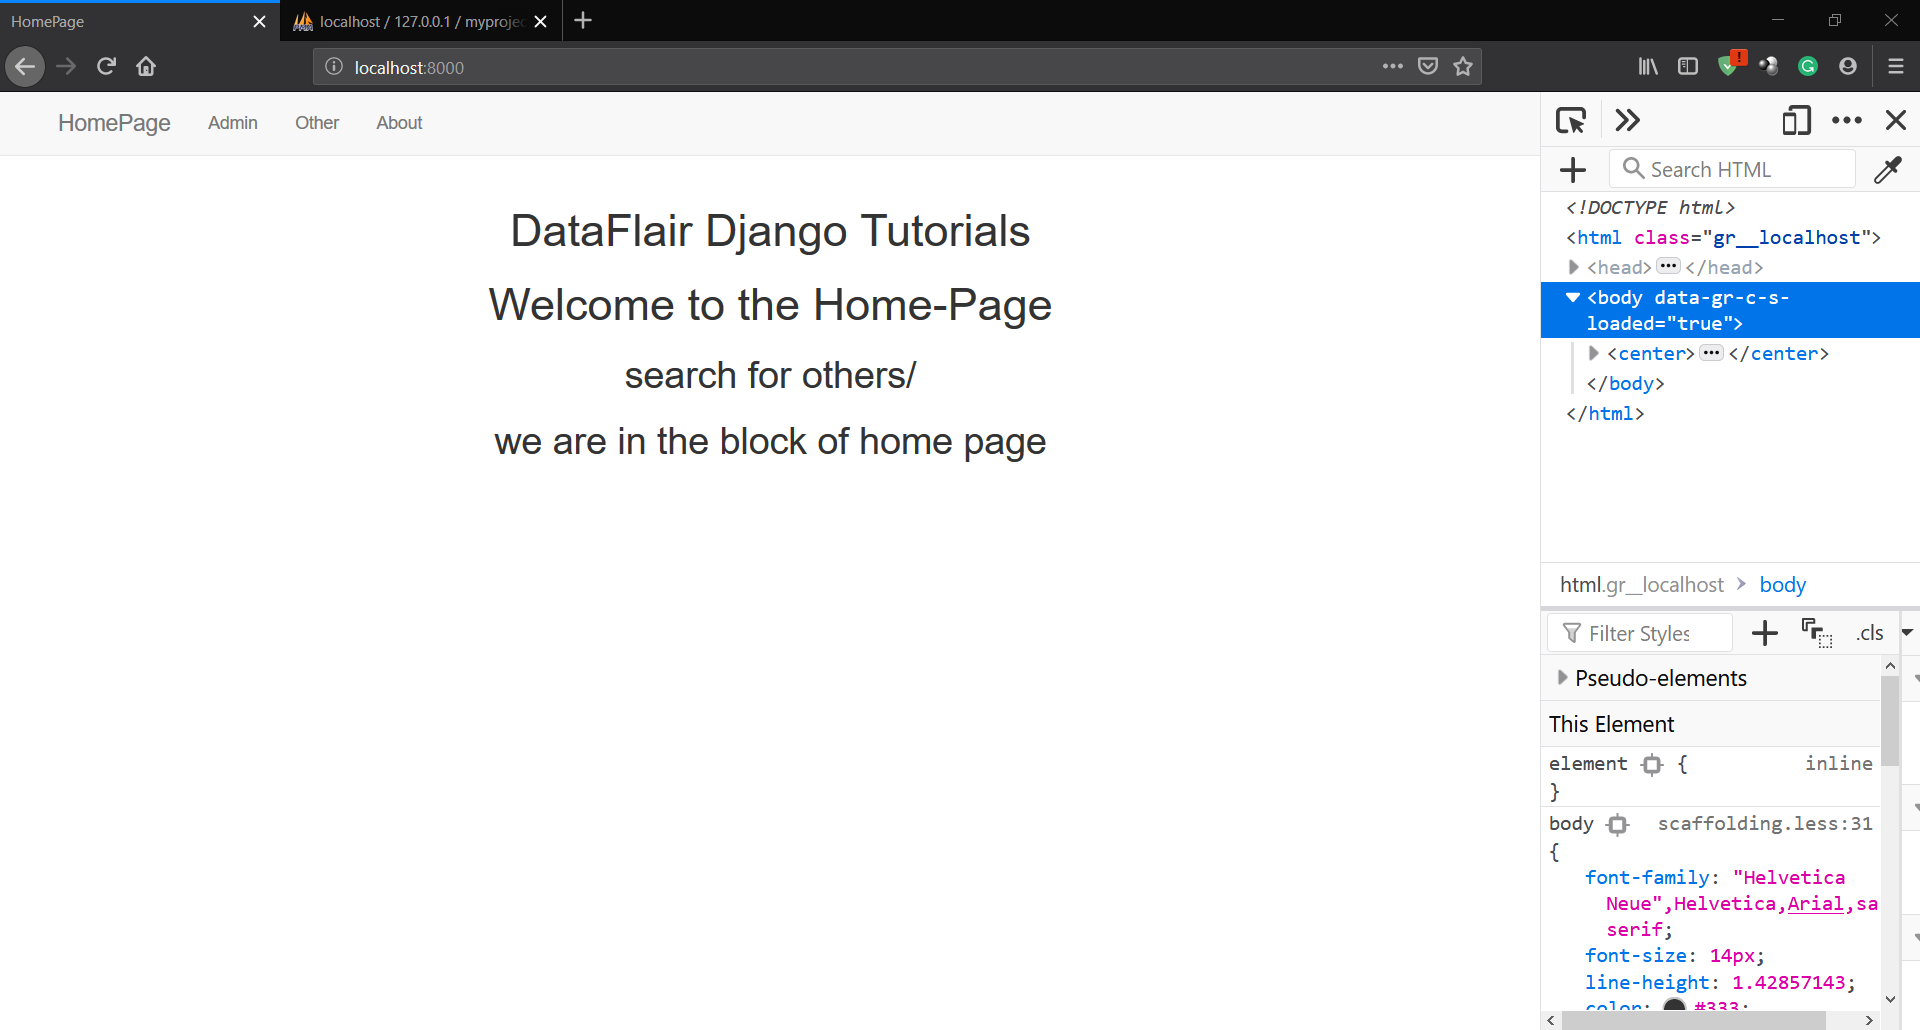
5. Test Run
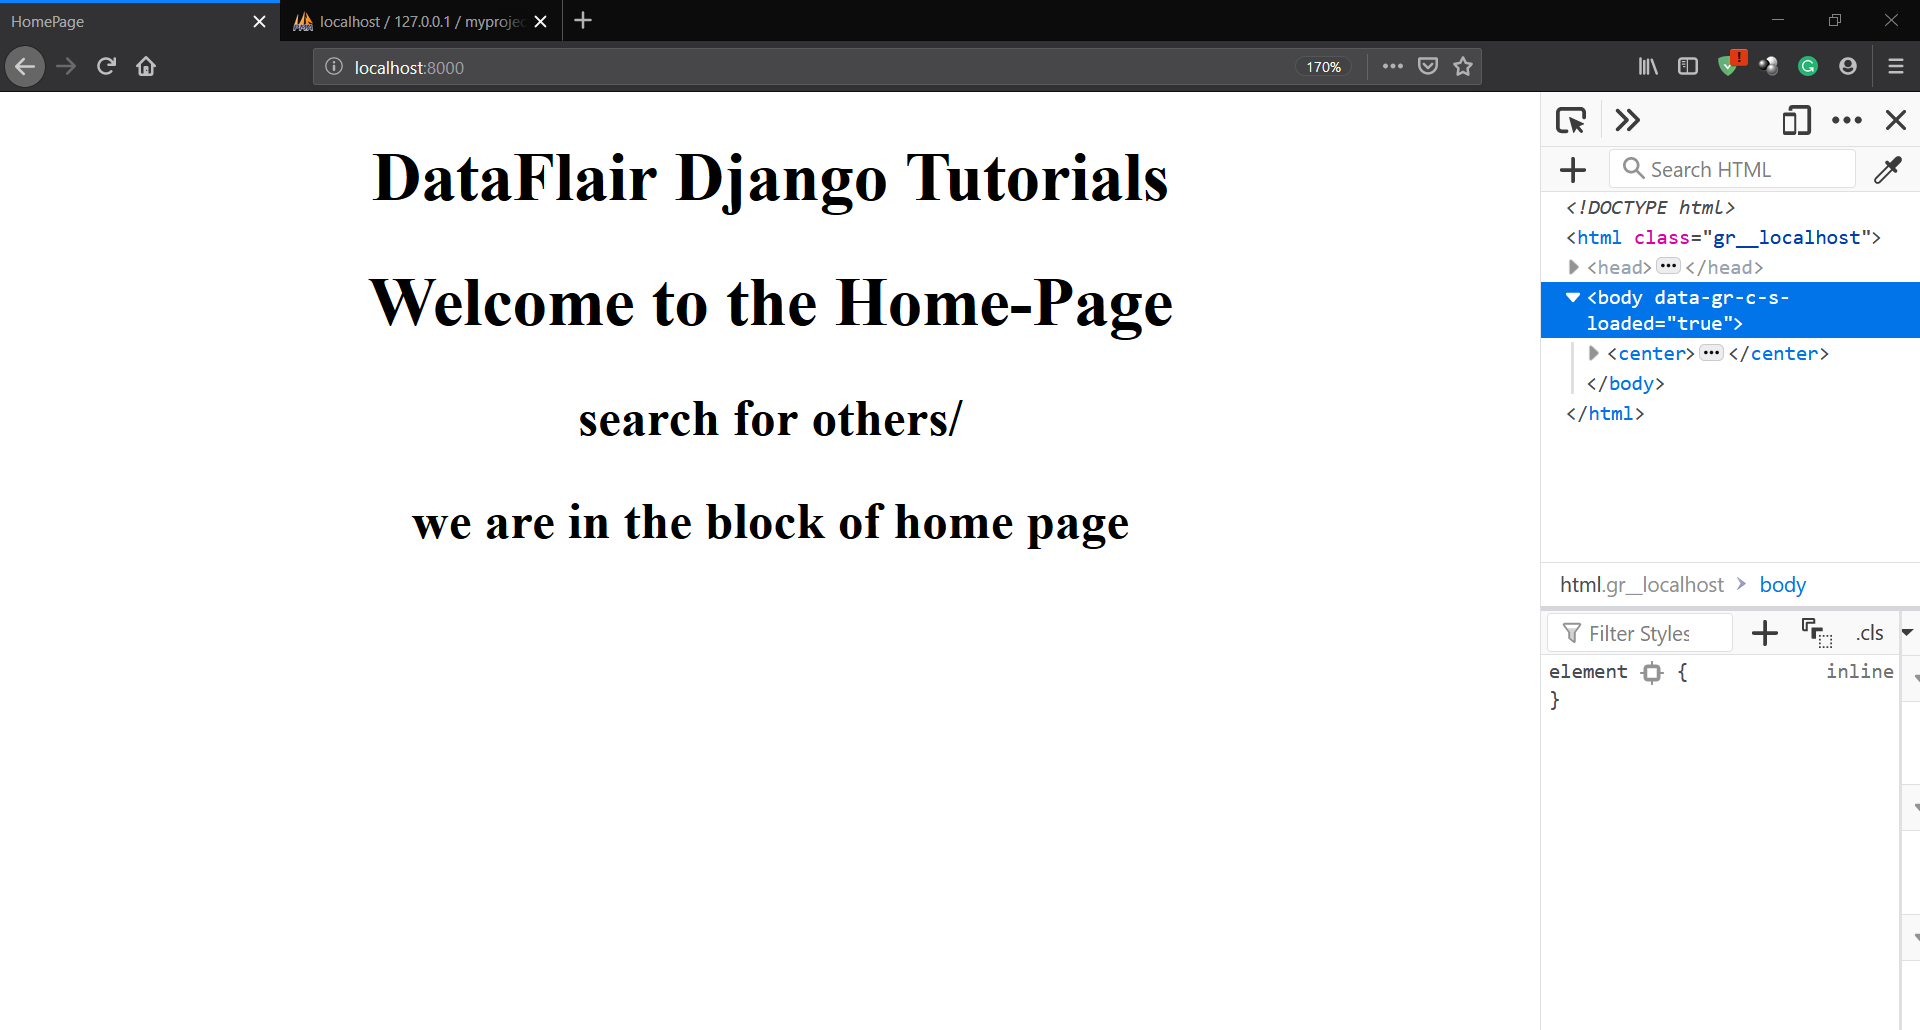
Finally, test our functions. See through it that you have followed the whole tutorial.
In URL bar, enter – localhost:8000
Then search for other/ in the URL bar.
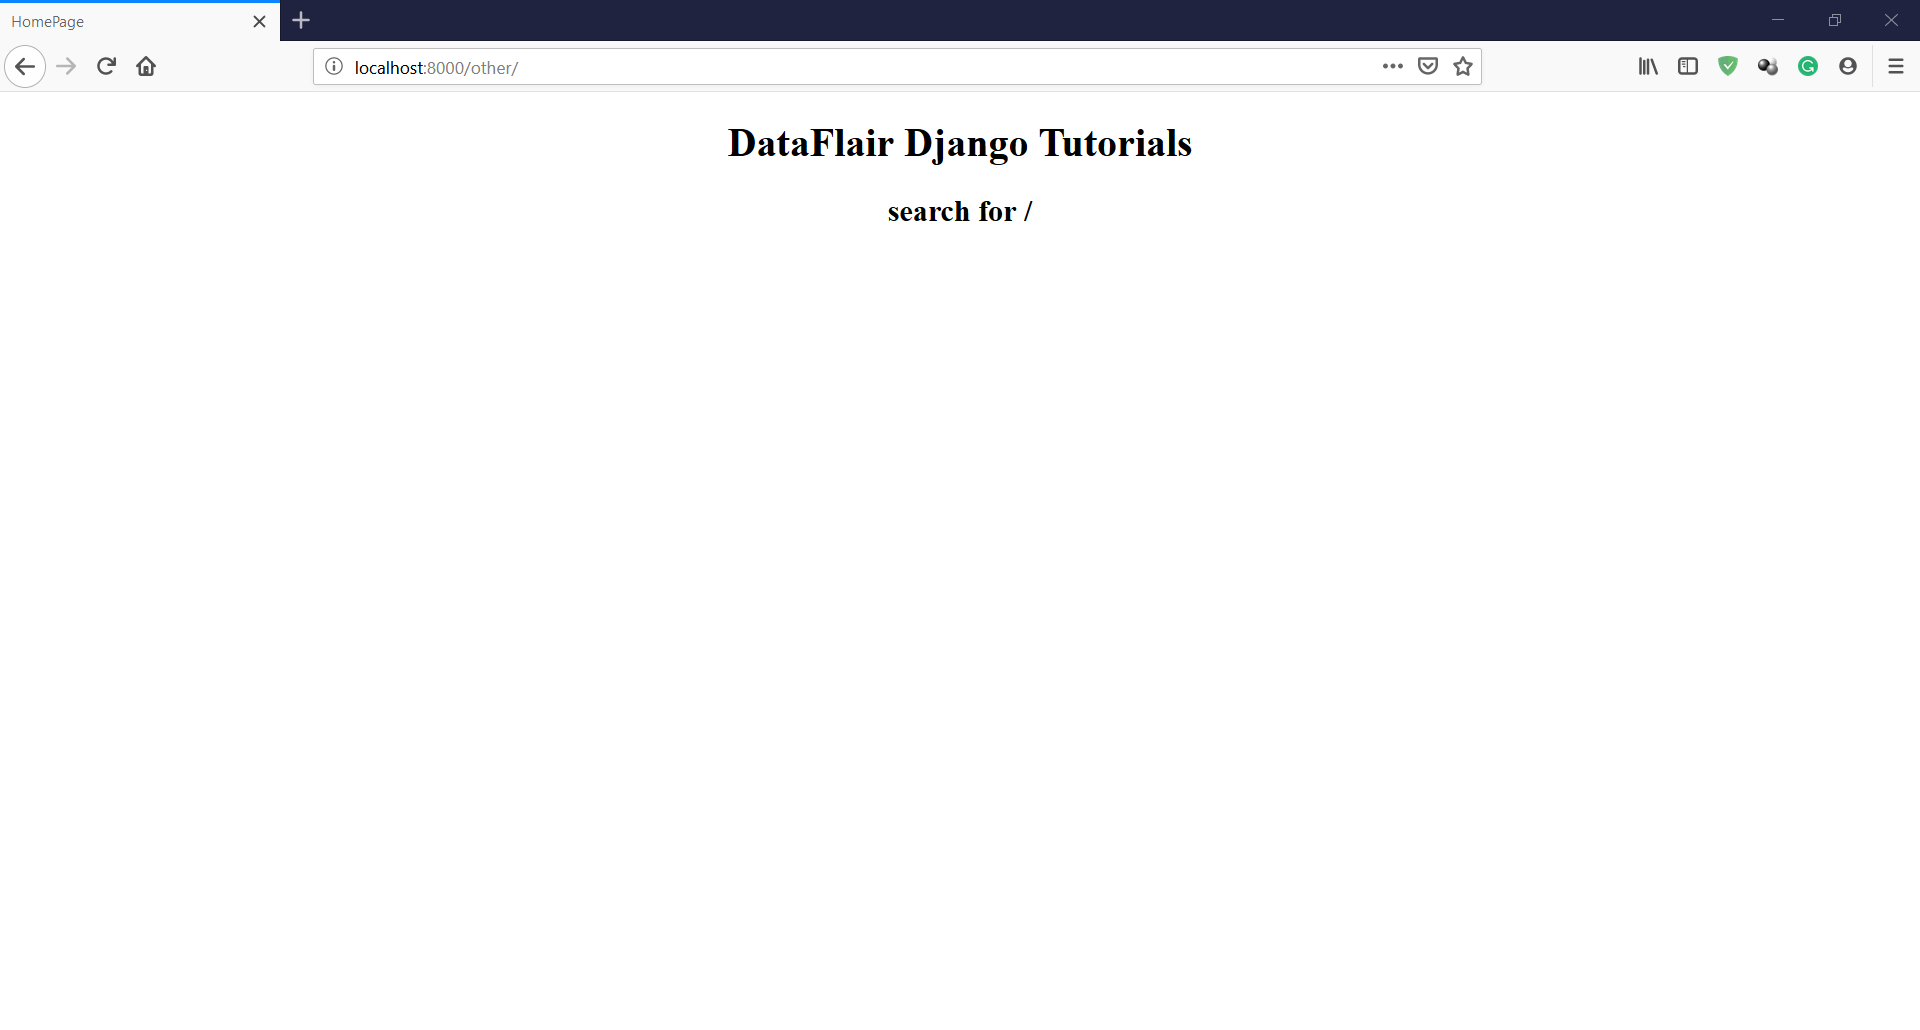
So, this is the output.
That’s how we perform template inheritance.
Remember, there can be multiple blocks in a single template.
Now, we will add some static files so that our page looks more attractive. We will be modifying our settings.py a little bit.
Managing Static Files in Django
A good developer also manages static files. Static file management is an important factor in web development. When the website undergoes frequent UI changes and graphics are updated constantly, this condition requires developers to manage static files.
Django provides us with built-in static file handler. It’s a very simple concept and requires some modification in settings.py.
Check the list of INSTALLED_APPLICATIONS in settings.py file.
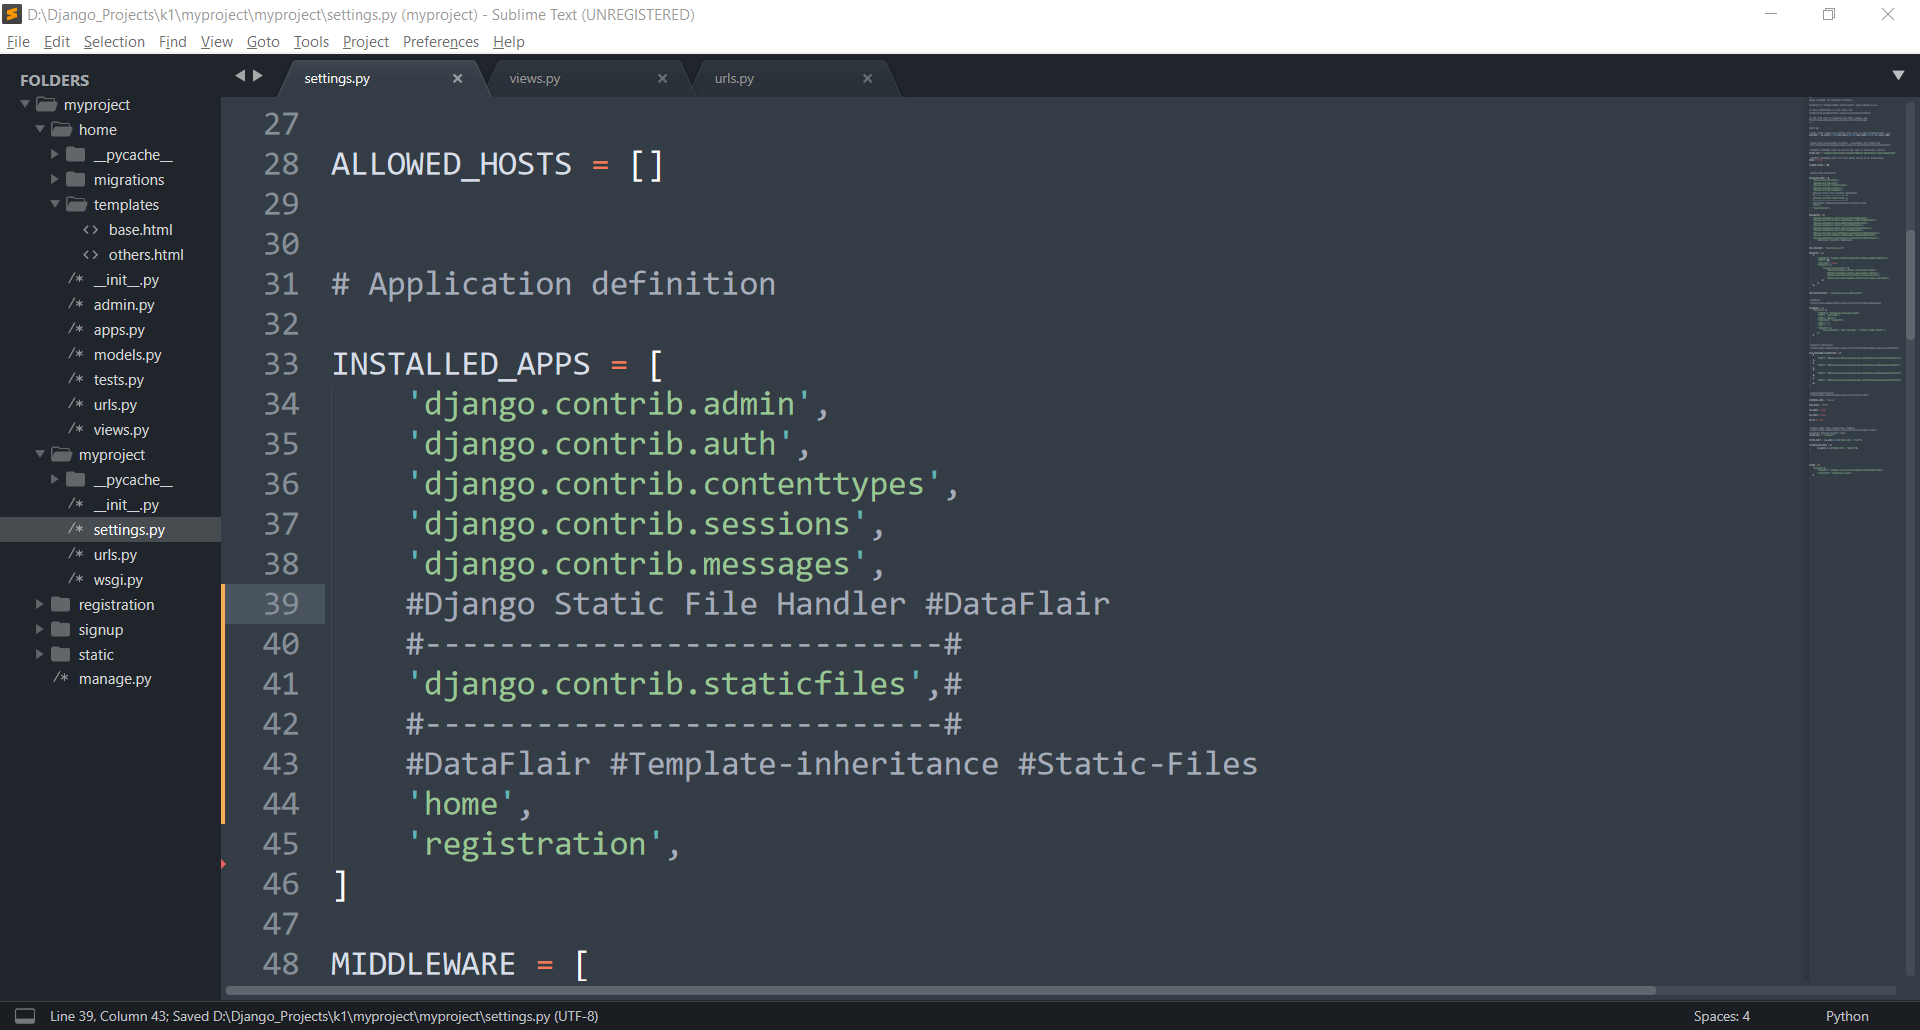
Application is: django.contrib.staticfiles
Moving to the next phase, we have STATIC_URL variable in the last section of the page.
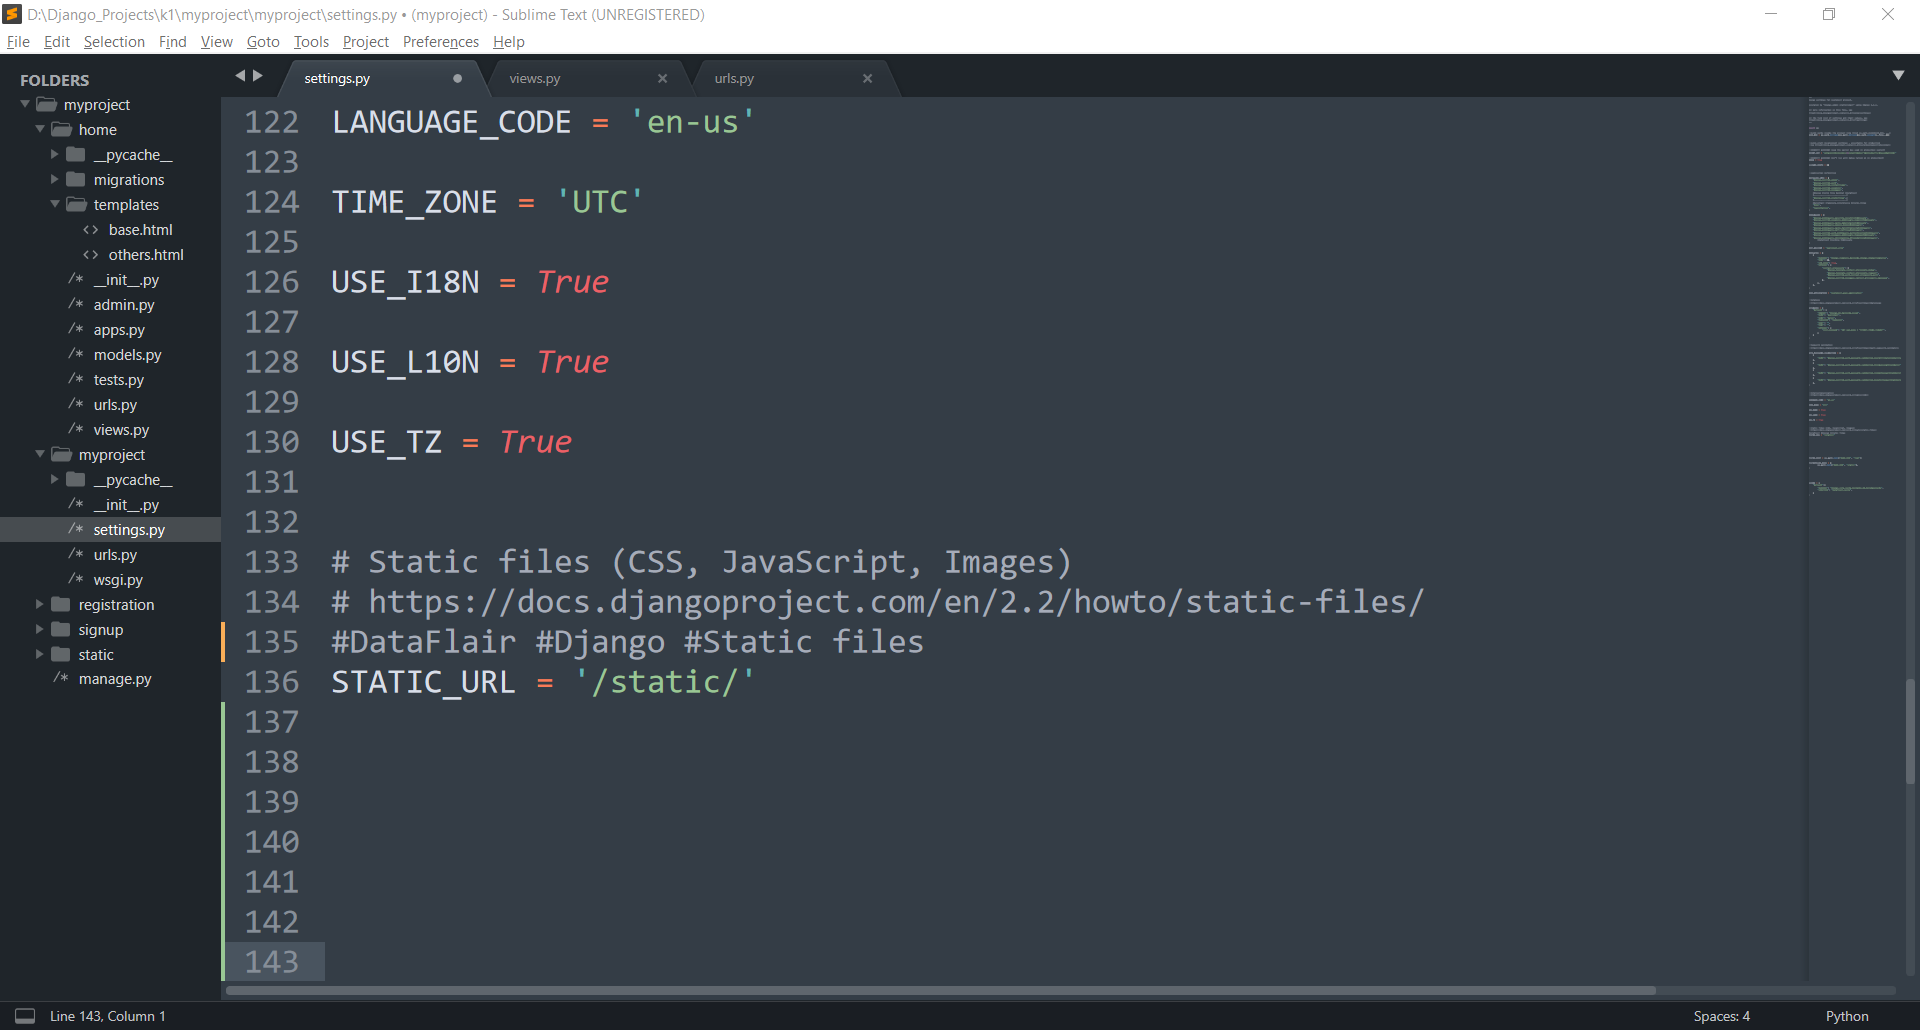
This URL is important as it will be the base URL for all static files of your project. This URL should be of the same name as the folder where your static file is stored.
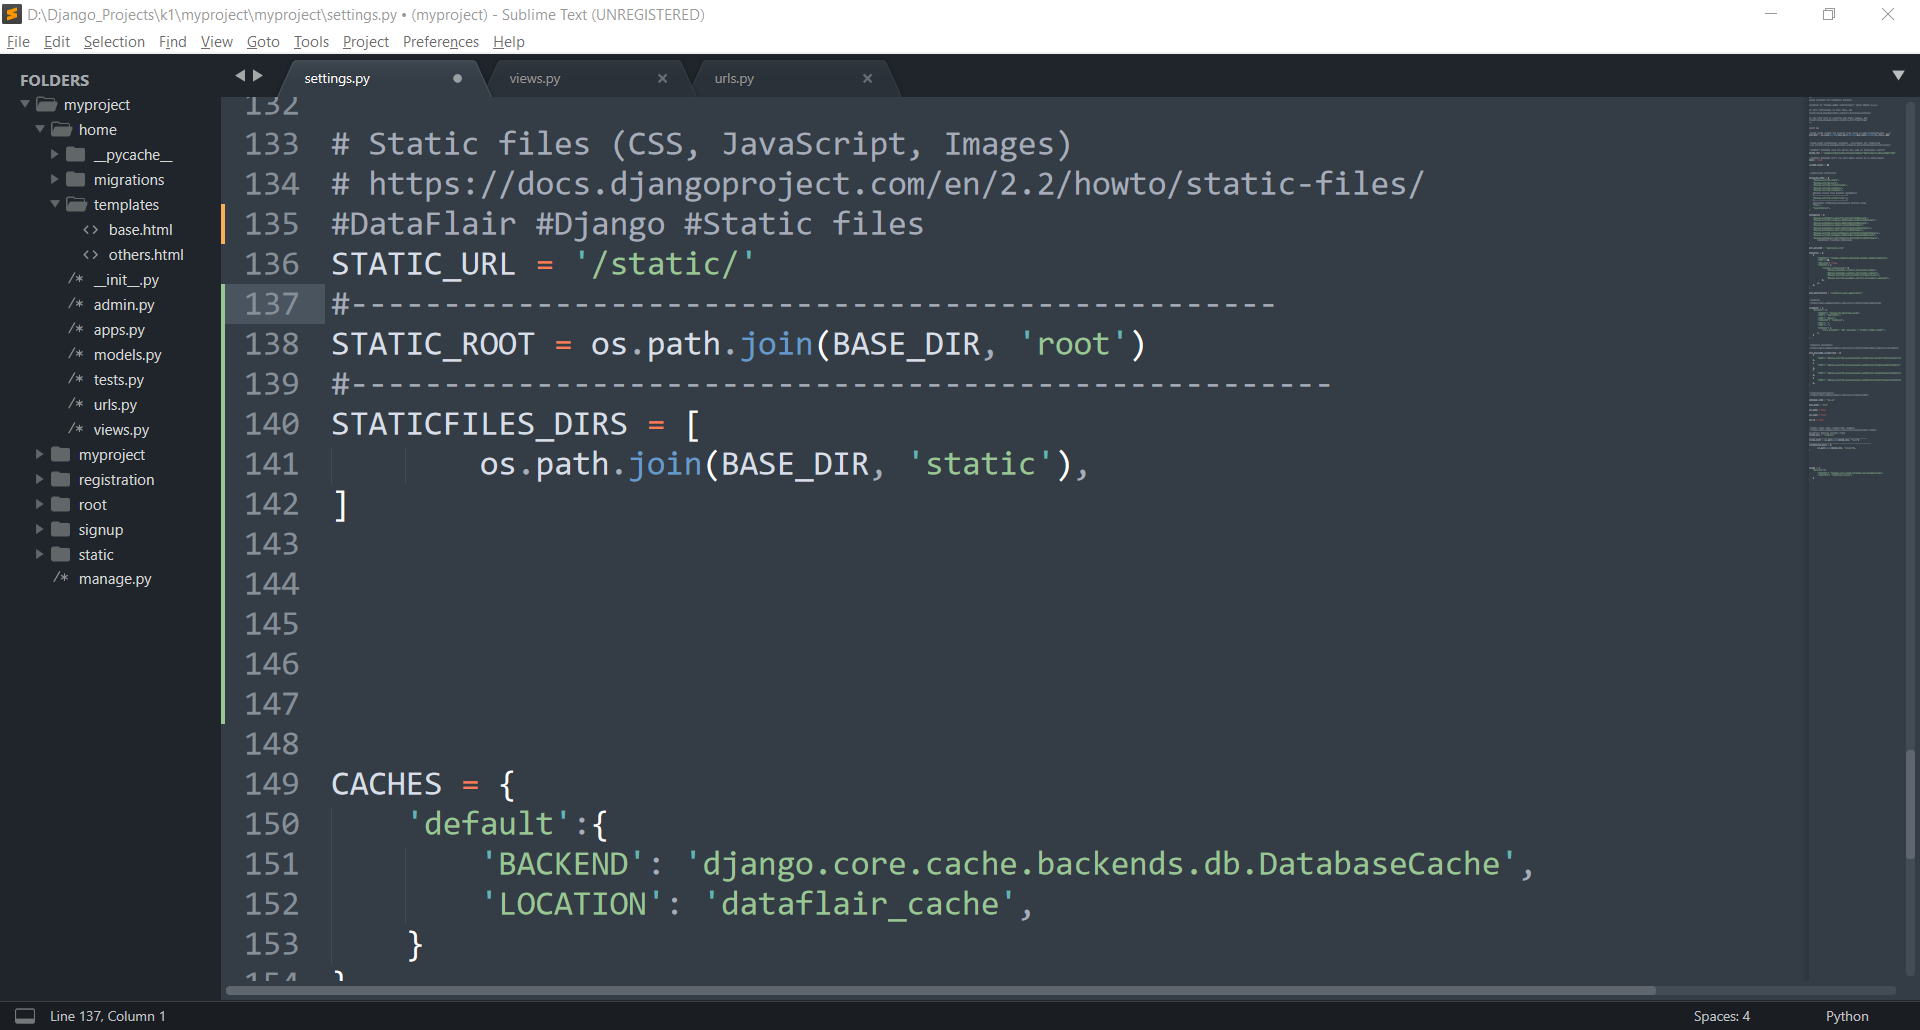
Then another important setting comes in – STATIC_ROOT. This setting contains the address of the folder where we will be storing static files. When we execute the collectstatic command, the Django will store our files in this directory.
The last is a list of directories – STATICFILES_DIRS. This list has file-paths of the folders where we store our static files. When we execute the collectstatic command, Django will look for static files in these directories. Then it will save them in our STATIC_ROOT folder.
collectstatic command
This command is very useful when the website is in production state. When this command is executed, Django performs these operations:
- It looks for static files in all the directories listed in STATICFILES_DIRS
- The static-files are then copied and saved in STATIC_ROOT directory.
- When the server is requested for static content, it will fetch a file from STATIC_ROOT.
- And, that file will have its URL modified with STATC_URL.
That’s how files are served.
Have you checked – Django Forms Handling & Validation
1. Setting up Static Files
Let’s add some static files to our home app. Just add this code in your setting file.
Code:
#DataFlair #Django #Static files
STATIC_URL = '/static/'
#--------------------------------------------------
STATIC_ROOT = os.path.join(BASE_DIR, 'root')
#-----------------------------------------------------
STATICFILES_DIRS = [
        os.path.join(BASE_DIR, 'static'),
]
Here, you can note that we are not using the STATIC_ROOT has a different value. But, that’s fine since we defined Root.
You can test it for some errors here. Try executing this command:
python manage.py collectstatic

If it succeeds then no issues, we can move forward.
Now, make a new folder named static same as we named in STATIC_DIRS list. Inside that, make a new folder image and in that folder, store image1.jpeg. This file can be anything that you want to display.
Again run the command: collectstatic
This time, it shall produce this output.
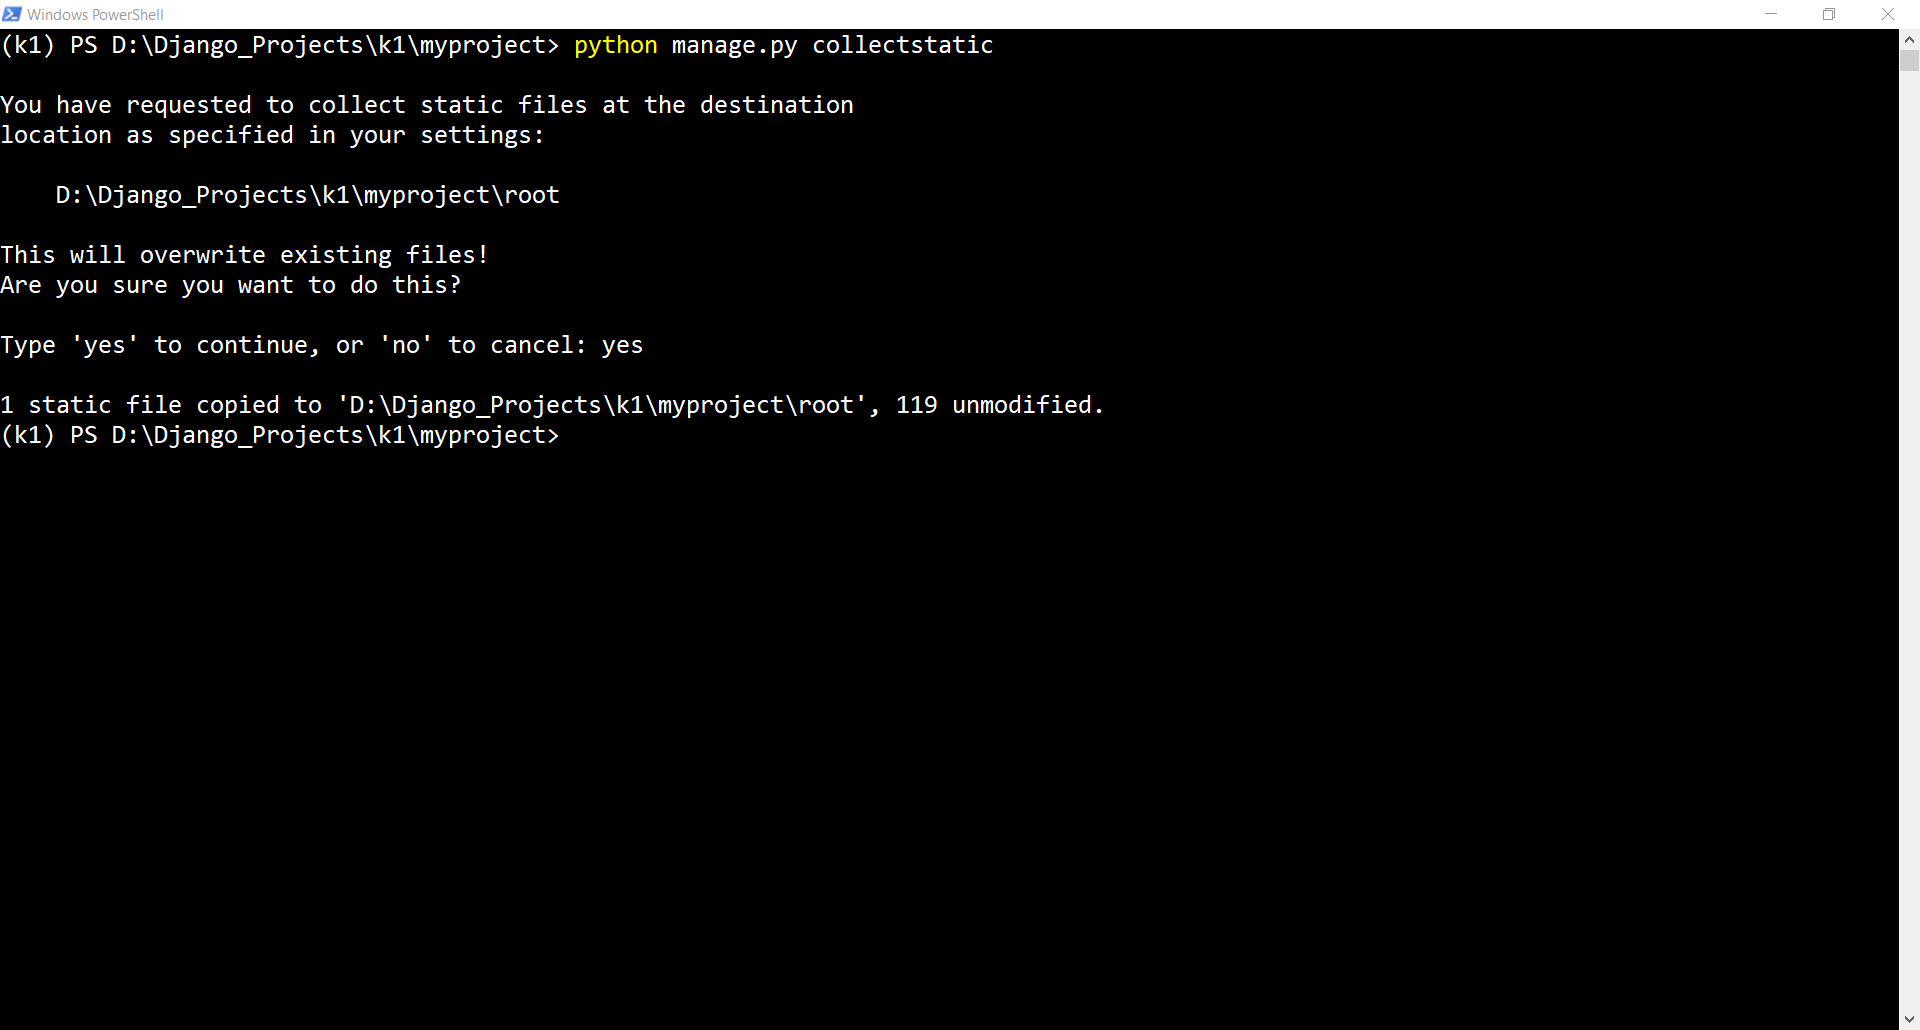
It shows that one file is added, then move forward. Otherwise, comment on any errors or check all the steps prior to this point.
2. Editing Templates for Static files
Now, we will edit some templates in the home app. Add a new template about.html in the templates folder.
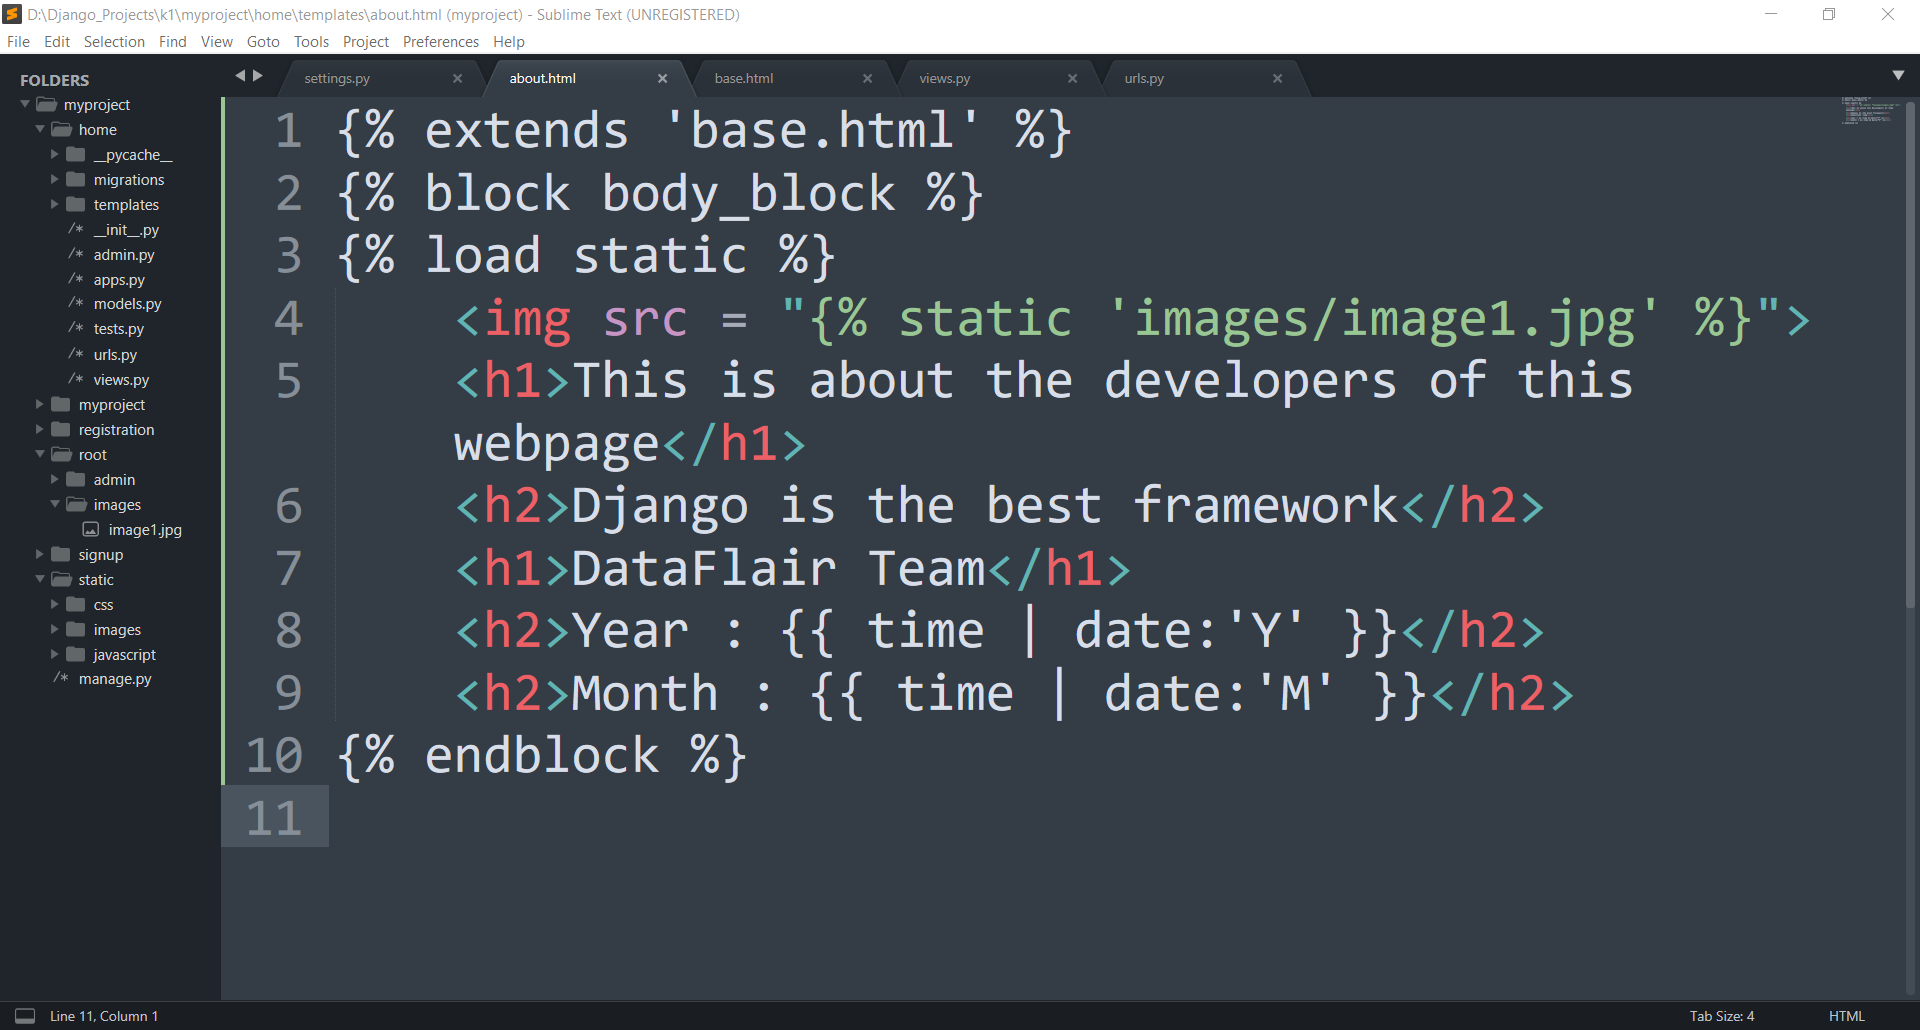
Then, paste this code in the file.
Code:
{% extends 'base.html' %}
{% block body_block %}
{% load static %}
    <img src = "{% static 'images/image1.jpg' %}">
    <h1>This is about the developers of this webpage</h1>
    <h2>Django is the best framework</h2>
    <h1>DataFlair Team</h1>
    <h2>Year : {{ time | date:'Y' }}</h2>
    <h2>Month : {{ time | date:'M' }}</h2>
{% endblock %}
Understand the Code:
See the 3rd line. {% load static %} tag will inform Django that there are static files in this template. Django will then check for the related static files. Then sends them together with the HTML code.
After that, we gave the src of the image tag. The source of image tag is a Django tag. Here we used static keyword and the path to the image. The path is not specified from the root directory.
The STATIC_URL value is automatically added to the source of the image file, even though it is coming from a different directory altogether.
After that, we have used filters – {{ time |date:‘Y’}}.
What are Django Template Filters?
The | pipe character indicates the use of template filters. Here, the time dictionary contains a Python DateTime object. Then, we wanted to print only year, therefore we used a date filter. This will chop-off all other parts except year from time.
Template filters are used to make data received from the server more presentable. There are lots of filters to customize the look and feel of the data received. We can also create our own custom data filters. It’s a vast topic and needs a blog of its own. We will be covering the same in upcoming articles.
3. Editing View Functions
Let’s make a new view function. Just add this function to your home/views.py.
Code:
import datetime
def about(request):
    time = datetime.datetime.now()
    return render(request, 'about.html',{'time': time})
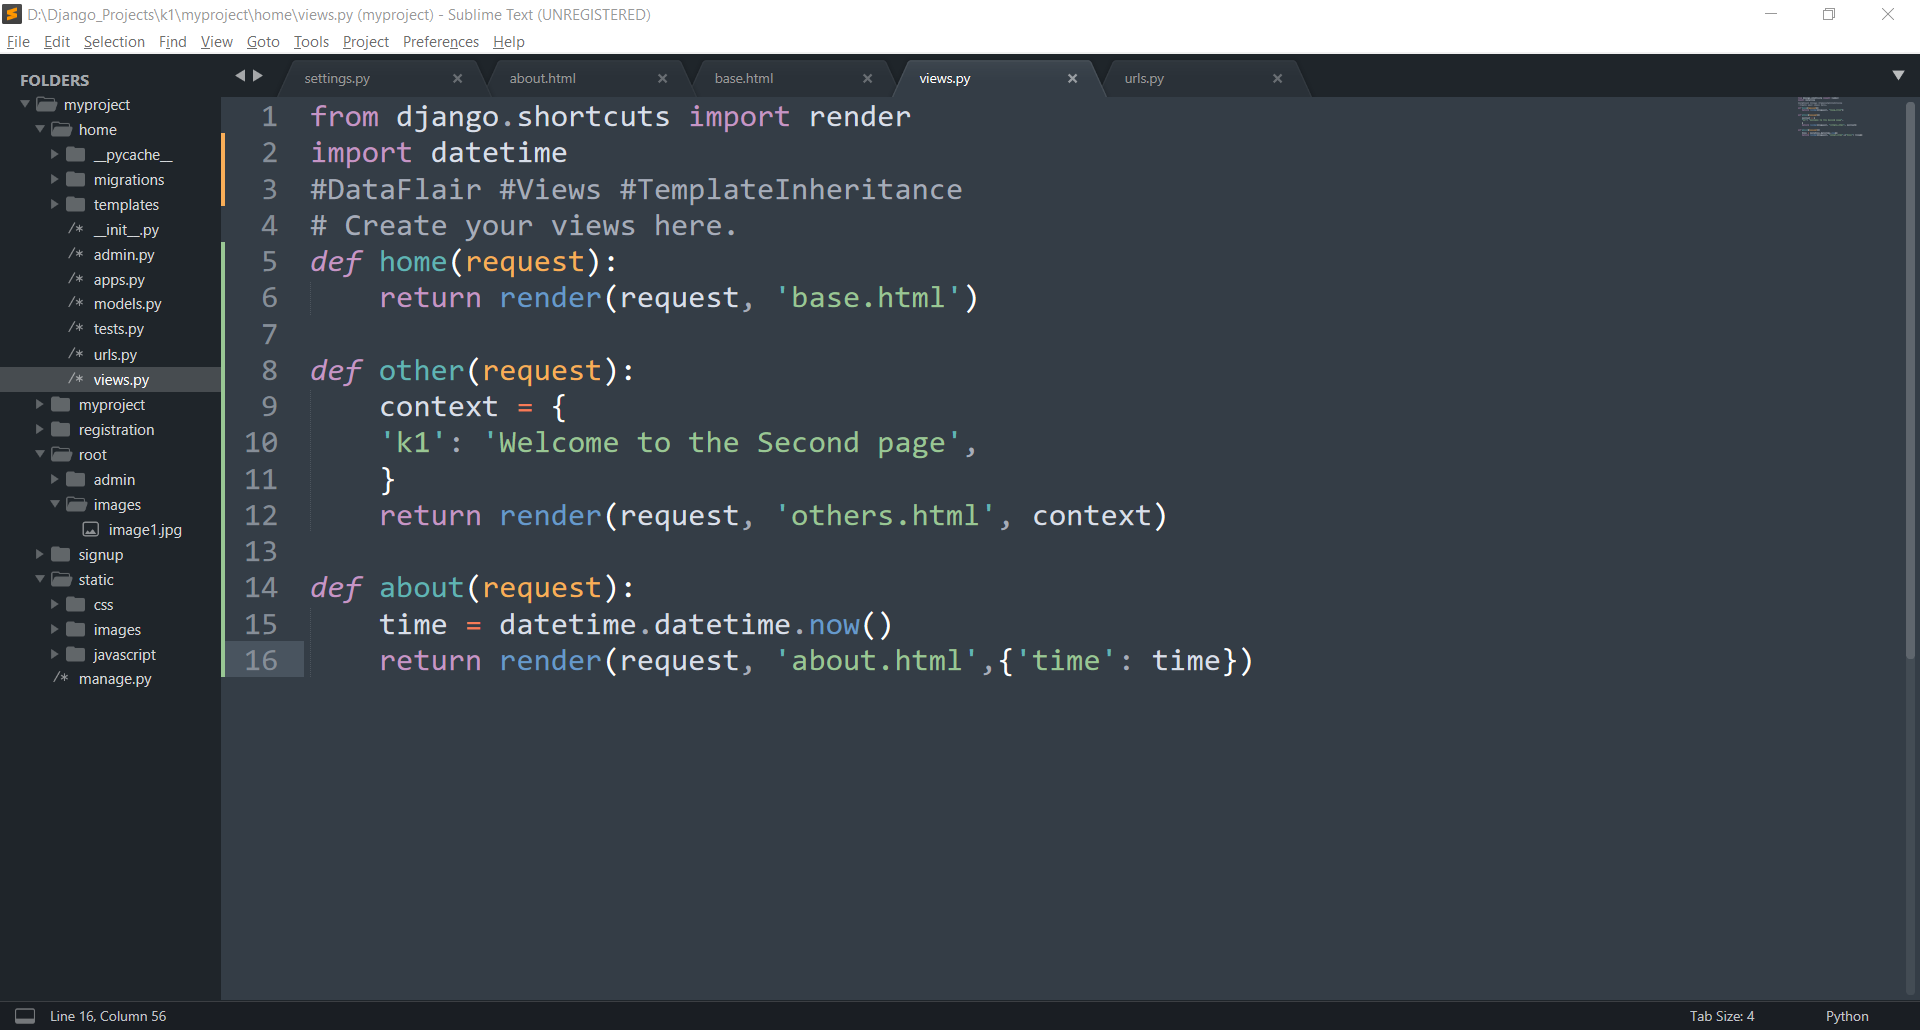
We imported the datetime class to use its methods. We are then passing the same to our about.html.
4. Editing urls.py
This time, we are changing the urls file. We will be using relative urls here. They are a professional way of inserting urls in templates and are really helpful.
Paste this code in home/urls.py
Code:
from django.urls import path
from .views import *
urlpatterns = [
    path('', home, name = 'homepage'),
    path('other/', other, name = 'otherpage'),
    path('about/', about, name = 'about'),
]
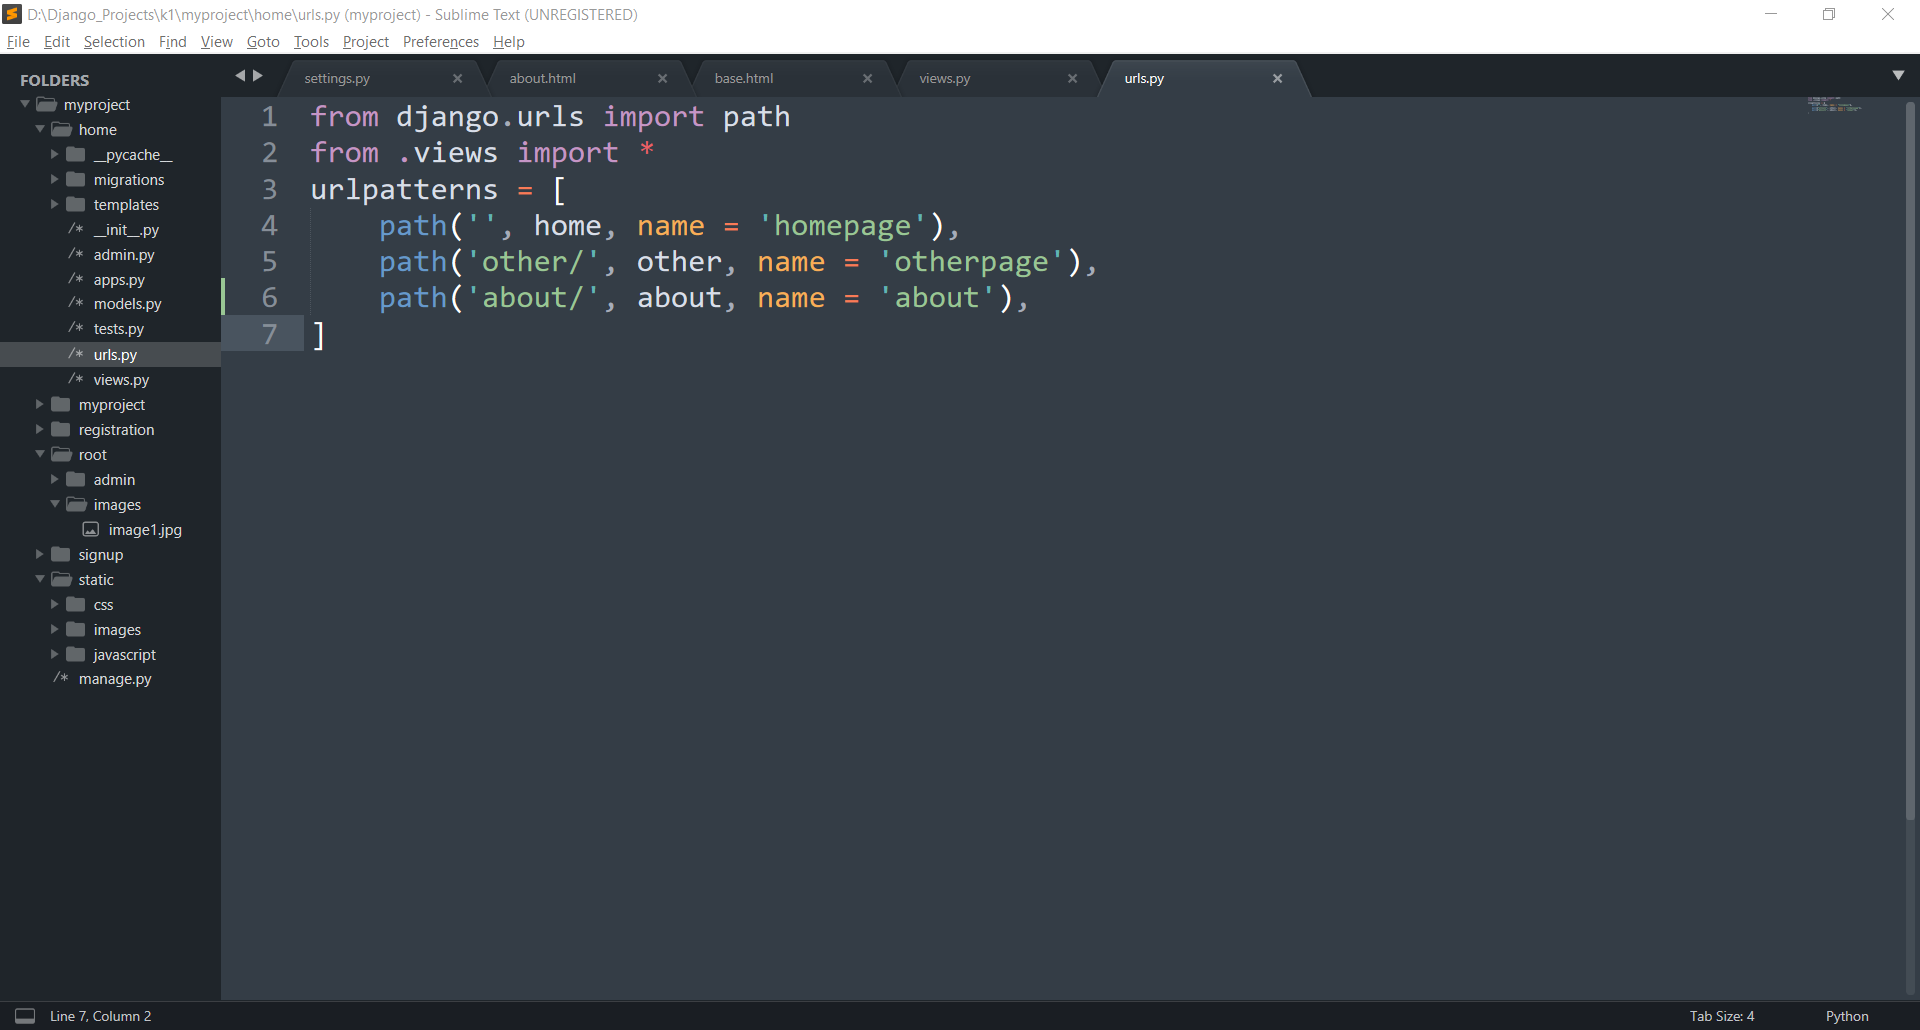
In this part, just remember the name parameter. They will be very useful.
5. Adding Bootstrap
Bootstrap is one of the most popular front-end frameworks. It contains pre-defined CSS and JavaScript classes for rapid development. So, today we are going to add the CSS version of Bootstrap to our project.
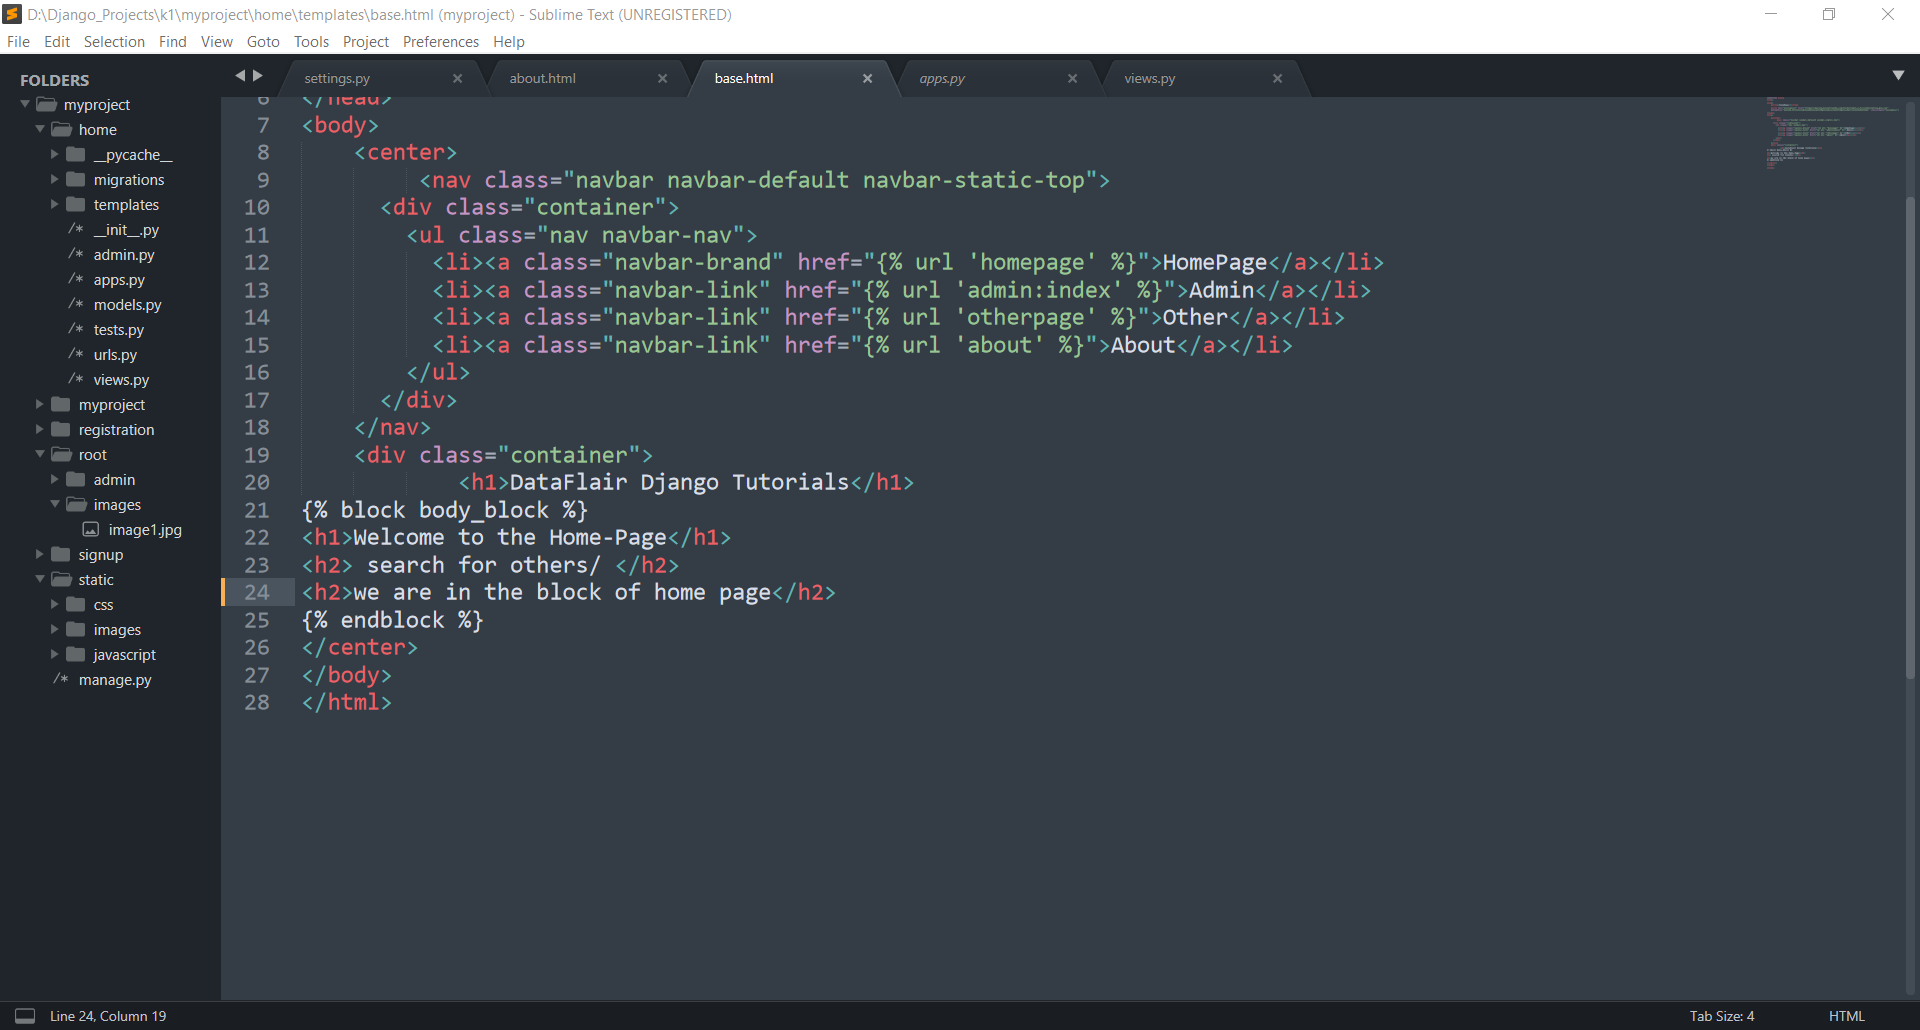
In home/templates/base.html paste this.
Code:
<!DOCTYPE html>
<html>
<head>
	<title>HomePage</title>
	<link rel="stylesheet" href="https://maxcdn.bootstrapcdn.com/bootstrap/3.3.7/css/bootstrap.min.css" integrity="sha384-BVYiiSIFeK1dGmJRAkycuHAHRg32OmUcww7on3RYdg4Va+PmSTsz/K68vbdEjh4u" crossorigin="anonymous">
</head>
<body>
	<center>
		 <nav class="navbar navbar-default navbar-static-top">
      <div class="container">
        <ul class="nav navbar-nav">
          <li><a class="navbar-brand" href="{% url 'homepage' %}">HomePage</a></li>
          <li><a class="navbar-link" href="{% url 'admin:index' %}">Admin</a></li>
          <li><a class="navbar-link" href="{% url 'otherpage' %}">Other</a></li>
          <li><a class="navbar-link" href="{% url 'about' %}">About</a></li>
        </ul>
      </div>
    </nav>
    <div class="container">
    	    <h1>DataFlair Django Tutorials</h1>
{% block body_block %}
<h1>Welcome to the Home-Page</h1>
<h2> search for others/ </h2>
<h2>we are in the block of home page</h2>
{% endblock %}
</center>
</body>
</html>
Understand the Code:
In this base.html, we have added some new elements. Let’s understand them one by one.
Bootstrap CSS: <link> tag is used to add CSS file from Bootstrap. Here rather than original CSS file, we just added the server URL of the same. This path can be directly copied from the Bootstrap website, its an opensource project.
Then we used some bootstrap classes with HTML. The classes like navbar, navbar-nav, navbar-link, etc are all Bootstrap CSS classes. They are just for front-end and to give you an idea of bootstrap. You can get more details on https://getbootstrap.com/
The href of anchor tags: This is the implementation of relative urls. See the urls in the href attribute of <a> tags. Instead of using complete urls, we are actually calling view functions directly. In the previous section, we stated you to remember names in urls.
The {% url ‘url_name’ %} is replaced by the actual URL. And, this is very helpful for bigger projects.
The main advantage is that you can name the function. So, instead of URL (which could go wrong), we write url-name.
6. Collecting Static Files
Then again run this command of collecting static files.
python manage.py collectstatic
We have already discussed in the previous section what this command does.
If you get no errors, then move forward.
7. Test Run
At last, we will test it. Start your project’s server.
Search in the URL bar: localhost:8000
Notice those links and navigation bar. It was all bootstrap. Bootstrap is very powerful and perfect for frontend developers.
Now, you can test on different links if they work properly.
Click on About link in the navigation bar.
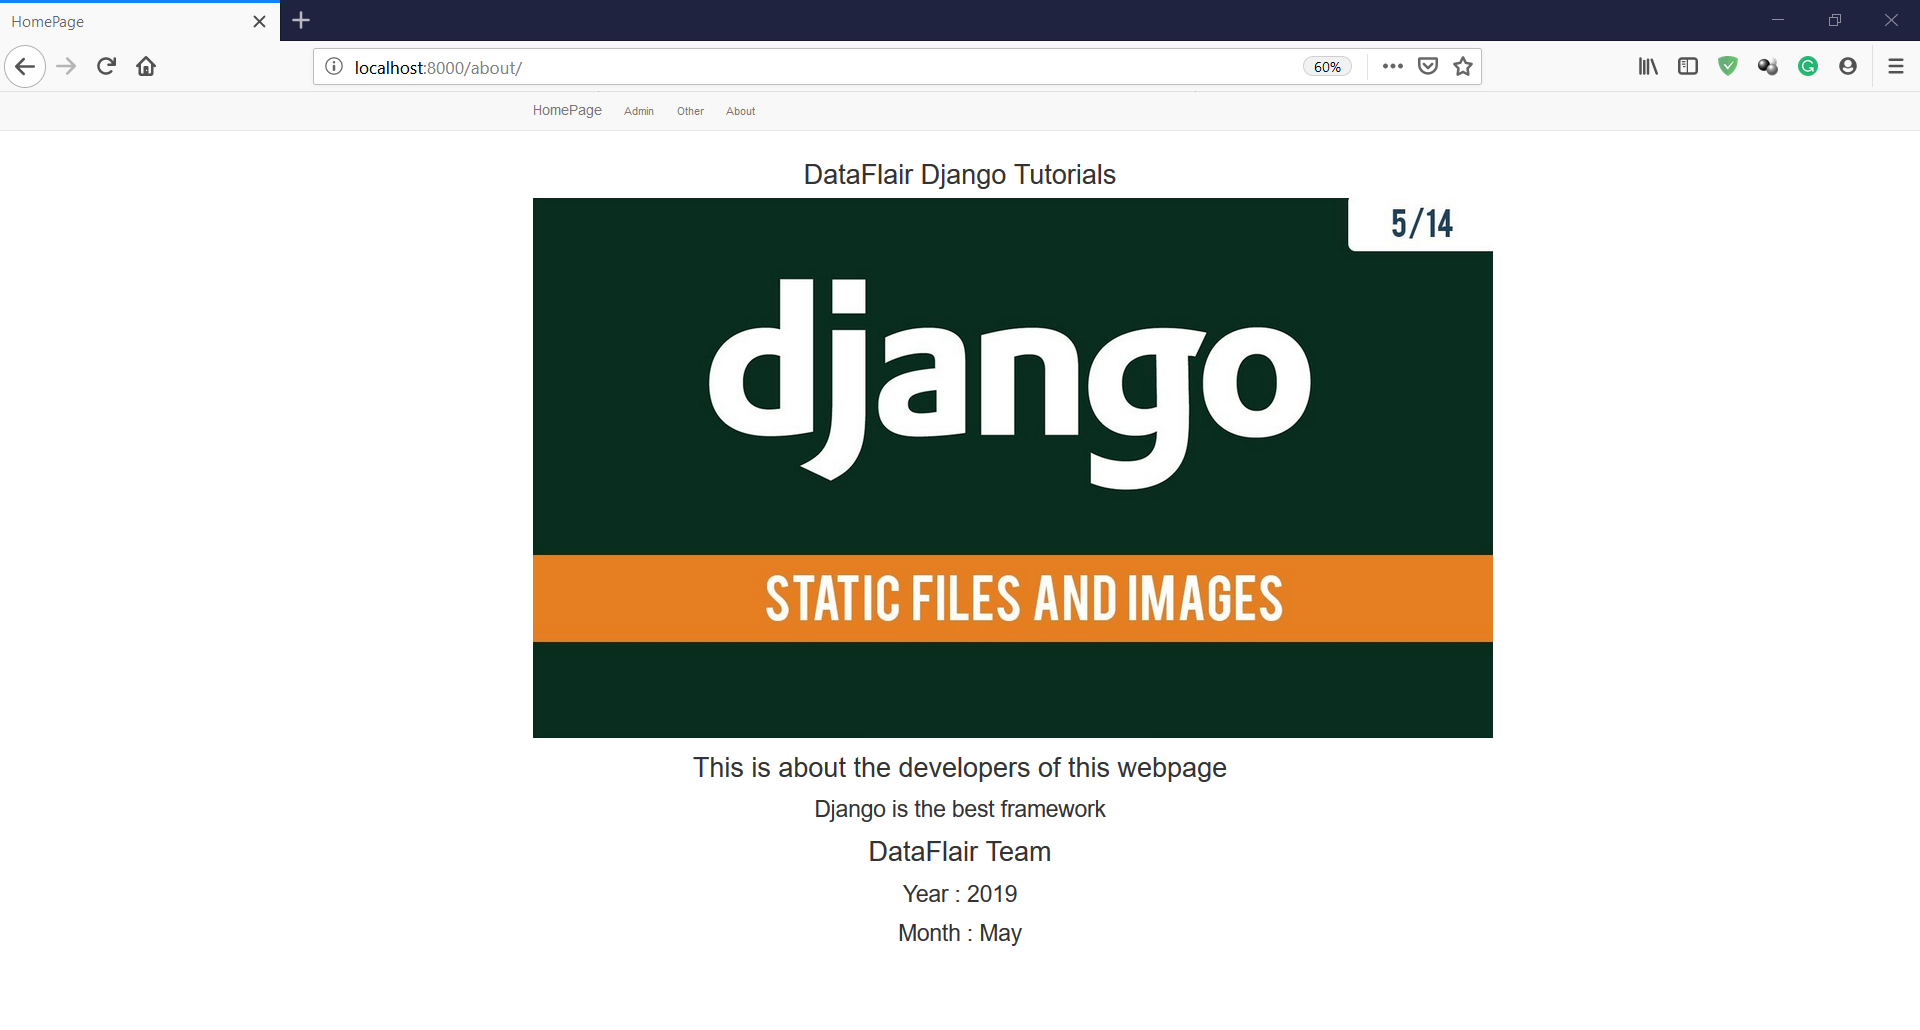
And, other links shall work well too. There are two important things regarding about.html
It is serving a static file and the image.
The year and month printed are rendered by the server. They are formatted with template filters.
Look at the code of about.html. we used template inheritance with base.html. that made our website pretty good, with all that navigation bar. We can change whatever we want with that. It will never affect the about.html. that’s one of the reasons for faster development with Django.
Summary
We learned a lot of interesting concepts from this article. The topics are as follows:
- Template inheritance
- Django Static Files
- Template Filters
- Bootstrap addition in templates
- Using relative urls
These concepts can be a bit complex. Therefore, if you face any issues, you can freely comment your query below. We will try to resolve your doubts as soon as possible.
Find all the questions for your Django interview preparation in a single guide – Django Interview Questions
Did you like this article? If Yes, please give DataFlair 5 Stars on Google


I’m having a problem with the url patterns and getting Page not found (404).
Page not found (404)
Request Method: GET
Request URL: http:// localhost : 8000/%5B%25%20url%20’homepage’%20%25%5D
[name=’homepage’]
other/ [name=’otherpage’]
about/ [name=’about’]
The current path, [% url ‘homepage’ %], didn’t match any of these.
You’re seeing this error because you have DEBUG = True in your Django settings file. Change that to False, and Django will display a standard 404 page
This is my main URL pattern
path(”, include(‘home.urls’)),
This is home/urls.py
urlpatterns = [
path (”, home, name = ‘homepage’),
path (‘other/’, other, name =’otherpage’),
path (‘about/’, about, name = ‘about’),
]
This is the template
HomePage
Admin
Other
About
Can someone please help me here to understand what’s going on.
You might not be using the template language correctly. You should use {} Curly brackets instead of [] square brackets inside templates for anchor URLs. {% URL “homepage” %}.
What does from .views import * mean and how is it different from from . import views ?
1) from . views import *
Import all the functions inside views.py inside that folder. so if your urls.py is inside the app_name/ folder then this statement will import from app_name/views.py folder.
2) from . import views
it also means import views.py from the same directory. The difference is that when you want to pass a view function to path(), you will write view.some_func. in 1st case, you can directly use some_func.
its quite the same thing,
one enable you to import single functions from your views file
eg: from .views import home
the other one contains every function and classes written in the views file
eg: from . import views
urlpatterns = [“”, views.home, name=‘home’,
“”, views.about, name=‘about’,]
Hi,
I am Nazim from Bangladesh. By using your website info, I could learn handling static files in django. Thank you very much for such kind of beautiful blog based website.
Thanking You,
Nazim
Hi, there’s an error, the ‘Welcome to the Second page’ is not displayed. The variable name must be {{k1}} not {{ context.k1 }} in others.html file