Django Caching – It’s Easy if you do it in the Smart Way!
Master Python with 70+ Hands-on Projects and Get Job-ready - Learn Python
We offer you a brighter future with industry-ready online courses - Start Now!!
In today’s era of web development, every user wants their requests on the website to be responded ASAP. There are certain methods which will make your website faster. Faster the website, greater the users it will attract.
Let’s take an example of WhatsApp. This popular messaging application works on very low speed in bytes but you can receive text messages instantly because it uses different technology due to which we get the importance of faster response.
Caching is one of those methods which a website implements to become faster. It is cost efficient and saves CPU processing time. You must be having some questions in your mind – Is caching a method to make websites faster? The answer is Yes!
Then, what kind of websites will actually benefit from caching? The answer is dynamic websites.
What are Dynamic Websites?
Dynamic websites are a collection of webpages which are generated dynamically.
Simple! So, why is it a big deal? because that generation of webpages means every page requires some processing. Servers aren’t cheap and so is their CPU time. Their limitation is that they need more CPU time to generate those webpages. More processing means more time added in response time, which makes the response of website slow. It is slow enough that users get annoyed.
Dynamic websites generate highly personalized webpages. They come with tons of features. Some examples of websites are Spotify, Google, Facebook, Instagram, etc.
A very good example can be Google Feed. The personal news feed on google app is generated dynamically. Its contents change in every 2-3 hrs. The updating process takes time if you refresh.
Most of the websites on the Internet are becoming more and more dynamic and that makes it necessary for web developers to create faster websites. Caching comes in there. It provides a cost-effective and working solution. The more processing time a webpage takes, the more caching can improve its performance.
There are other solutions as well:
- Installing better server hardware
- Installing the better server software
- Improving database
- Writing efficient code, etc.
All these solutions require time and some resource. But, caching doesn’t require that much time to implement. Just learn from this tutorial and implement it easily.
What is Caching?
Caching is the process of storing recently generated results in memory. Those results can then be used in future when requested again.
The computer memory works in a similar manner. CPU stores some files in the cache Memory. And, when CPU needs them again it looks for those files in Cache Memory first. Since Cache Memory is fast, the processing time improves. We will be implementing something similar on our server.
Caching on Server
Suppose we have a dynamic website. When a user request for some page:
1. A Dynamic Page generates
The requested dynamic page generates. Since it is generating for the first time, it will take a little bit longer. The CPU will process the page and that time will add to the response time.
2. A webpage serves and gets stored in Cache Space
Now, before serving this page to the client, it stores in Cache Space. Cache Space is a location where you temporarily store data to be retrieved for later use. Then it will serve to the client.
3. Multiple users request for the same page
Maybe, there are other clients requesting the same page. So, instead of generating webpage again we use the resource in Cache Space.
4. Server responses with Cached Webpage
Since we have that same resource stored in our Cache Space, our server will respond to these users with that webpage. The response time will decrease by the processing time. This makes the response much faster.
5. Deletion of data in Cache Space
Cache Space store copies of data. To keep the redundancy of data minimum, we delete the Cache Data after some time. This makes room for new Caching Data and the cycle goes on.
Some important points:
- CPU time of Webpage
We discussed about dynamic websites in the previous section that caching subtracts processing time from response time. So, if our website serves static pages, there may not be any improvement. Therefore, caching is mostly used for dynamic webpages.
- Memory type used for Cache Space
Caching space is also a factor to improve speed. There can be three types of Cache Spaces:
- Main Memory
- Database Tables
- File-System or local directories
As we can see, the main memory caching is the fastest of all. Faster the memory, better is the response time.
- Expiry time of cached data
Cached data should exist for a certain period of time. If the data gets deleted too early, there will be no utilization of caching. Also, if the data doesn’t get deleted, then it will waste cache memory.
It depends on the type of resource and its demand by the users.
Caching in Django
Caching is important for a dynamic website. Since Django is a dynamic framework, it comes with built-in options for you to manage your cache.
Django allows caching on different caching spaces as well as on different parts of a website. There can be certain parts of the website which can demand more CPU time and granularity to implement caching on them individually. This makes caching efficient.
We learned about different caching spaces in the previous section. Now, let’s implement caching on all of them.
Setting-up Caching System
We will be setting up different caching frameworks or spaces. Your system may only need one so implement one, which fits your requirements with given constraints.
What is Memcached Framework?
Memcached is a memory-based cache framework. This software takes a certain part of the main memory and converts it to Cache Space. It handles that efficiently so the main memory is never completely full.
When a request comes to the server, it will first look in Cache Space. Memcached provides faster response since the main memory is fastest of all. If the resource is not present in Cache Space, the server generates that resource. That is again stored by Memcached, if the developer has cached it.
The Memcached framework can work on multiple servers. We can change the LOCATION key and it can have different values, like the IP addresses of other servers.
When Memcached is expanded to multiple servers, it considers all of them as a single server. This approach reduces data-redundancy to a certain level. This is also one of the reasons Memcached Caching is preferred over other types of Caching.
The Memcached framework is one of the most popular choices for caching. It is used by almost all the servers. It can be difficult to implement on Windows/ Mac as it is designed for Debian/ Ubuntu Operating System, which is server OS.
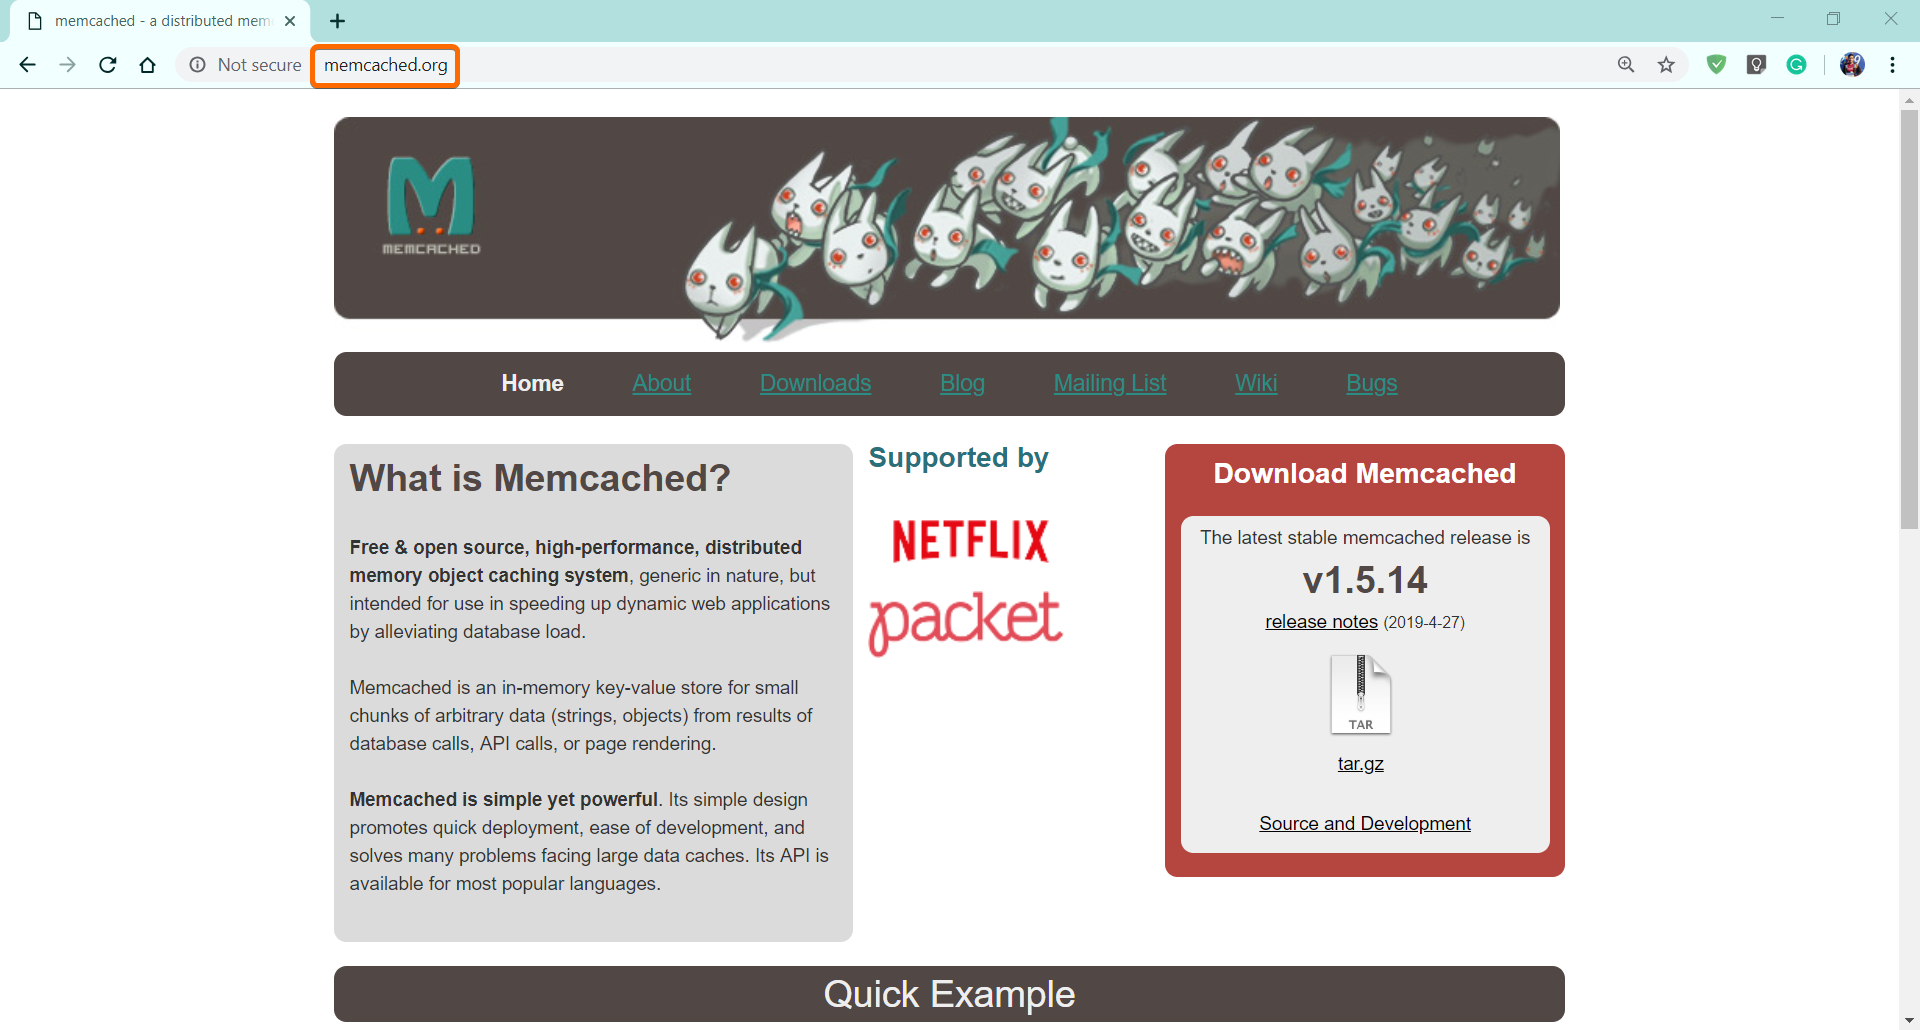
You can get more on its installation and documentation on www.memcached.org. This is an official website.
To use Memcached framework in Django:
- Install Memcached framework on your system
- Install Python connectors for Memcached Framework
- Edit our Settings.py file
As mentioned earlier, installing Memcached framework on Windows/ Mac OS is difficult. If it is installed then proceed. And, if you have Debian/Ubuntu OS, then there are no issues.
Next, we require python connectors for Memcached.
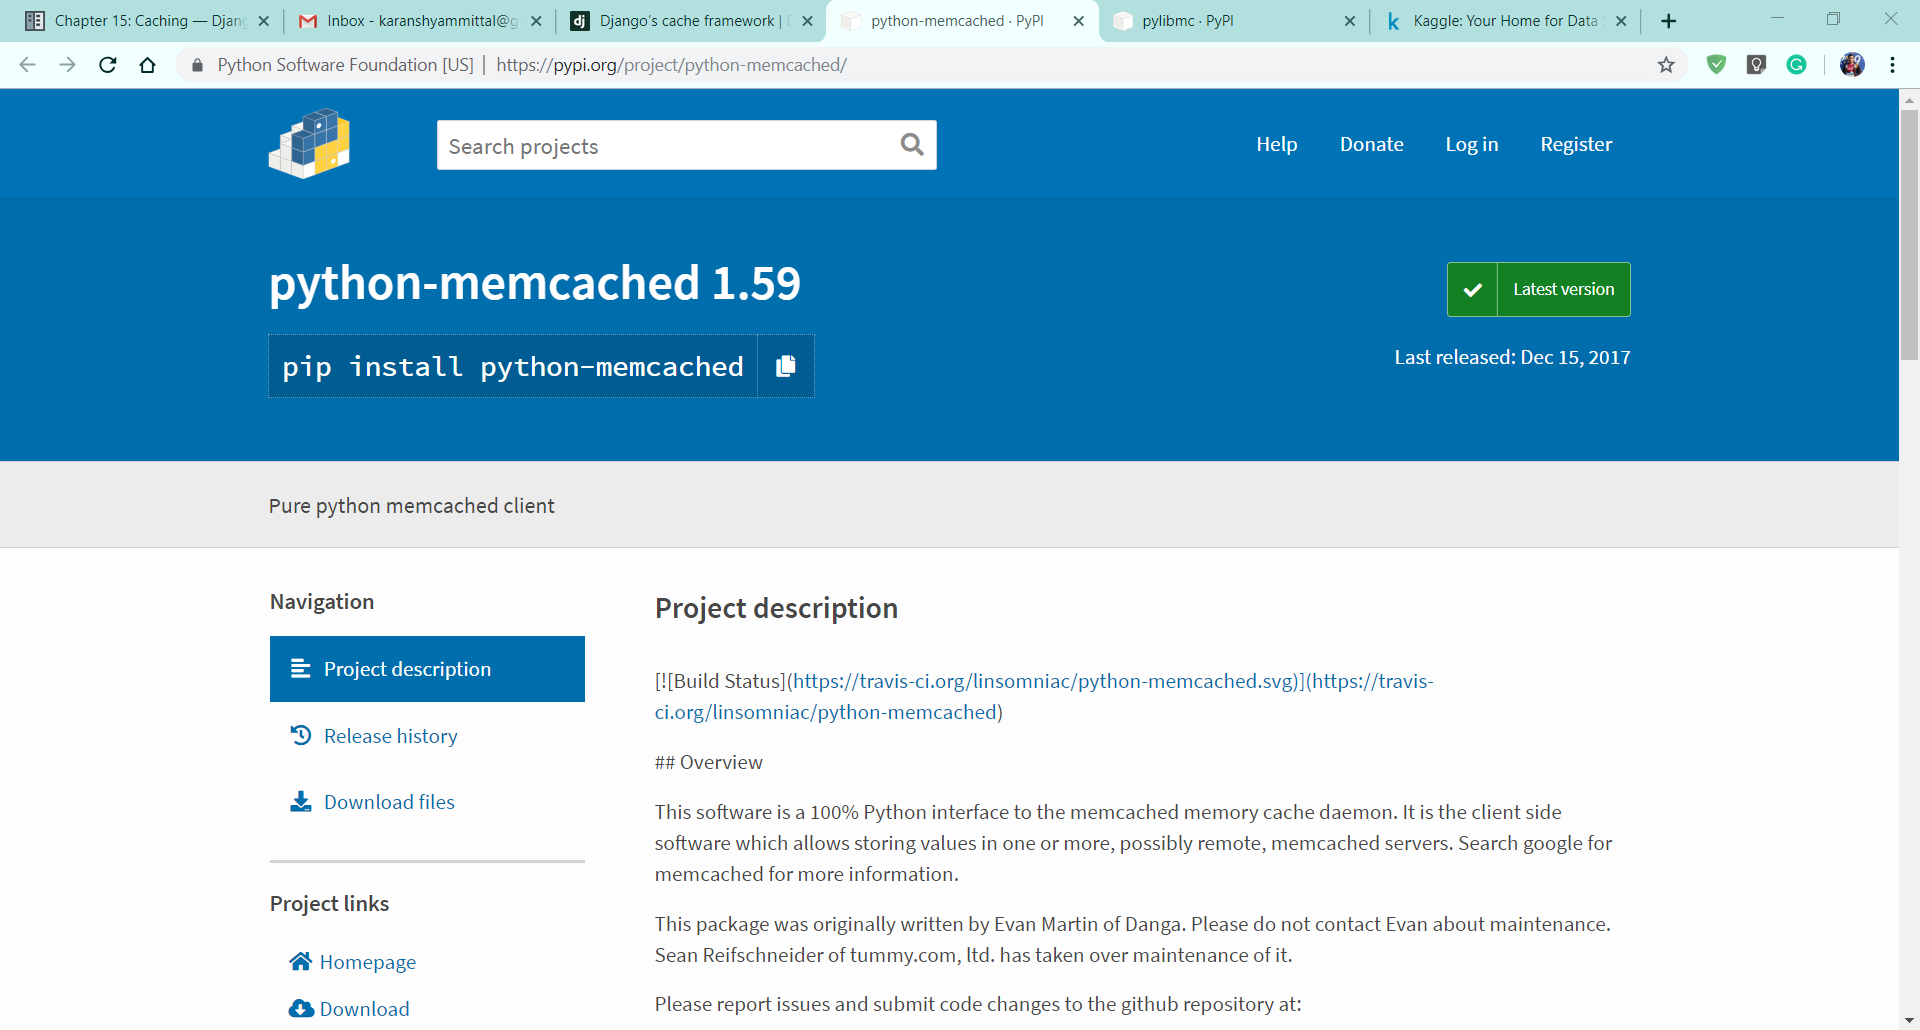
The link to the package will provide you all the documentation and it also has the command for the installation. The link to python connector is https://pypi.org/project/python-memcached/ The last step is to modify settings.py file. Add these lines of code in projects settings.py file.
Code:
#DataFlair #Memcached
CACHES = {
    'default':{
        'BACKEND': 'django.core.cache.backends.memcached.MemcachedCache',
        'LOCATION': '127.0.0.1;11211',
    }
}
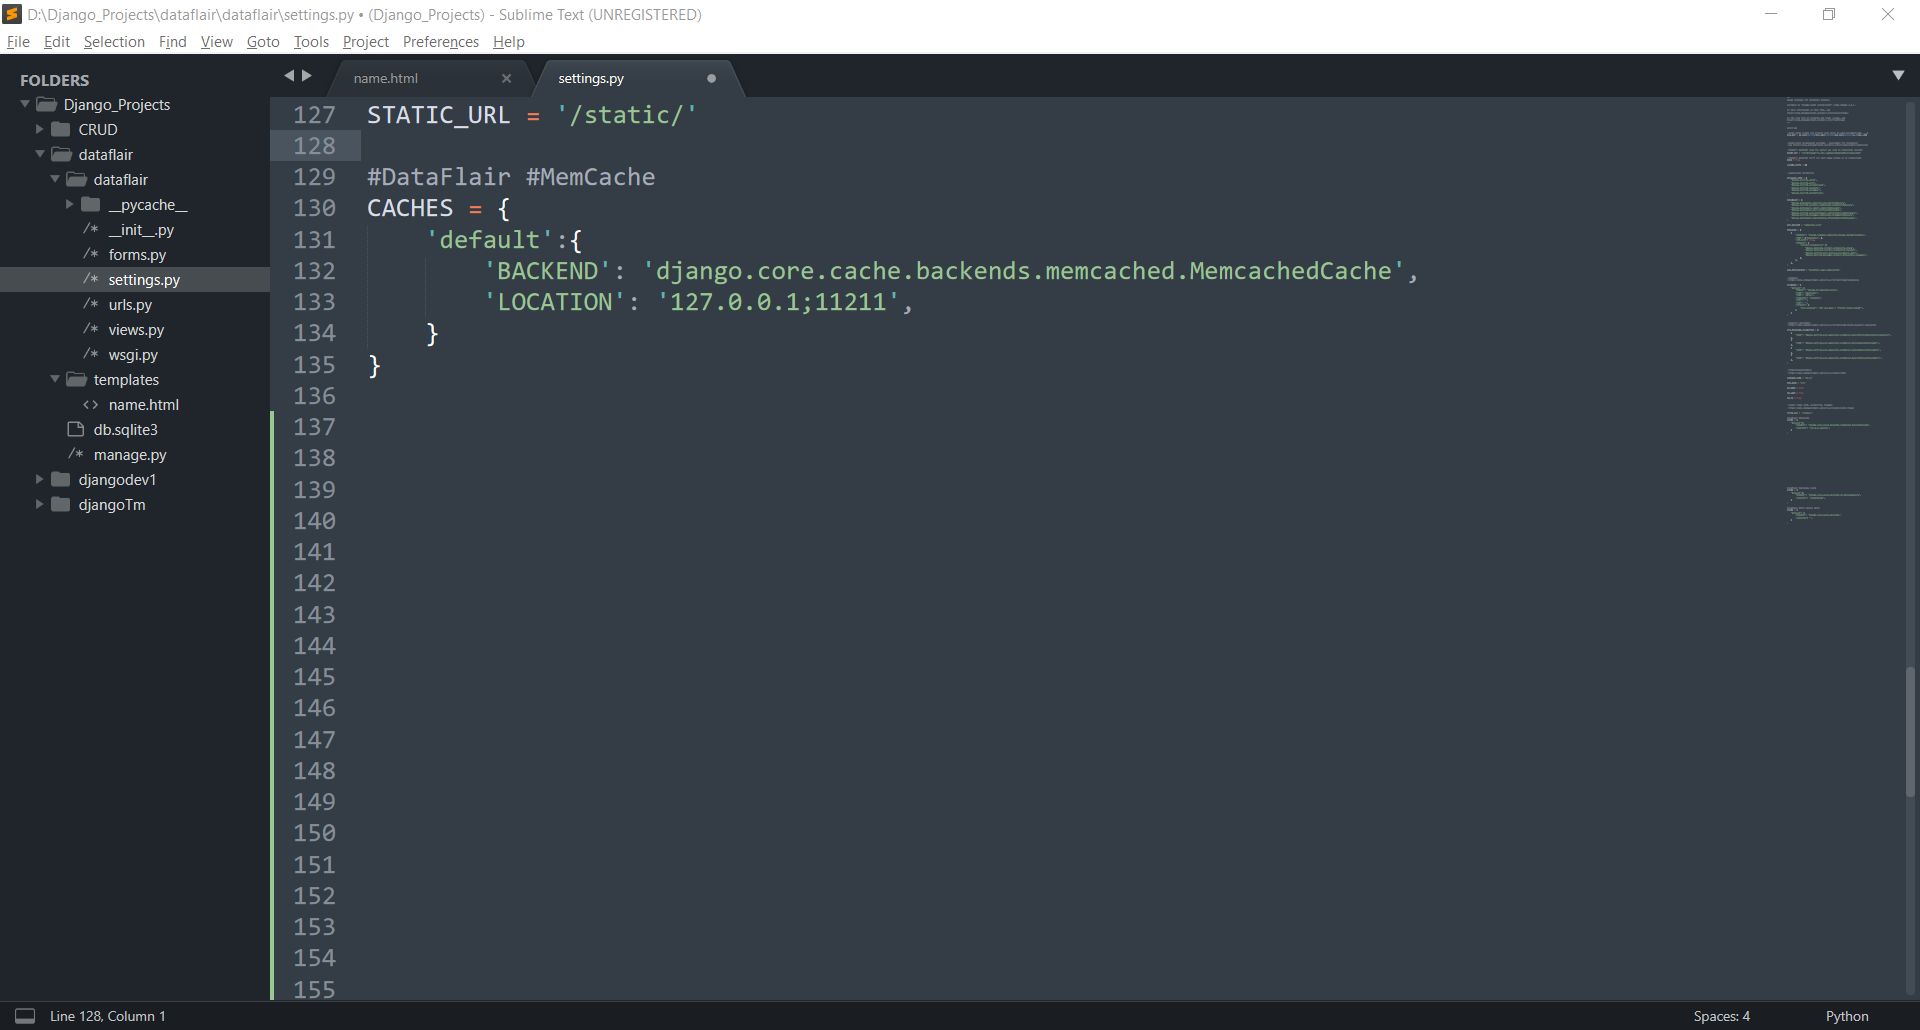
It completes your Memcached Framework Setup.
Note:
Since Memcached Framework has official support for Debian/ Ubuntu OS, some of you may not be able to install it on the system. Well, that is not a problem. Because when you will be deploying your website, there you can install it easily.
Memcached provides many built-in features to maintain the cache. This makes it efficient and time-saving framework.
Types of Caching in Django
There are different options of caching in Django:
1. Database Caching
Database Caching is also one of the viable options when there is a fast database server. This type of Caching is more common and is most easily applicable.
We will add this code section to settings.py file. Remove that Memcached section or comment it out.
Code:
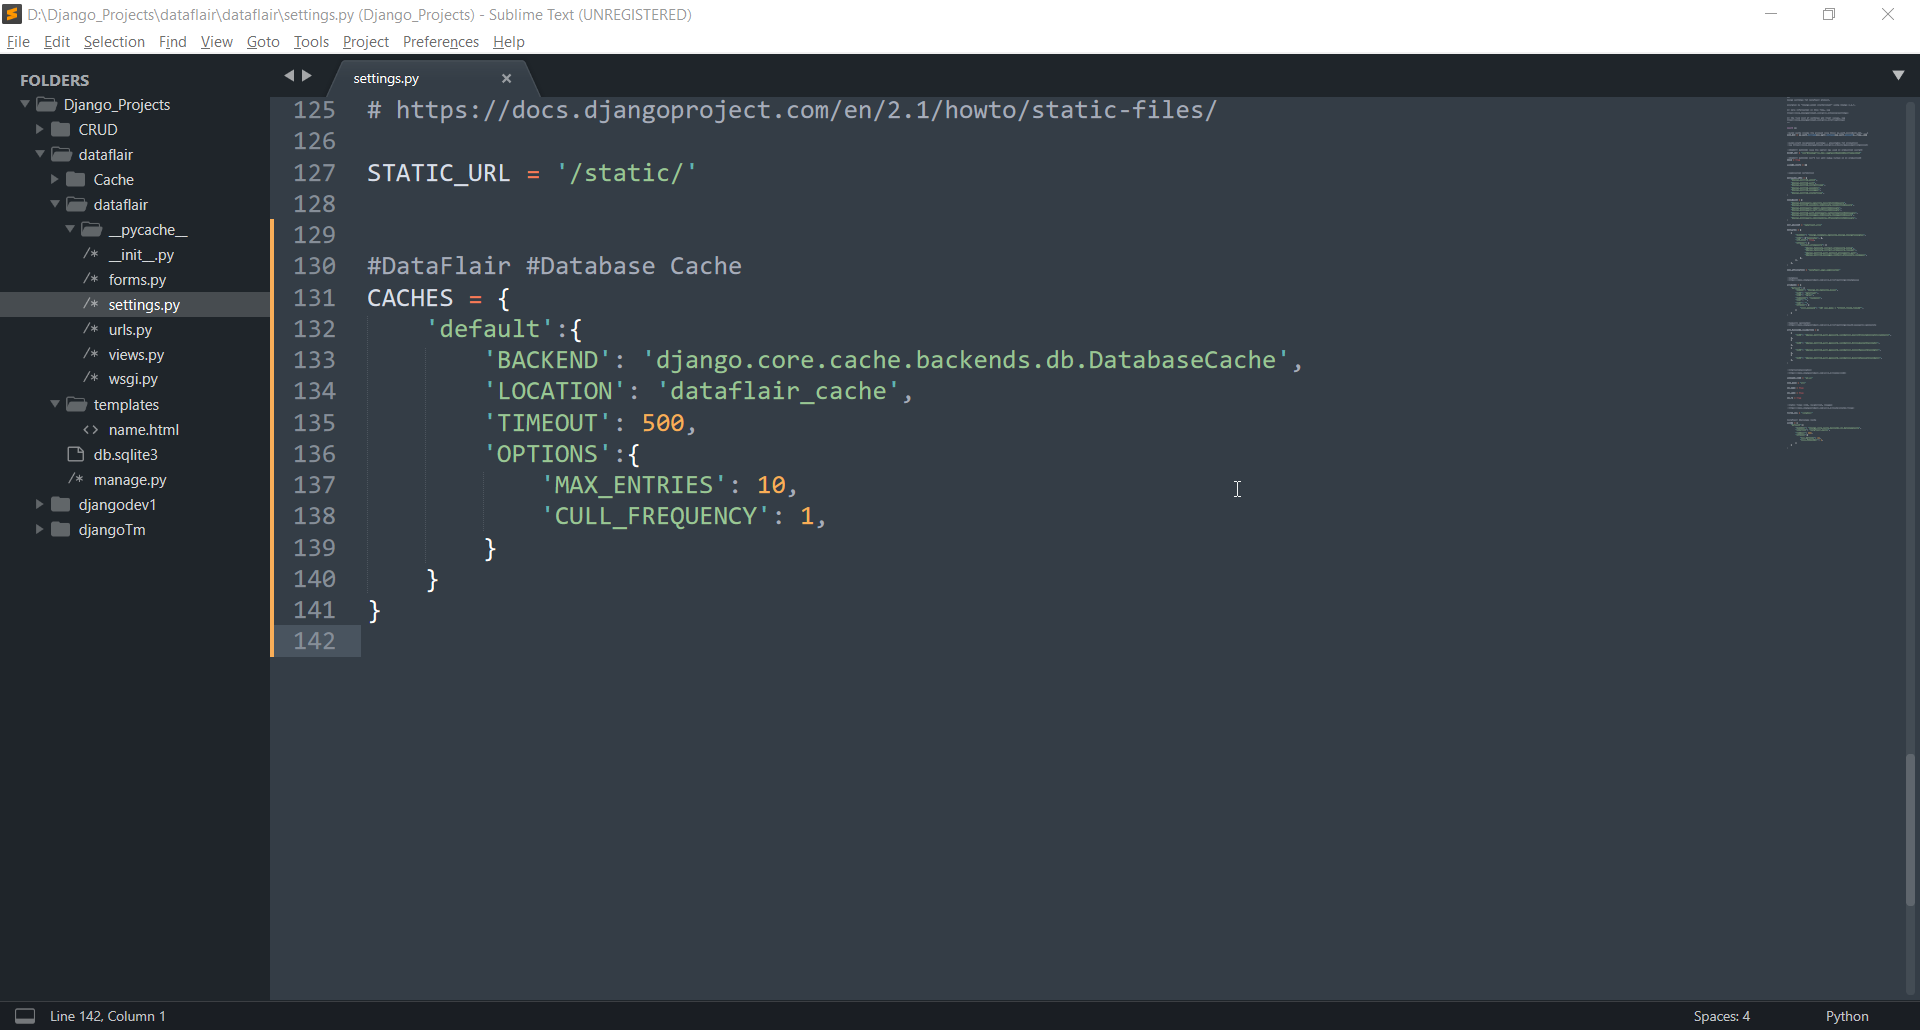
#DataFlair #Database Cache
CACHES = {
'default':{
'BACKEND': 'django.core.cache.backends.db.DatabaseCache',
'LOCATION': 'dataflair_cache',
}
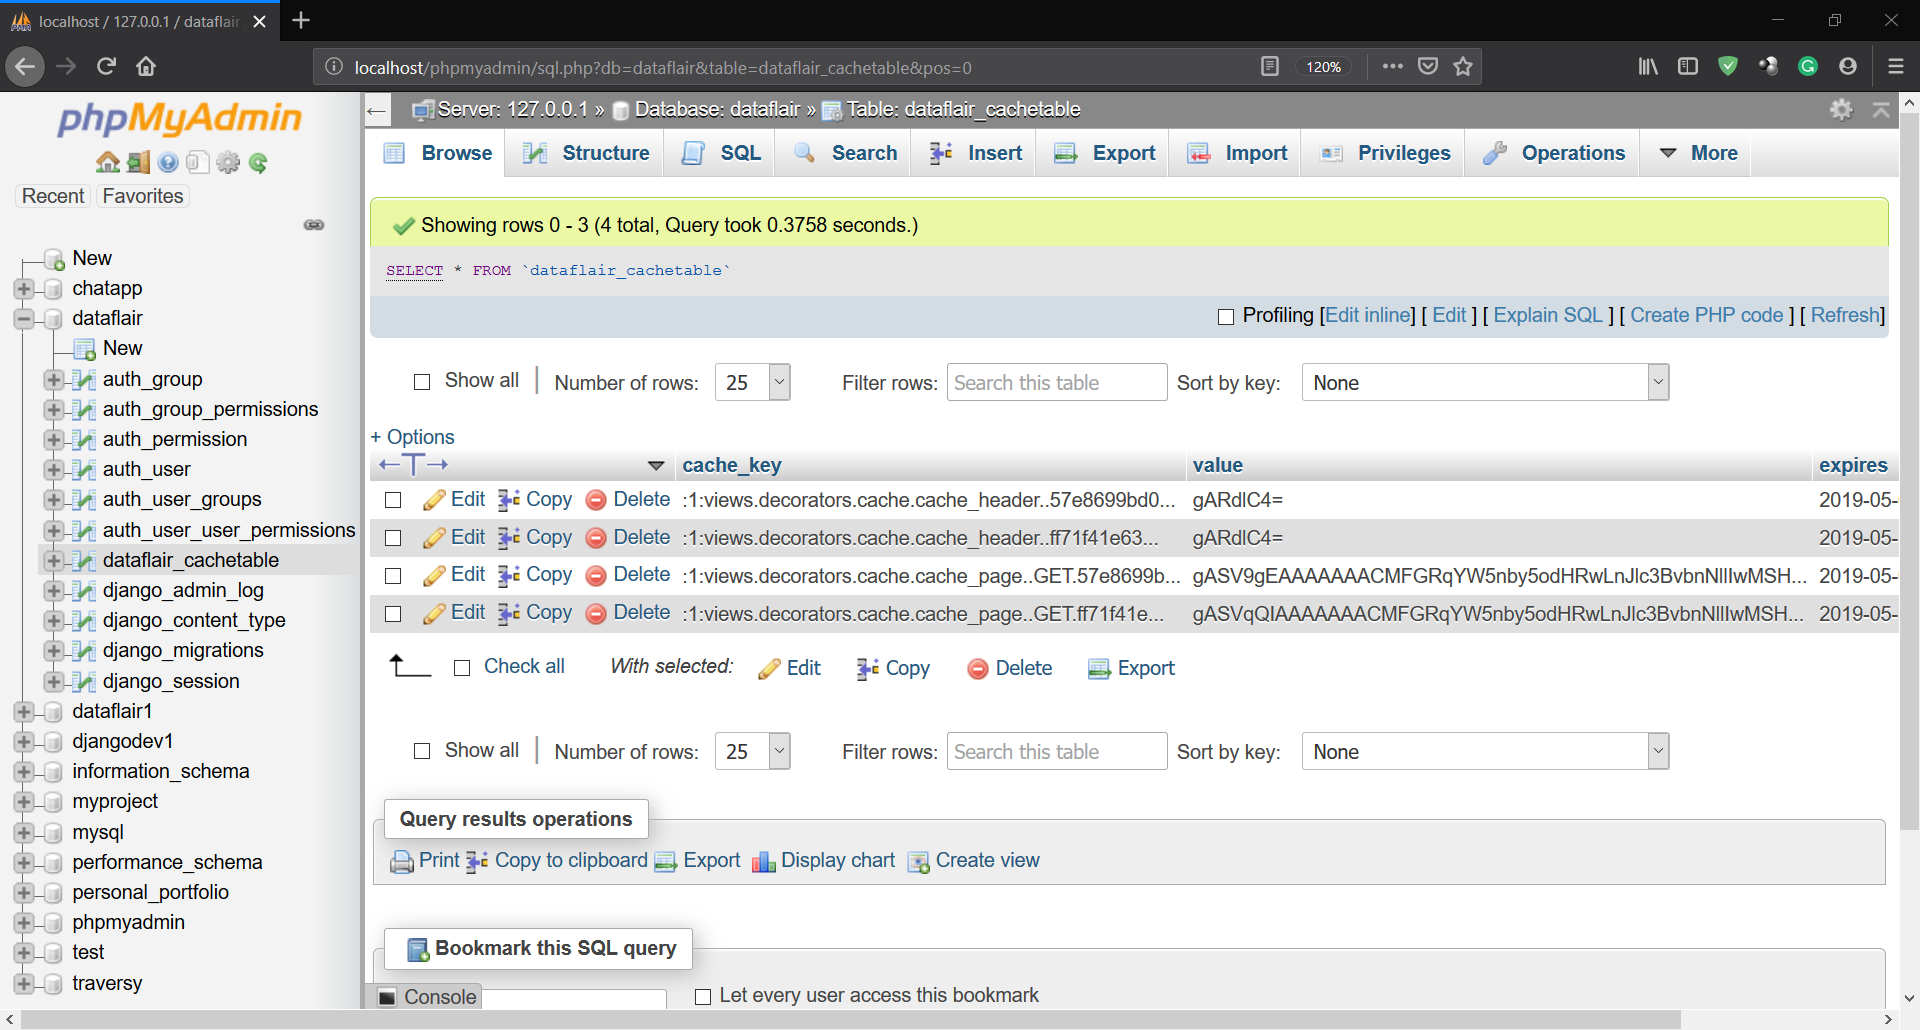
}Now, before starting our server, we will need to specify Django where to store its data. There shall be a particular table for it.
In your command line, enter
python manage.py createcachetable

Understand the Code:
When we use caching in Django, we need to declare a new dictionary in settings.py, named as CACHES. The name is default in Django.
It takes one key default, which corresponds to the default value of the caching engine. Caching engine handles the cache generated by the server.
There are particular keys in it, like:
- BACKEND
This field specifies which caching engine to use. Django provides you with many options for caching systems. In this case, our caching system is Database Caching.
- LOCATION
This field specifies the location of Cache Space. Tells the server where or on which machine it will be storing cache. In this case, our cache table name will be dataflair_cache.
When you run this code, we get a table like this:
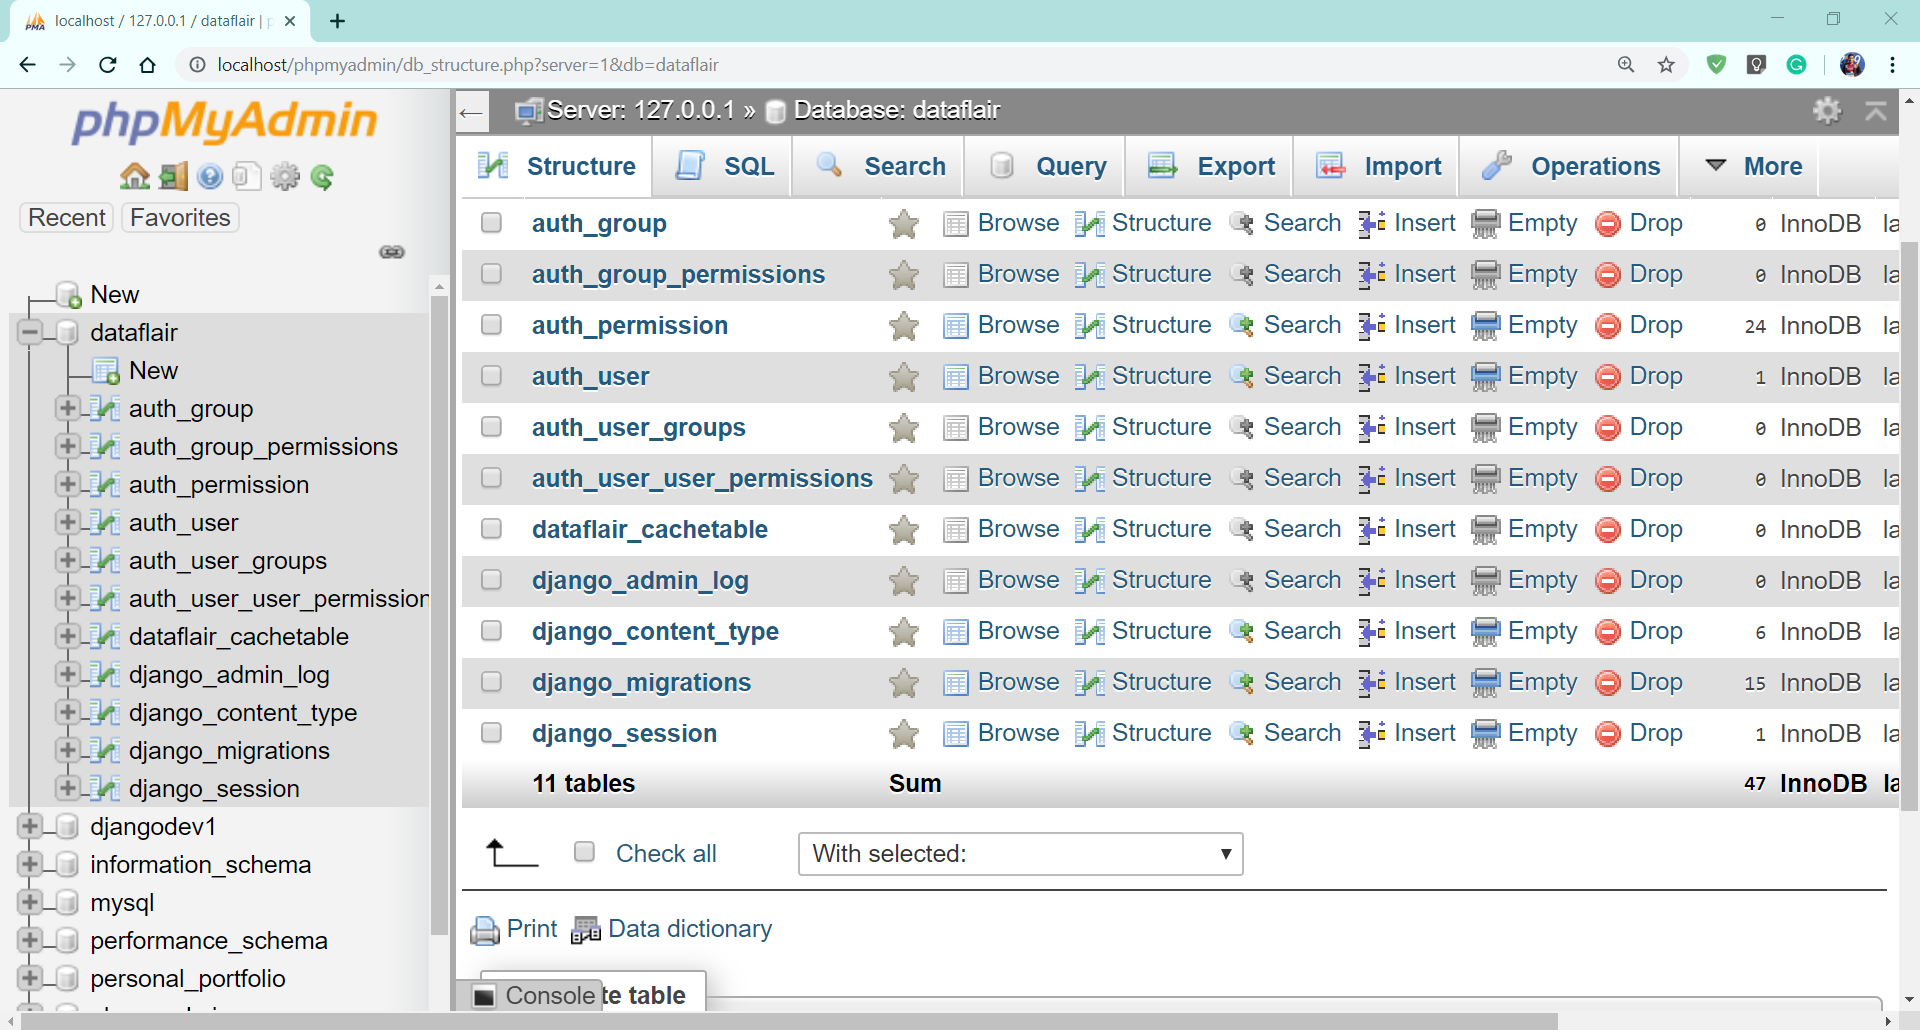
This table should have these fields.
You can also implement it via multiple databases and it is implemented using models. We will need to create a caching router. It’s very easy once you have implemented the previous section.
2. File-System Caching
Django has this option as well. We can cache our data on our file system or any directory on the server, rather than main memory or database. This option is the most cost-efficient of all as it requires no hardware upgrades at all. The previous caching setups required better hardware as a prerequisite.
This caching is slowest of all Cache Spaces. The software does depend on what you want to use. There are lots of frameworks out there and most of them work fine with Django.
The File-based Caching means storing caches as individual files. The engine we use for file-system will serialize files. That makes it a better way to manage files.
Just add this Code Section to settings.py file. Remember to delete other CACHE lists.
Code:
#DataFlair #File System Cache
CACHES = {
    'default': {
        'BACKEND': 'django.core.cache.backends.filebased.FileBasedCache',
        'LOCATION': 'D:Django_Projects/dataflair/Cache',
    }
}
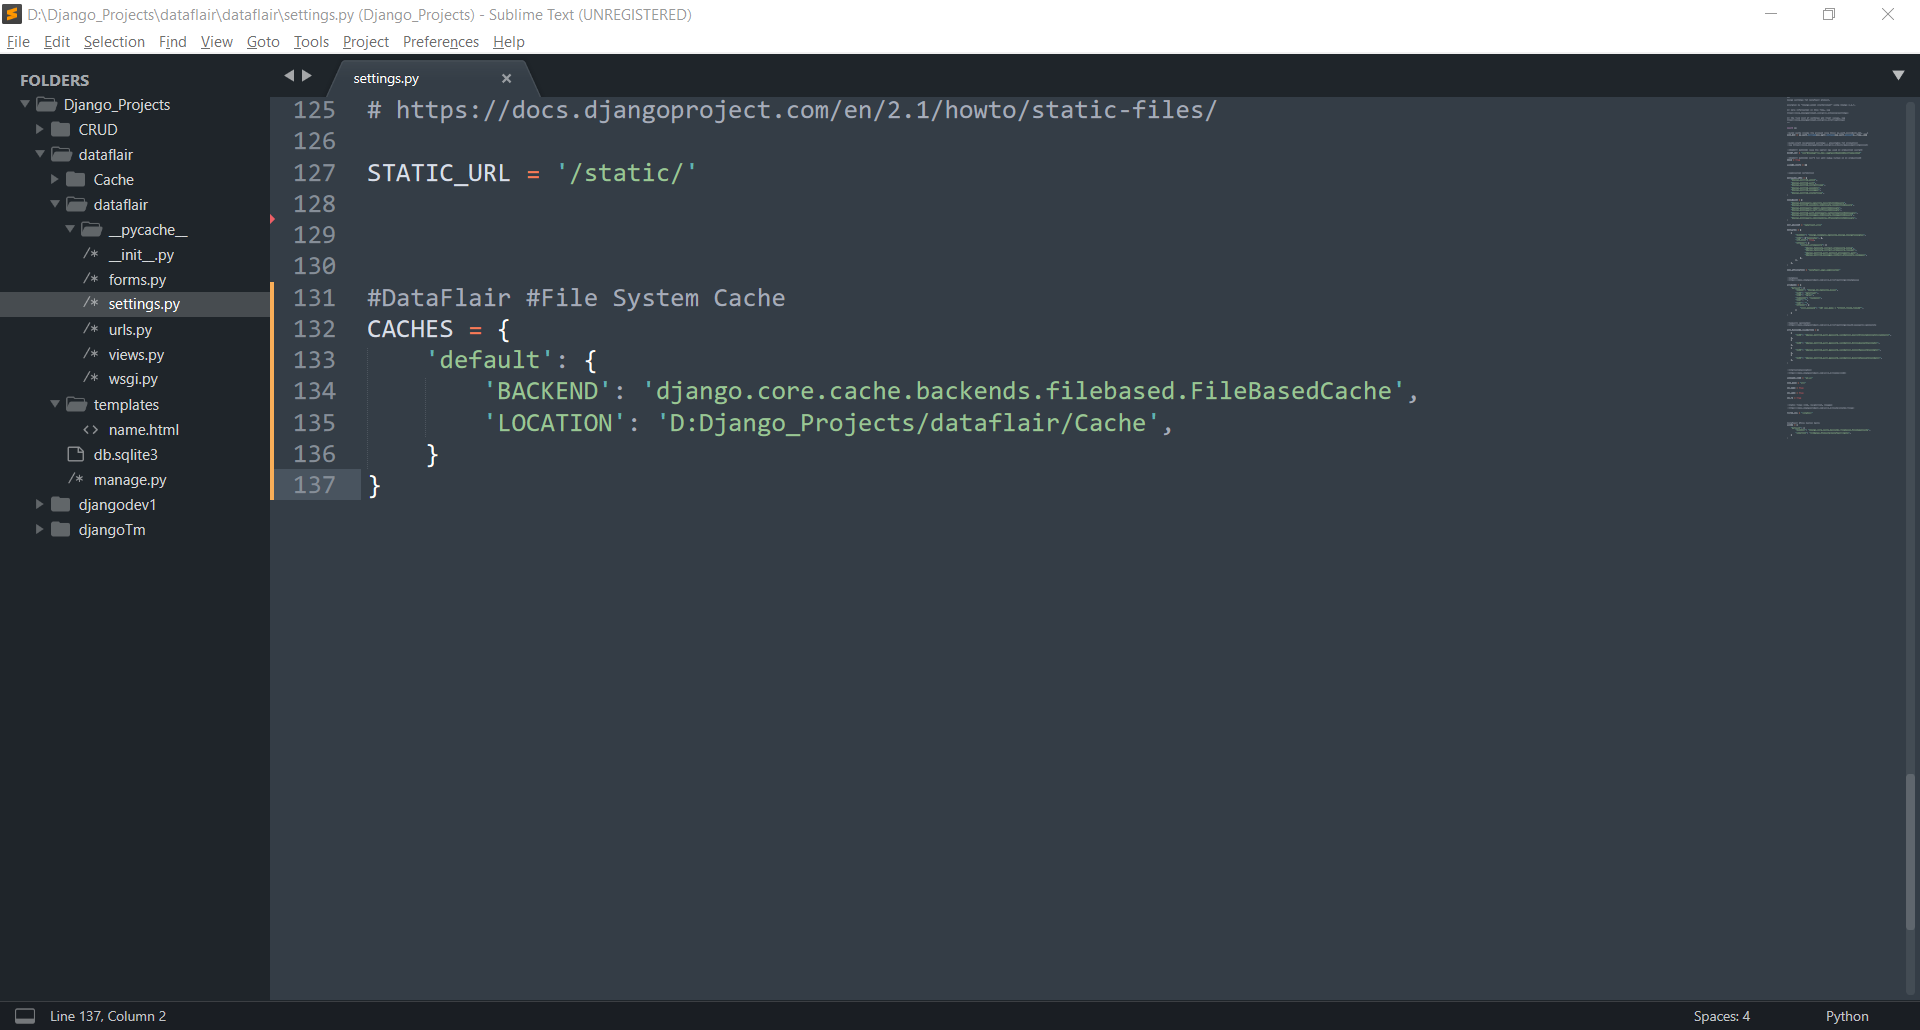
This code contains the information of BACKEND engine for caching. Also, specify the location of the directory where the cache is stored.
Some Important Points:
- The server (Apache) should have access to this directory.
- The directory should exist before running this code.
- LOCATION should contain the absolute directory path. Django searches from the root of your file-system.
If you get some error check for these points, you can comment your problem in the comment section.
3. Local-Memory Caching
Django has a default caching system in the form of local-memory caching. It is very powerful and robust. This system can handle multi-threaded processes and is efficient.
It is best for those projects which cannot use Memcached framework. It provides responses at the same speed. To implement local-memory caching, add this CACHES Dictionary to your settings.py file.
Code:
#DataFlair #Local Memory Cache
CACHES = {
    'default': {
        'BACKEND': 'django.core.cache.backends.locmem.LocMemCache',
        'LOCATION': 'DataFlair',
    }
}

This code will set up your local memory cache. You can skip the location part if you require only one portion to store cache and if you want to distinguish between caches then you should use LOCATION.
This parameter can take multiple names, as many partitions as you want.
Local memory caching offers most of the Memcached features, although, Memcached is more optimized as a framework. Thus, has more features. But, local memory is still one of the fastest caching after the Memcached caching.
It takes up a portion of main memory and uses LRU. LRU is Least recently used strategy to delete caching data.
Note:
This process of caching is memory efficient. It is the same as before, you needn’t define this CACHE dictionary. Also, since every process/ request made to the server will have its own instance, the cross-process caching is not an option.
4. Dummy Caching
Django also provides you with dummy caching. This implementation allows you to develop a website in a production environment.
Suppose your website is in a production environment. There are some sections of code which use caching and you may not be capable of implementing caching in your development environment.
Then, dummy caching will provide you the solution. It actually doesn’t cache anything and makes your server to interpret that caching is implemented.
This approach is really helpful for developers. They don’t need to write code for implementing caching again. Thus, providing error-free websites and faster development.
Add this code to your settings.py file to implement Dummy Caching.
Code:
#DataFlair #Dummy Caching
CACHES = {
    'default': {
        'BACKEND': 'django.core.cache.backends.dummy.DummyCache',
    }
}

Dummy caching is important for developers who don’t have powerful personal machines. It bypasses many caching setups for you.
5. Custom Cache System
Django supports a wide variety of caching implementations. If you want something that isn’t natively supported by Django like making your own cache backend, then you might want this setting which is really helpful.
You can refer to cache backend in Django, get information on which fields are there and create your own backend accordingly. This code might be helpful here.
Code:
#DataFlair #Custom Caching Engine
CACHES = {
    'default': {
        'BACKEND': 'path.to.backend',
    }
}

Some Important Arguments
These are some important caching arguments. You may require them according to your project. They are general arguments and can be applied on different caching engines.
You can also define your own arguments when using custom caching engines. These arguments are keys in CACHES dictionary. Let’s understand them.
1. TIMEOUT
This argument takes time in seconds. It is similar to expire time for cookies. You can also define the expire time of cache data.
By default, its 5 minutes or 300 seconds.
2. OPTIONS
This key is set for a particular option concerning that particular backend engine. It will have values for that backend. There are different options for Memcached and Local Memory Cache.
These options are valid for local memory, database, and file-system caching implementations. You can define different options in custom cache engines as this field gives superior control over your cache data.
These are some general options:
- MAX_ENTRIES
This argument takes in the maximum number of cache items that can be stored. Here the developer defines a capacity for the database, when capacity is filled.
The server will culminate the previous entries.
- CULL_FREQUENCY
This sets up the frequency of deletion of cookies when the maximum number of entries has reached. This argument will take integer parameters as well.
For example – You have given 2 as a value of CULL_FREQUENCY. When the MAX_ENTRIES is reached, the entries will be cut in half, like Thanos Snap 😂 and half of the entries are deleted.
The selection of entries depends on what culinary strategy your implementation is using.
Implementation of Options in Database
- KEY_PREFIX
When working on a production site with many servers, the KEY_PREFIX value saves you from difficult to find errors.
The Key prefix adds this value to every cache_id. So, for a particular server, there are no cache value collisions, since our cache systems consider multiple servers as one.
The system is very efficient when we have a scaling project, but has its own problems. Django takes care of it by providing this parameter.
- VERSION
Django lets you create Key Prefixes but the nice point is, it also lets your version them. If a caching key is updated, you need not create a new key. We increment the version of that particular entry which makes it easy to access previous data.
These concepts make sense when you have multiple servers and heavy traffic. It can increase the data redundancy but makes cache handling easier.
- KEY_FUNCTION
The KEY_FUNCTION generates KEY for your cache entries and takes in 3 parameters; KEY_PREFIX, VERSION, and Key itself which is generated by backend engine.
Implementing Caching in Django
In previous sections, we completed the setup of our caching system. Now, to implement caching on the website, there are these 2 popular ways:
1. Per-site Caching
Suppose we want our whole website to be cached. The part of per-site caching comes there. Just by adding this your whole website will be cached.
Open your settings.py file and add these middlewares. Edit your MIDDLEWARE list.
Code:
#DataFlair #Caching Middleware

'django.middleware.cache.UpdateCacheMiddleware',

'django.middleware.common.CommonMiddleware',

'django.middleware.cache.FetchFromCacheMiddleware',
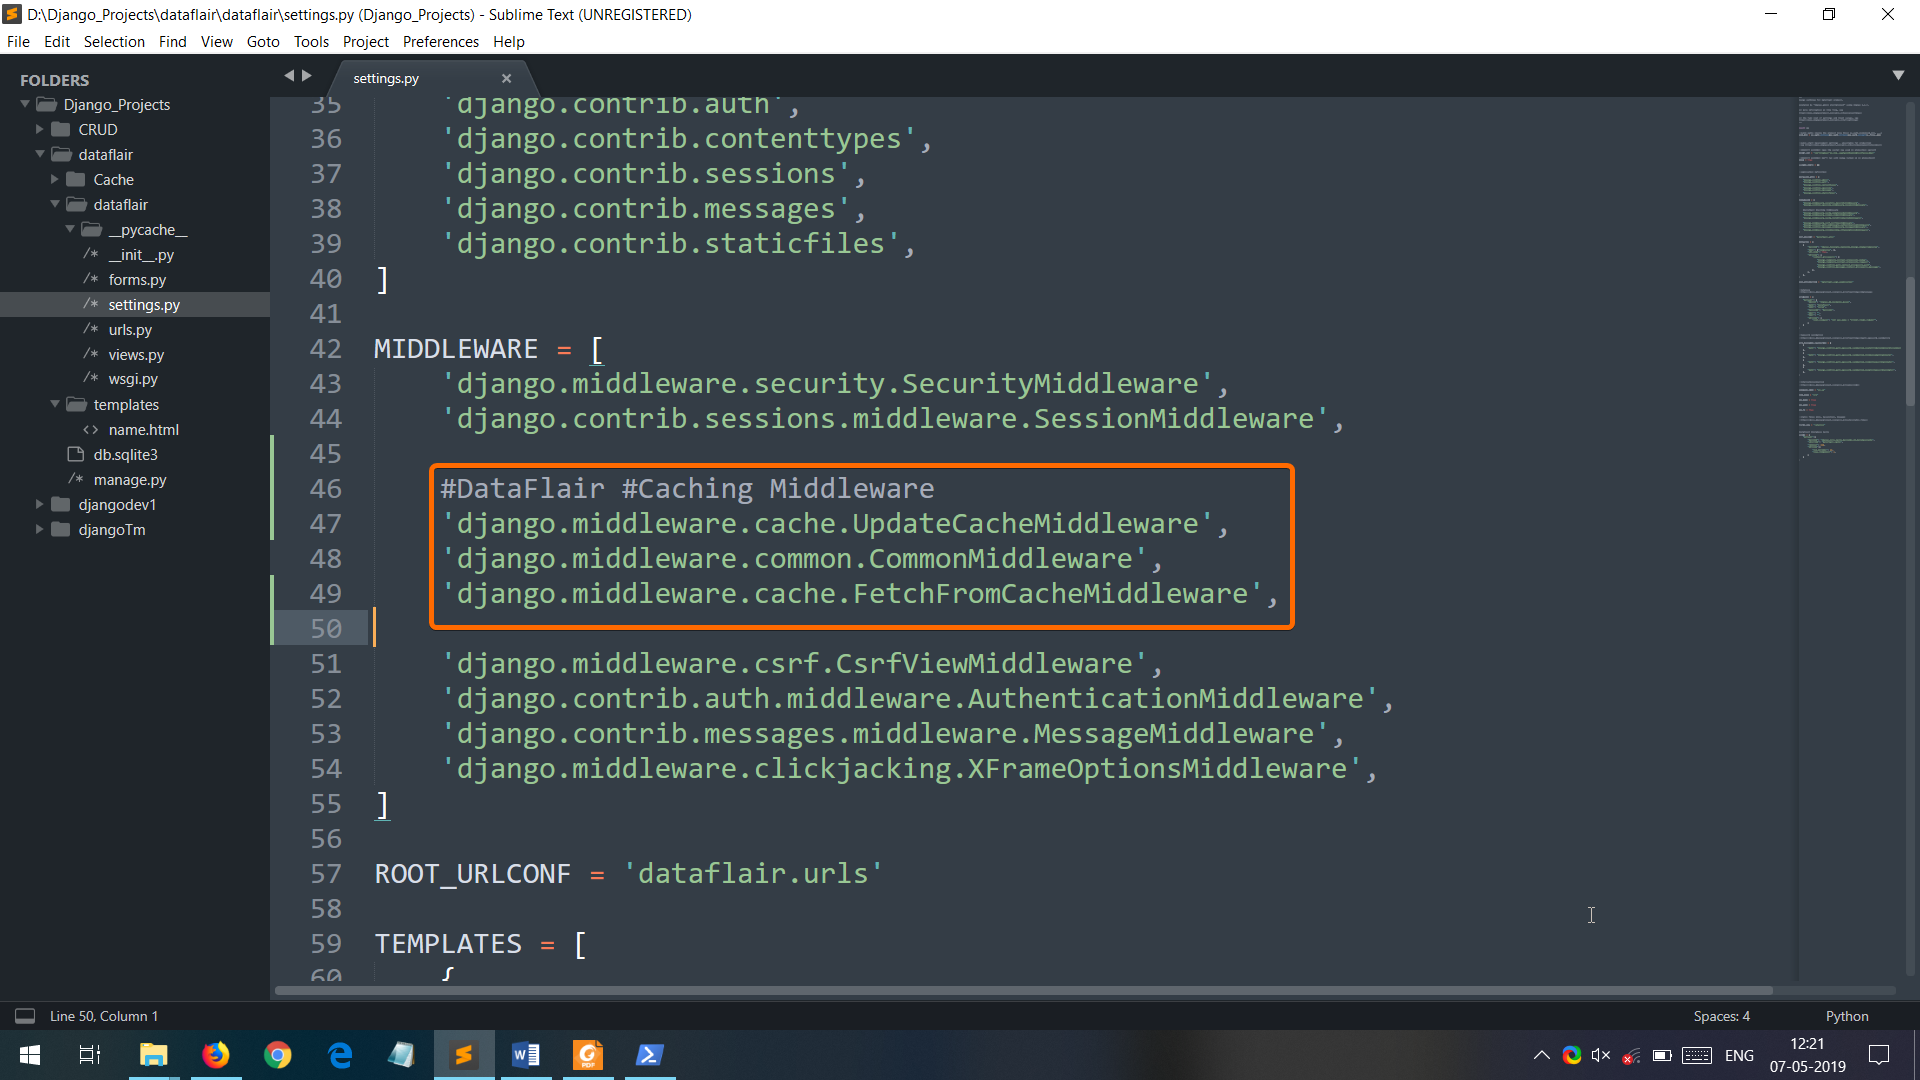
The order of middlewares is important over here, so keep that in mind. That’s it, you have cached your website now. After that, try running your server and then you can see that your webpages are being cached.
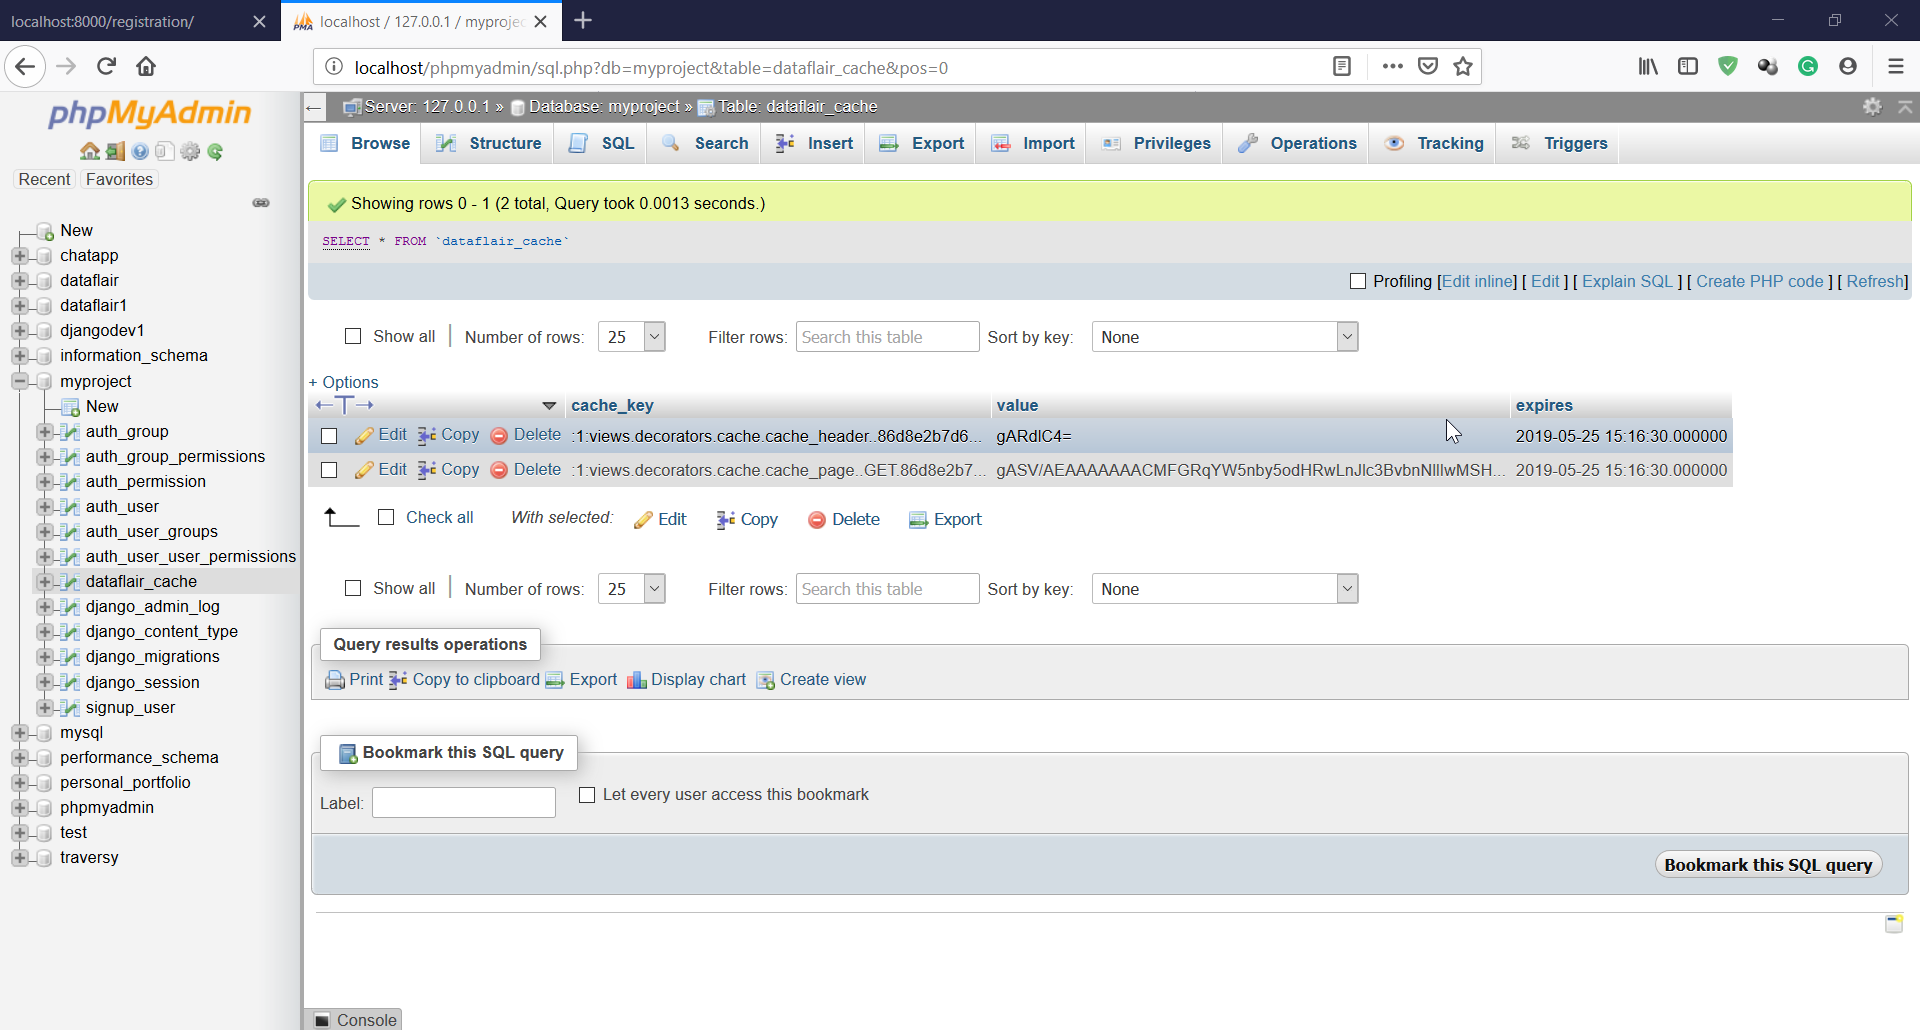
This table will fill eventually until you have the limit fulfilled. Now, let’s test the performance of our cached website.
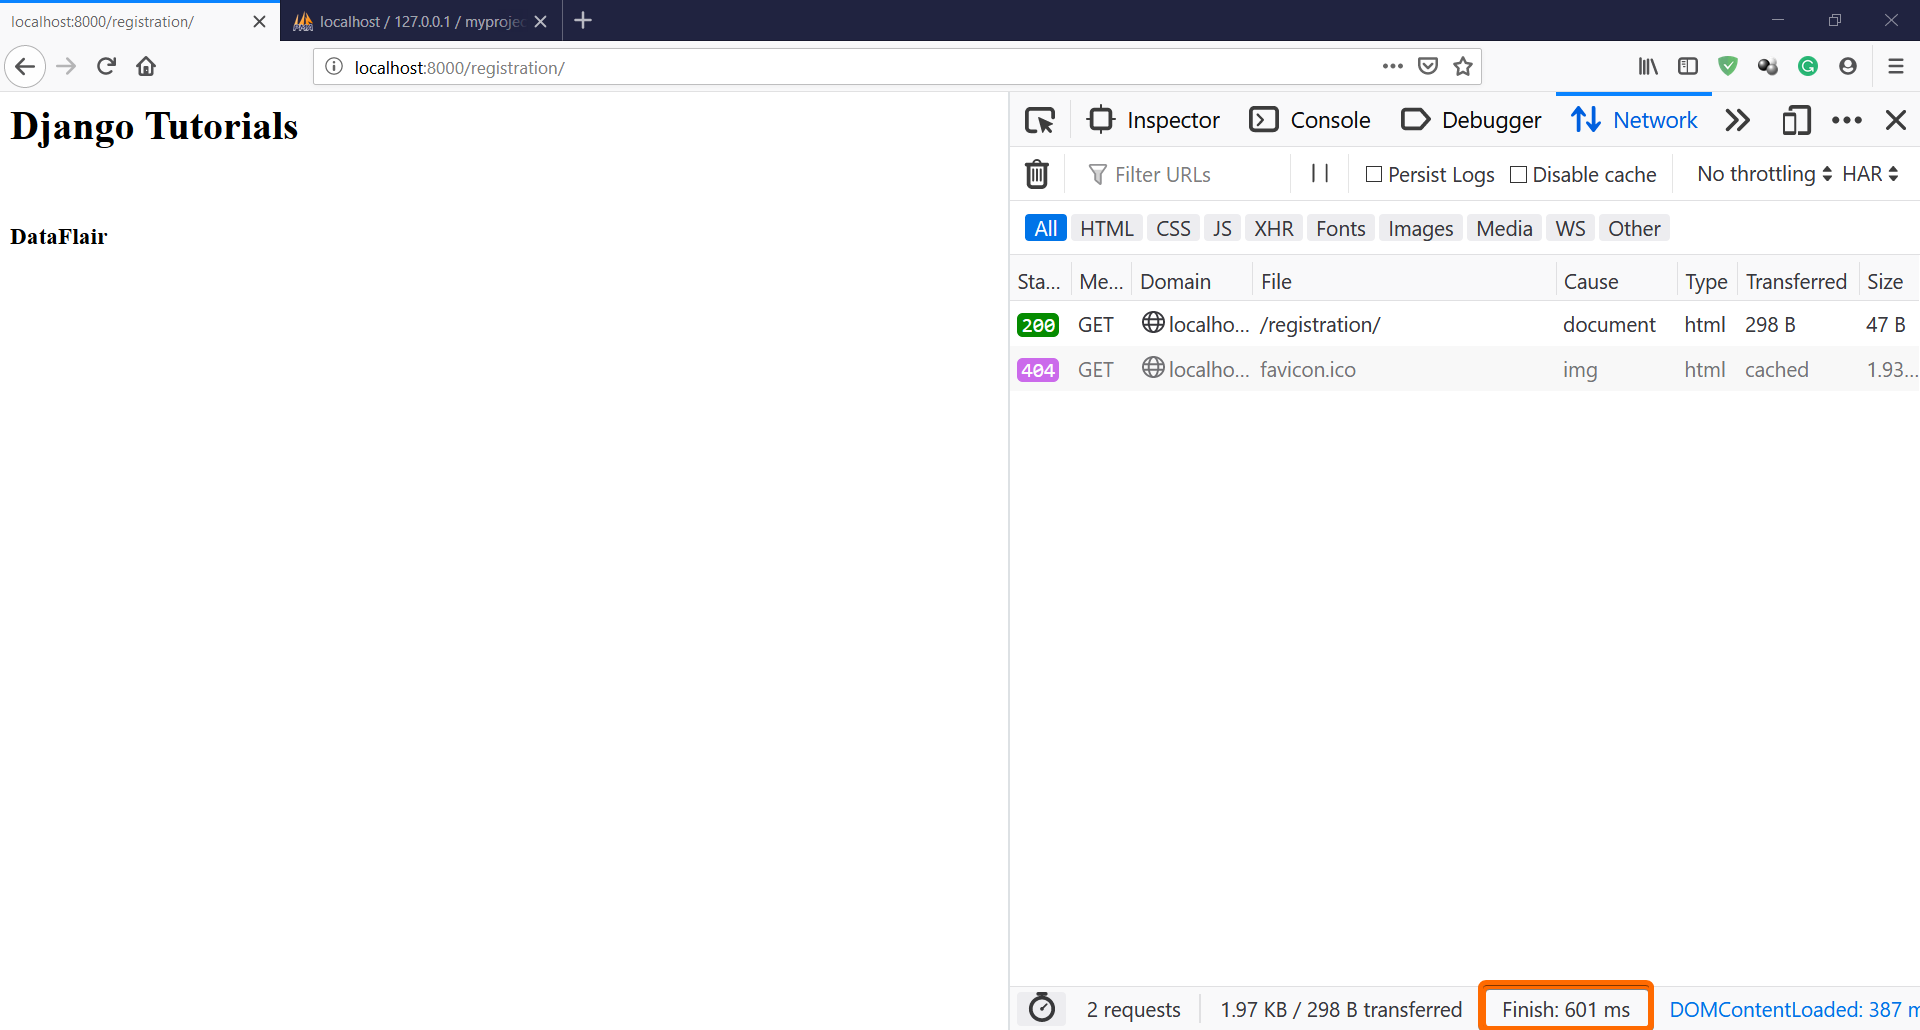
We have loaded our page for the first time so it’s taking around 600 milliseconds to render. Then we can see whether it’s cached or not.
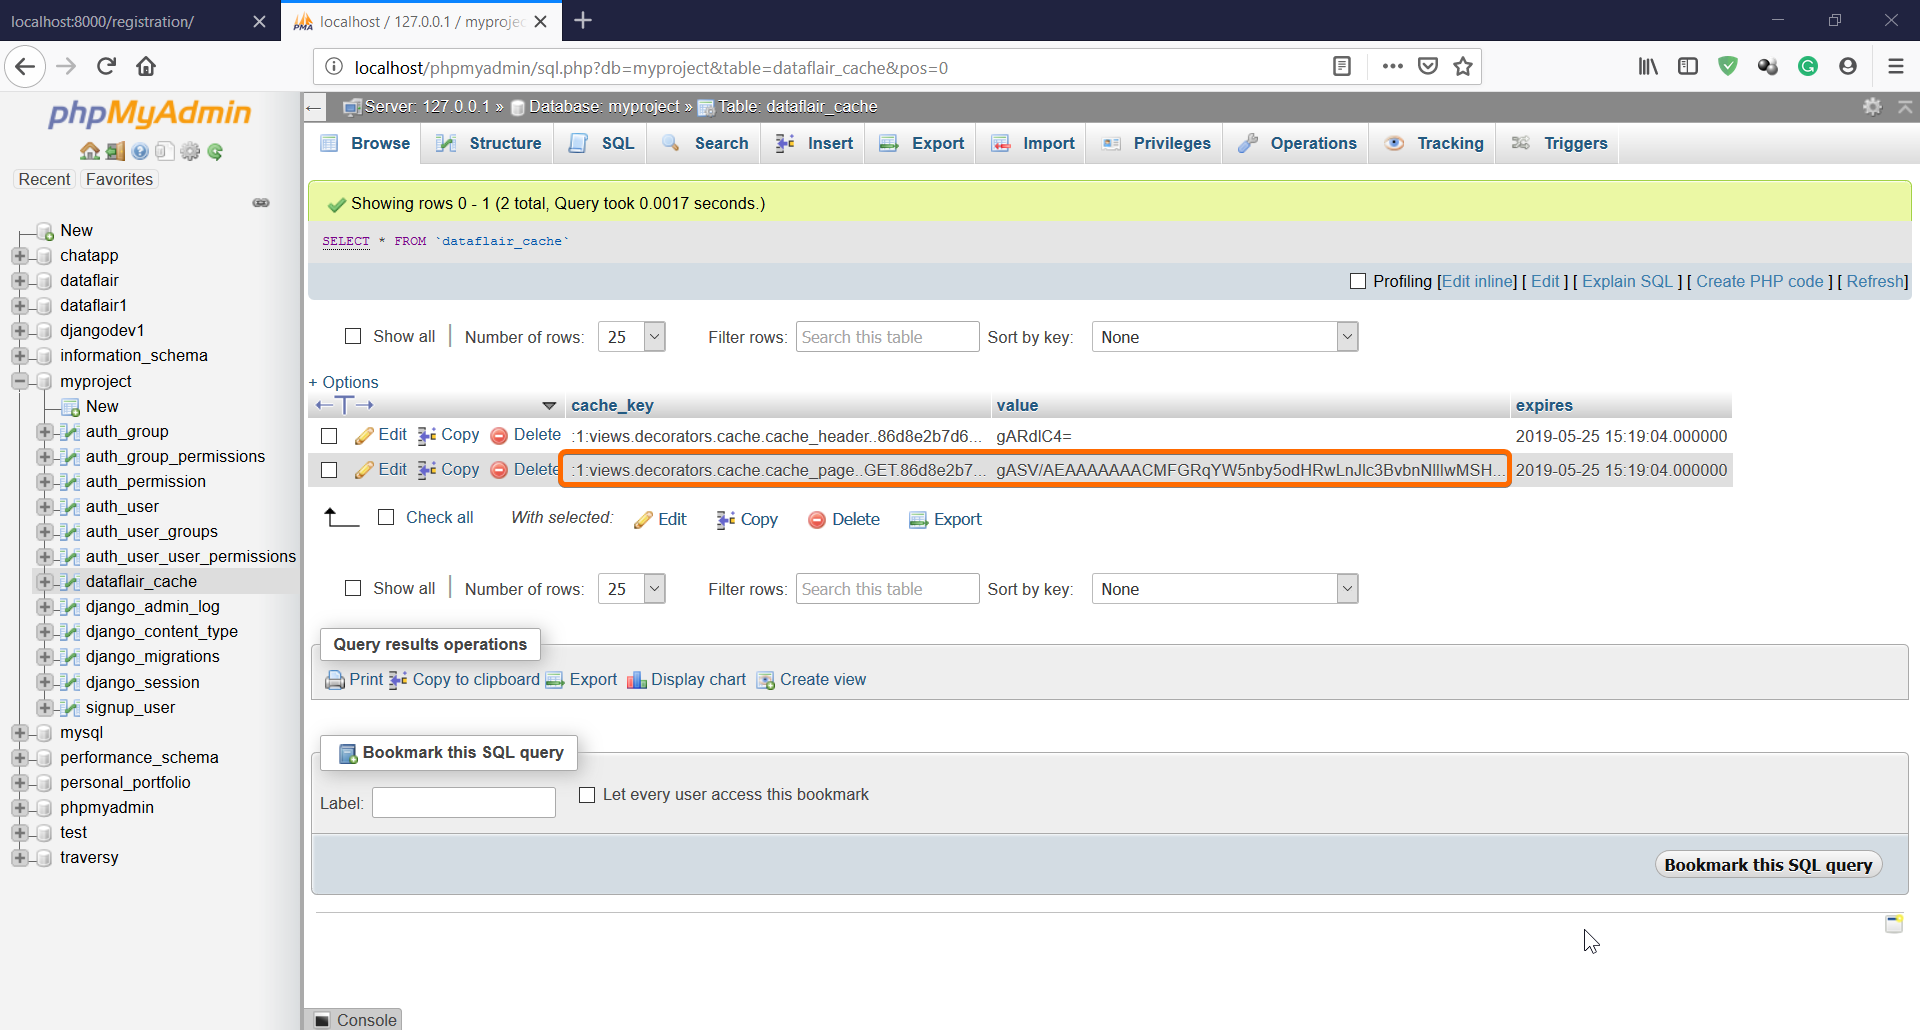
Ok, it’s cached. Now try loading this page again.
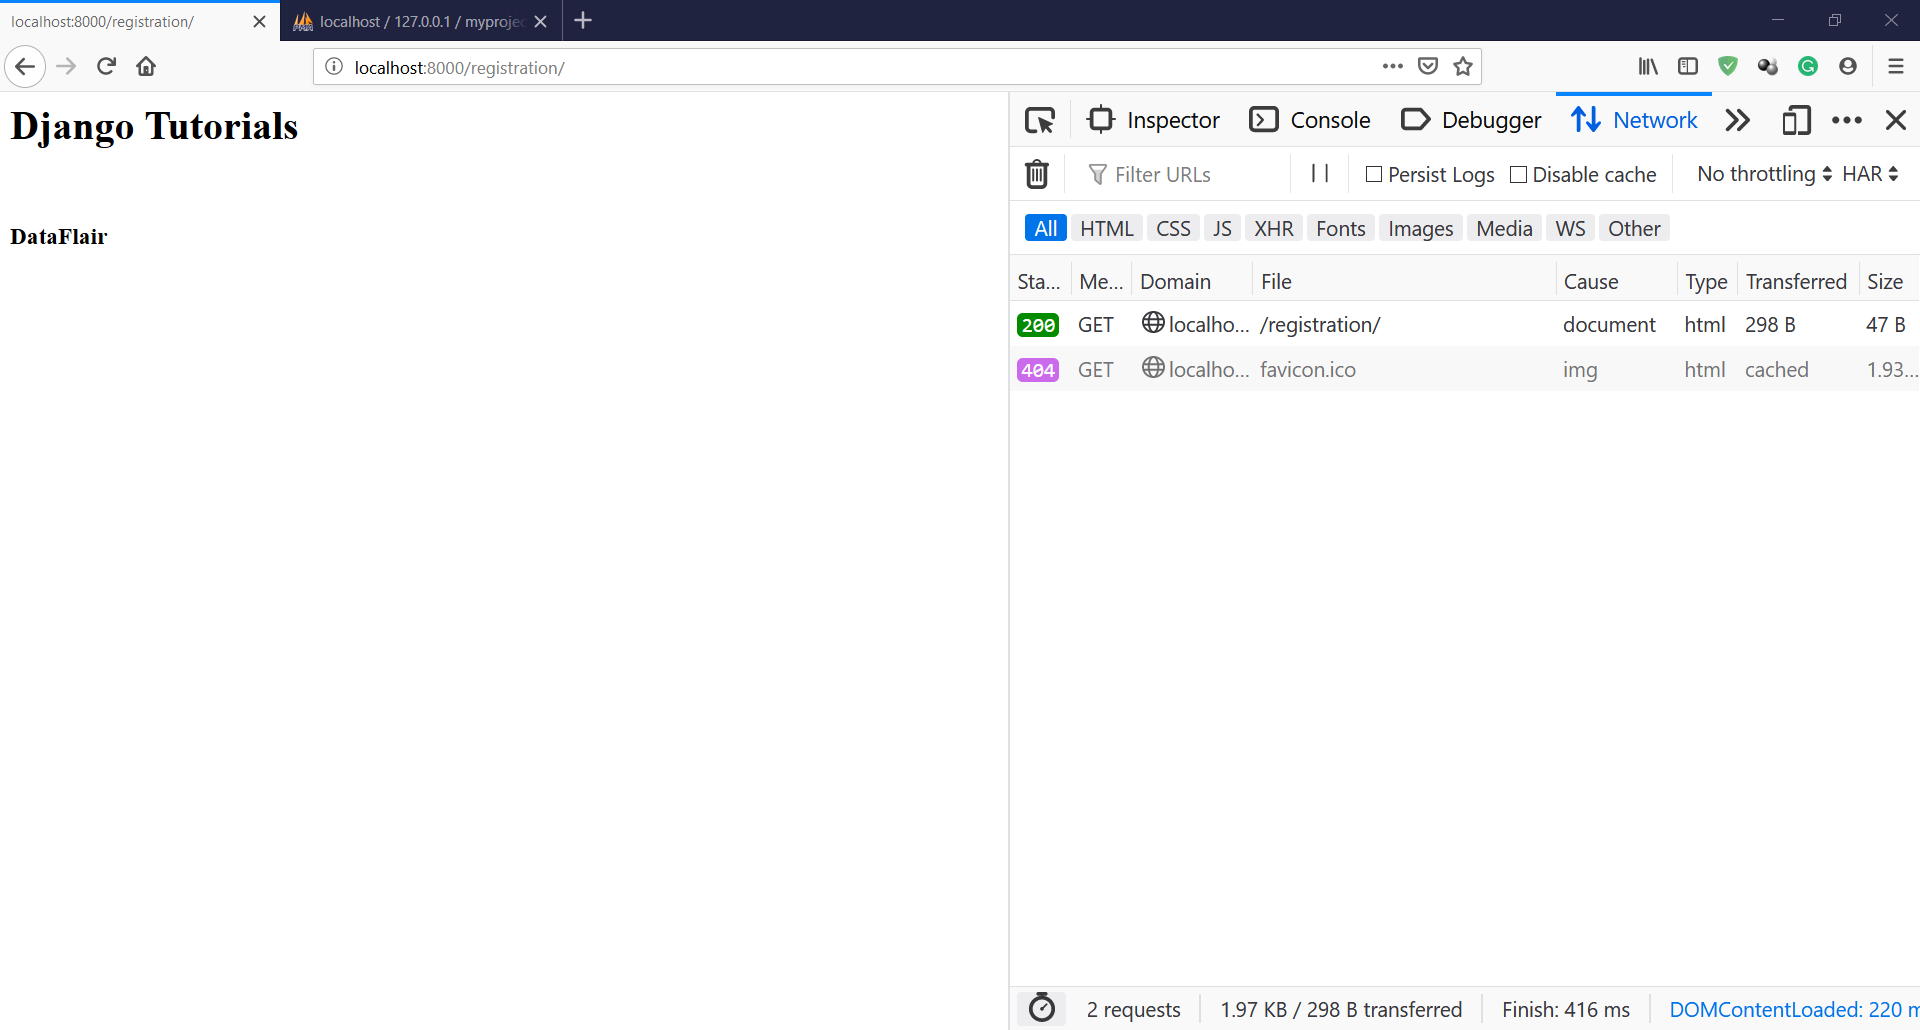
A massive improvement of 200 milliseconds is there.
This difference may not seem a very big deal. As websites become more and more dynamic, we will need caching. This page does not require much processing. Therefore, its load time is also not impressive.
For pages which are generated by heavy machine learning algorithms, caching is a great improvement.
2. Per-View Caching
Websites often have some static and dynamic pages. Only dynamic pages require processing, static pages are served directly. Then caching the whole website means wasting memory.
For efficient use of space, developers often cache particular view functions. That saves us a lot of space and thus caching only the important parts of the website.
Although for that you need to know about Django Decorators. It is a different topic altogether and we will be covering the same in our future tutorials.
To cache particular views, we use:
Django.views.decorators.cache.cache_page() method.
Import this function in your views.py file to implement caching. Use it just above the view that you want to be cached.
For example-
Code:
#DataFlair #View Caching
from django.views.decorators.cache import cache_page
cache_page(200)
#definition of the view function
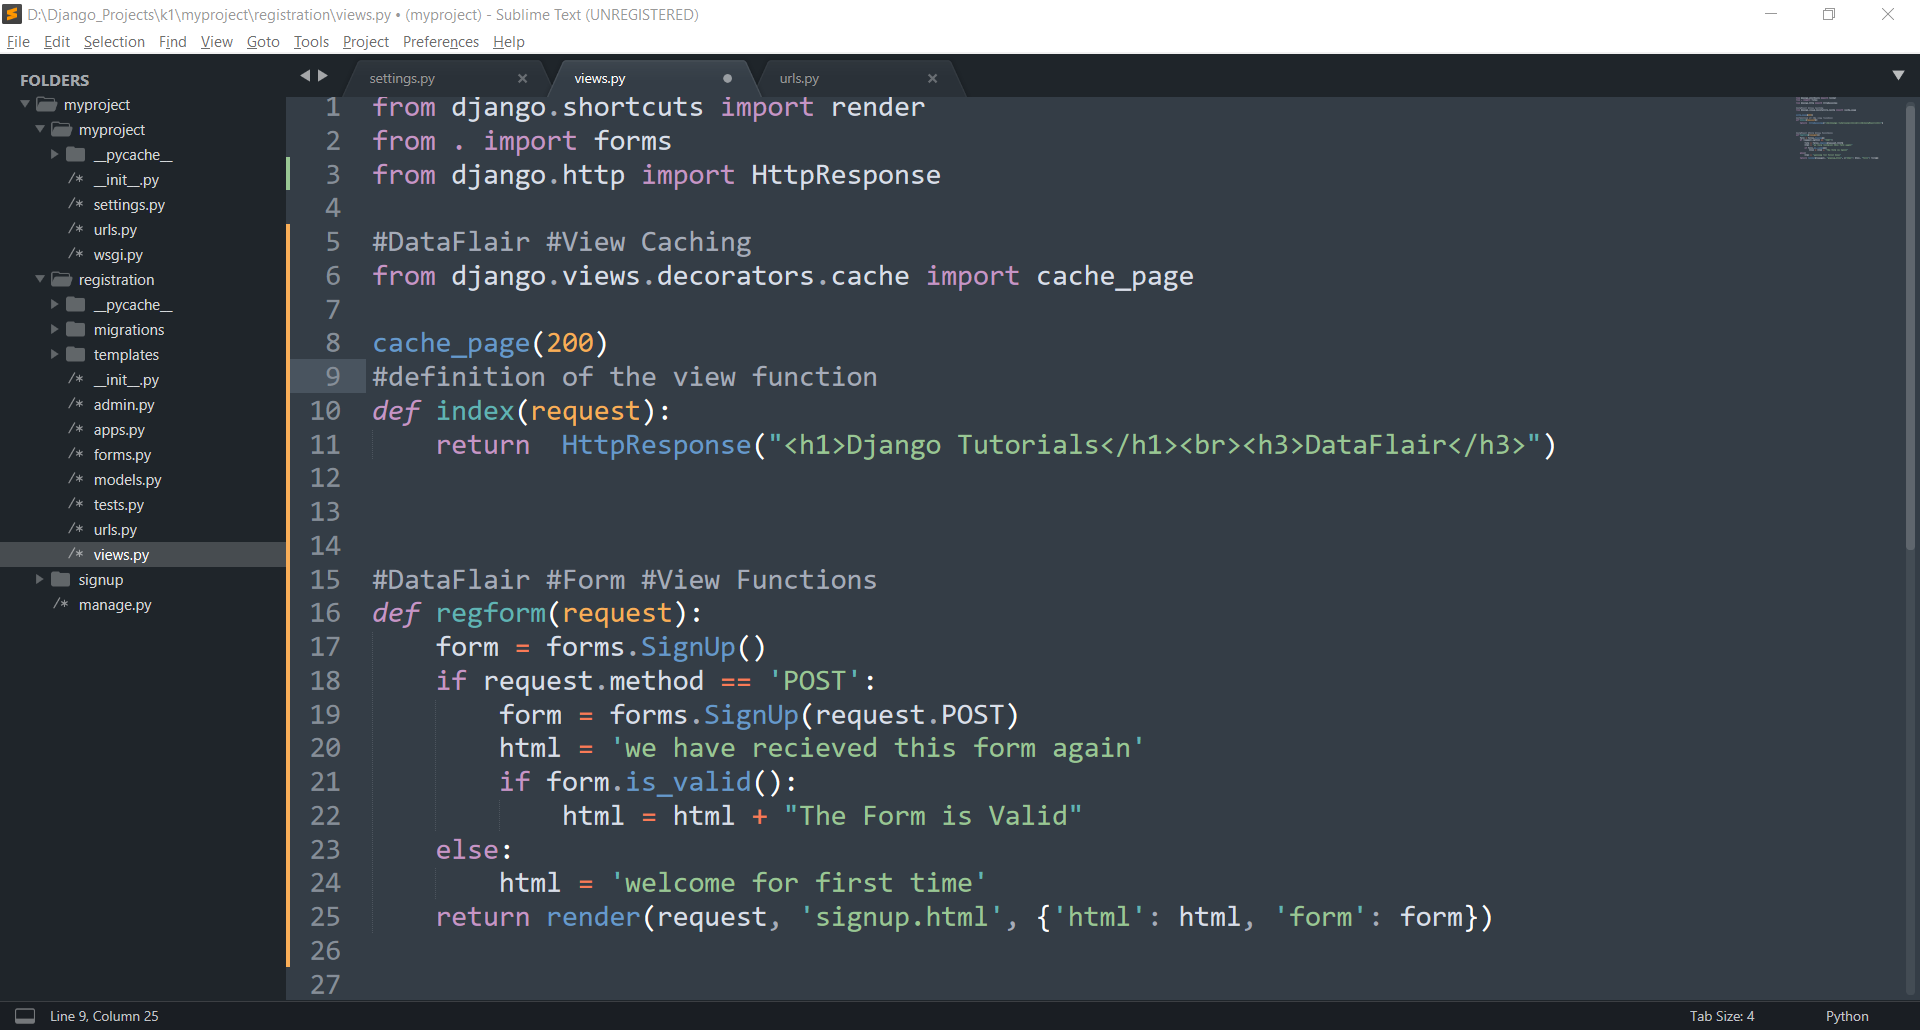
Understanding the code:
The cache_page() method takes in one argument, the expiration time of cache data. The value is in seconds and we have given 200 in the above example.
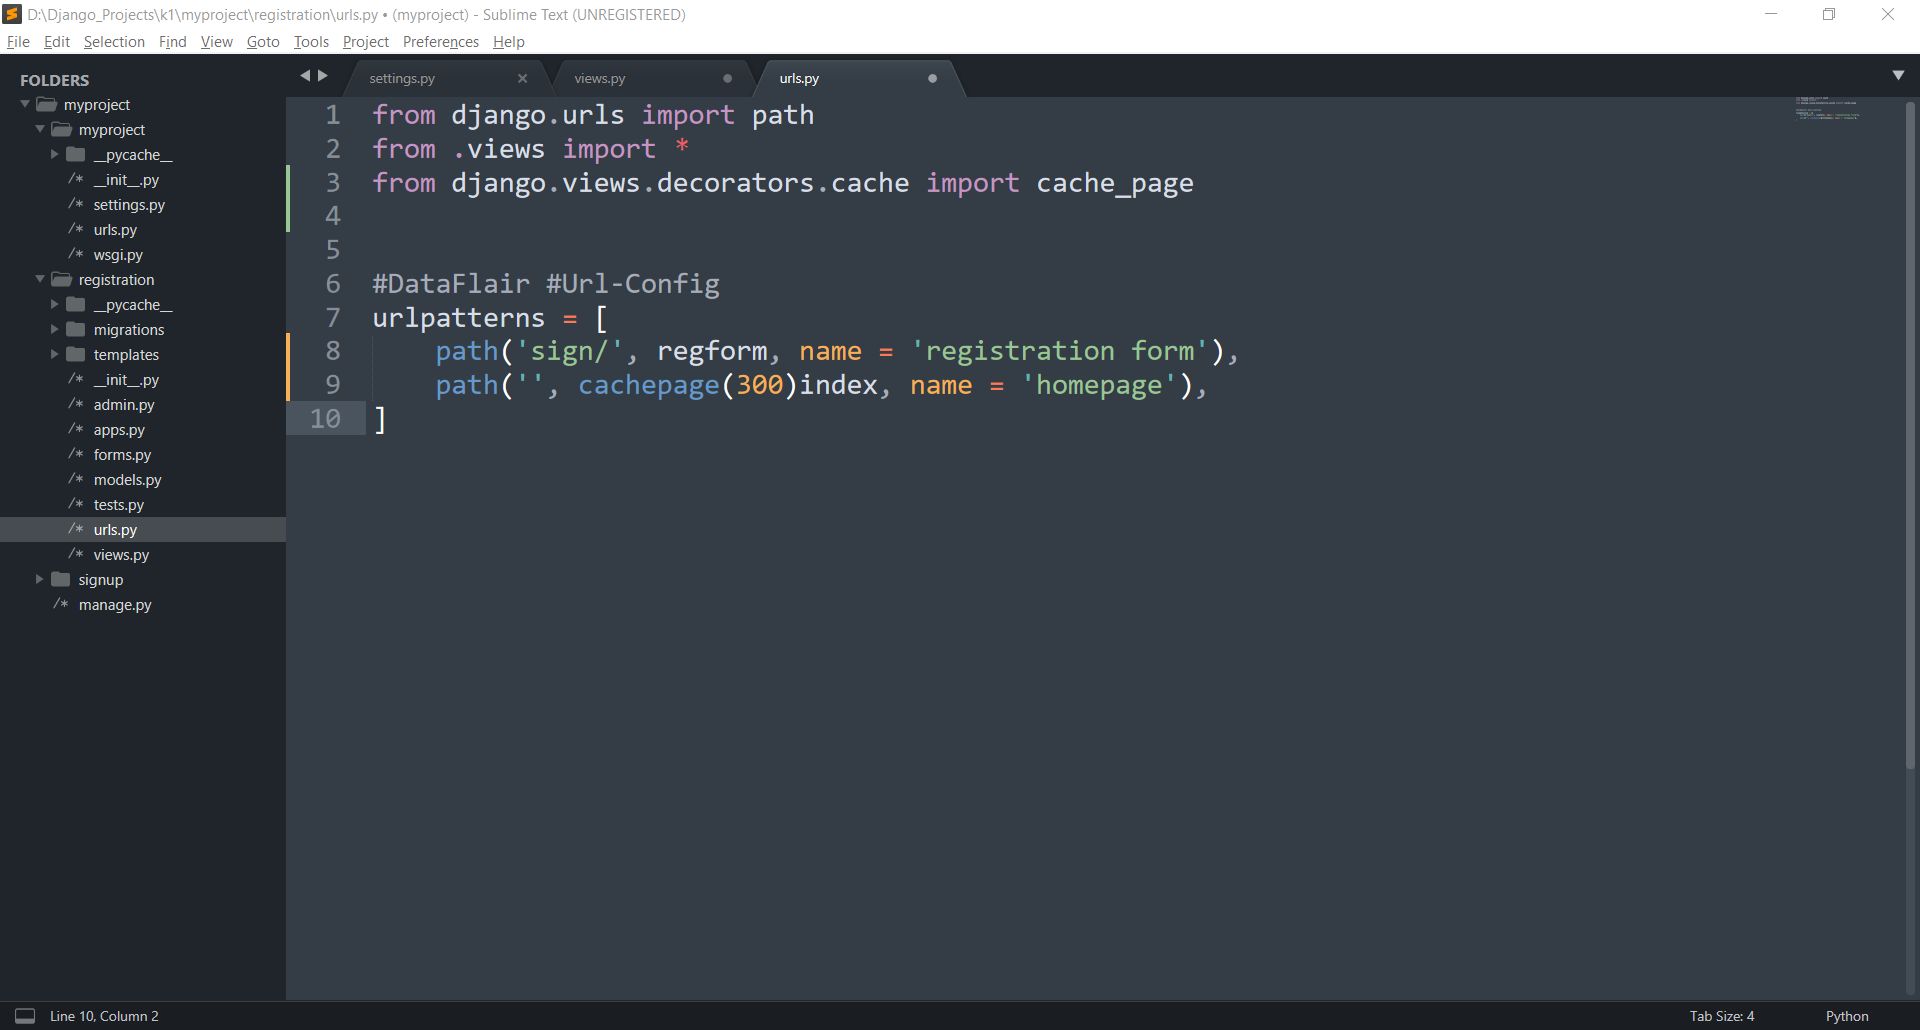
We can use cache_page() from urls_config, since there we call only one view function at a time. This method is more professional and makes the code more readable. All the cached function can be placed in one list.
To use above method, wrap your view function with cache_page() in the path().
Code:
from django.views.decorators.cache import cache_page

urlpatterns = [
    path('index/', cache_page(300)view_function, ),
#
]
This comes to the end of Django caching tutorial.
Summary
As you can see, caching improves performance, even though we don’t have a very large website, the load times became better.
Caching is still good for all websites. It can be better with hardware improvement. There are some pages which do not affect by caching.
Caching solves the problem of dynamic websites and the webpages generated by server processing and then served to the client. But, if your website is static, caching is not needed. It will be doing nothing but increase the usage of space on the server.
If your website or even some webpages are dynamic, you can use caching.
Granularity in caching is one of the special features of Django and it is not limited to views. There are more levels of caching and we need an understanding of advanced concepts like status codes, HTML headers, and decorators.
These concepts are useful on the web and most of the developers should learn them. We will cover the majority of them in our tutorials.
Still any doubts in Django caching process? Feel free to share your views in the comment section below.
Did you like this article? If Yes, please give DataFlair 5 Stars on Google


This is very nice explained about caching with detailed example.
In the database caching after the backend and location topic, how to open that cache page? what should i type in my url ??? do need i need to set it in my urls.py file ? please explain.
Once you add the settings.py, It will start caching the responses in a caching table inside your database. It can be accessed inside your database but you need not access it on the frontend since, it’s the same data stored in your database or generated by your website, which is just most frequently or recently used.
Conclusion: You don’t need to set anything in your urls.py file. no changes in your views.py or urls.py are needed.