Django URLs and URLConf – Learn to Map URL Patterns to View Function in 10 Minutes
Master Python with 70+ Hands-on Projects and Get Job-ready - Learn Python
Job-ready Online Courses: Click for Success - Start Now!
In the last tutorial, we learned about Django Admin Interface, now in this tutorial will introduce you to the concept of URLs in Django and how you can connect different files with your Django Project.
Also, we will learn different ways of connecting our project components with each other, while maintaining the practices of a professional developer.
What is a URL?
URL stands for Uniform Resource Locator. It is the address used by your server to search for the right webpage.
All the servers take the URL which you searched in the browser and via that server, provides you the correct result and if they don’t find anything matching the URL, it will show 404 FILE NOT FOUND ERROR.
Explore Unique Features of Django
URLs in Django
How does Django Server interpret URLs?
Django interprets URLs in a rather different way, the URLs in Django are in the format of regular expressions, which are easily readable by humans than the traditional URLs of PHP frameworks.
Regular Expressions
A Regular Expression also called RegEx is a format for search pattern which is much cleaner and easy to read for the humans and is very logical.
That’s important because it makes the process of SEO much easier then it would be with the traditional URL approach which contains much more special characters.
We will understand the regular expression along the way in the tutorial.
How does the URL get searched and the file is delivered?
When we search for a URL in the URL Bar like this:
![]()
The same URL is passed to the server after DNS connects us to the appropriate server. While your Django-server is running, it will receive the URL and search for the URL in the urls.py file or the value in the ROOT_URLCONF variable.
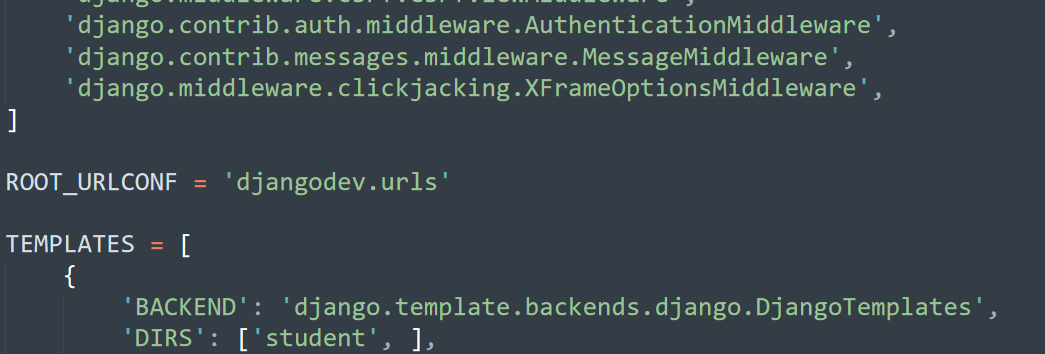
As from the name, this variable contains the address of the urls.py file. The server will now match the urls from that file.
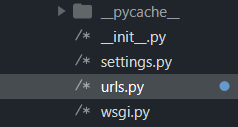
Your server will now look for the URL patterns inside the urls.py file.
Inside the file, you will find this code and a very useful comment section.
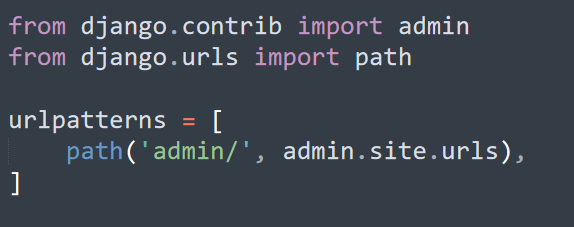
This is a list urlpatterns and name is the convention which should not be changed. In this list, we will be adding all the urls and patterns to be available for searching on our website.
In this file, the Django server matches the Regular Expression with the given URL, like ‘admin/’ in the path function parameter. Here you may wonder that it’s not the site URL. Actually, it snips off the part of URL till website and only searches for the remaining part of URL.
Then it redirects the page to the provided webpage or python file ‘admin.site.urls’ in the second parameter, which will finally reach the views like functions and class objects or even another urls will return appropriate template.
Modifying urls.py file
The urls.py file in Django is like the address book of your Django website. It stores all the web addresses for your website. It connects that to some view component or any other urls-conf file for a certain application.
Importing the view function
We will be learning the steps to import the view functions and connecting different url-conf files with the main urls.py file.
A URLconf is similar to a table of contents for our Django-powered web site. It’s a mapping between URL patterns and the view functions that need to be called for those URLs.
First, we will have to import the view function that we want our server to run when the URL is matched. For that, we have to import the function from the views.py file.
In our case, we are assuming it is in the same directory as of the urls.py file. Although if it’s in another app we will have a different approach.
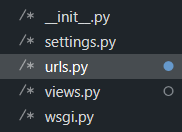
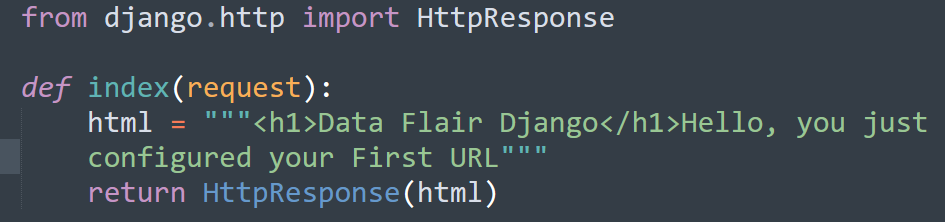
Then just type in this code in views.py file:
from django.http import HttpResponse

def index(request):
    html = “””<h1>Data Flair Django</h1>Hello, you just configured you First URL”””
    return HttpResponse(html)
Then we just have to modify our Django urls.py file that’s very easy.
Understand the components of Django MTV Architecture
For that, we will first import the index function from our view file in the urls.py. Then, in the next step, we can add another element in the list with some parameters.
Code:
from .views import index
This will import the index function from the views.py file.
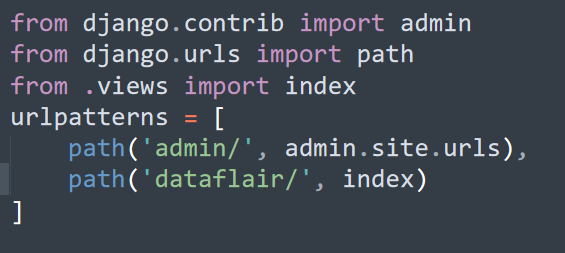
Then inside the urlpatterns list, add this item as:
path(“dataflair/”, index)
This function has different parameters for different cases since here we are passing a view function directly as we have imported the same. The first argument here is the URL you are going to search and it can be anything you want, I have kept it like this.
At times, you will need to import the view file itself rather than the function. We will learn that process in upcoming tutorials.
Must Learn – Creating Your First Django Model
Your urls.py file should look like this:
Now you just have to start your Django server.
We all know the command, that is
python manage.py runserver
Then open the browser and search the URL:
localhost:8000/dataflair/
This shall give you this output

That’s it, now practice some more functions to import. Then, you will be able to understand the workflow of the Django Framework more easily.
Explore Django Books to learn Web Development in Django
Summary
In this tutorial, we learned how to connect Django views to Django URLs and made a simple webpage based on that.
In further tutorials, we will be learning about page redirect and cookies handling in Django. If you have any questions related to Django URLs tutorial, you can ask in the comment section.
We work very hard to provide you quality material
Could you take 15 seconds and share your happy experience on Google


Feedback because I was stuck there:
So you create a new views.py file inside dataflair folder (in the tutorials before we were working with views.py inside student folder)
Than you add a linking of the new view.py with the index function in the urls.py file. Both files are placed in the dataflair folder.
Could you maybe add this hint (creating a new views.py file in dataflair folder, etc.) just to make it clear?
And for beginners: Why do you call this function index? I have red it multiple times now and still wondering about the “best practise purpose” behind it. Guess I will find it out soon but a short explanation might safe some distraction time.
I also faced the same problem and spend considerable time to figure it out. This is a grate tutorial by the way and as you mentioned, would have been much better to have bit more details about how things are done and specially why for us to understand the reasons behind it as beginners.