How to Create & Run Your First Django Project in Easy Steps
Master Python with 70+ Hands-on Projects and Get Job-ready - Learn Python
Job-ready Online Courses: Click, Learn, Succeed, Start Now!
In this part of the Django tutorial, we will create our first Django project using the Django Framework and will test the same application on the test server made available by Django.
We will discuss some easy steps in this Django project tutorial to create your first Django project and run the server application.
How to Create Your First Django Project
To create a Django project, you will have to start your virtual environment which we set up in the last tutorial of Install Django and Set up a virtual environment, in that directory, you will be creating your Django project.
For Windows PowerShell Users
Type this command:
pip install django
This command will install Django in your virtual environment and will make it error free.
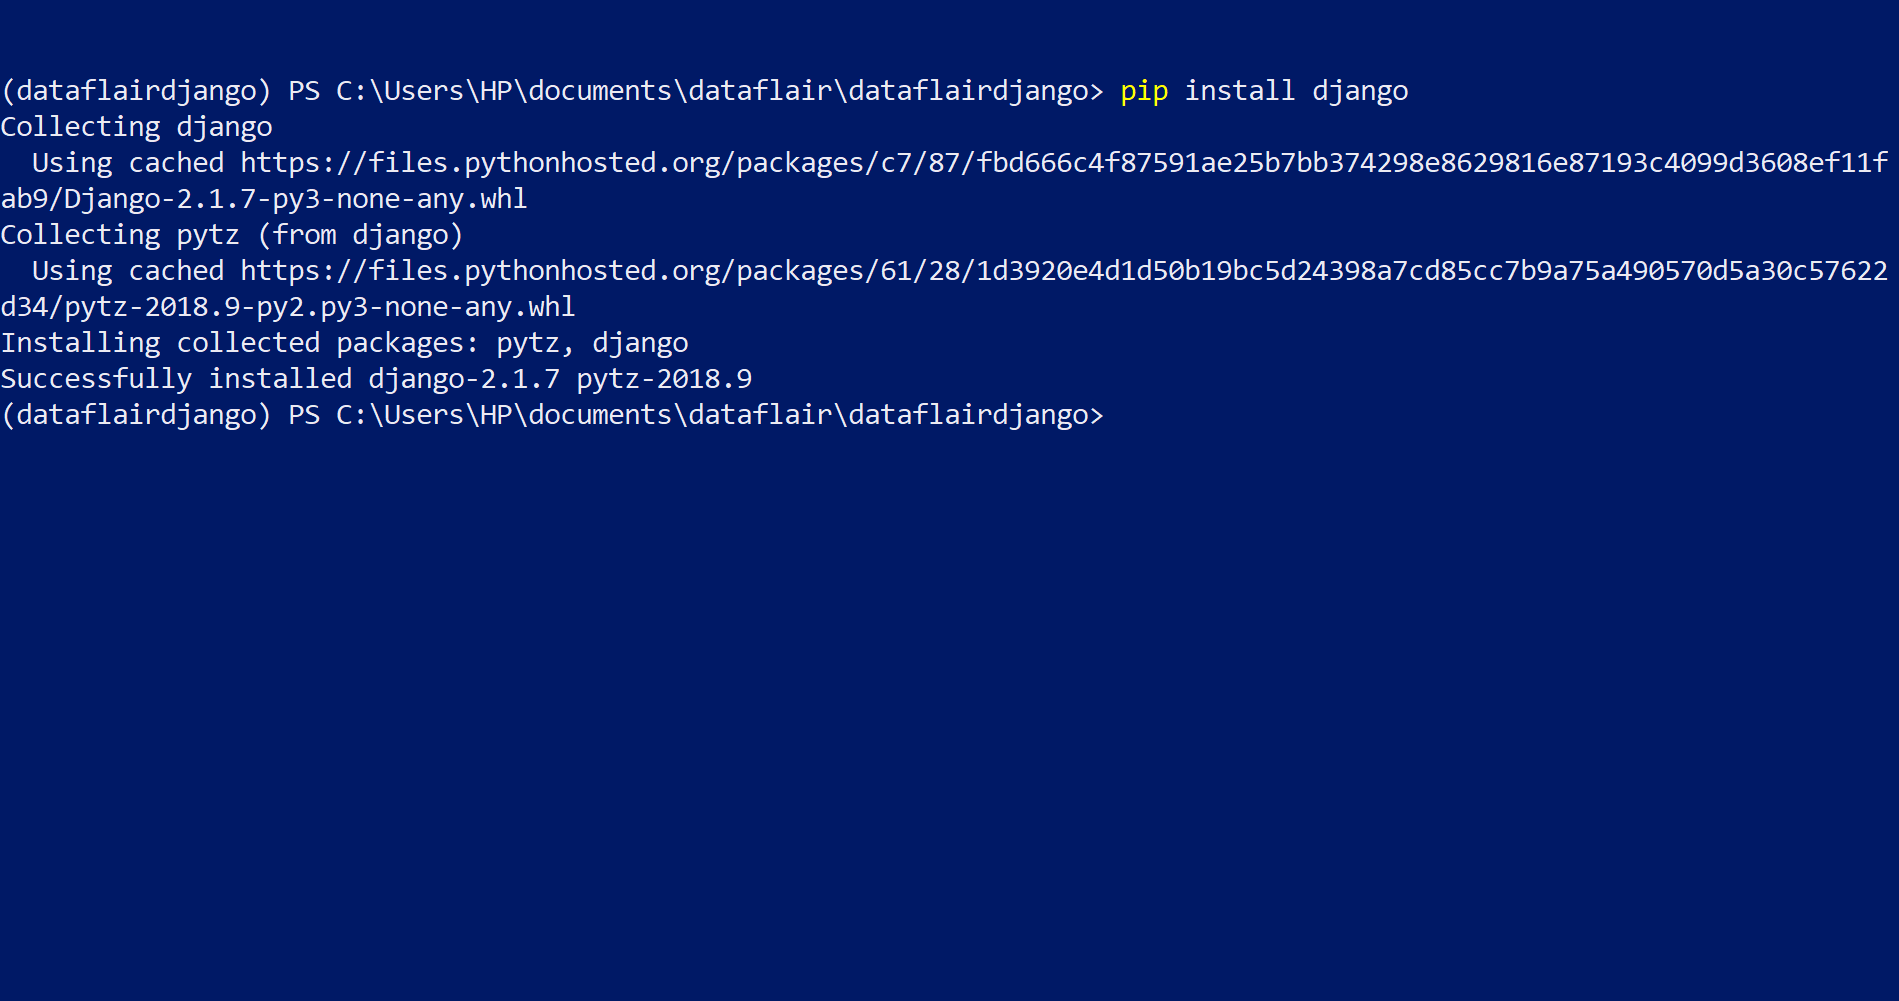
After that, type this command:
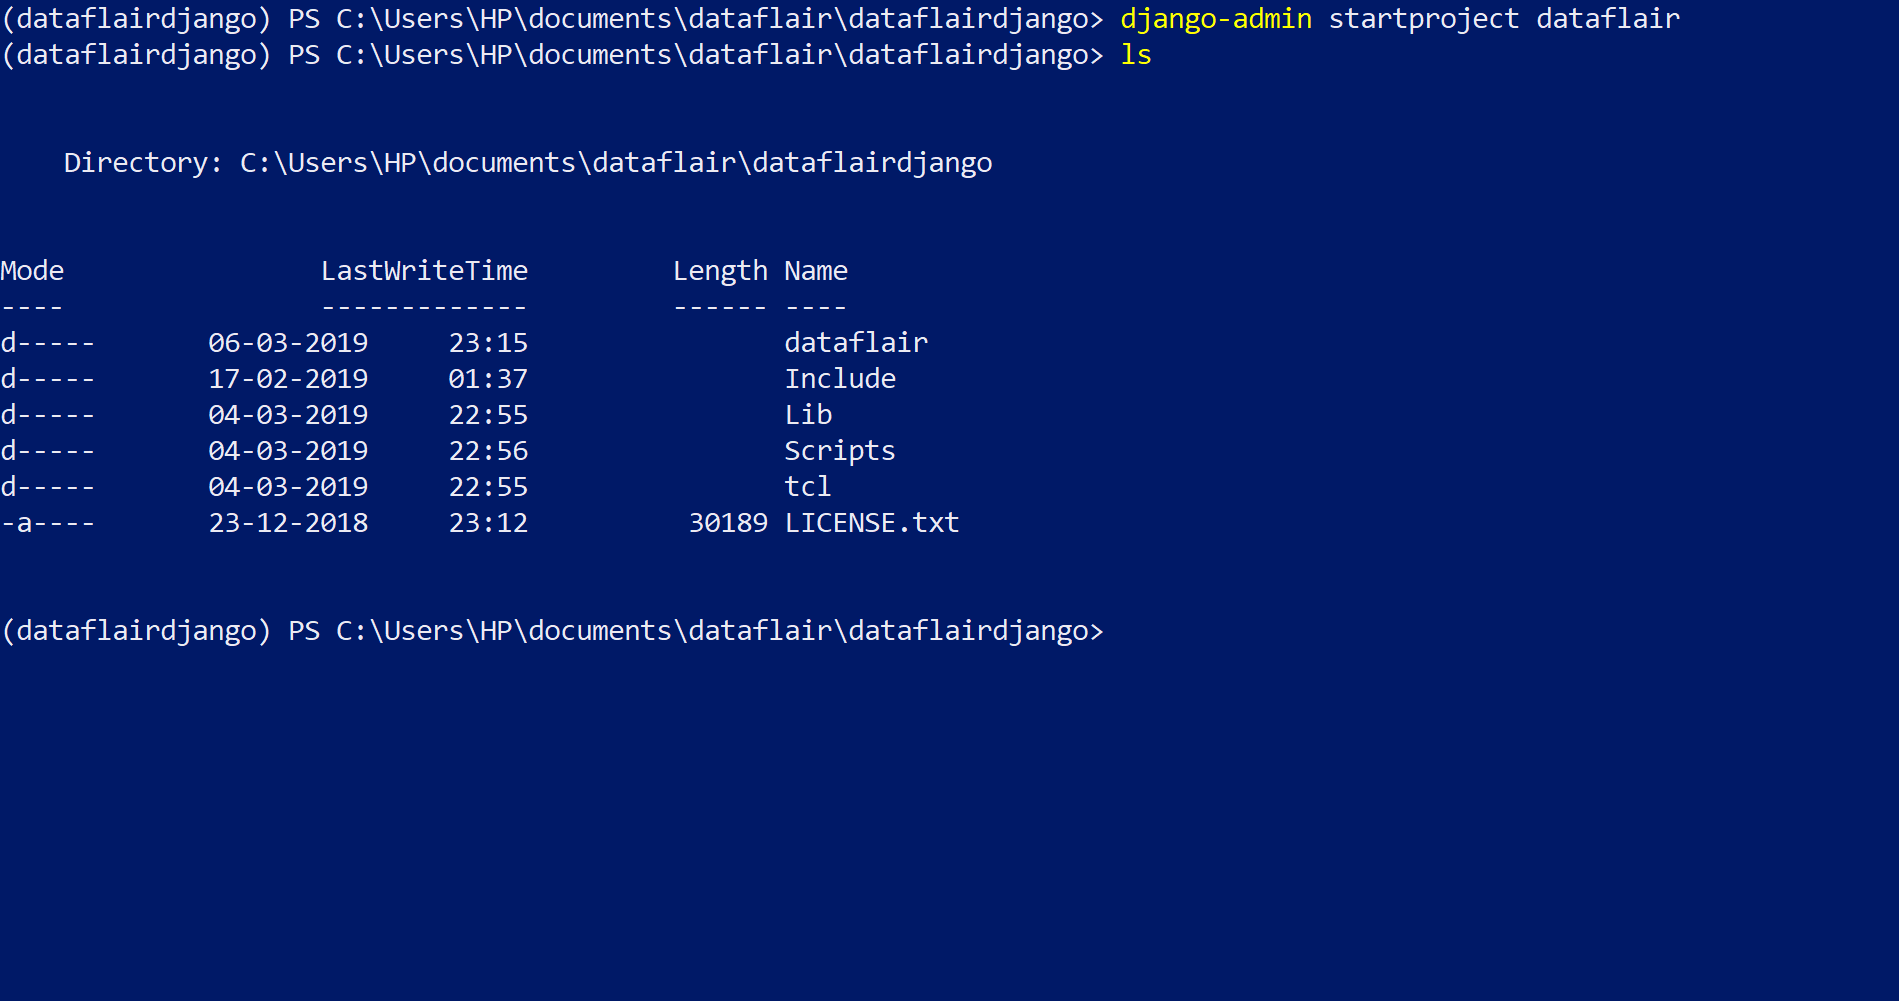
django-admin startproject project-name
It will create a Django project in your system in the directory in which you are currently in.
The project name can be anything you like but keep it short and meaningful as you will be creating large websites after these tutorials.
For Ubuntu Terminal Users
In the terminal type this command after activating your virtual environment, and in the desired directory.
$ pip install -e django
This should install Django in your virtual environment.
$ Django-admin.py startproject project-name.
The Django project in that directory has been created and you can check the files in it.
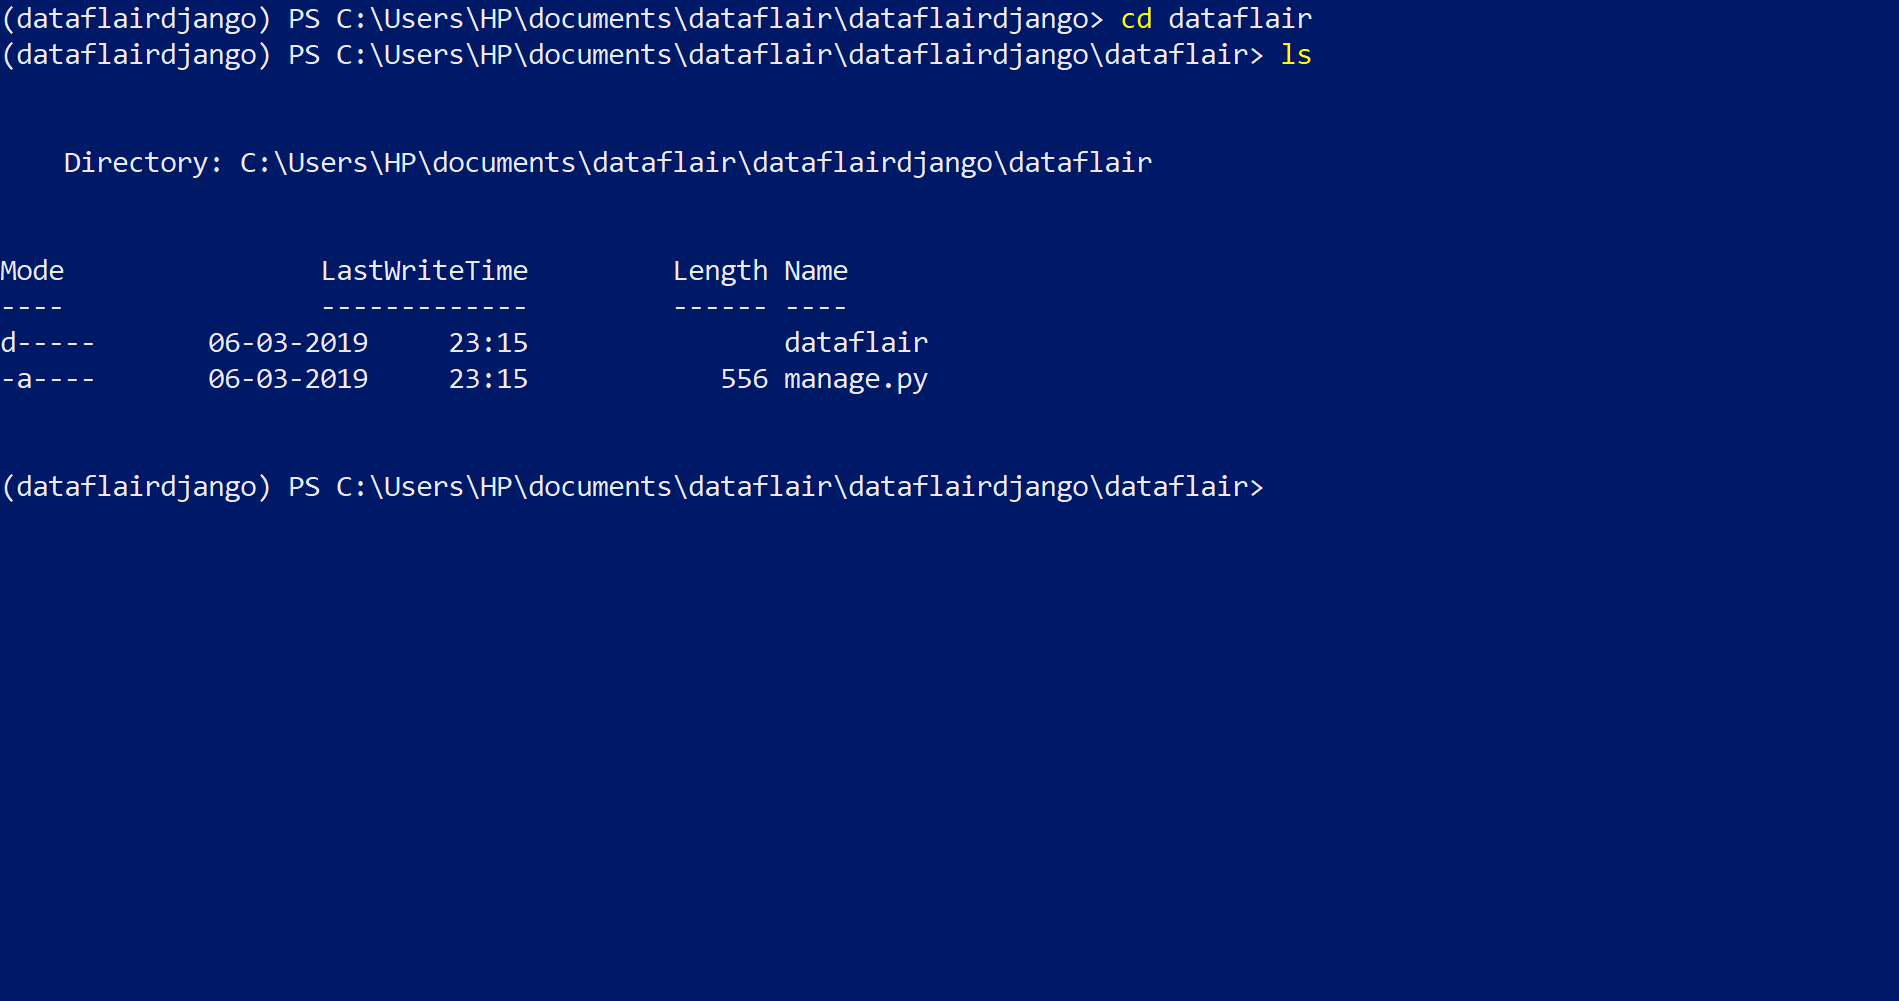
Just enter the directory of your project-name and you will need to run some the manage.py file there. This Django project tutorial will be showing you how you will be doing that.
In this image, you will see that when I executed the command and checked the directory again, I get a new directory of the project name in this case “dataflair”.
Running the Test Server
Django is so much handy you will really like it as it provides you with the inbuilt test server.
Django will change your habits of web development to the very core. It has given web-developers and test servers inside their pc where they can very easily run their Django projects. Thus, making the development process very fast and easy to use.
For testing the project, change your directory to the Django project directory and there you must see the manage.py file. It is because that is the control file which we will use to operate our project, every time and it’s very important.
Type this command:
python manage.py runserver
This command execution should look like this.
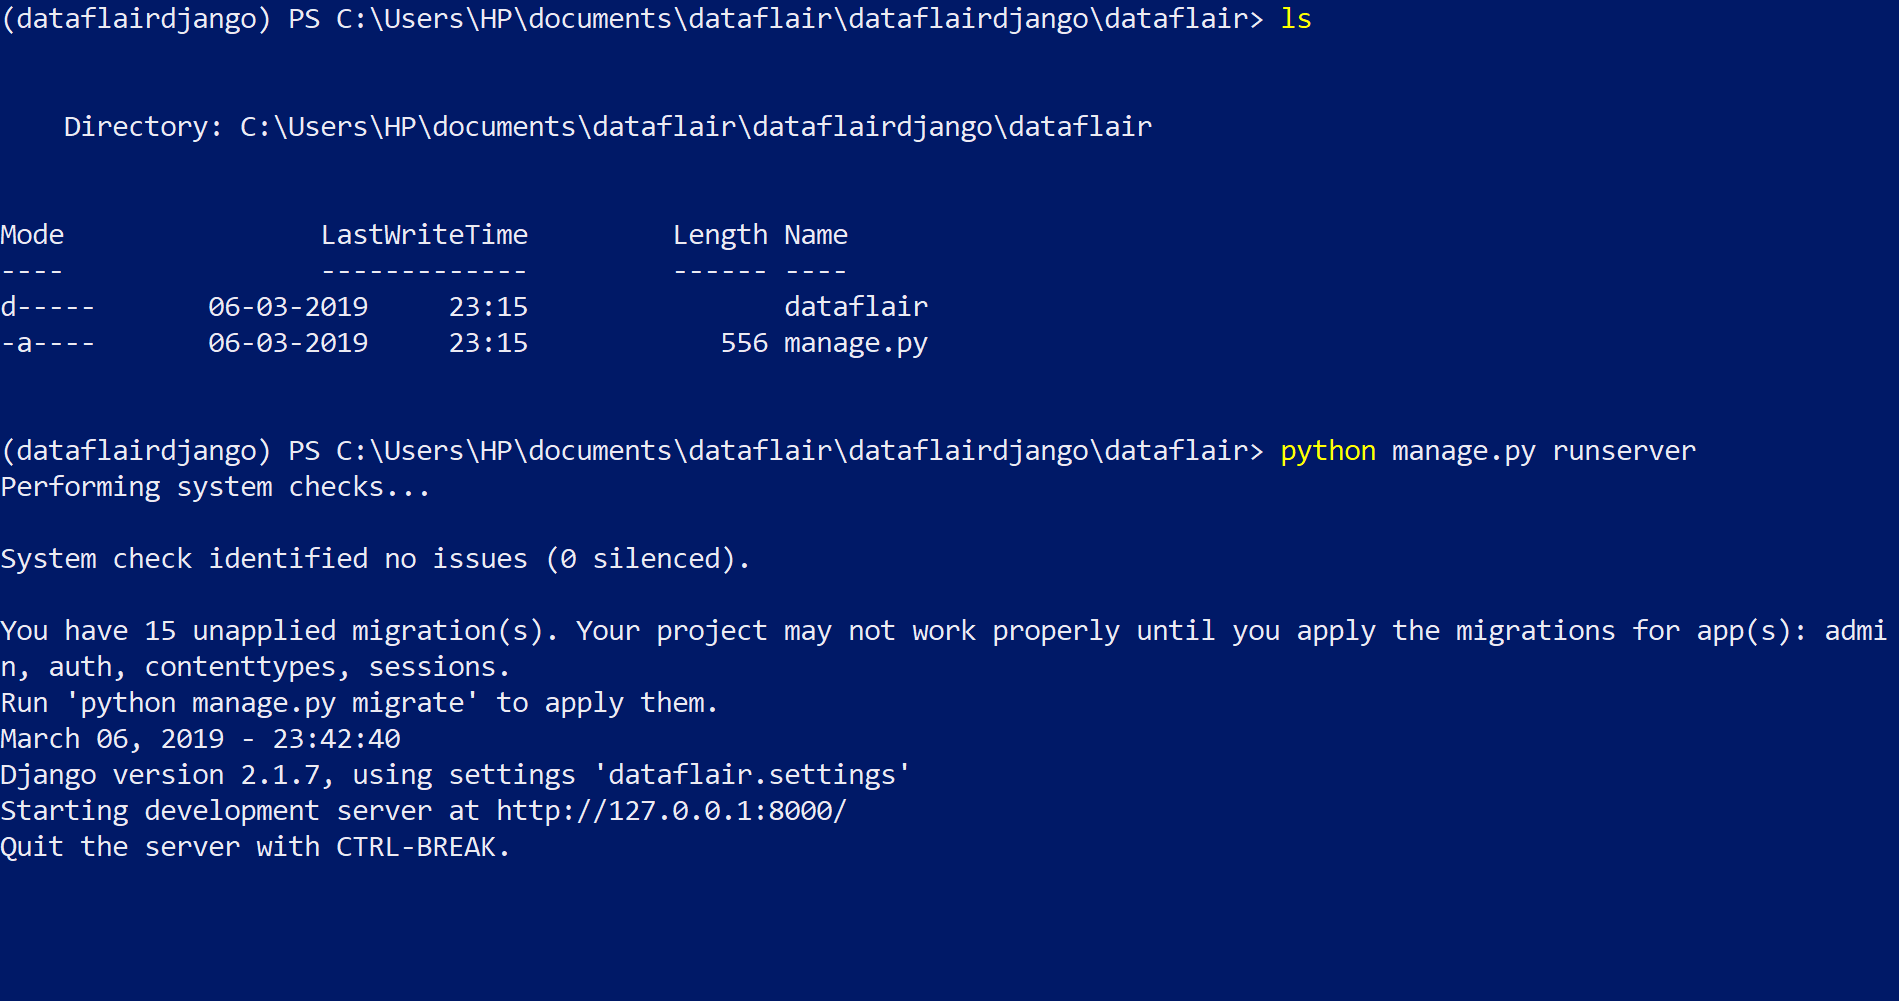
Now, you can run the server application, just go to your browser and type this in the url bar:
Localhost:8000
This is the test server page on the web browser, of course, we are doing the backend and we haven’t done any real work yet. We have just created a Django project and learned the process to run the server so that we will be able to deploy our project.

Summary
In this Django project tutorial, we learned how to create a project in Django and how to run the test server. These processes are just the basic aspects that you need to understand while working with Django.
However, we will also learn the other aspects related to the Django framework for creating an application in upcoming articles.
We will be developing several applications and understanding the Django architecture and file structure before we create our first app, it’s really fun and you will love to work on it.
We will be glad to hear from you, just enter your views or queries in the comment section below.
Did you know we work 24x7 to provide you best tutorials
Please encourage us - write a review on Google


how to open and create first project
Hello Raksha,
You can check the directory where you created your project. The name of the dircetory will be the same as project. Open that folder in IDE of your choice or text editors like VSCode, Sublime, Atom.
Hii
can i open the same directory in Pycharm?
Thanks for explained… I enjoy follow your tutorial and can’t wait to reach all the articles.
Excellent tutorials! I’m definitely reading all content. Thank you!
Edit- Please update that Capital P in Python manage.py runserver command to small p (python manage.py runserver). New users will not visit this site again if the command says “bash: Python: command not found”
Thankyou thankyou so much