Python Django Bookstore Management System Project
Master Python with 70+ Hands-on Projects and Get Job-ready - Learn Python
We offer you a brighter future with industry-ready online courses - Start Now!!
A Bookstore Management System is a software application designed to help bookstore owners and staff efficiently manage various aspects of their bookstore operations. It provides a centralized platform for handling inventory, sales, customer information, purchasing, and other essential tasks related to running a bookstore.
About Python Django Bookstore Management System
A Bookstore Management System aims to streamline operations by efficiently managing inventory, automating sales processes, and enhancing customer relationship management. It generates insights and reports for informed decision-making, increases operational efficiency, and facilitates integration with e-commerce platforms for online sales.
Prerequisite For Bookstore Management System Using Django
- Proficiency in the Python programming language and a comprehensive grasp of the Django web framework are essential requirements.
- A strong understanding of HTML, CSS, and JavaScript is required to develop the project’s user interface.
- Relational Database: You will need to have a good understanding of relational databases, such as SQLite, MySQL, or PostgreSQL, to create and manage the database for the Online voting system project.
Download Python Django Bookstore Management System
Please download the source code of Python Django Bookstore Management System App Project: Python Django Bookstore Management System Project Code.
Python Django Bookstore Management System Project Setup
Minimum system configuration:
- The operating system requirements include Windows 7 or later, macOS 10.11 or later, or a modern operating system.
- Linux distribution.
- Processor: Intel Core i3 or equivalent.
- RAM: 4 GB or more
- Disk Space: 5 GB or more.
- You have the flexibility to utilize browsers like Google Chrome, Mozilla Firefox, or Microsoft Edge for your browsing needs.
Visual Studio Code can be downloaded from the official website.
When accessing the download page, you have the option to choose the appropriate installer based on your operating system, be it Windows, macOS, or Linux. After downloading the installer, run it and proceed with the installation instructions to install VS Code on your computer.
Here’s a brief explanation of each step, along with the commands to execute:
1. To ensure Python is installed, please download and install the most recent version of Python from the official website. Follow the installation instructions provided for your specific operating system.
2. Install pip: Download the get-pip.py script and run python get-pip.py to install pip.
3. Create a virtual environment: Run python -m venv myenv to create a new virtual environment named ‘myenv’.
4. Activate the virtual environment: Run source myenv/bin/activate on Linux/Mac or myenv\Scripts\activate on Windows to activate the virtual environment.
5. Install Django: Run pip install django to install the latest stable version of Django.
6. Verify installation: Run python -m django –version to verify that Django is installed correctly.
7. Create a new Django project: Run django-admin startproject project to create a new Django project named ‘project’.
8. Start the development server: Run python manage.py runserver to start the development server.
That’s it! A working installation of Django should now be in place, and you should be ready to start building your web application.
Steps to Create “Bookstore Management System” Project – Let’s Move ahead with this amazing project.
1. Open the terminal from the folder where we want to create the project. Right click on mouse -> open in terminal -> write “code .” (space is mandatory between code and “.”)
2. Then go to the project folder -> urls.py and inside urls.py of project, do this -> add “include” in import as shown in the code below and add “path(“”,include(“app.urls”))”
3. Create urls.py in the app of Bookstore Management System project(urls.py is mandatory in both project and app).
4. In setting.py, add the ‘app name”.
5. Now runserver to check, if everything is working or not. If you see the below image, then we are done with the installation part. To runserver, run command in terminal as follows “py manage.py runserver”.
6. Now, create the models.py using the ORM technique as follows.
To create the above field in a database, run the following commands as follows:
● Py manage.py makemigrations
● Py manage.py migrate
The file structure will look like this for our project: `App(main) -> Templates -> app(folder inside app) -> registration.html, login.html, votingpage.html.
Now, execute the project step by step with code as follows:
Steps to Create Bookstore Management System Project – Let’s Move ahead with an amazing project:`
1. Open the terminal from the folder where we want to create the project. Right click on mouse -> open in terminal -> write “code .” (space is mandatory between code and “.”)
2. Then go to the project folder -> urls.py and inside urls.py of project, do this -> add “include” in import as shown in the code below and add “path(“”, include(“app.urls”))”
from django.db import models
from django.contrib.auth.models import User
# Create your models here.
class Book(models.Model):
    title = models.CharField(max_length=100)
    author = models.CharField(max_length=100)
    isbn = models.CharField(max_length=20)
    genre = models.CharField(max_length=50)
    price = models.CharField(max_length=50)
    user = models.ForeignKey(User, on_delete=models.CASCADE)

    def __str__(self):
        return self.title


class Genre(models.Model):
    name = models.CharField(max_length=50)

    def __str__(self):
        return self.name
The Book model has a ForeignKey field to the User model. This means that each book must be owned by a user.
3. Create data
templates/app -> add.html
<header>
    <h1>Bookstore Management System</h1>
  </header>
  <nav>
    <ul>
      {% if user.is_authenticated %}
      <li><a href="#">{{ user.username }}</a></li>
      {% endif %}
    </ul>
  </nav>
  <div class="container">
    <h2>Add Book</h2>
    <form action="{% url 'create_book' %}" method="post">
      {% csrf_token %}
      <label>Title:</label>
      <input type="text" id="title" name="title" required>

      <label>Author:</label>
      <input type="text" id="author" name="author" required>

      <label>ISBN:</label>
      <input type="text" id="isbn" name="isbn" required>

      <label>price:</label>
      <input type="text" id="price" name="price" required>

      <label for="genre">Genre:</label>
      <select id="genre" name="genre">
        <option value="fiction">Fiction</option>
        <option value="non-fiction">Non-Fiction</option>
        <option value="fantasy">Fantasy</option>
        <option value="mystery">Mystery</option>
      </select>
      <br><br>
      <input type="submit" value="Add Book">
    </form>
  </div>
Views.py
def create_book(request):
    if request.method == 'POST':
        title = request.POST.get('title')
        author = request.POST.get('author')
        isbn = request.POST.get('isbn')
        genre = request.POST.get('genre')
        price = request.POST.get('price')

        book = Book.objects.create(title=title, author=author, isbn=isbn, genre=genre, price=price, user=request.user)

        return redirect("show_book")
    else:
        return render(request, 'app/add.html')
The create_book view takes a request object as input and returns a redirect to the show_book view. The view first checks if the request method is POST. If the request method is POST, the view gets the title, author, ISBN, genre, and price from the POST request and creates a new book object. The view then redirects to the show_book view. If the request method is not POST, the view simply renders the add.html template.
4. Show data and search data
Templates/app -> home.html
<div class="container">
    <h2>Search Book</h2>
    <form method="get">
      <label for="search">Search:</label>
      <input type="text" id="search" name="search" placeholder="Enter book title or author">
      <br><br>
      <input type="submit" value="Search">
    </form>

    <h2>Book List</h2>
    <table>
      <tr>
        <th>Title</th>
        <th>Author</th>
        <th>ISBN</th>
        <th>Genre</th>
        <th>Price</th>
        <th></th>
      </tr>
      {% if queryset %}
      {% for item in queryset %}
      <tr>
        <td>{{item.title}}</td>
        <td>{{item.author}}</td>
        <td>{{item.isbn}}</td>
        <td>{{item.genre}}</td>
        <td>{{item.price}}</td>
        <td class="btn-container">
          <button ><a href="{% url 'delete' pk=item.pk %}" style="color: #fff;">Delete</a></button>
          <button><a href="{% url 'updated_data' pk=item.pk %}" style="color: #fff;">Update</a></button>
        </td>
      </tr>
      {% endfor %}
      {% endif %}
    </table>
  </div>
Views.py
def book_list(request):
    queryset = Book.objects.all()
    name = request.GET.get('search')

    if name:
        queryset = queryset.filter(title__icontains=name) | queryset.filter(author__icontains=name)

    return render(request, 'app/home.html', {'queryset': queryset, 'name': name})
The book_list view takes a request object as input and returns a rendered HTML template. The view first gets all the books from the database. If the user has entered a search query, the view then filters the books by title or author. The filtered books are then rendered to the HTML template.
5. Update and delete data
templates/app -> update.html
</nav>
  {% if updated_data %}
  <div class="container">
    <h2>Update Book</h2>
    <form action="{% url 'create_book' %}" method="post">
      {% csrf_token %}
      <label for="title">Title:</label>
      <input type="text" id="title" name="title" value="{{updated_data.title}}" required>

      <label for="author">Author:</label>
      <input type="text" id="author" name="author" value="{{updated_data.author}}" required>

      <label for="author">ISBN:</label>
      <input type="text" id="isbn" name="isbn" value="{{updated_data.isbn}}" required>

      <label>price:</label>
      <input type="text" id="price" name="price" value="{{updated_data.price}}" required>

      <label for="genre">Genre:</label>
      <select id="genre" name="genre">
        <option value="fiction">Fiction</option>
        <option value="non-fiction">Non-Fiction</option>
        <option value="fantasy">Fantasy</option>
        <option value="mystery">Mystery</option>
      </select>
      <br><br>
      <input type="submit" value="Add Book">
    </form>
  </div>
  {% endif %}
Views.py
def updated(request, pk):
updated_data = get_object_or_404(Book, pk=pk)
return render(request, "app/update.html", {"updated_data": updated_data})
def updated_book(request, pk):
updated_data = get_object_or_404(Book, pk=pk)
updated_data.title = request.POST.get("title")
updated_data.author = request.POST.get("author")
updated_data.isbn = request.POST.get("author")
updated_data.genre = request.POST.get("genre")
updated_data.price = request.POST.get("price")
updated_data.save()
return redirect("show_book")
def Delete_data(request, pk):
data = get_object_or_404(Book, pk=pk)
data.delete()
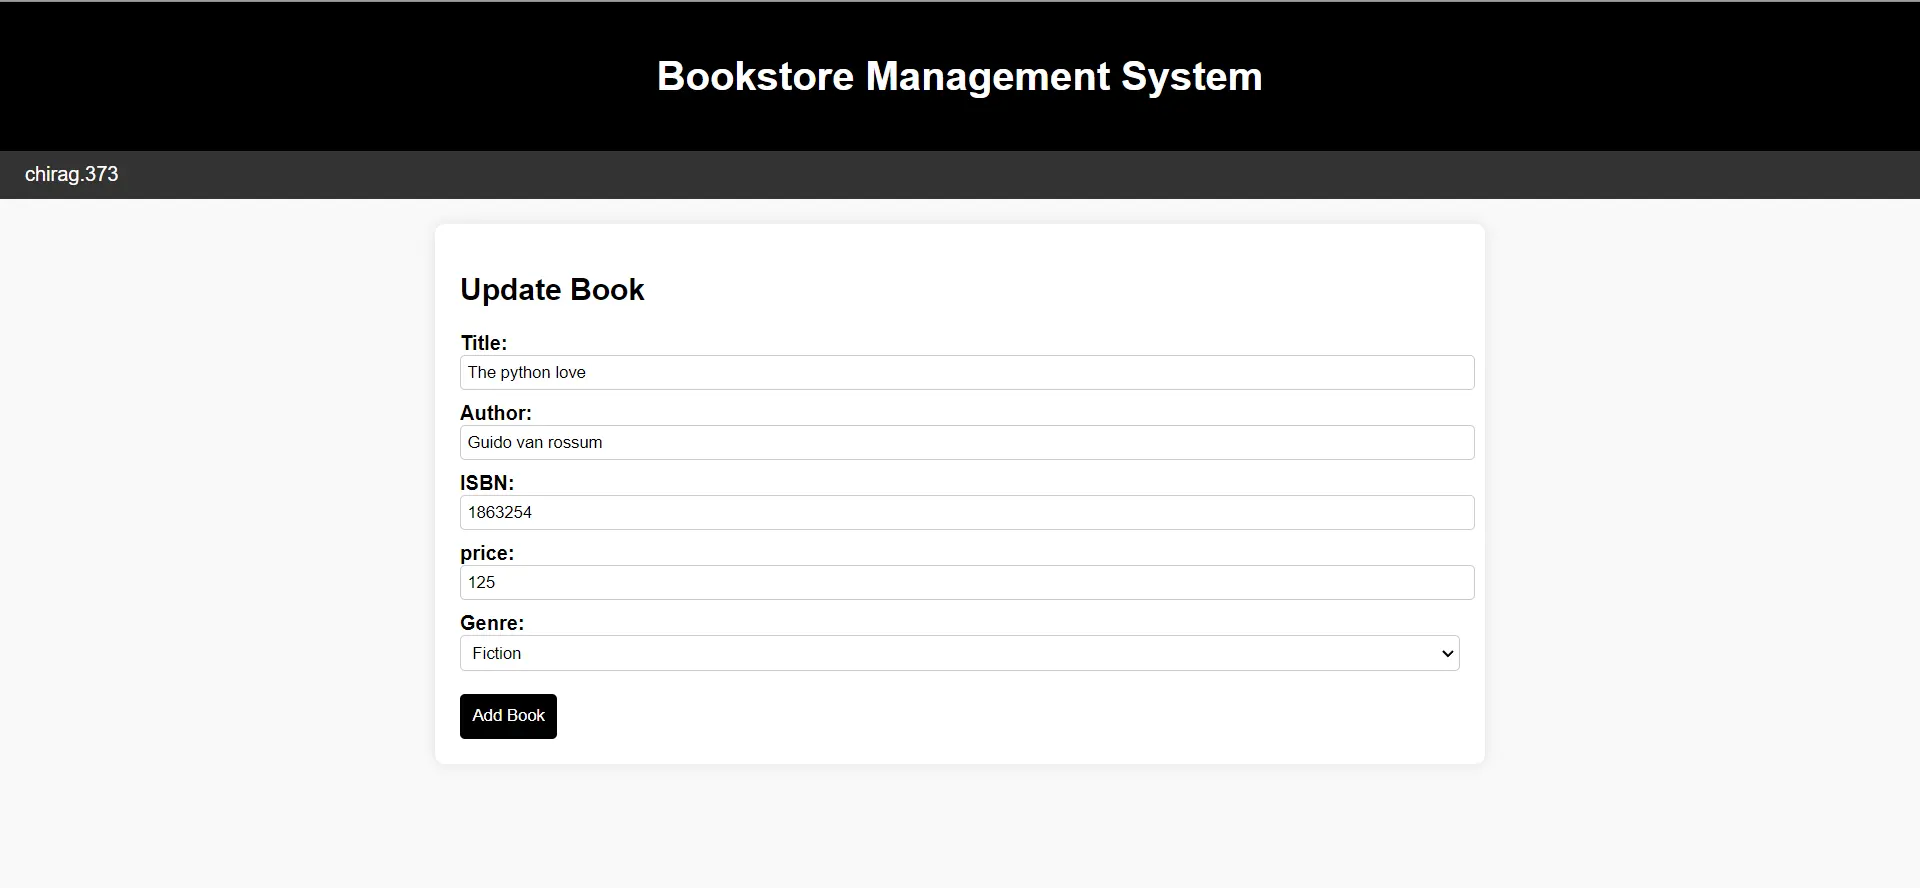
return redirect("show_book")The updated view takes a request object and the primary key of a book as input and returns a rendered update.html template. The view gets the book object with the given primary key and renders the template with the book object data.
The updated_book view takes a request object and the primary key of a book as input and updates the book object with the data from the POST request. The view then redirects to the show_book view.
`The Delete_data view takes a request object and the primary key of a book as input and deletes the book object. The view then redirects to the show_book vie
6. For signout process
Views.py
def signout(request):
    if User.is_authenticated:
        logout(request)
        return redirect("login")
    return
The signout view takes a request object as input and returns a redirect to the login view. The view first checks if the user is authenticated. If the user is authenticated, the view logs the user out and redirects to the login view. If the user is not authenticated, the view simply returns.
Urls.py for above:
from django.urls import path
from .views import *
urlpatterns = [
    path("home", Home, name="home"),
    path("register", Register, name="register"),
    path("registration", Registration, name="registration"),
    path("", Login_view, name="login"),
    path("logout", signout, name="logout"),
    path("create_book", create_book, name="create_book"),
    path("add", add, name="add"),
    path("show_book", book_list, name="show_book"),
    path("delete/<int:pk>", Delete_data, name="delete"),
    path("updated_data/<int:pk>", updated, name="updated_data"),
]
Explanation of above:
The provided code consists of views in a Django application for a bookstore management system. Let’s go through the code and understand how the logic works and how it is connected to the HTML templates.
1. The views in the code handle different functionalities of the bookstore management system, such as registration, login, book creation, book listing, book update, and book deletion.
2. Each view corresponds to a specific URL and is triggered when the user interacts with that URL.
3. The views interact with the HTML templates to render dynamic content and receive data from the user.
4. When a user visits a specific URL, the corresponding view function is executed.
5. The view functions perform necessary operations, such as retrieving data from the database, processing user input, and rendering HTML templates with the appropriate data.
6. The HTML templates are responsible for presenting the data and providing an interface for user interaction.
7. The views use the render function to render the HTML templates and pass data to the templates using context variables.
8. In the HTML templates, Django template tags and expressions are used to access and display the data passed from the views.
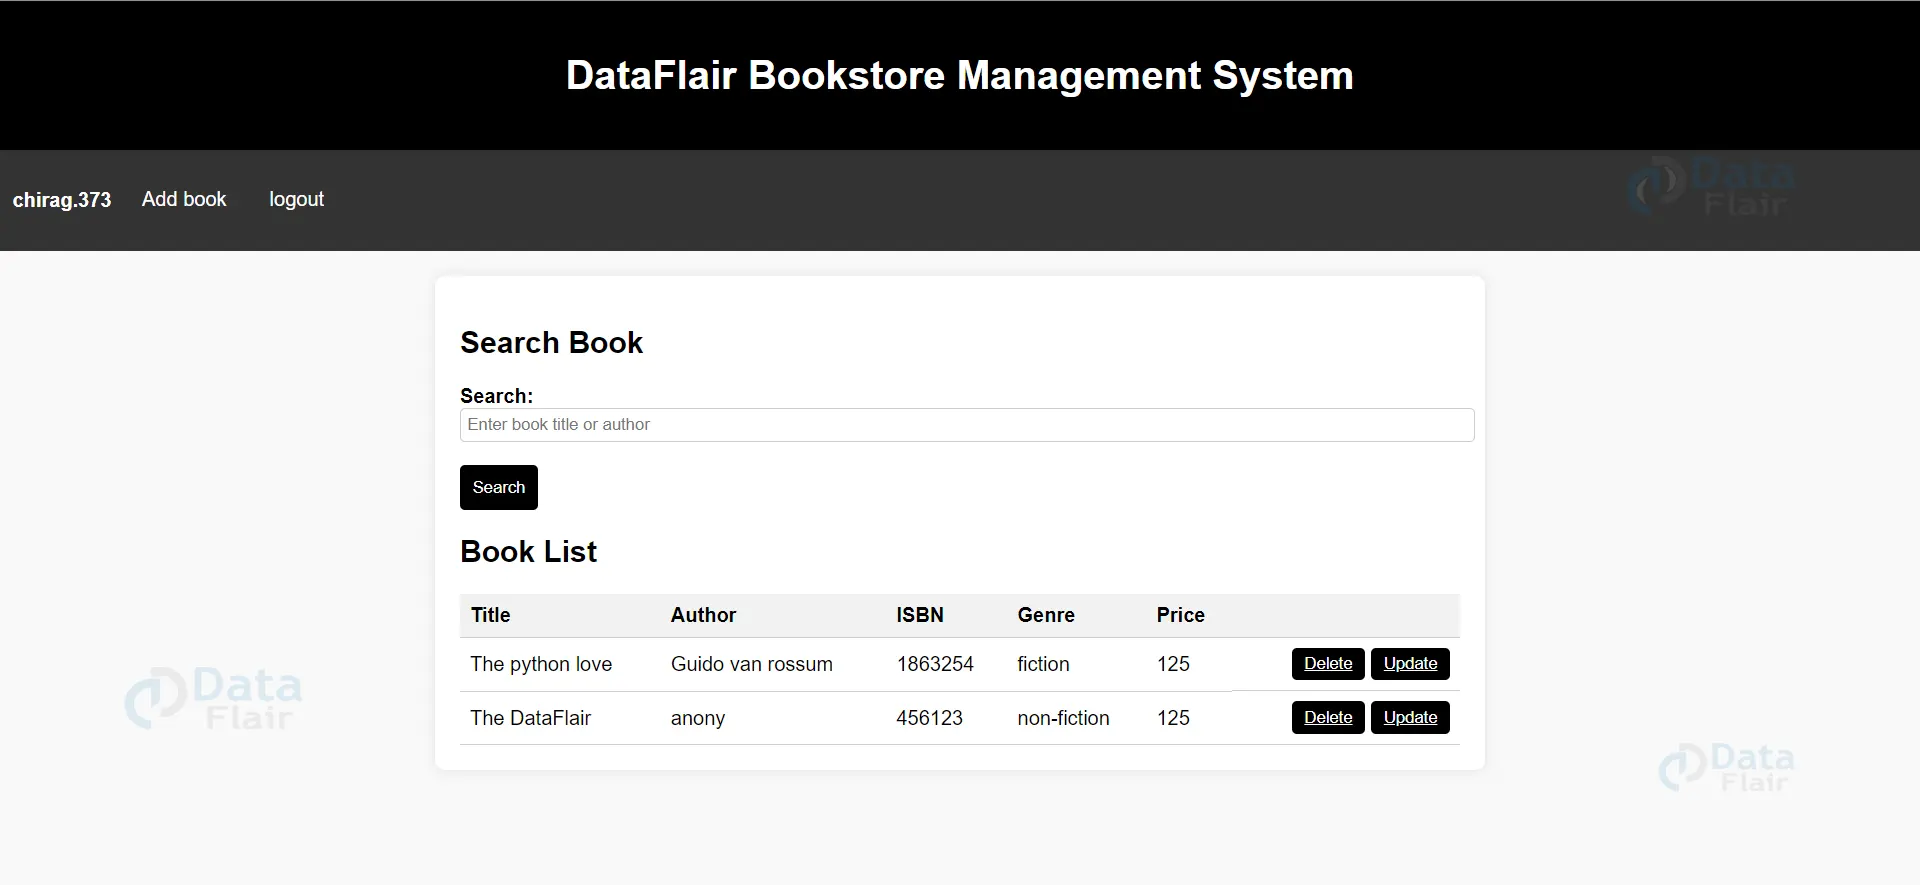
9. For example, in the book_list view, the book data is retrieved from the database and filtered based on the search query. The filtered queryset is then passed to the home.html template using the render function.
10. In the home.html template, the book data is accessed using Django template variables and displayed in an HTML table. The template additionally incorporates a search form, enabling users to input a search query and submit it to filter the list of books.
11. Similarly, other views and templates in the code follow a similar pattern, where the views handle the logic and data processing, and the templates handle the presentation of the data and user interaction.
Overall, the code establishes the connection between the views, which handle the application logic, and the HTML templates, which render the data and provide an interface for user interaction.
templates/app -> login.html
<!DOCTYPE html>
<html lang="en">
<head>
<meta charset="UTF-8">
<meta name="viewport" content="width=device-width, initial-scale=1.0">
<title>Login Page</title>
<style>
body {
background-color: #f9f9f9;
font-family: Arial, sans-serif;
}
.container {
max-width: 400px;
margin: 0 auto;
padding: 20px;
background-color: white;
border-radius: 8px;
box-shadow: 0px 0px 10px rgba(0, 0, 0, 0.1);
margin-top: 50px;
}
h2 {
text-align: center;
}
label, input {
display: block;
width: 100%;
margin-bottom: 10px;
}
input[type="submit"] {
background-color: #000;
color: #fff;
padding: 10px;
border: none;
border-radius: 4px;
cursor: pointer;
}
input[type="submit"]:hover {
background-color: #333;
}
</style>
</head>
<body>
<div class="container">
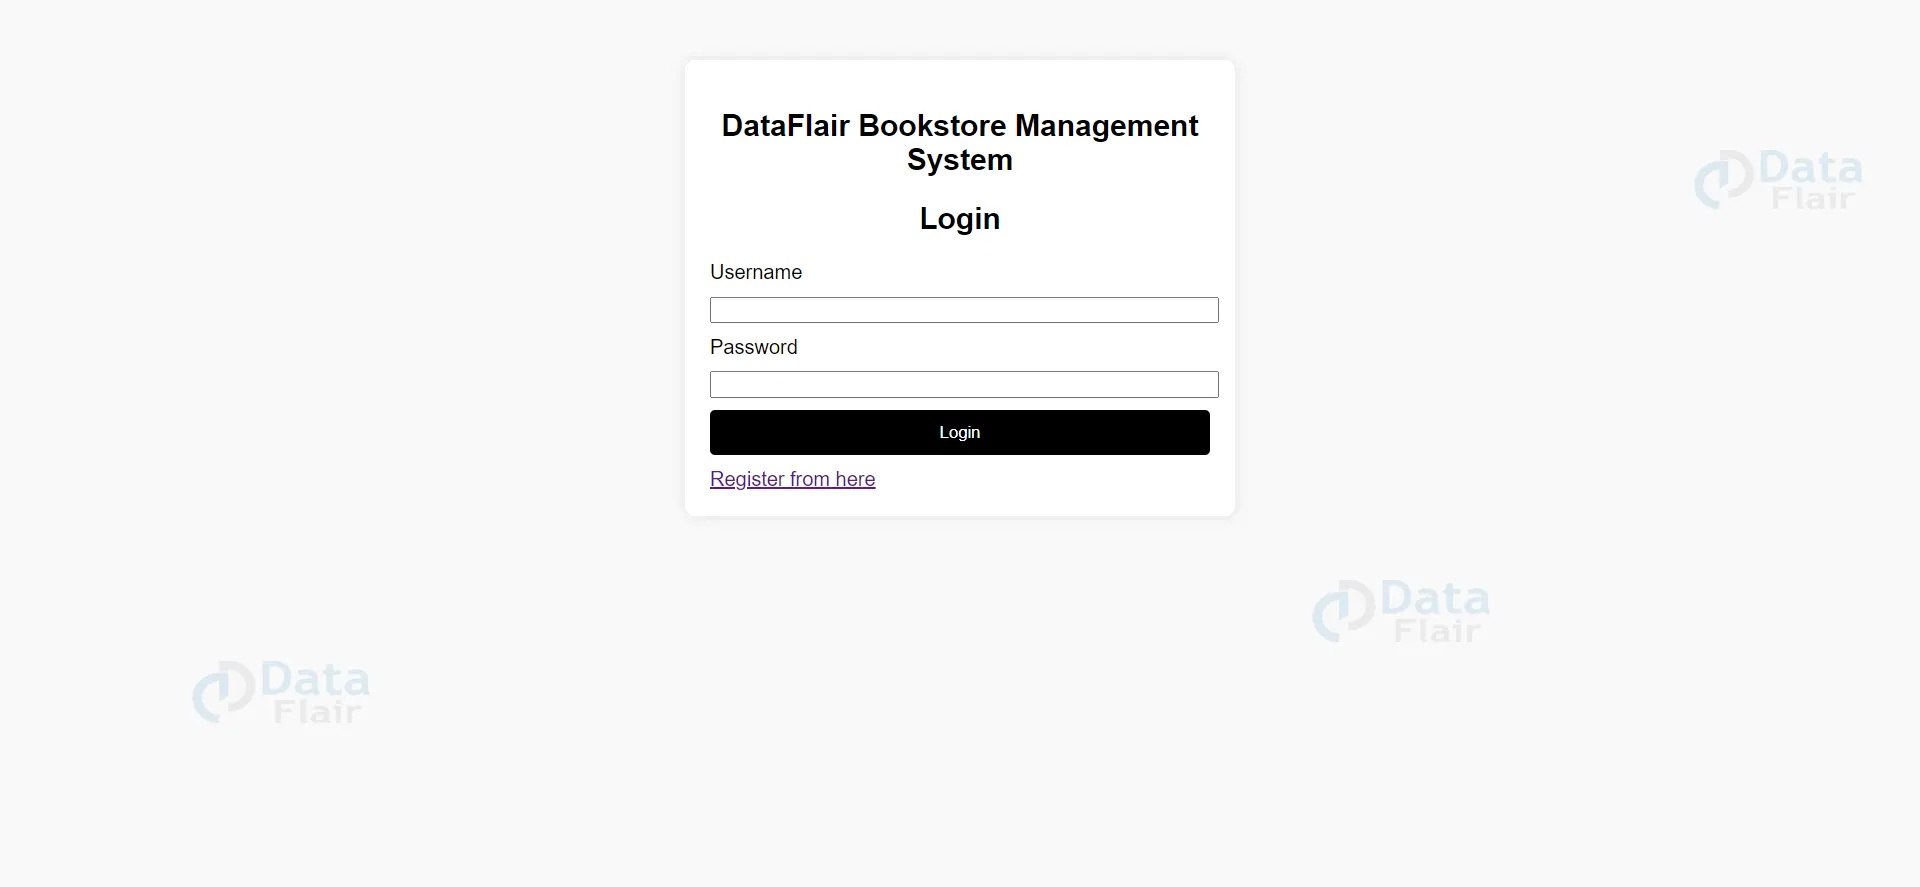
<h2>DataFlair Bookstore Management System</h2>
<h2>Login</h2>
<form action="{% url 'login' %}" method="post">
{% csrf_token %}
<label for="username">Username</label>
<input type="text" id="username" name="username" required>
<label for="password">Password</label>
<input type="password" id="password" name="password" required>
<input type="submit" value="Login">
</form>
<a href="{% url 'register' %}">Register from here</a>
</div>
</body>
</html>templates/app -> registration.html
<!DOCTYPE html>
<html lang="en">
<head>
<meta charset="UTF-8">
<meta name="viewport" content="width=device-width, initial-scale=1.0">
<title>Registration Page</title>
<style>
body {
background-color: #f9f9f9;
font-family: Arial, sans-serif;
}
.container {
max-width: 400px;
margin: 0 auto;
padding: 20px;
background-color: white;
border-radius: 8px;
box-shadow: 0px 0px 10px rgba(0, 0, 0, 0.1);
margin-top: 50px;
}
h2 {
text-align: center;
}
label, input {
display: block;
width: 100%;
margin-bottom: 10px;
}
input[type="submit"] {
background-color: #000;
color: #fff;
padding: 10px;
border: none;
border-radius: 4px;
cursor: pointer;
}
input[type="submit"]:hover {
background-color: #333;
}
</style>
</head>
<body>
<div class="container">
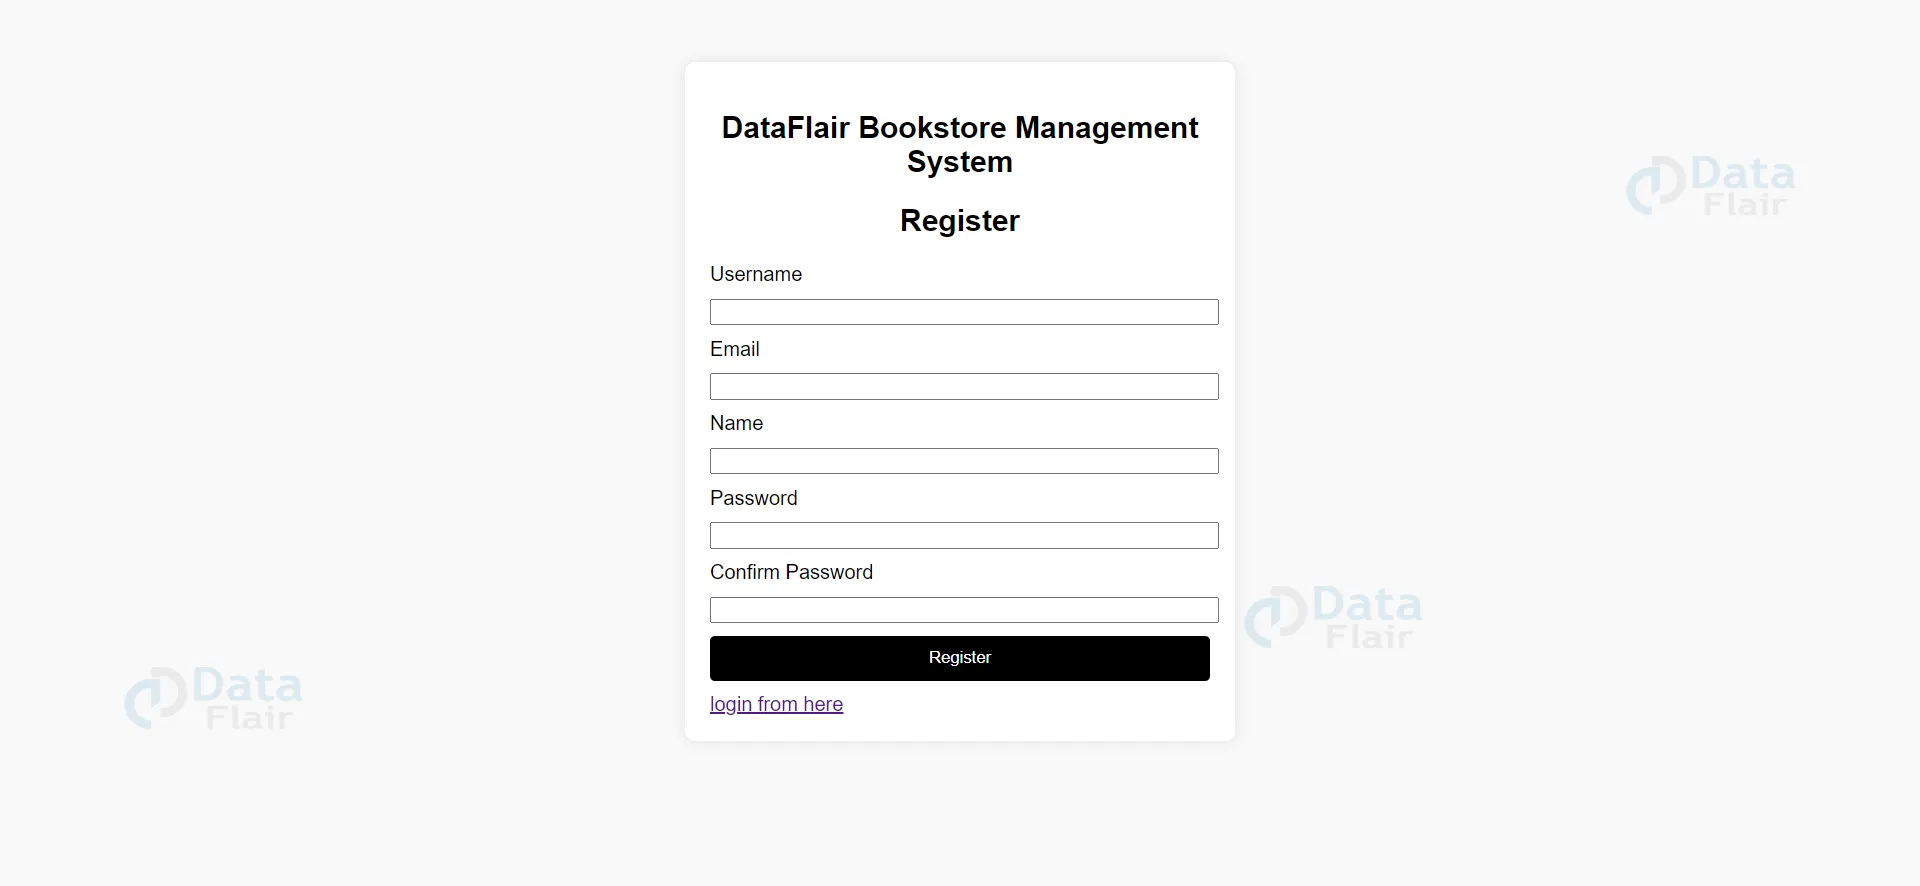
<h2>DataFlair Bookstore Management System</h2>
<h2>Register</h2>
<form action="{% url 'registration' %}" method="post">
{% csrf_token %}
<label for="username">Username</label>
<input type="text" id="username" name="username" required>
<label for="email">Email</label>
<input type="email" id="email" name="email" required>
<label for="name">Name</label>
<input type="text" id="name" name="name" required>
<label for="password">Password</label>
<input type="password" id="password" name="password" required>
<label for="confirm-password">Confirm Password</label>
<input type="password" id="confirm-password" name="confirm_password" required>
<input type="submit" value="Register">
</form>
<a href="{% url 'login' %}">login from here</a>
</div>
</body>
</html>templates/app -> home.html
<!DOCTYPE html>
<html lang="en">
<head>
  <meta charset="UTF-8">
  <meta name="viewport" content="width=device-width, initial-scale=1.0">
  <title>Bookstore Management System</title>
  <style>
    body {
      background-color: #f9f9f9;
      font-family: Arial, sans-serif;
      margin: 0;
      padding: 0;
    }
    header {
      background-color: #000;
      color: #fff;
      padding: 20px;
      text-align: center;
    }
    nav {
      background-color: #333;
      padding: 10px;
    }
    nav ul {
      list-style-type: none;
      margin: 0;
      padding: 0;
      overflow: hidden;
    }
    nav ul li {
      display: inline-block;
      margin-right: 10px;
    }
    nav ul li a {
      color: #fff;
      text-decoration: none;
      padding: 5px 10px;
    }
    nav ul li a:hover {
      background-color: #777;
    }
    .container {
      max-width: 800px;
      margin: 20px auto;
      padding: 20px;
      background-color: white;
      border-radius: 8px;
      box-shadow: 0px 0px 10px rgba(0, 0, 0, 0.1);
    }
    label {
      display: block;
      font-weight: bold;
      margin-top: 10px;
    }
    input[type="text"] {
      width: 100%;
      padding: 5px;
      border-radius: 4px;
      border: 1px solid #ccc;
    }
    input[type="submit"] {
      background-color: #000;
      color: #fff;
      padding: 10px;
      border: none;
      border-radius: 4px;
      cursor: pointer;
    }
    input[type="submit"]:hover {
      background-color: #333;
    }
    table {
      width: 100%;
      border-collapse: collapse;
    }
    table th, table td {
      padding: 8px;
      text-align: left;
      border-bottom: 1px solid #ccc;
    }
    table th {
      background-color: #f2f2f2;
    }
    .btn-container {
      display: flex;
      justify-content: flex-end;
    }
    .btn-container button {
      margin-left: 5px;
      background-color: #000;
      color: #fff;
      padding: 5px 10px;
      border: none;
      border-radius: 4px;
      cursor: pointer;
    }
    .btn-container button:hover {
      background-color: #333;
    }

  </style>
</head>
<body>
  <header>
    <h1>DataFlair Bookstore Management System</h1>
  </header>
  <nav>
    <ul>
      {% if user.is_authenticated %}
      <li style="color: #fff;"><h4>{{ user.username }}</h4></li>
      {% endif %}
      <li><a href="{% url 'add' %}">Add book</a></li>
      <li class="logout"><a href="{% url 'logout' %}">logout</a></li>
    </ul>
  </nav>
  <div class="container">
    <h2>Search Book</h2>
    <form method="get">
      <label for="search">Search:</label>
      <input type="text" id="search" name="search" placeholder="Enter book title or author">
      <br><br>
      <input type="submit" value="Search">
    </form>

    <h2>Book List</h2>
    <table>
      <tr>
        <th>Title</th>
        <th>Author</th>
        <th>ISBN</th>
        <th>Genre</th>
        <th>Price</th>
        <th></th>
      </tr>
      {% if queryset %}
      {% for item in queryset %}
      <tr>
        <td>{{item.title}}</td>
        <td>{{item.author}}</td>
        <td>{{item.isbn}}</td>
        <td>{{item.genre}}</td>
        <td>{{item.price}}</td>
        <td class="btn-container">
          <button ><a href="{% url 'delete' pk=item.pk %}" style="color: #fff;">Delete</a></button>
          <button><a href="{% url 'updated_data' pk=item.pk %}" style="color: #fff;">Update</a></button>
        </td>
      </tr>
      {% endfor %}
      {% endif %}
    </table>
  </div>
</body>
</html>
templates/app -> update.html
<!DOCTYPE html>
<html lang="en">
<head>
  <meta charset="UTF-8">
  <meta name="viewport" content="width=device-width, initial-scale=1.0">
  <title>Bookstore Management System - Add Book</title>
  <style>
    body {
      background-color: #f9f9f9;
      font-family: Arial, sans-serif;
      margin: 0;
      padding: 0;
    }
    header {
      background-color: #000;
      color: #fff;
      padding: 20px;
      text-align: center;
    }
    nav {
      background-color: #333;
      padding: 10px;
    }
    nav ul {
      list-style-type: none;
      margin: 0;
      padding: 0;
      overflow: hidden;
    }


nav ul li {
      display: inline-block;
      margin-right: 10px;
    }
    nav ul li a {
      color: #fff;
      text-decoration: none;
      padding: 5px 10px;
    }
    nav ul li a:hover {
      background-color: #777;
    }
    .container {
      max-width: 800px;
      margin: 20px auto;
      padding: 20px;
      background-color: white;
      border-radius: 8px;
      box-shadow: 0px 0px 10px rgba(0, 0, 0, 0.1);
    }
    label {
      display: block;
      font-weight: bold;
      margin-top: 10px;
    }
    input[type="text"], select {
      width: 100%;
      padding: 5px;
      border-radius: 4px;
      border: 1px solid #ccc;
    }
    input[type="submit"] {
      background-color: #000;
      color: #fff;
      padding: 10px;
      border: none;
      border-radius: 4px;
      cursor: pointer;
    }
    input[type="submit"]:hover {
      background-color: #333;
    }
  </style>
</head>
<body>
  <header>


<h1>Bookstore Management System</h1>
  </header>
  <nav>
    <ul>


     {% if user.is_authenticated %}
      <li><a href="#">{{ user.username }}</a></li>
      {% endif %}
    </ul>
  </nav>
  {% if updated_data %}
  <div class="container">
    <h2>Update Book</h2>
    <form action="{% url 'create_book' %}" method="post">
      {% csrf_token %}
      <label for="title">Title:</label>
      <input type="text" id="title" name="title" value="{{updated_data.title}}" required>

      <label for="author">Author:</label>
      <input type="text" id="author" name="author" value="{{updated_data.author}}" required>

      <label for="author">ISBN:</label>
      <input type="text" id="isbn" name="isbn" value="{{updated_data.isbn}}" required>

      <label>price:</label>
      <input type="text" id="price" name="price" value="{{updated_data.price}}" required>

      <label for="genre">Genre:</label>
      <select id="genre" name="genre">
        <option value="fiction">Fiction</option>
        <option value="non-fiction">Non-Fiction</option>
        <option value="fantasy">Fantasy</option>
        <option value="mystery">Mystery</option>
      </select>
      <br><br>
      <input type="submit" value="Add Book">
    </form>
  </div>
  {% endif %}
</body>
</html
templates/app -> add.html
<!DOCTYPE html>
<html lang="en">
<head>
  <meta charset="UTF-8">
  <meta name="viewport" content="width=device-width, initial-scale=1.0">
  <title>Bookstore Management System - Add Book</title>
  <style>
    body {
      background-color: #f9f9f9;
      font-family: Arial, sans-serif;
      margin: 0;
      padding: 0;
    }
    header {
      background-color: #000;
      color: #fff;
      padding: 20px;
      text-align: center;
    }
    nav {
      background-color: #333;
      padding: 10px;
    }
    nav ul {
      list-style-type: none;
      margin: 0;
      padding: 0;
      overflow: hidden;
    }
    nav ul li {
      display: inline-block;
      margin-right: 10px;
    }
    nav ul li a {
      color: #fff;
      text-decoration: none;
      padding: 5px 10px;
    }
    nav ul li a:hover {
      background-color: #777;
    }
    .container {
      max-width: 800px;
      margin: 20px auto;
      padding: 20px;
      background-color: white;
      border-radius: 8px;
      box-shadow: 0px 0px 10px rgba(0, 0, 0, 0.1);
    }
    label {
      display: block;
      font-weight: bold;
      margin-top: 10px;
    }
    input[type="text"], select {
      width: 100%;
      padding: 5px;
      border-radius: 4px;
      border: 1px solid #ccc;
    }
    input[type="submit"] {
      background-color: #000;
      color: #fff;
      padding: 10px;
      border: none;
      border-radius: 4px;
      cursor: pointer;
    }
    input[type="submit"]:hover {
      background-color: #333;
    }
  </style>
</head>
<body>
  <header>
    <h1>Bookstore Management System</h1>
  </header>
  <nav>
    <ul>
      {% if user.is_authenticated %}
      <li><a href="#">{{ user.username }}</a></li>
      {% endif %}
    </ul>
  </nav>
  <div class="container">
    <h2>Add Book</h2>
    <form action="{% url 'create_book' %}" method="post">
      {% csrf_token %}
      <label>Title:</label>
      <input type="text" id="title" name="title" required>

      <label>Author:</label>
      <input type="text" id="author" name="author" required>

      <label>ISBN:</label>
      <input type="text" id="isbn" name="isbn" required>

      <label>price:</label>
      <input type="text" id="price" name="price" required>

      <label for="genre">Genre:</label>
      <select id="genre" name="genre">
        <option value="fiction">Fiction</option>
        <option value="non-fiction">Non-Fiction</option>
        <option value="fantasy">Fantasy</option>
        <option value="mystery">Mystery</option>
      </select>
      <br><br>
      <input type="submit" value="Add Book">
    </form>
  </div>
</body>
</html
Python Django Bookstore Management System Output
Summary:
The Bookstore Management System is a Django-based application aimed at efficiently managing bookstore operations. It enables users to register, login, and perform tasks like adding, updating, and deleting books. The system provides search functionality to filter and display books based on title or author. It streamlines inventory management, enhances customer experience, and facilitates efficient sales processes.
Your 15 seconds will encourage us to work even harder
Please share your happy experience on Google


