Create a Blog Application with Python Django
Master Python with 70+ Hands-on Projects and Get Job-ready - Learn Python
Expert-led Courses: Transform Your Career – Enroll Now
Let us develop a Blog Application using Django and let others post beautiful blogs on it. Here the users will also be able to post comments on any blog. This is a very useful and popular project in Django.
About the Blog Application:
A blog is basically an informational or discussion website. Logged in users can post blogs on any subject or topic that they find interesting so that everyone could see it.
Django Blog Application Project:
The objective of the project is to implement a blog web-based application where the users will post useful and informative blogs. Basic knowledge of the front-end part and a good knowledge of Django is required to complete and understand the project.
Django Blog Project Prerequisites
This project requires a good knowledge of programming both in front-end and back-end.
Download Blog Application Django Code
Please download the source code of python django blog app from the following link: Blog Python Django Project
Project File Structure
First, let’s check the steps to build the Blog Application in Python Django Framework:
1. First of all, we start a project in Django with an app inside it.
2. Then create the required folders for templates, static files (images, javascript and css files) and media (images uploaded through backend)
3. Finally, creating the required urls and views.
Let’s start.
1. First of all we create a base.html file in templates folder which will contain the basic design that is required on all pages that is the navigation bar. Then we can extend this file on all the html pages :
<nav class="navbar navbar-expand-lg navbar-dark bg-dark">
       <div class="container-fluid">
         <a class="navbar-brand" href="#">DataFlair Blogs</a>
         <button class="navbar-toggler" type="button" data-bs-toggle="collapse" data-bs-target="#navbarSupportedContent" aria-controls="navbarSupportedContent" aria-expanded="false" aria-label="Toggle navigation">
           <span class="navbar-toggler-icon"></span>
         </button>
         <div class="collapse navbar-collapse" id="navbarSupportedContent">
         <div class="container mx-3">
           <ul class="navbar-nav me-auto mb-2 mb-lg-0">
             <li class="nav-item">
               <a class="nav-link {% block homeactive %} {% endblock homeactive %}" aria-current="page" href="/">Home</a>
             </li>
             {% if user.is_authenticated %}
             <li class="nav-item">
               <a class="nav-link {% block add_blogs_active %} {% endblock add_blogs_active %}" href="/add_blogs/">Add Blogs</a>
             </li>
             <li class="nav-item">
               <a class="nav-link active" href="#">Hello {{request.user}}</a>
             </li>
             <li class="nav-item">
               <a class="nav-link {% block profileactive %} {% endblock profileactive %}" href="/profile/">Profile</a>
             </li>
             <li class="nav-item">
               <a class="nav-link" href="/logout/">Logout</a>
             </li>
             {% else %}
             <li class="nav-item">
               <a class="nav-link {% block registeractive %} {% endblock registeractive %}" href="/register/">Register</a>
             </li>
              <li class="nav-item">
               <a class="nav-link {% block loginactive %} {% endblock loginactive %}" href="/login/">Login</a>
             </li>
             {% endif %}
           </ul>
           </div>
           <form class="d-flex">
             <input class="form-control me-2" type="search" placeholder="Search" aria-label="Search">
             <button class="btn btn-outline-success" type="submit">Search</button>
           </form>
         </div>
       </div>
     </nav>
Code Explanation:
The above code is for the navigation bar which would be in use on all the html pages of the project. If the user is not logged in then the user will be getting the options of register and login whereas if the user is logged in then the user can see the options of add blogs, profile and logout.
Models.py
from django.db import models
from django.contrib.auth.models import User
from django.urls import reverse
from django.utils.timezone import now


class Profile(models.Model):
    user = models.OneToOneField(User, on_delete=models.CASCADE, blank=True, null=True)
    image = models.ImageField(upload_to="profile_pics", blank=True, null=True)
    bio = models.TextField(blank=True, null=True)
    facebook = models.CharField(max_length=300, blank=True, null=True)
    instagram = models.CharField(max_length=300, blank=True, null=True)
    linkedin = models.CharField(max_length=300, blank=True, null=True)

    def __str__(self):
        return str(self.user)

class BlogPost(models.Model):
    title=models.CharField(max_length=255)
    author= models.ForeignKey(User, on_delete=models.CASCADE)
    slug=models.CharField(max_length=130)
    content=models.TextField()
    image = models.ImageField(upload_to="profile_pics", blank=True, null=True)
    dateTime=models.DateTimeField(auto_now_add=True)

    def __str__(self):
        return str(self.author) +  " Blog Title: " + self.title

    def get_absolute_url(self):
        return reverse('blogs')

class Comment(models.Model):
    user = models.ForeignKey(User, on_delete=models.CASCADE)
    content = models.TextField()
    blog = models.ForeignKey(BlogPost, on_delete=models.CASCADE)
    parent_comment = models.ForeignKey('self', on_delete=models.CASCADE, null=True, blank=True)
    dateTime=models.DateTimeField(default=now)

    def __str__(self):
        return self.user.username +  " Comment: " + self.content
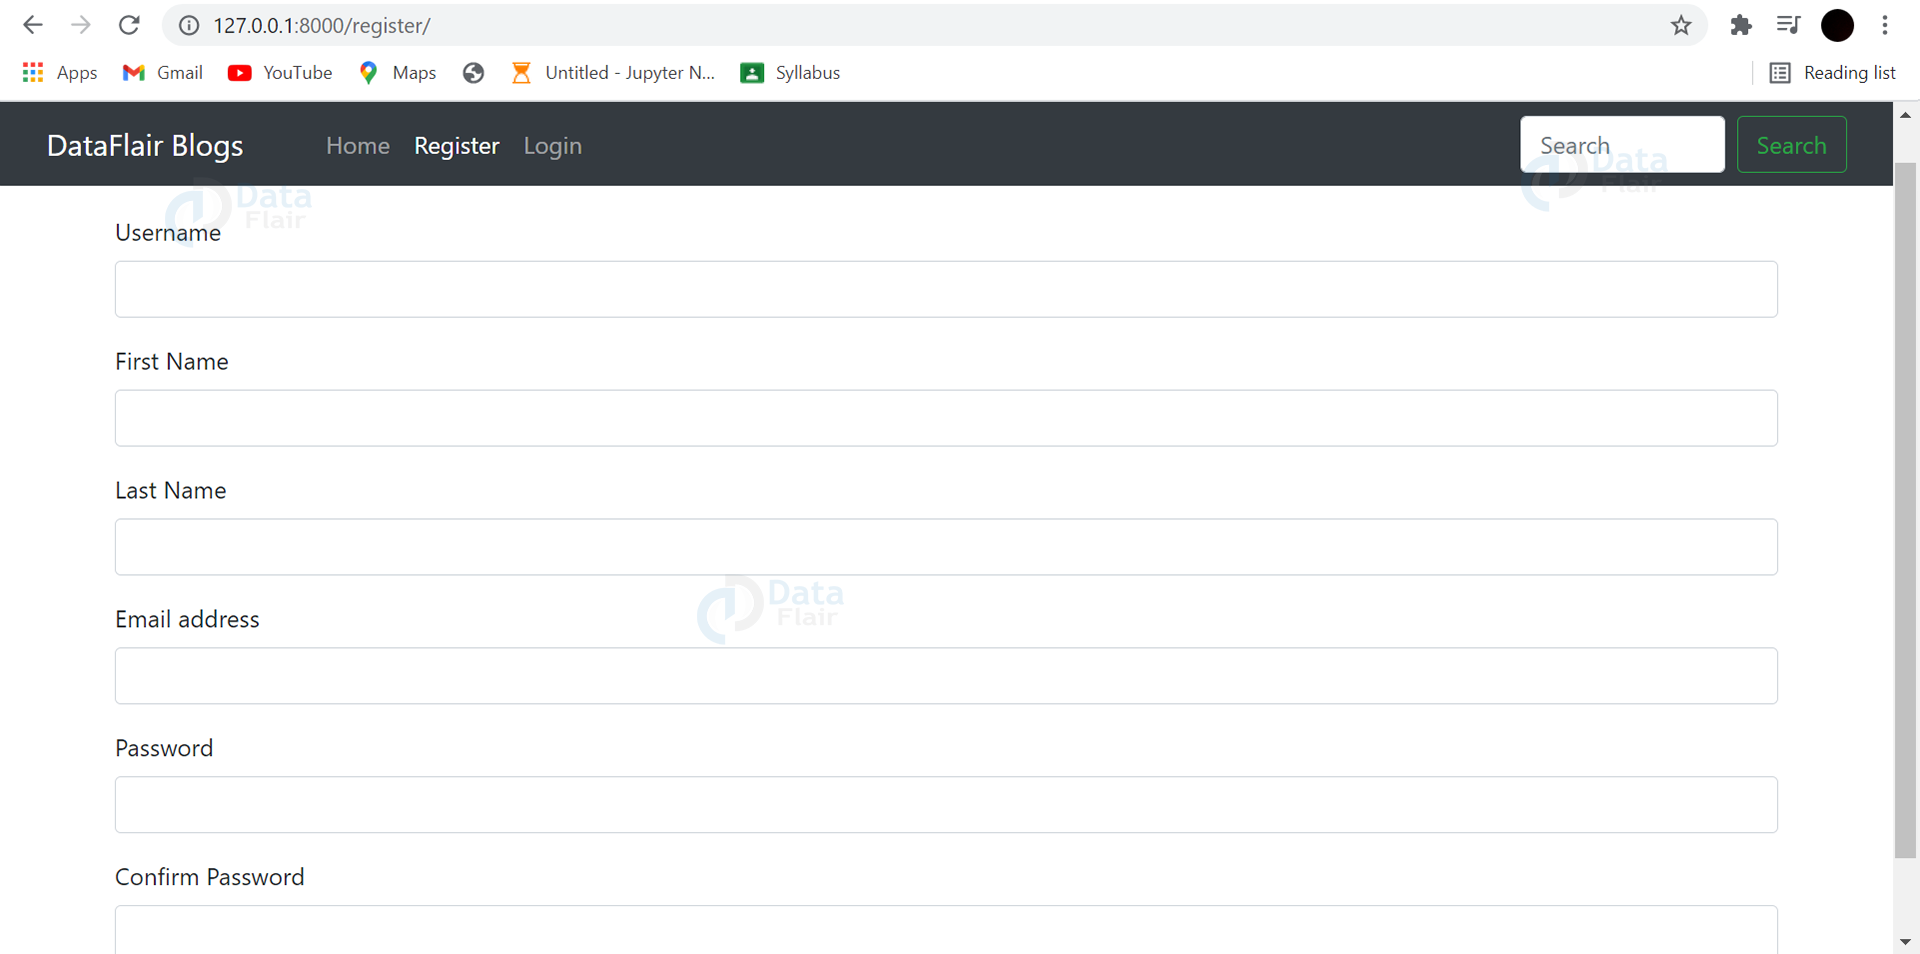
2. Then we create the user registration page (register.html):
<form action="/register/" method="POST"> {% csrf_token %}
    <div class="container mt-5">
        <div class="mb-3">
            <label for="username" class="form-label">Username</label>
            <input type="text" class="form-control" id="username" name="username">
        </div>
        <div class="mb-3">
            <label for="first_nam" class="form-label">First Name</label>
            <input type="text" class="form-control" id="first_name" name="first_name">
        </div>
        <div class="mb-3">
            <label for="last_name" class="form-label">Last Name</label>
            <input type="text" class="form-control" id="last_name" name="last_name">
        </div>
        <div class="mb-3">
            <label for="email" class="form-label">Email address</label>
            <input type="email" class="form-control" id="email" name="email">
        </div>
        <div class="mb-3">
            <label for="password1" class="form-label">Password</label>
            <input type="password" class="form-control" id="password1" name="password1">
        </div>
        <div class="mb-3">
            <label for="password2" class="form-label">Confirm Password</label>
            <input type="password" class="form-control" id="password2" name="password2">
        </div>
        <button type="submit" class="btn btn-primary">Submit</button>
    </div>
</form>
Views.py :
def Register(request):
    If request.method=="POST":
        username = request.POST['username']
        email = request.POST['email']
        first_name=request.POST['first_name']
        last_name=request.POST['last_name']
        password1 = request.POST['password1']
        password2 = request.POST['password2']

        if password1 != password2:
            messages.error(request, "Passwords do not match.")
            return redirect('/register')

        user = User.objects.create_user(username, email, password1)
        user.first_name = first_name
        user.last_name = last_name
        user.save()
        return render(request, 'login.html')
    return render(request, "register.html")
Code Explanation:
As we know, while registering a new user the fields username, email, first name, last name, password and confirm password are taken as input. Then these details are stored in the user model using the POST request.
3. Then we create the user login page (login.html) :
<form action="/login/" method="POST"> {% csrf_token %}
  <div class="container mt-5">
  <div class="mb-3">
    <label for="username" class="form-label">Username</label>
    <input type="text" class="form-control" id="username" name="username">
  </div>
  <div class="mb-3">
    <label for="password" class="form-label">Password</label>
    <input type="password" class="form-control" id="password" name="password">
  </div>
  <br>
  <button type="submit" class="btn btn-primary">Submit</button>
</div>
</form>
Views.py :
def Login(request):
    if request.method=="POST":
        username = request.POST['username']
        password = request.POST['password']

        user = authenticate(username=username, password=password)

        if user is not None:
            login(request, user)
            messages.success(request, "Successfully Logged In")
            return redirect("/")
        else:
            messages.error(request, "Invalid Credentials")
        return render(request, 'blog.html')
    return render(request, "login.html")
Code Explanation :
In the login page the username and password is taken as the input from the users and matched with the database using Django built in function authenticate(). If the logged in credentials are correct then the user gets redirected to the home page else error message that is Invalid Credentials will get displayed.
4. Then we create the profile page of the user after the user is logged in (profile.html) :
<div class="container profile">
        <div class="row">
            <div class="col-md-4">
                <div class="profile-img">
                    {% if user.profile.image %}
                    <img src="{{user.profile.image.url}}" alt="" width="310px" height="270px">
                    {% endif %}
                </div>
            </div>
            <div class="col-md-8">
                <div class="profile-tab">
                    <div class="tab-pane">
                        <br><br>
                        <div class="row">
                            <div class="col-md-6">
                                <label>Username:</label>
                            </div>
                            <div class="col-md-6">
                                <p>{{user}}</p>
                            </div>
                        </div>
                        <div class="row">
                            <div class="col-md-6">
                                <label>Full Name:</label>
                            </div>
                            <div class="col-md-6">
                                <p>{{user.get_full_name}}</p>
                            </div>
                        </div>
                        <div class="row">
                            <div class="col-md-6">
                                <label>Email:</label>
                            </div>
                            <div class="col-md-6">
                                <p>{{user.email}}</p>
                            </div>
                        </div>
                        {% if user.profile.phone_no %}
                        <div class="row">
                            <div class="col-md-6">
                                <label>Phone Number:</label>
                            </div>
                            <div class="col-md-6">
                                <p>{{user.profile.phone_no}}</p>
                            </div>
                        </div>
                        {% endif %}
                        {% if user.profile.bio %}
                        <div class="row">
                            <div class="col-md-6">
                                <label>Bio:</label>
                            </div>
                            <div class="col-md-6">
                                <p>{{user.profile.bio}}</p>
                            </div>
                        </div>
                        {% endif %}
                        {% if user.profile.linkedin %}
                        <div class="row">
                            <div class="col-md-6">
                                <label>Linkedin:</label>
                            </div>
                            <div class="col-md-6">
                                <p><a href="{{user.profile.linkedin}}">{{user.profile.linkedin}}</a></p>
                            </div>
                        </div>
                        {% endif %}
                        {% if user.profile.instagram %}
                        <div class="row">
                            <div class="col-md-6">
                                <label>Instagram:</label>
                            </div>
                            <div class="col-md-6">
                                <p><a href="{{user.profile.instagram}}">{{user.profile.instagram}}</a></p>
                            </div>
                        </div>
                        {% endif %}
                        {% if user.profile.facebook %}
                        <div class="row">
                            <div class="col-md-6">
                                <label>Facebook:</label>
                            </div>
                            <div class="col-md-6">
                                <p><a href="{{user.profile.facebook}}">{{user.profile.facebook}}</a></p>
                            </div>
                        </div>
                        {% endif %}
                    </div>
                    <a href="/edit_profile/" class="btn btn-secondary">Edit Profile</a>
                </div>
            </div>
</div>
</div>
Views.py :
def Profile(request):
    return render(request, "profile.html")
For editing the profile page: (edit_profile.html)
<form action="/edit_profile/" enctype="multipart/form-data" method="POST"> {% csrf_token %}
    <div class="container mt-3">
   {{ form.as_p }}
        <button type="submit" class="btn btn-primary">Update</button>
    </div>
</form>
Views.py :
def edit_profile(request):
    try:
        profile = request.user.profile
    except Profile.DoesNotExist:
        profile = Profile(user=request.user)
    if request.method=="POST":
        form = ProfileForm(data=request.POST, files=request.FILES, instance=profile)
        if form.is_valid():
            form.save()
            alert = True
            return render(request, "edit_profile.html", {'alert':alert})
    else:
        form=ProfileForm(instance=profile)
    return render(request, "edit_profile.html", {'form':form})
Forms.py :
class ProfileForm(forms.ModelForm):
    class Meta:
        model = Profile
        fields = ('phone_no', 'bio', 'facebook', 'instagram', 'linkedin', 'image', )
Code Explanation :
After login is done the user can view their profile where the user’s username, full name and email is displayed. The user can add a profile photo if the user wants and also add a bio, phone no, linkedin id, instagram id and facebook id so that other people can view the user’s profile and view the necessary information on it.
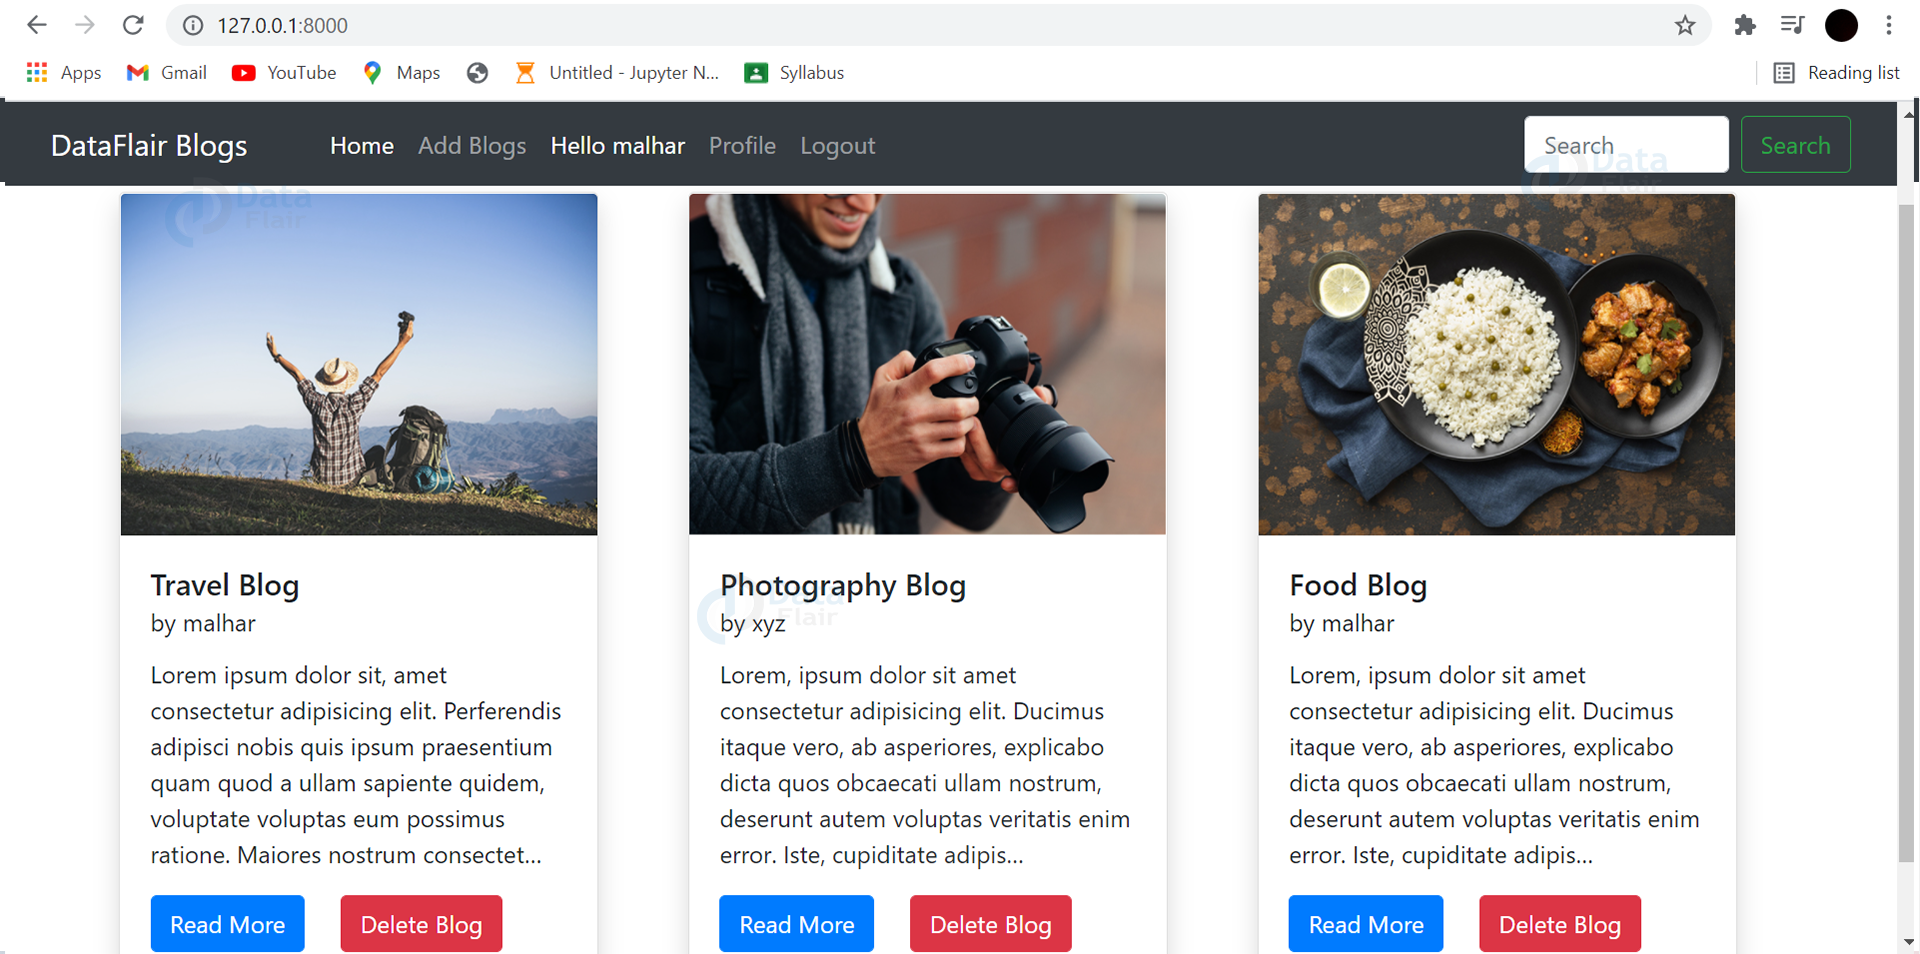
5. Home page where there are all the blogs (blog.html) :
<div class="container mt-5 mb-3">

    <div class="row">
        {% for post in posts %}
        <div class="col-lg-4 my-4">
            <div class="card shadow" style="width: 20rem; height: 33rem;">
                <img src="/media/{{post.image}}" class="card-img-top" alt="..." height="250px">
                <div class="card-body">
                  <h5 class="card-title">{{post.title}} <br><small>by {{post.author}}</small></h5>
                  <p class="card-text">{{post.content| truncatechars:210}}</p>
                  <a href="blog/{{post.slug}}" class="btn btn-primary">Read More {% if user.is_superuser %}<a href="delete_blog_post/{{post.slug}}/" class="btn btn-danger mx-4">Delete Blog</a>{% endif %}</a>
                </div>
              </div>
        </div>
        {% endfor %}
    </div>
</div>
Views.py :
def blogs(request):
    posts = BlogPost.objects.all()
    posts = BlogPost.objects.filter().order_by('-dateTime')
    return render(request, "blog.html", {'posts':posts})
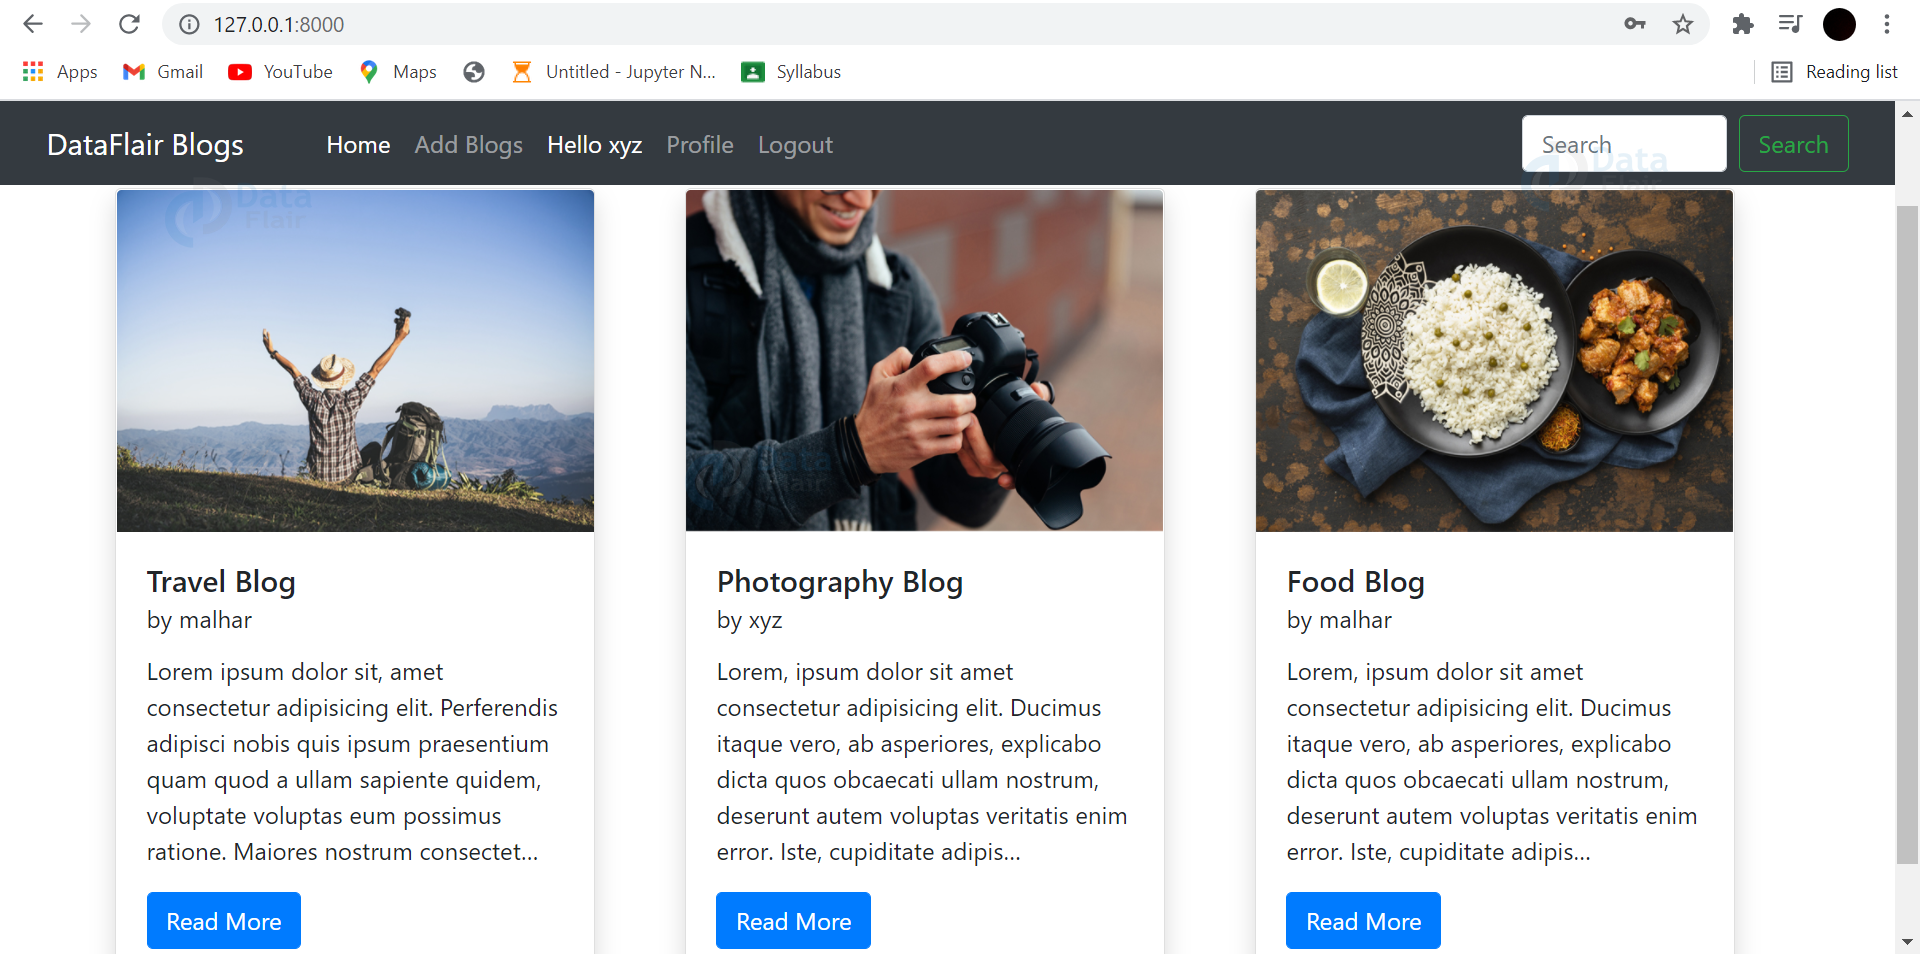
Code Explanation :
Using a bootstrap card all the basic information about the blog that is the image, title, author and description is displayed using a for loop. Then on clicking the read more button users can see the whole blog. The delete blog button is visible only to the superuser that is the admin.
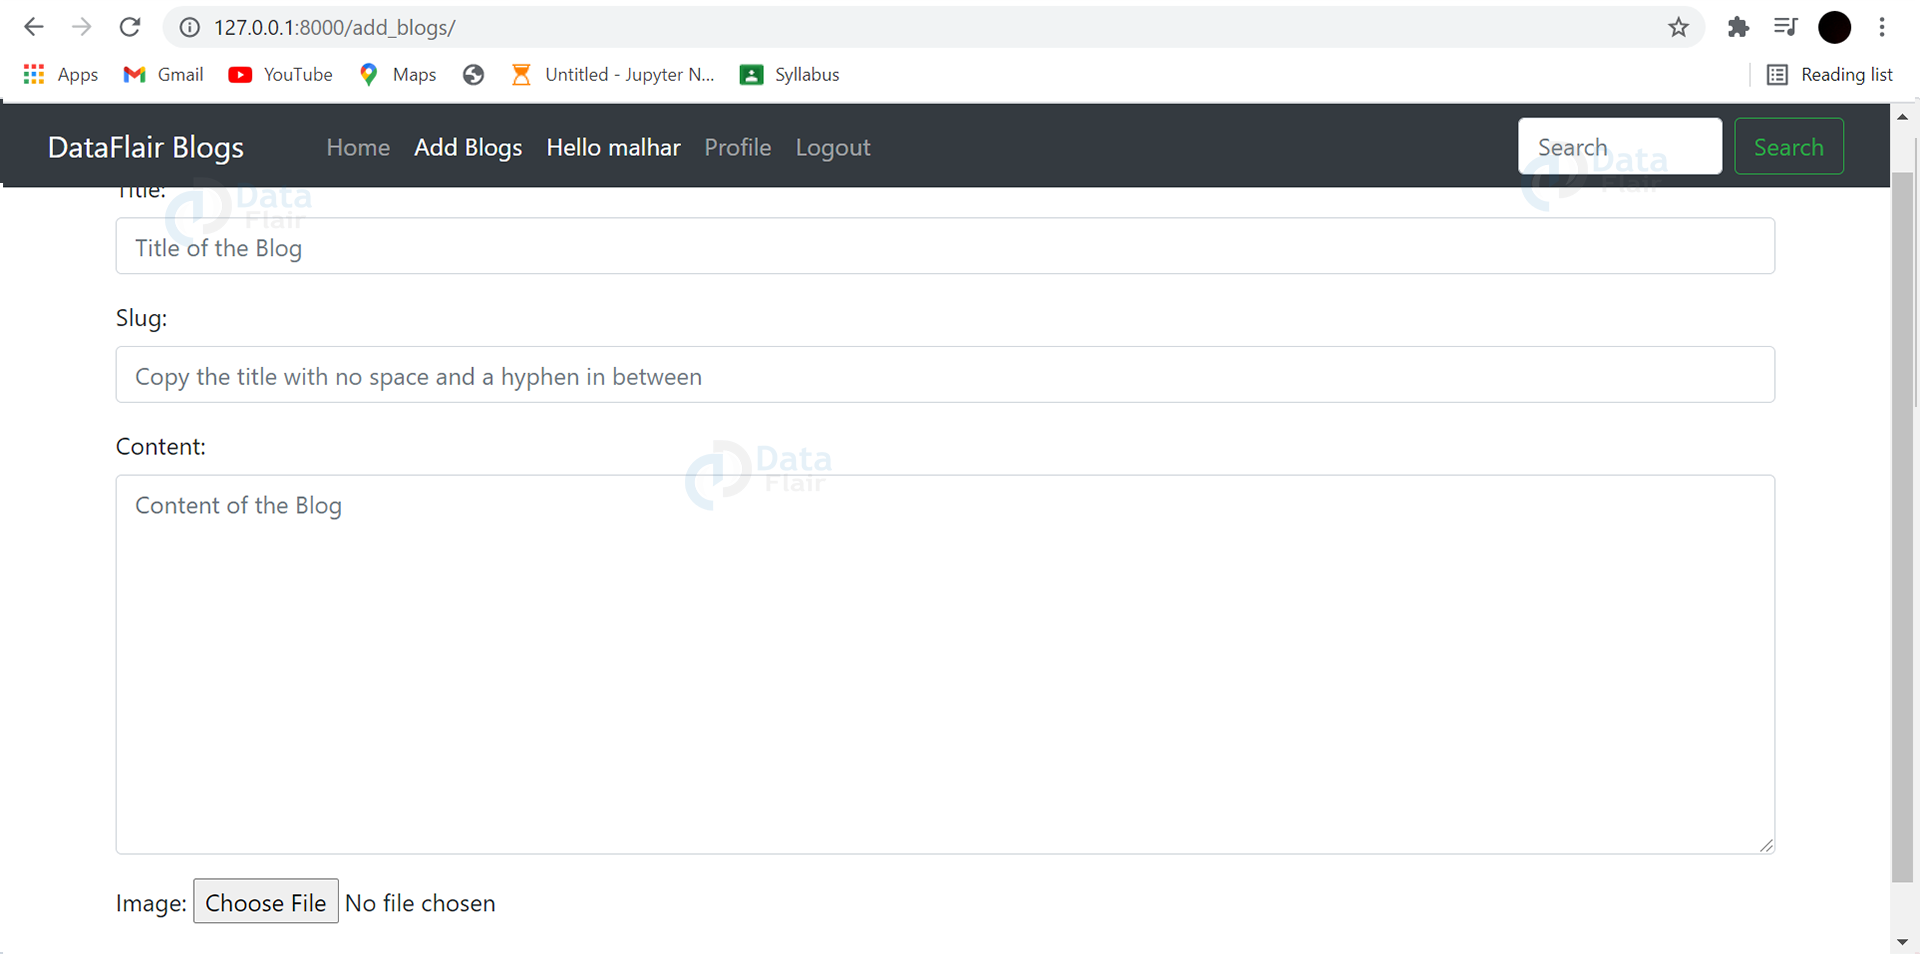
6. Adding new blogs (add_blogs.html) :
<form action="/add_blogs/" enctype="multipart/form-data" method="POST"> {% csrf_token %}
<div class="container mt-4">
{{ form.as_p }}
<button class="btn btn-primary">Add Blog</button>
</div>
</form>
Views.py:
@login_required(login_url = ‘/login’)
def add_blogs(request):
    if request.method=="POST":
        form = BlogPostForm(data=request.POST, files=request.FILES)
        if form.is_valid():
            blogpost = form.save(commit=False)
            blogpost.author = request.user
            blogpost.save()
            obj = form.instance
            alert = True
            return render(request, "add_blogs.html",{'obj':obj, 'alert':alert})
    else:
        form=BlogPostForm()
    return render(request, "add_blogs.html", {'form':form})
Forms.py :
class BlogPostForm(forms.ModelForm):
    class Meta:
        model = BlogPost
        fields = ('title', 'slug', 'content', 'image')
        widgets = {
            'title': forms.TextInput(attrs={'class':'form-control', 'placeholder':'Title of the Blog'}),
            'slug': forms.TextInput(attrs={'class':'form-control', 'placeholder':'Copy the title with no space and a hyphen in between'}),
            'content': forms.Textarea(attrs={'class':'form-control', 'placeholder':'Content of the Blog'}),
        }
Code Explanation :
User’s can add new blogs by navigating to the add blogs option in the navigation bar.
@login_required(login_url = ‘/login’) using this decorator if the user is not logged in then that user will not be allowed to add a blog instead the user will be redirected to the login page.
7. This page displays the entire blog and the users are allowed to comment on any blog. (blog_comments.html) :
<div class="container w-75 my-4">
      <h2 class="blog-post-title">{{post.title}}</h2>
      <br>
      <div class="media">
            {% if post.author.profile.image %}
            <img class="mr-3 rounded-circle" src="{{post.author.profile.image.url}}" width="50px" height="50px"
                  alt="image">
            {% endif %}
            <div class="media-body">
                  <h5 class="mt-0"><a href="/user_profile/{{post.author.id}}/">{{post.author}}
                              {% if user.is_authenticated %}
                              {% if user.id == post.author.id %}
                              <small><a href="/edit_blog_post/{{post.slug}}/" class="edit btn btn-warning">Edit Blog Post</a></small>
                              {% endif %}
                              {% endif %}
                        </a></h5>
                  {{post.dateTime}}
            </div>
      </div>
      <br>
      <img src="/media/{{post.image}}" alt="" height="250px" width="500px">
      <br>
      <p>{{post.content}}.</p>
      <hr>
      {% if user.is_authenticated %}
      <div class="container">
            <h2>Add Comments Here</h2>
            <form action="/blog/{{post.slug}}/" method="POST"> {% csrf_token %}
                  <div class="form-floating">
                        <textarea class="form-control" placeholder="Leave a comment here" id="floatingTextarea2"
                              style="height: 100px" id="content" name="content"></textarea>
                        <label for="floatingTextarea2">Leave a comment here.</label>
                        <br>
                        <button type="submit" class="btn btn-primary">Comment</button>
                  </div>
            </form>
            {% else %}
            <div class="container">
                  <h4><a href="/login/">Login</a> to post comments below.</h4>
                  {% endif %}
                  <br>
                  <h2>All Comments ({{comments.count}})</h2>
                  <br>
                  {% for comment in comments %}
                  <div class="card">
                        <div class="card-header">
                              <span style="font-size: 22px;">{{comment.user}} </span> <span
                                    style="font-size: 12px;">{{comment.dateTime | naturaltime}}</span>
                        </div>
                        <div class="card-body">
                              <h6 class="card-text">{{comment.content}}</h6>
                        </div>
                  </div>
                  <br>
                  {% endfor %}
            </div>
      </div>
Views.py :
def blogs_comments(request, slug):
    post = BlogPost.objects.filter(slug=slug).first()
    comments = Comment.objects.filter(blog=post)
    if request.method=="POST":
        user = request.user
        content = request.POST.get('content','')
        blog_id =request.POST.get('blog_id','')
        comment = Comment(user = user, content = content, blog=post)
        comment.save()
    return render(request, "blog_comments.html", {'post':post, 'comments':comments})
Code Explanation :
After clicking on the read more button the user’s are redirected to this page where the entire blog will be displayed with the comments section below it.
{% if user.id == post.author.id %}
If the logged in user’s id is equal to the posted blog’s author id then only that particular user will be allowed to edit that respective blog post. No one else will be allowed to edit other user’s blog posts.
User’s can comment their thoughts on any of the blog posts that they want to.
post = BlogPost.objects.filter(slug=slug).first()
comments = Comment.objects.filter(blog=post)
Using the above two lines the posted comment will get displayed on the respective blog post.
By clicking on the blog post’s author, the profile of that author will get displayed so that other user’s can view the profile.
Django Blog Project output:
User registration page:
First Page of the Django Blog Application project with all the posted blogs (admin login):
Home Page (user login):
Logged in users can add a new blog:
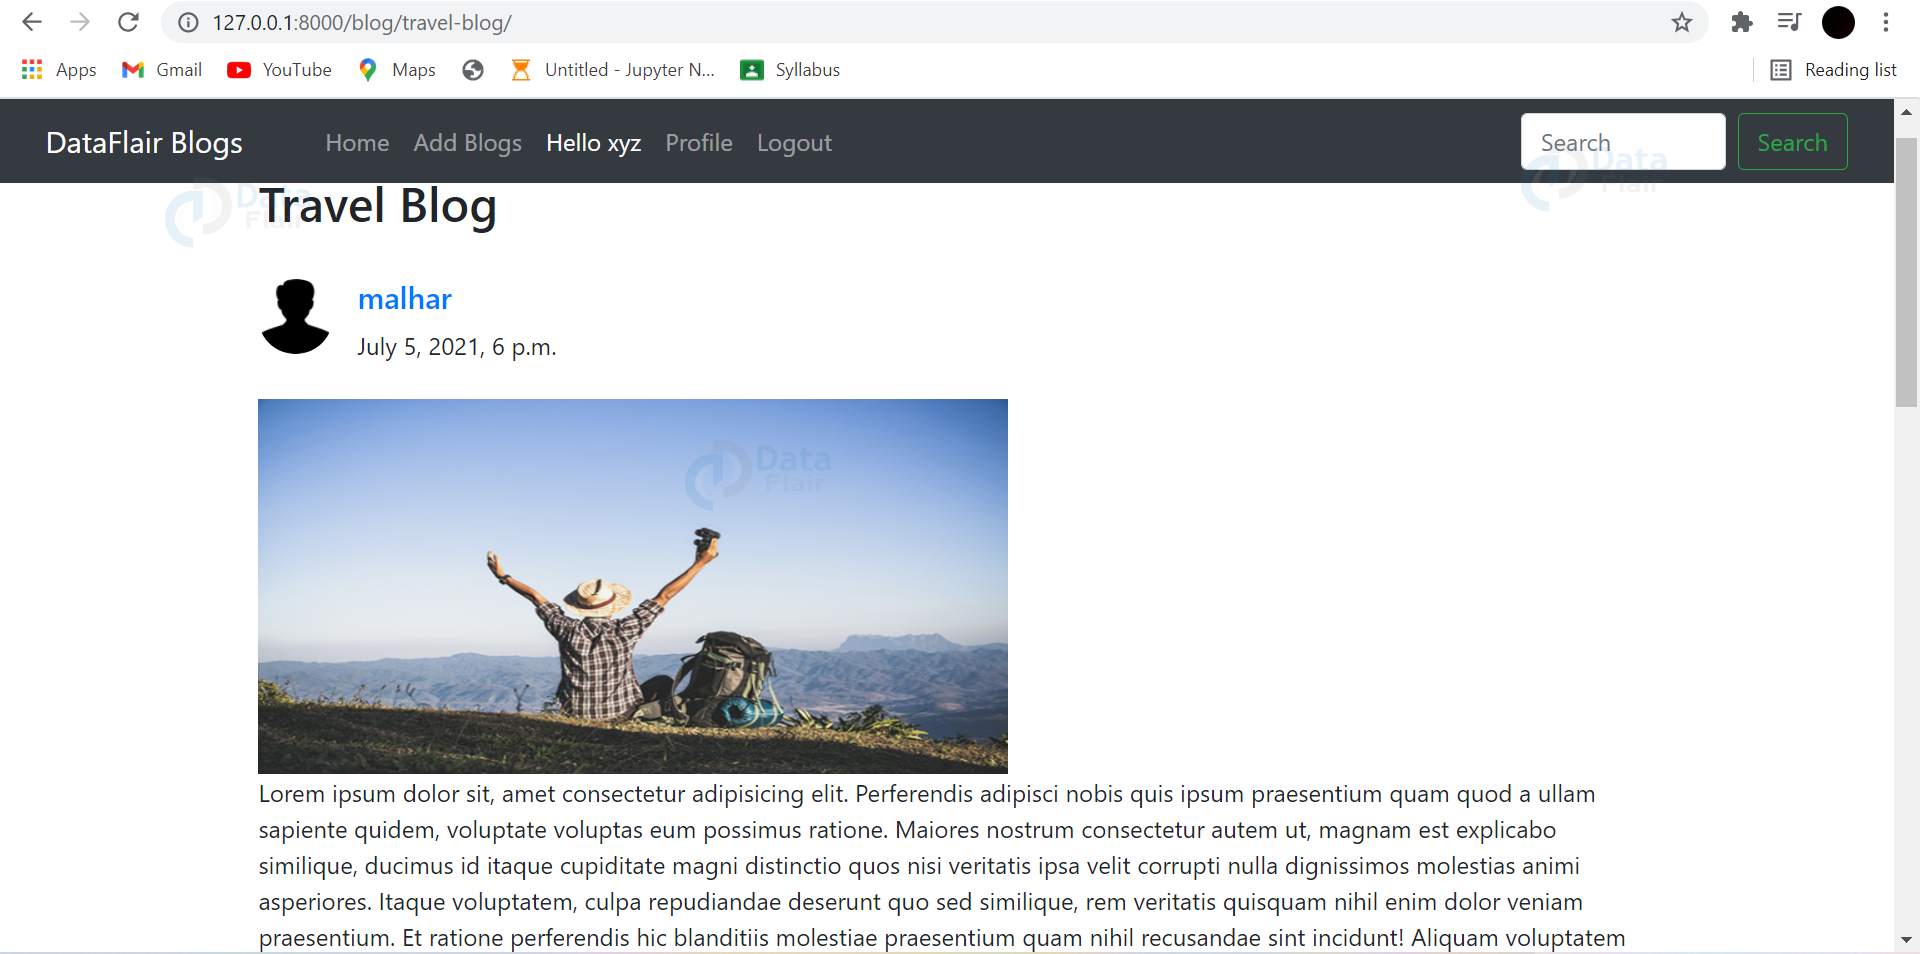
Clicking on read more to view the entire blog:
By clicking on the author name other users can see the profile of the author
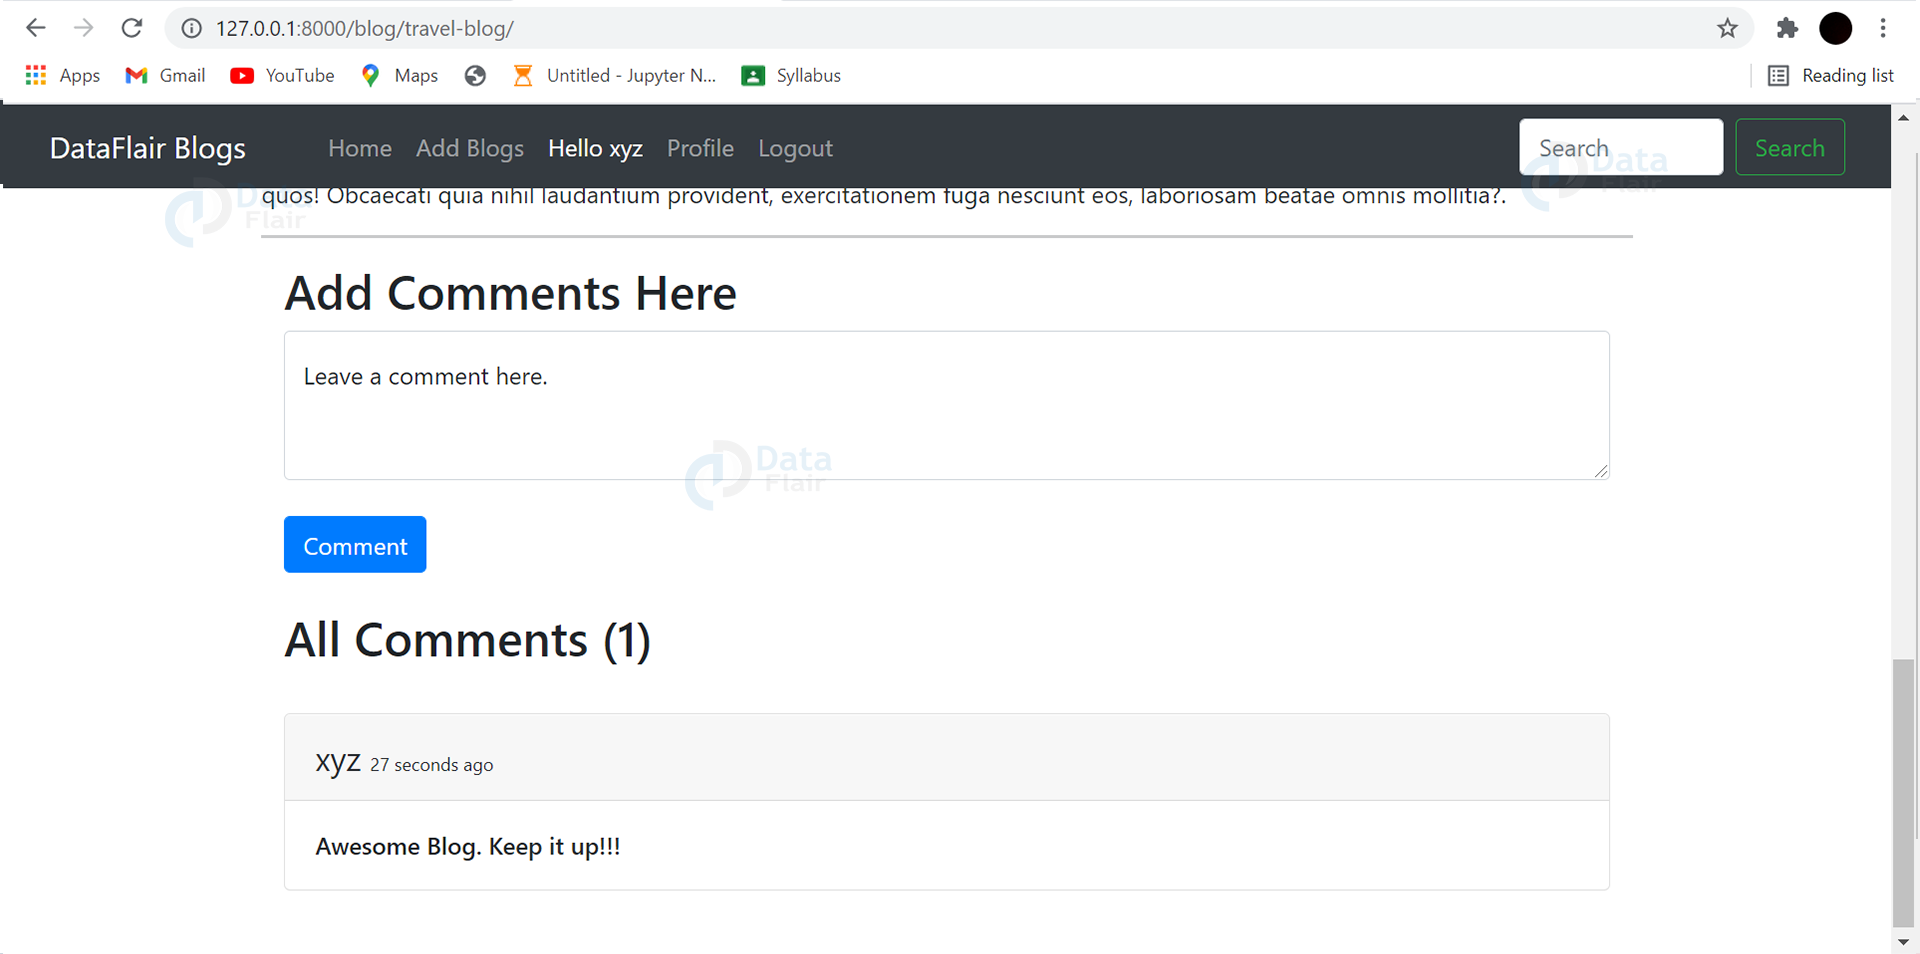
Users can also comment on any blog posts:
Search blogs by their title:

Summary
With this project in Django, we have successfully developed a Blog Application with proper front-end and back-end. Now, we know many concepts in Django. You can try to add more features or anything that you think is missing to this blog application and keep learning.
We work very hard to provide you quality material
Could you take 15 seconds and share your happy experience on Google


sir/maam how do we get admin username and password
u set it yourself.
if forgot, create new superuser.
by setting is_superuser to true works for me
You can use “python manage.py createsuperuser” to create a super user to access admin with all permissions.
or
You can set a user’s password and set user’s is_staff flag as True to access admin.
how I connect with the creator of this project?Need some help with my project
how I connect with the creator of this project?Need some help with my project
Edit and update profile is not working
How to add categories and latest posts
thank you so mush
Thank you very much for this post. If I want to attach multiple files to a post, how do I do that. I don’t want the post to be posted before attaching files, I want it attached as the post is being posted. Thanks.
You can add a boolean field of Published (for eg)
When you mark the Published box, the post will be published, if not, it will stored in the draft.
You can add a boolean field of Published (for eg)
When you mark the Published box, the post will be published, if not, it will be stored in the draft
When I create a new user account, the new user’s information is not saved to the profile, so I cannot edit the profile of the newly created user account. I have added the following code but it still doesn’t work
profile = Profile.objects.create(user=user, image=image, bio=bio, phone_no=phone_no, facebook=facebook, instagram=instagram, linkedin=linkedin)
profile.save()
comment faire pour éditer le profile ca ne fonctionne pas les utilisateurs nouvellement créer n’ont pas de profil donc pas de possibilité de modifier le profil j’ai essaye de changer mais rien