SAP HANA Studio Administration Console – Add Schema, Table, User
Expert-led Online Courses: Elevate Your Skills, Get ready for Future - Enroll Now!
This lesson is about the Administration Console or view in SAP HANA Studio. Here, we will learn about the Administration Console perspective found in the SAP HANA Studio. Also, we will learn how to add new systems, create a schema, adding new data tables in the schema, loading data in those tables and adding new users to access specific data tables.
So, are you excited to learn SAP HANA Administration Console?
SAP HANA Studio Administration Console/ View
Administration Console view is one of the many perspectives offered to work in the SAP HANA Studio. SAP HANA Studio is an Eclipse-based tool which serves as both the central application development environment as well as the core administration and monitoring platform for the HANA system.
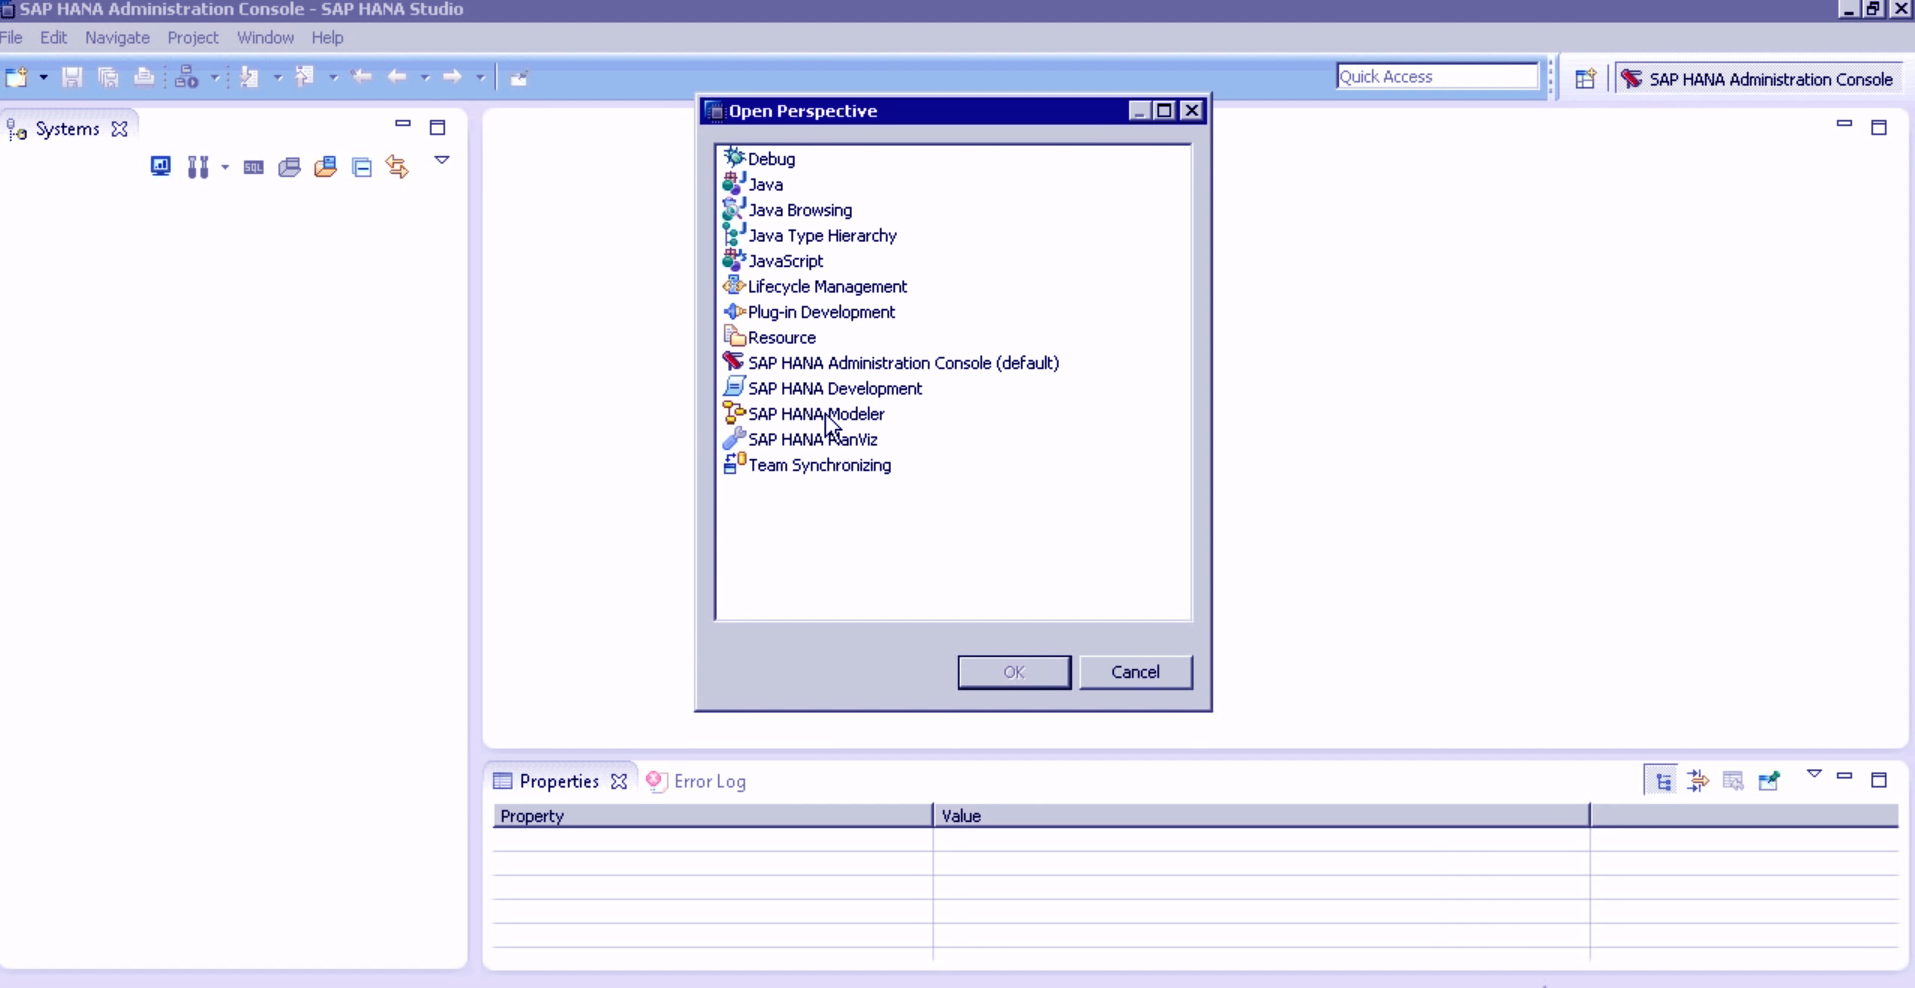
You can select the Administration Console from the first window that appears upon opening the SAP HANA Studio.
Do you know How to Download and Install Latest SAP HANA?
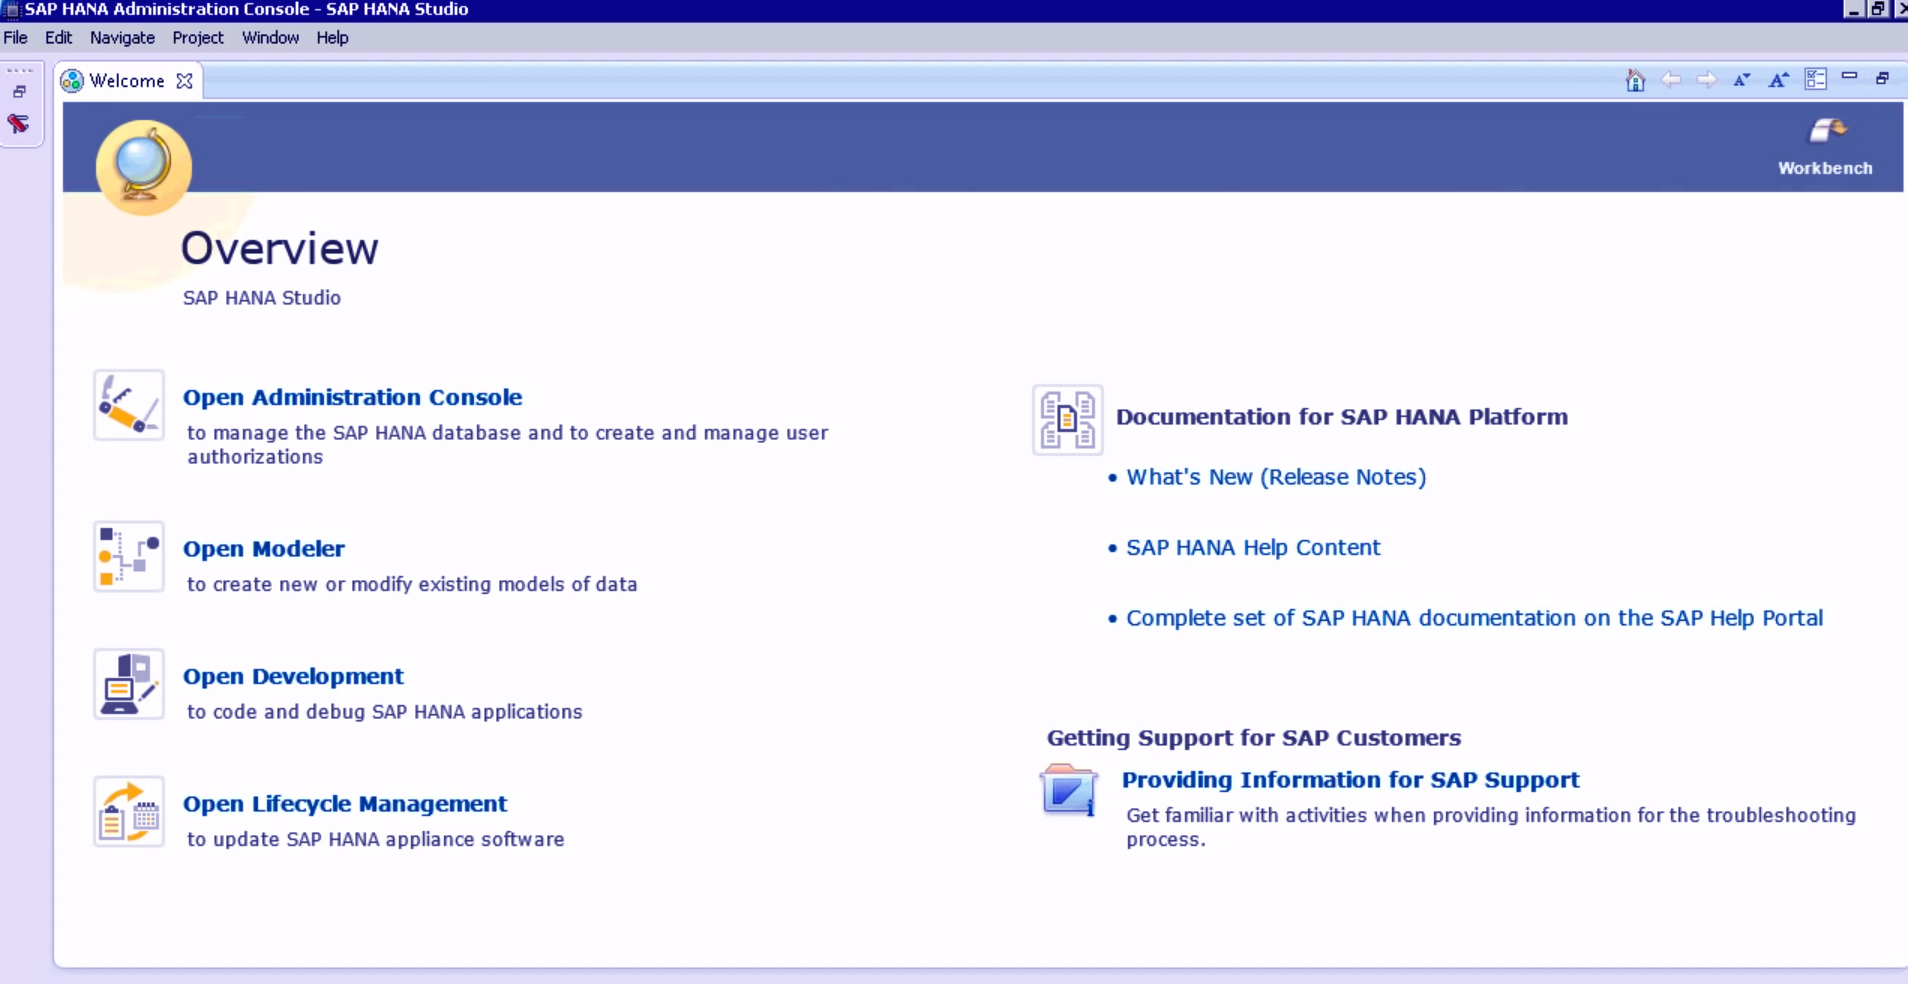
SAP HANA Studio Administration Console
The SAP HANA Studio Administration Console opens. However, in some cases, it opens directly if it is set as the default browser.
SAP HANA Studio Administration Console
A lot of administrative tasks can be performed in the SAP HANA Studio such as regulating (start/stop) services, monitoring the system, user management and authorization, backup and recovery, audit policy and security configuration, license management, alerts and messages, memory management etc.
All of the mentioned activities can be achieved from different tabs present in the administration console such as,
- Overview (general management and monitoring)
- Landscape (checks if all the services are running)
- Alerts (set and view the details of the alerts)
- Performance (checks the performance of the system for the activities taking place on the database)
- Volumes (details of the data volumes and logs.
- Configuration (contains the details of system configuration files)
- System Information (to access system information files and queries)
- Diagnosis Files (contains the system log files)
- Trace Configuration (contains the traces set up information)
Recommended reading – Latest SAP HANA Use Cases

SAP HANA Studio Administration Console
How to add a system in SAP HANA Studio Administration Console?
In order to work on the administration console, we have to load database systems into the Studio. This connects the client (user) to the SAP HANA database. Let us learn how to add data systems in the administration console.
Step 1
On the Administration Console view, right-click on the left panel and a drop-down menu appears. Select Add System.. from the menu.
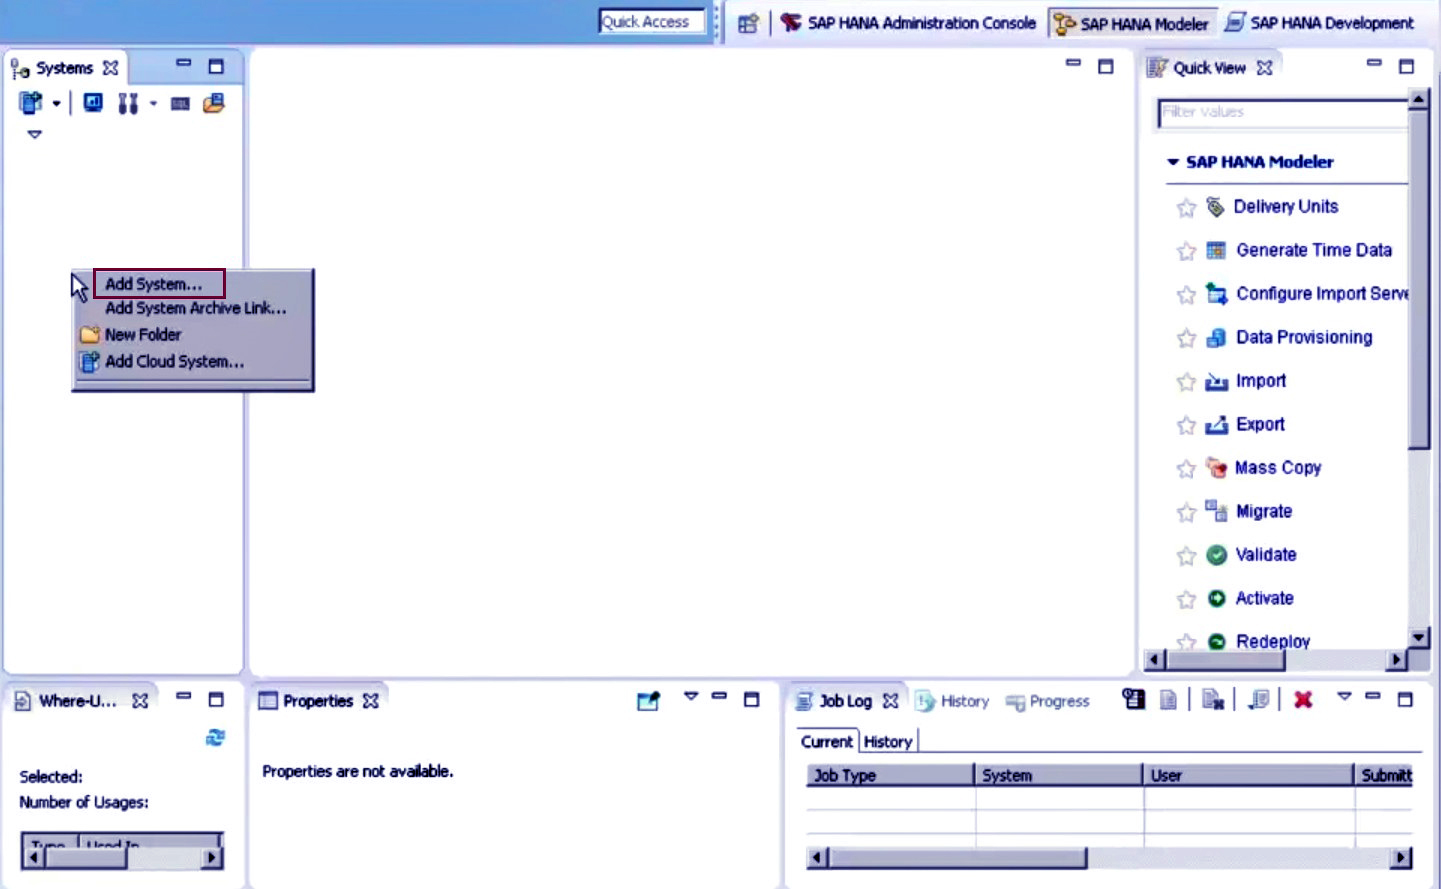
Step.1 To add a system in SAP HANA Studio Administration Console
Have a Look – 7 Unique Reasons to Learn SAP HANA
Step 2
Enter the database specific credentials like Hostname, Instance number, description of the database etc. Click on Next to continue.
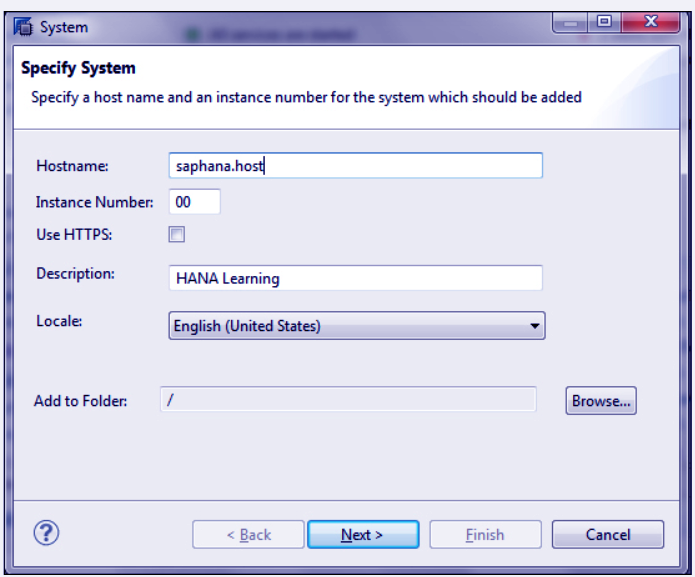
Step.2 To add a system in SAP HANA Studio Administration Console
Step 3
To add the system and access the database in SAP HANA Studio, you need to be an authenticated user with authorized username/ID and password. Then click on Finish.
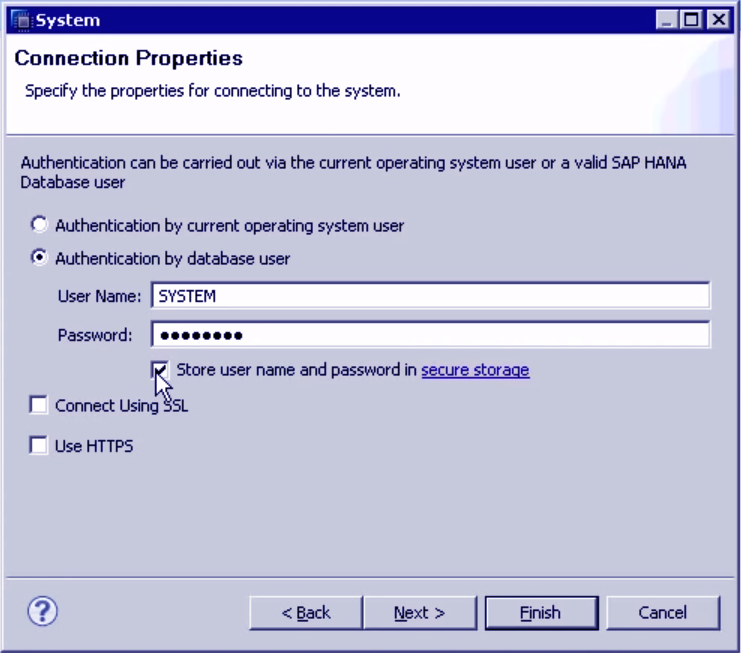
Step.3 To add a system in SAP HANA Studio Administration Console
Follow this link to know the best SAP HANA Books
Step 4
The system gets loaded and you can see the hierarchical view of all the components and categories of the system on the panel. For each system, there are four folders, Catalog, Content, Provisioning, Security plus a Backup folder which are dedicated to providing specific services.
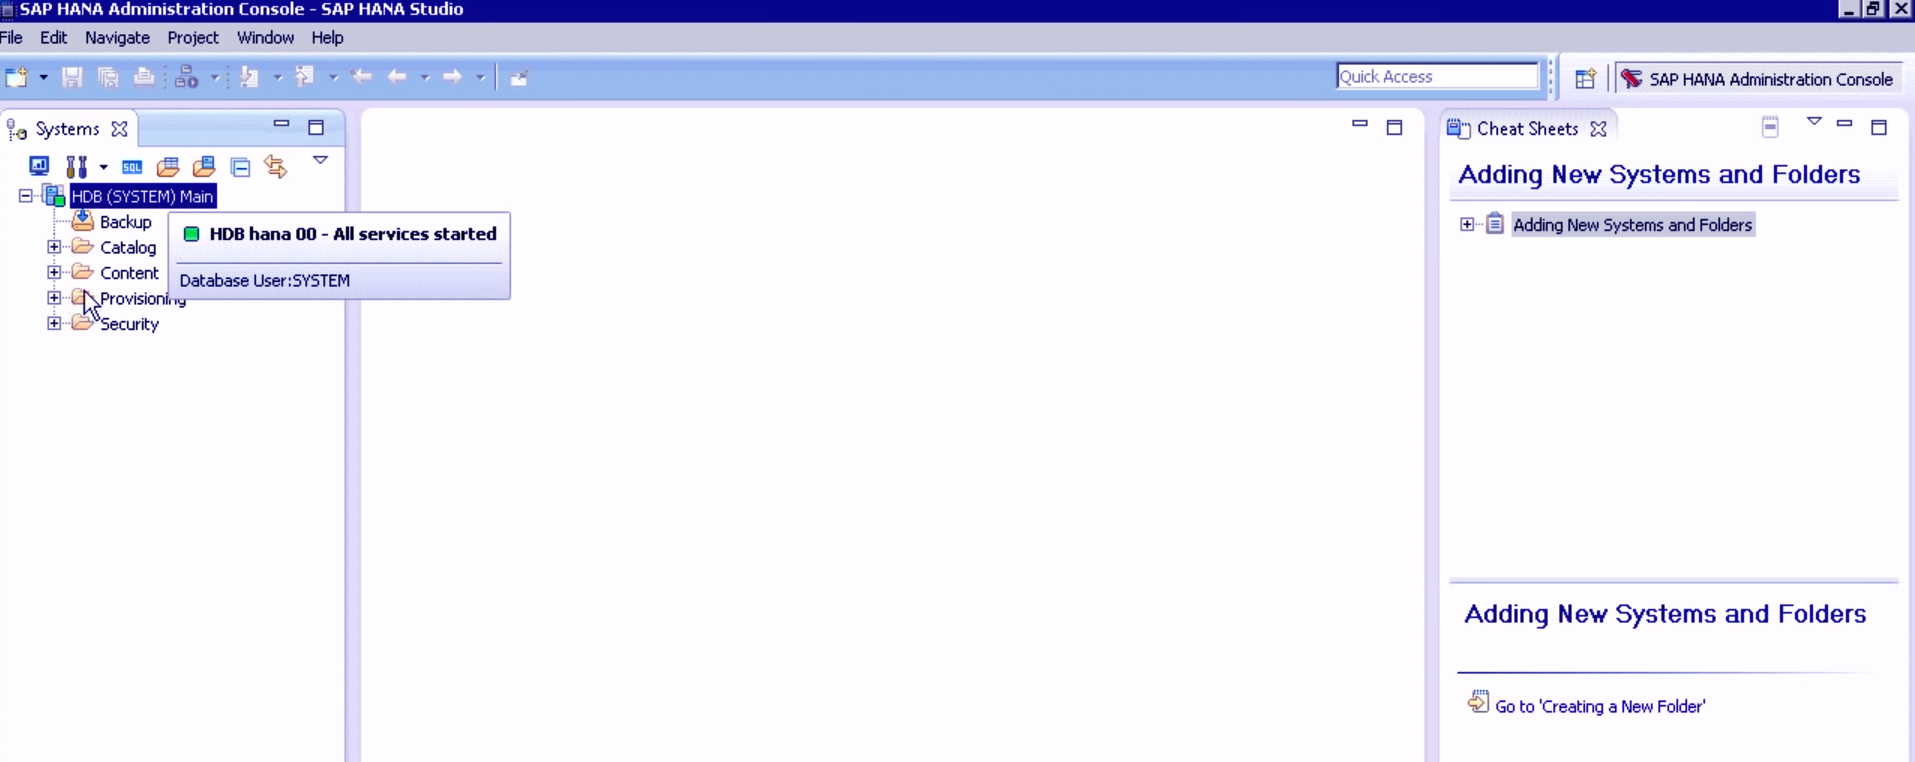
Step.4 To add a system in SAP HANA Studio Administration Console
Step 5
You can find data tables by drilling down in the hierarchical system folders.
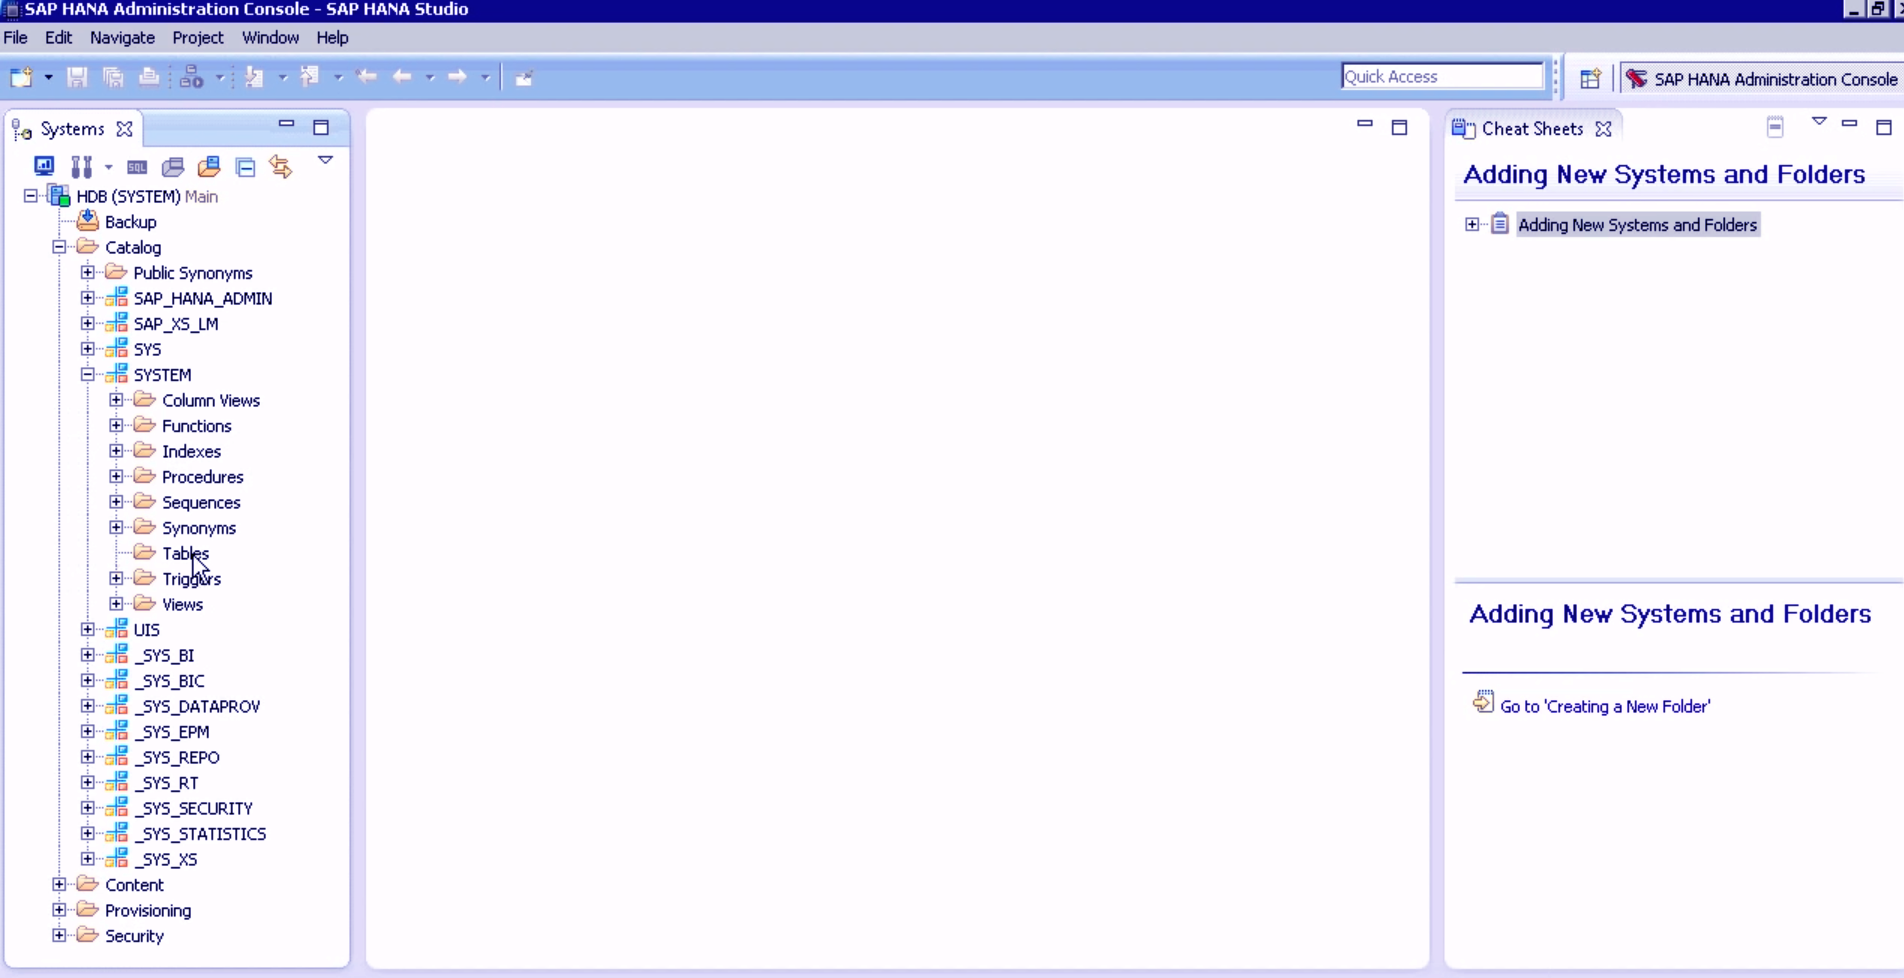
Step.5 To add a system in SAP HANA Studio Administration Console
Also, you can perform several operations on the table as shown in the menu in the screenshot below. You can view a table’s content etc. from this menu.
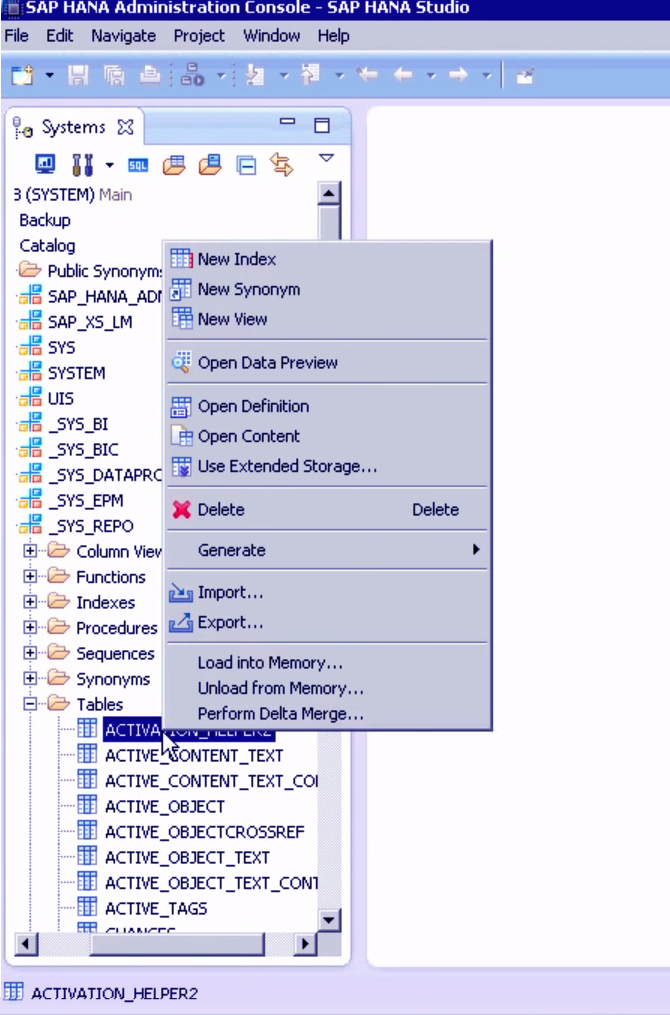
Step.6 To add a system in SAP HANA Studio Administration Console
How to add a schema?
In the Catalog folder, you can find schemas of all the loaded databases in the system. The schema contains folders which organize a database properly. The folders are Column view, Functions, Indexes, Procedures, Sequences, Tables etc. Let us learn how to add a new database schema.
Step 1
Open the SQL Console from the icons given at the top after clicking on the database system’s name in which you wish to add a schema.
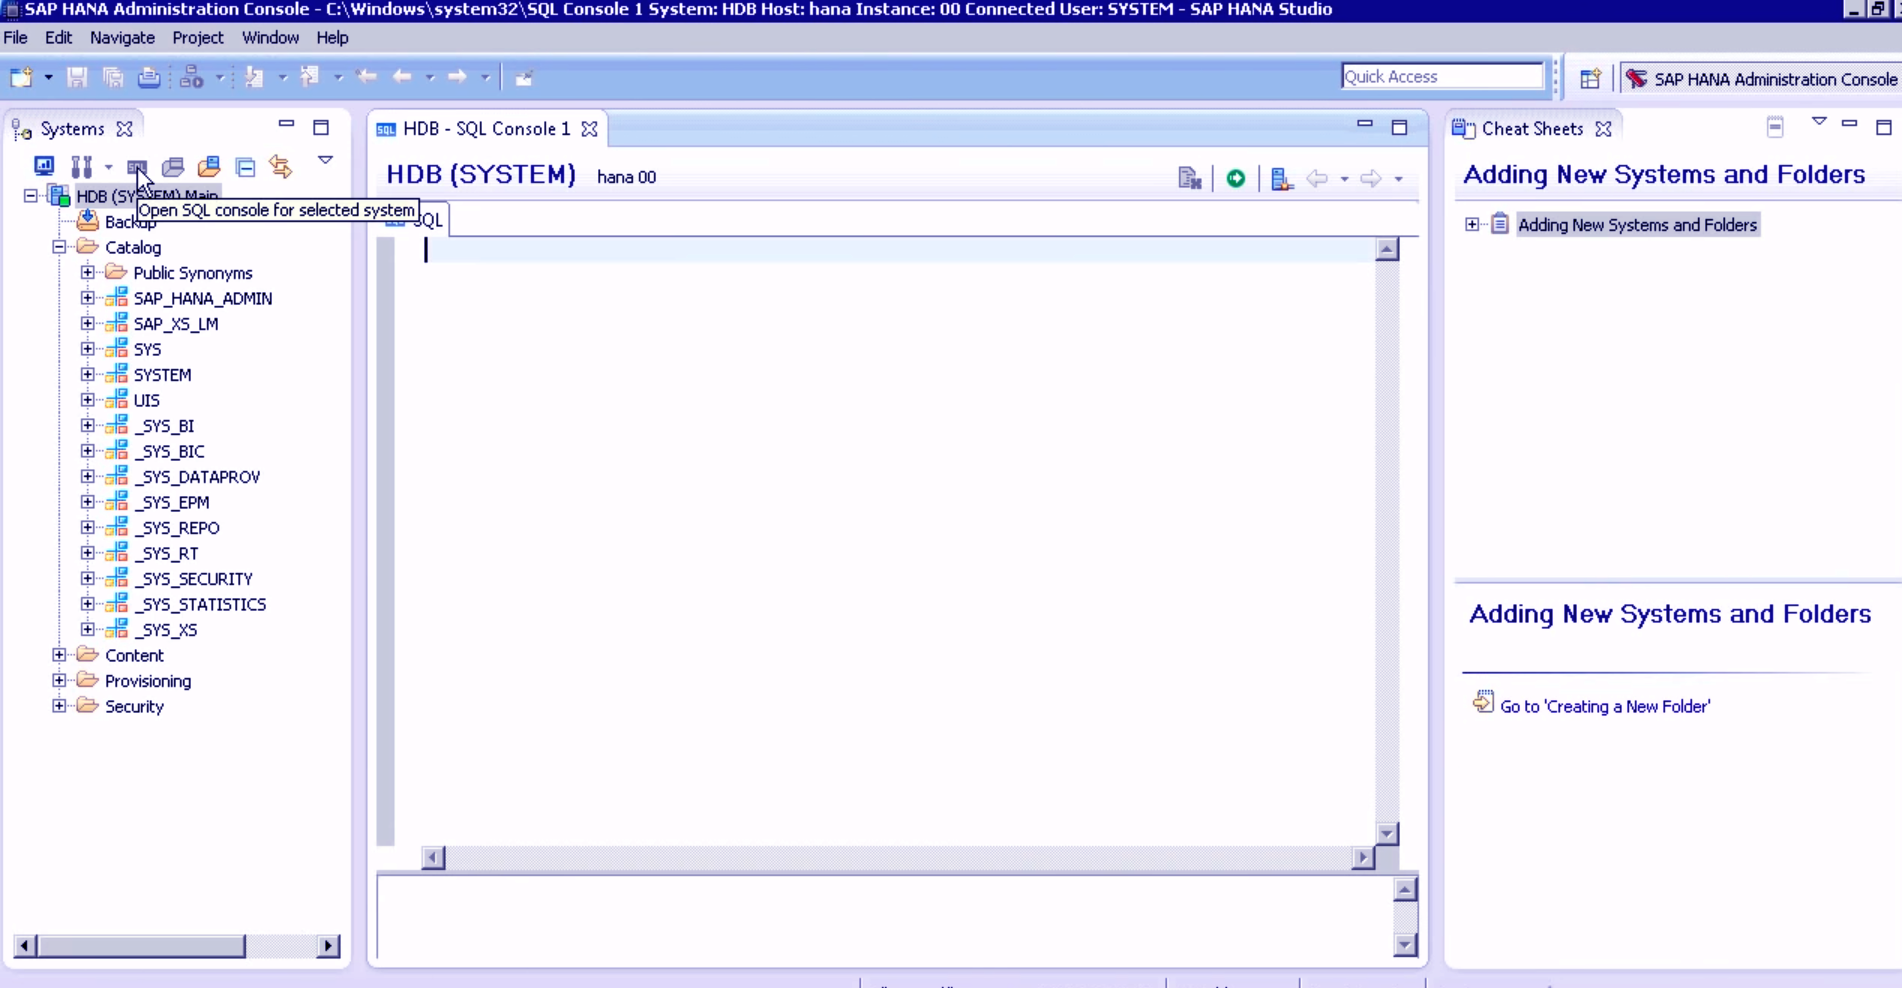
Step.1 to add a schema
Step 2
Enter the statement in the SQL Console to create the new schema. Name the schema as you like. Click on the green Execute button.
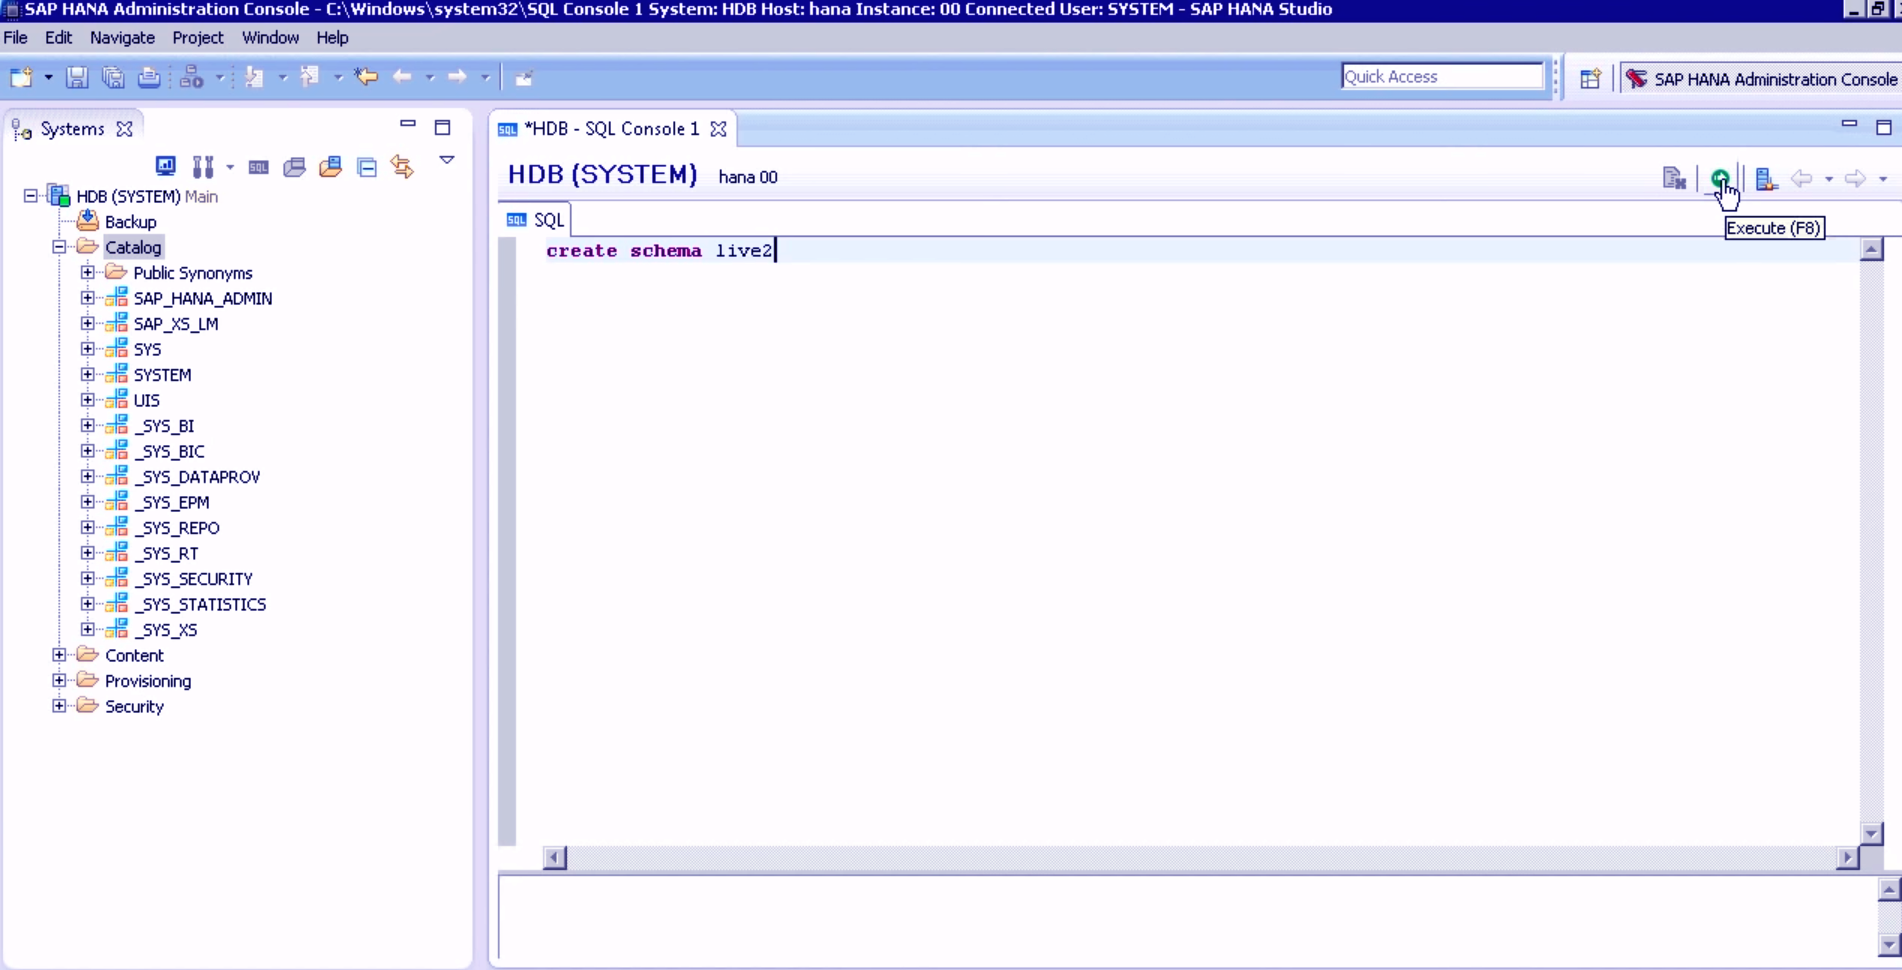
Step.2 to add a schema
Step 3
A new schema with the name Live2 is added in the system.
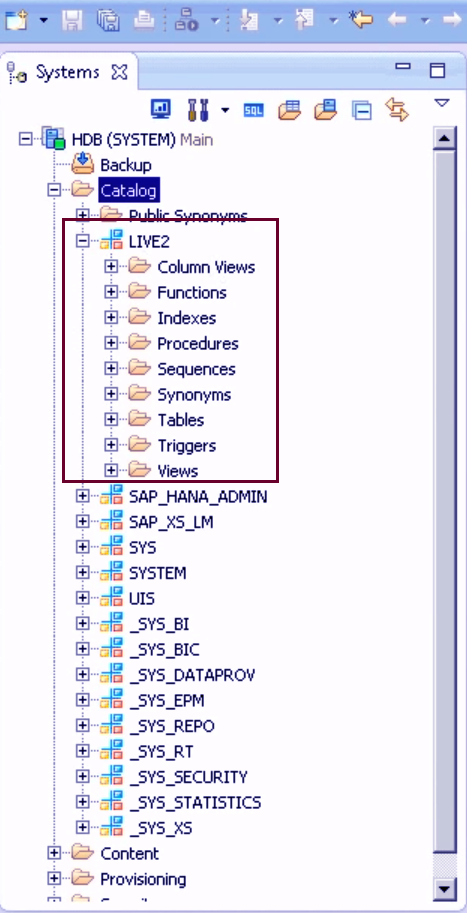
Step.3 to add a schema
You can add a new table as well by right-clicking on the tables folder.
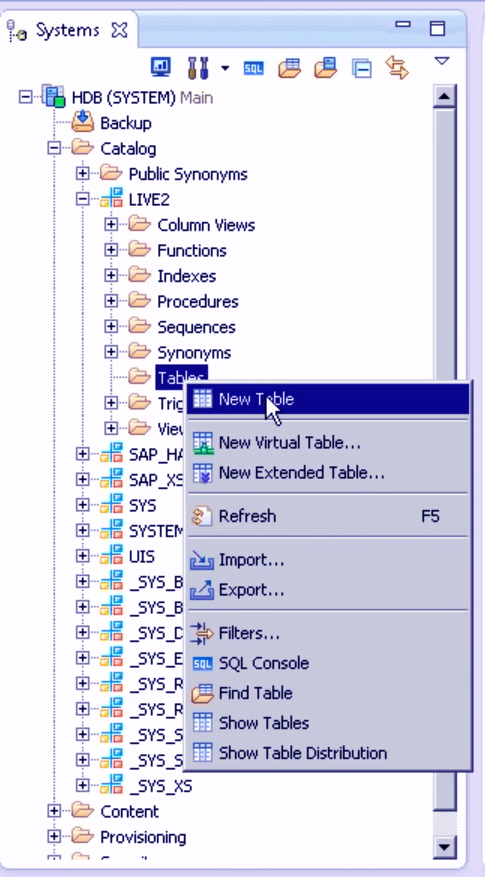
Step.4 to add a schema
How to add tables in a schema?
You can add new tables within a schema through the SQL Console. Enter the code which is a statement specifying all the table details. Click on the green execute button and the table will be added.
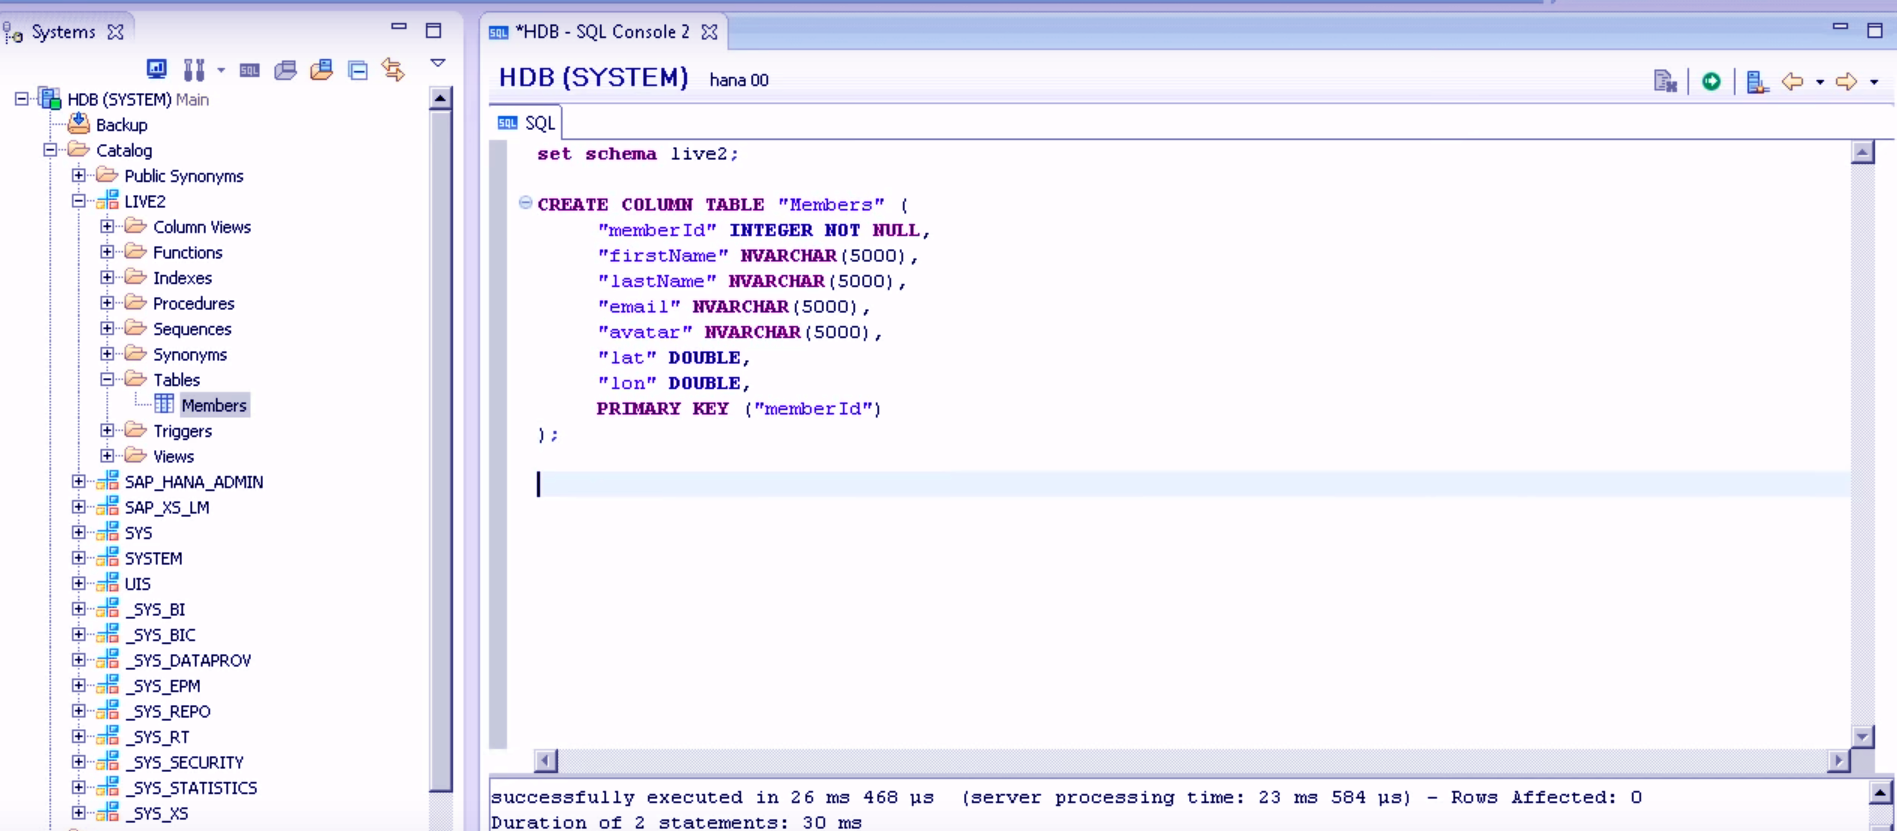
Step.1 to add table a schema
Refresh the Tables folder in the schema and the newly created table “Member” will appear in the list. You can add more tables like this.
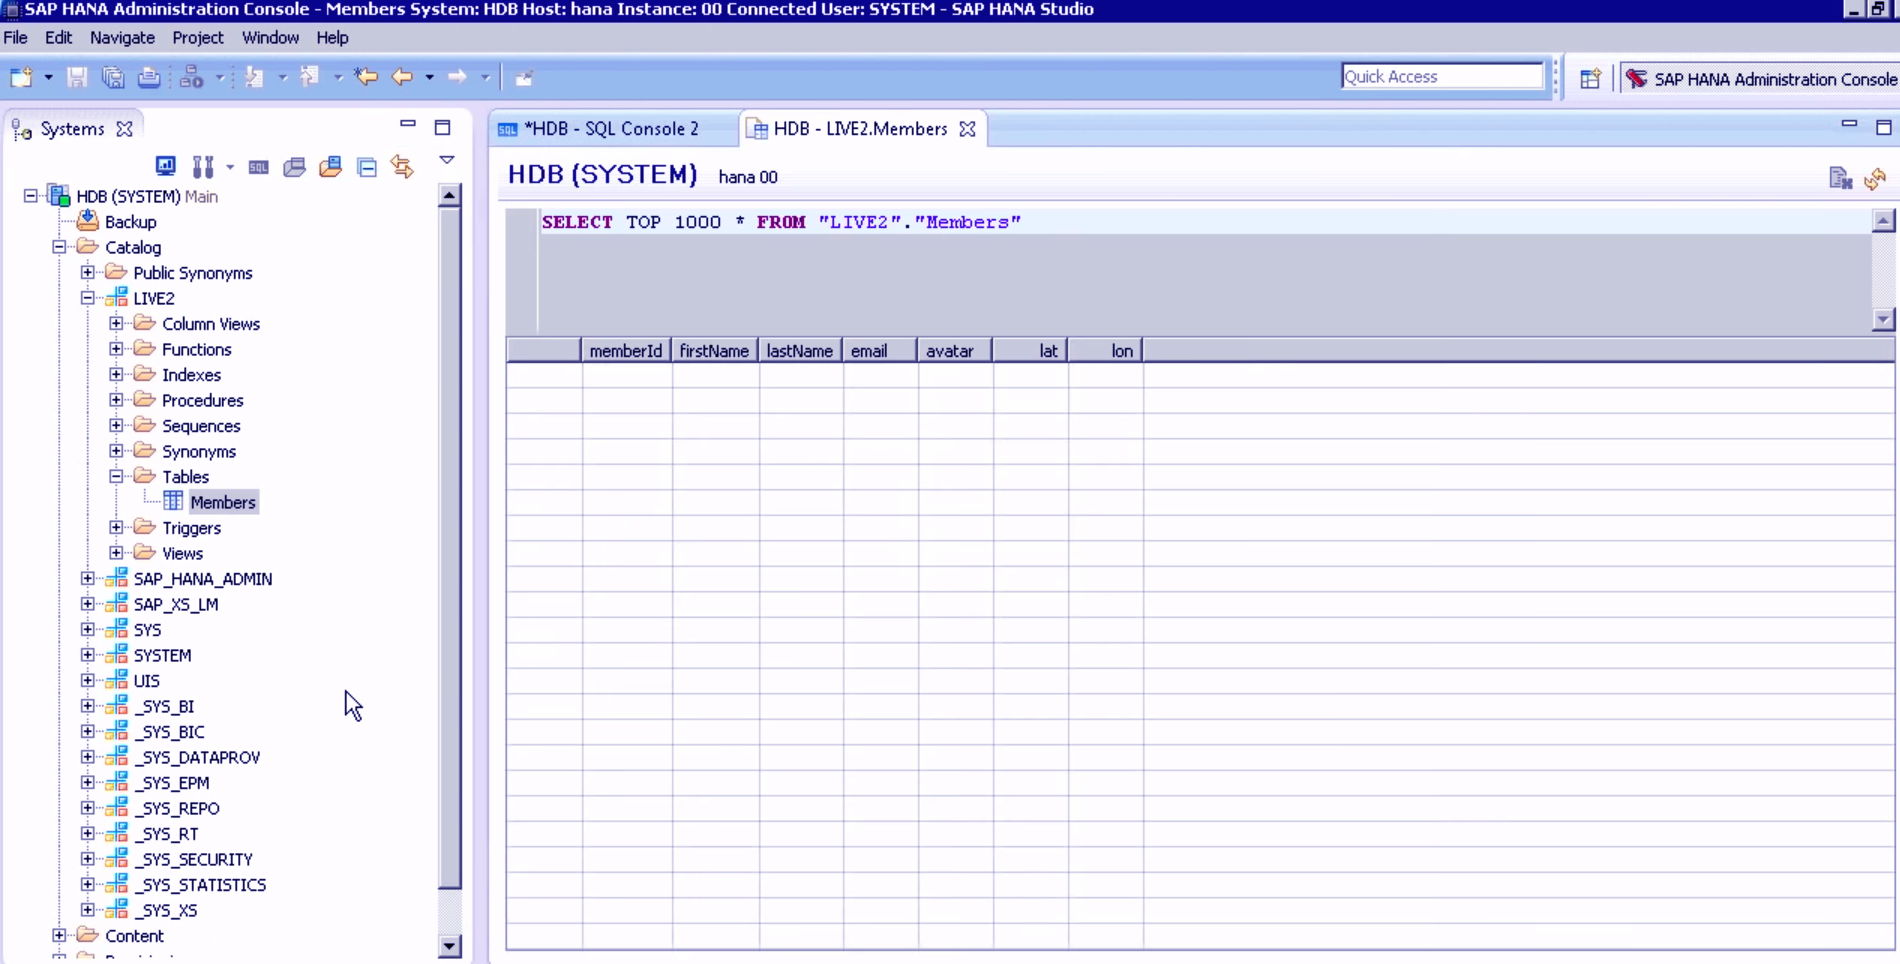
Step.2 to add table a schema
How to add a user in a schema?
You can add a new user and give it access to the system by going to the Security folder. Right-click on the Users option and select New User.
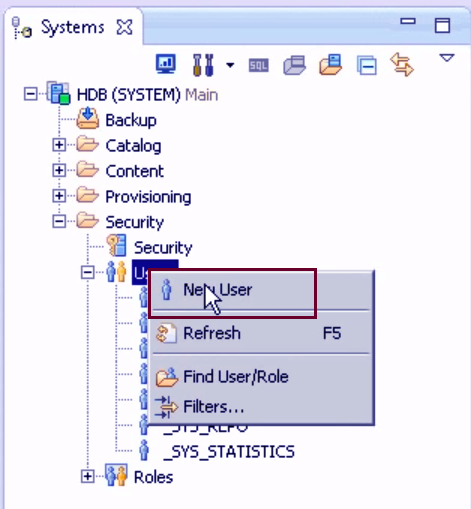
Step.1 add a user in a schema
Enter the username and password for the new user.
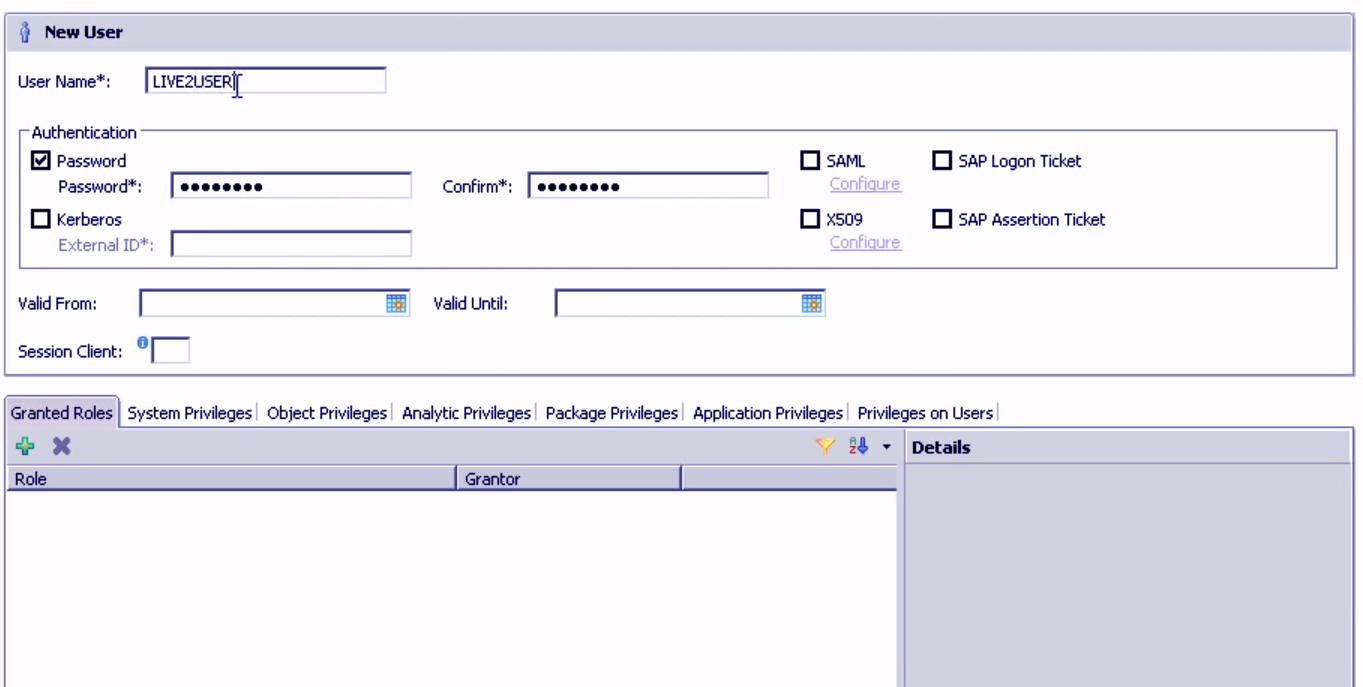
Step.2 add a user in a schema
We can add a new user to the user’s list.
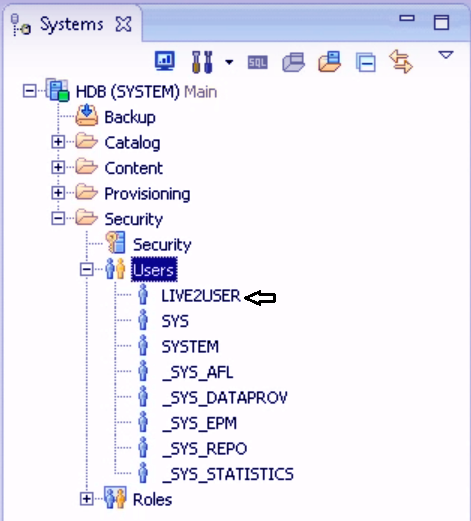
Step.3 add a user in a schema
Also, you can grant specific privileges to the new user i.e. they are only allowed to perform certain actions in the system and manipulate data.
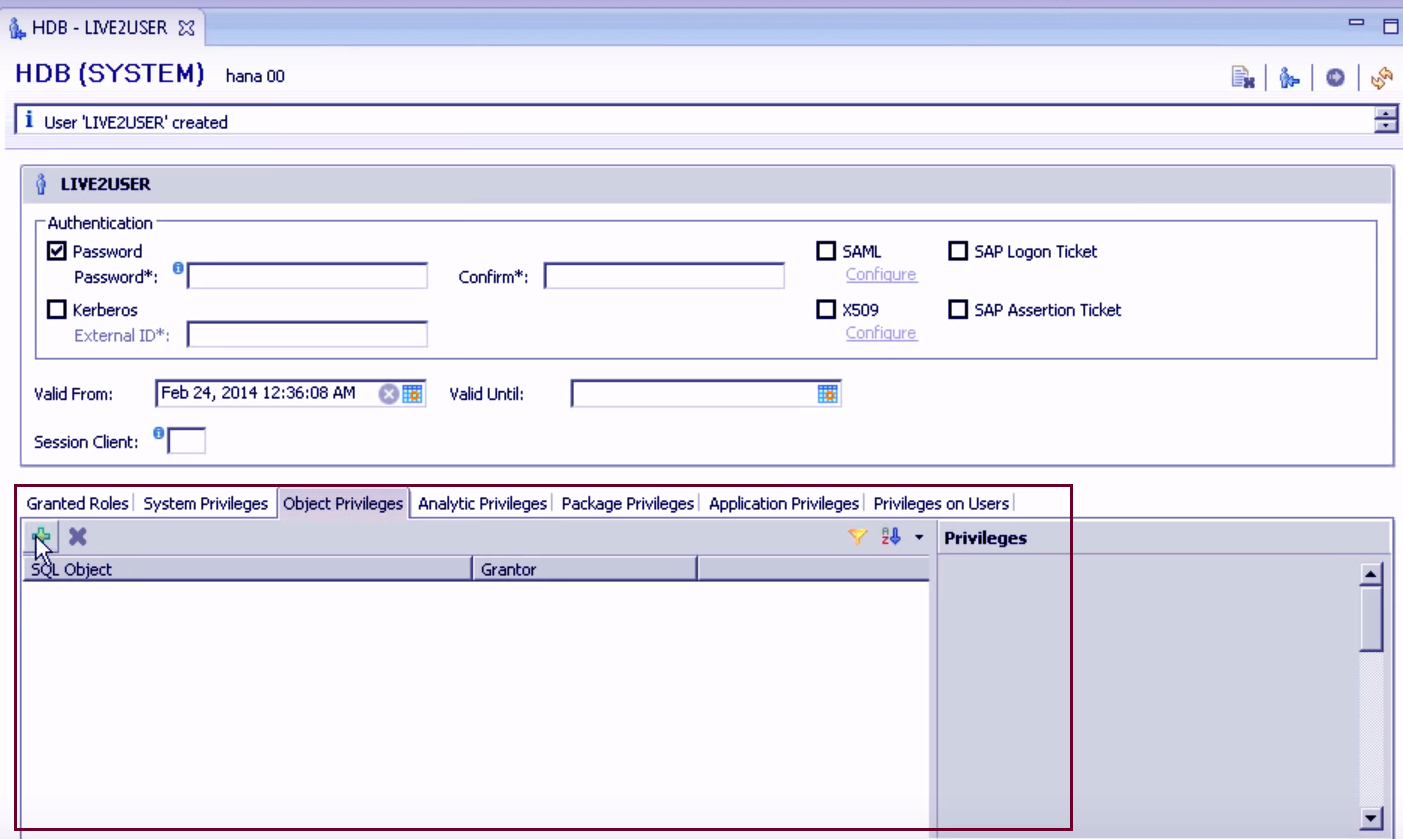
Step.4 add a user in a schema
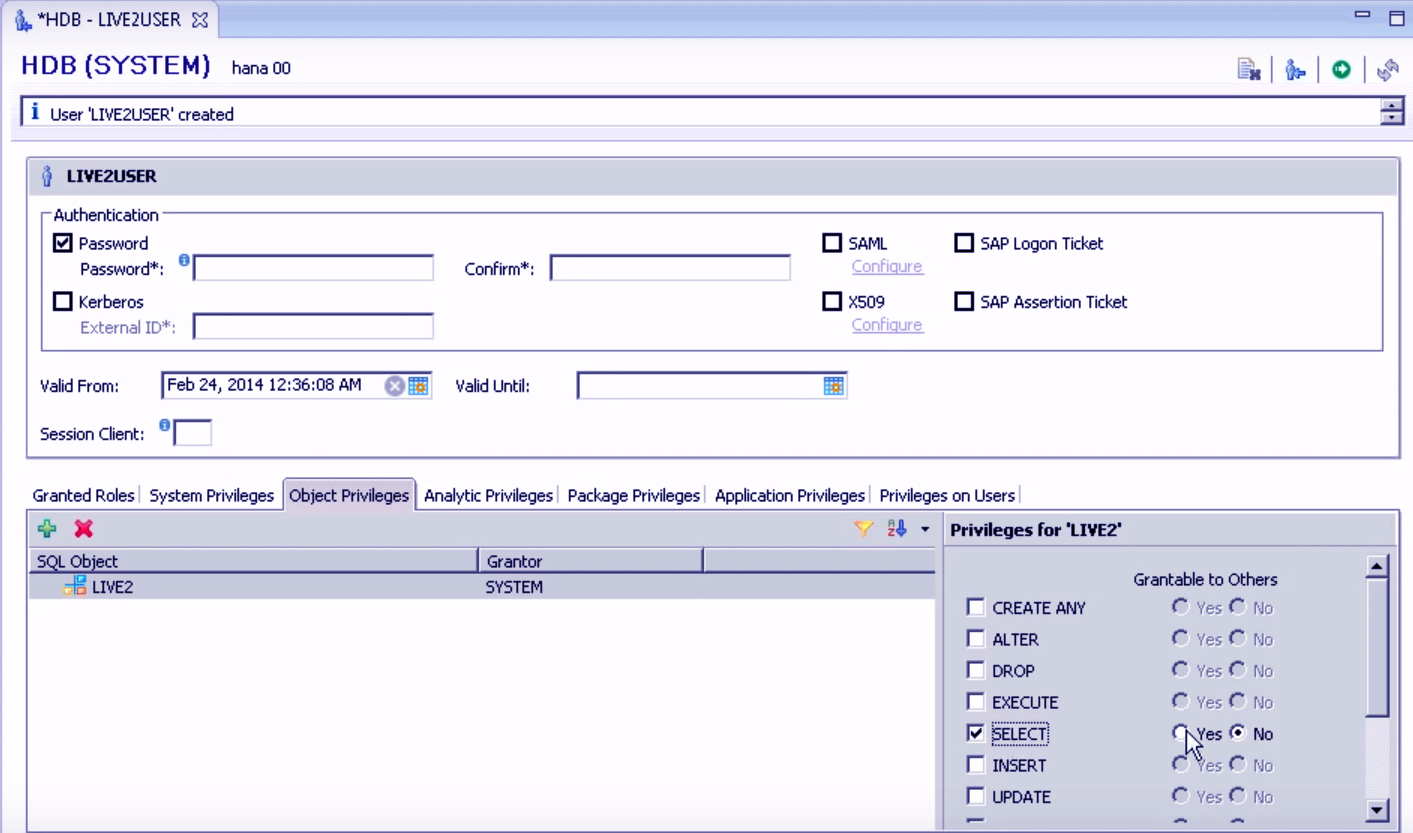
Step.5 add a user in a schema
Hence, a new user with the name LIVE2USER is created having access to limited tables and is granted distinct privileges.
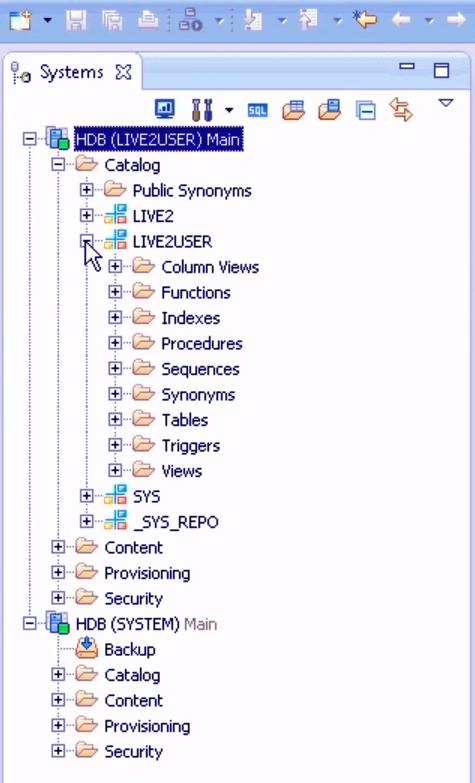
Step.6 add a user in a schema
Now, for instance, if we try to delete a table, we will get an error message for restricted user privilege as the user is only allowed to read the table contents and not delete them.
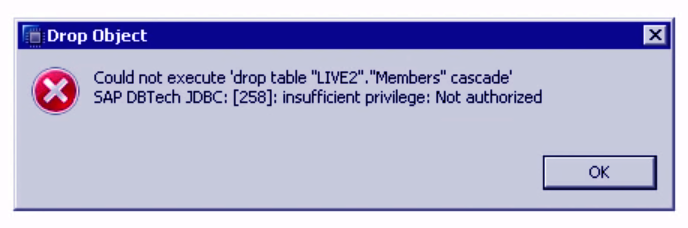
Step.6 add a user in a schema
Log Off/Login in SAP HANA Studio
You can log in and off a SAP HANA System by right-clicking on the system’s name and selecting Log Off from the drop-down menu. This will end all the existing connections from that system.
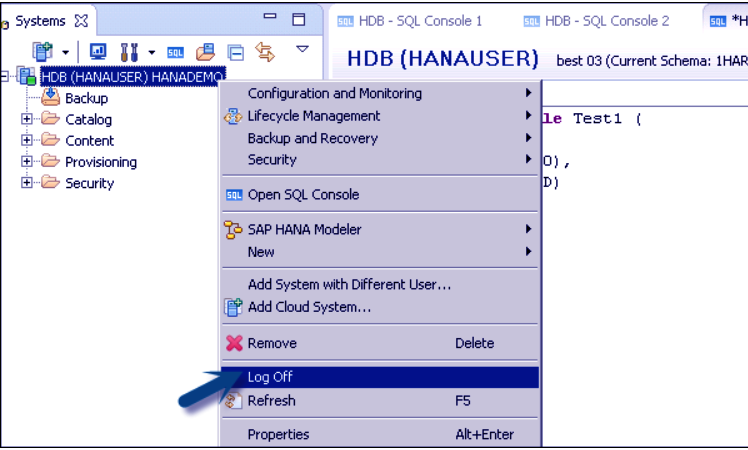
Log Off/Login in SAP HANA Studio
You can also log in to the system by doing the same and selecting Log In from the drop-down menu.
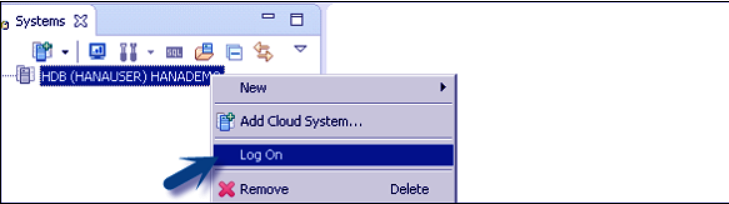
Log Off/Login in SAP HANA Studio
So, this was all about SAP HANA Studio Administration Console. Hope, you liked our explanation.
Conclusion
Thus, this is all you need to know about the SAP HANA Studio Administration Console view to start working on it and administering your database systems.
If you have any queries regarding this, drop them in the comment box below.
You give me 15 seconds I promise you best tutorials
Please share your happy experience on Google


