SAP HANA Attribute View – Create Attribute View in 9 Easy Steps
Expert-led Online Courses: Elevate Your Skills, Get ready for Future - Enroll Now!
Moving ahead in understating modeling with SAP HANA Information Modeler, let us start with learning about SAP HANA Attribute View. In this lesson, we will first understand the concept behind the attribute view, the process flow of creating the attribute view and types of attribute view.
Along with the conceptual knowledge, we will also learn how to create attribute view in SAP HANA Modeler.
Let us rewind a little and recall the significance of information modeling in SAP HANA. Information models or Views are logical frameworks or run-time objects which structures data from one-dimensional databases into multi-dimensional data structures for analytical purposes.
The information views do not store data physically in SAP HANA. The logic of a view is stored in HANA and every time a reporting tool requests the view, the system fetches the data according to the blueprint of the view from the data source and presents it to the user.
Let’s start this tutorial by learning the definition of Attribute View.
What is SAP HANA Attribute View?
The Attribute View in SAP HANA is a set of dimensions or master data which can be joined with the fact table in an Analytic View. An Attribute View can be created by taking data from one or more data tables. The attribute shows relationships between different attributes.
The attributes can be Customers, Region, Product, Period etc. In an Attribute View, joins can be made between two master data tables, a text table, and a master data table, etc.
Types of Attribute View
1. Standard Attribute Views: These views create by table fields among different column store tables by using joins in SAP HANA.
2. Derived Attribute Views: It is an Attribute View created using another existing Attribute View. It will open in read-only mode, we cannot edit the derived Attribute view. The only editable field in the created Attribute View is the description. It will act as a reference to the base Attribute view. Any modification to the base Attribute View will reflect in the created Attribute View.
3. Timed Attribute Views: Timed Attribute View stores the time-dependent data. It is created against calendar tables – M_FISCAL_CALENDAR (or) time tables – M_TIME_DIMENSION, M_TIME_DIMENSION_YEAR, M_TIME_DIMENSION_MONTH and M_TIME_DIMENSION_WEEK. All these tables stores in _SYS_BI schema.
Types of Joins
Tables from data sources join in different ways to create an Attribute View in SAP HANA. The join types are:
- Referential Join
- Inner Join
- Left Outer Join
- Right Outer Join
- Text Join
Along with defining the join type of the Attribute View, the cardinality of tables is also important to specify. The cardinality can be 1:1, 1: N or N:1.
Types of Hierarchies
Along with cardinality, and join type, dimensions in Attribute View arranges in hierarchies. There are two types of hierarchies in which attributes in a set gets arrange; Level hierarchy and Parent-Child hierarchy.
- The level hierarchy follows a rigid pattern of root and child nodes where successive attributes can be accessed only in the order they were created.
- A parent-child hierarchy is like a tree structure where there are multiple sub-nodes of a root node which can further extend to an undecided length. Thus, the tree-like structure has unbalanced root nodes.
Creating an Attribute View in SAP HANA
Before we learn how to create the Attribute View in SAP HANA Modeler, let us understand the process flow in order to create a complete and proper Attribute View.
- Enter details: Enter the technical name of the table and mention the table type.
- Table selection: Select tables from the database schemas. You can select tables from more than one schema. If you select multiple tables, joins can create between them in this step.
- Field selection: Define the key column and select the output column.
- Advanced operations: You can carry out transformation processes on columns like creating calculated columns, creating hierarchies, etc.
- Active and data preview: At last, you can activate the Attribute View after saving the selections made by you and go to Data Preview to preview the view created.
Attribute View Creation
Here are the steps to create an Attribute View in SAP HANA Modeler:
Step 1: Open packages in the Content folder in the SAP HANA Modeler.
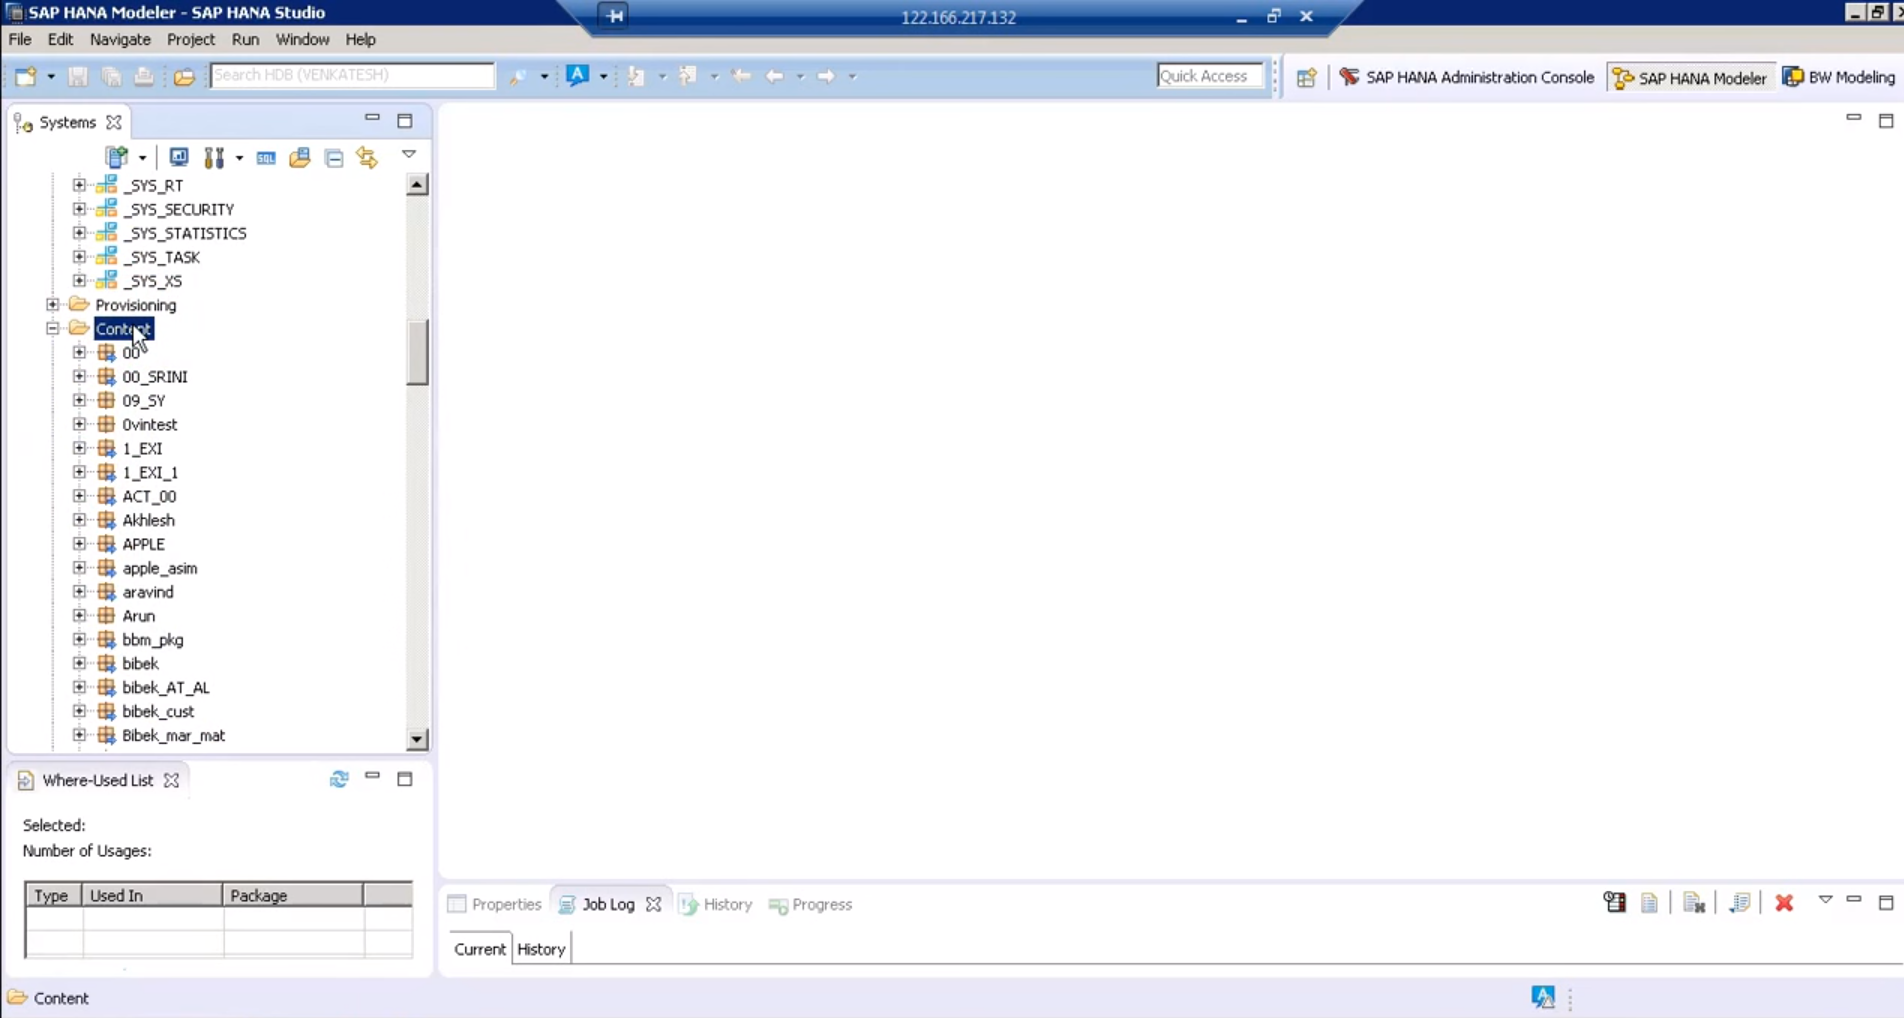 Step 2: Then, select an existing package or create a new package from the Content node.
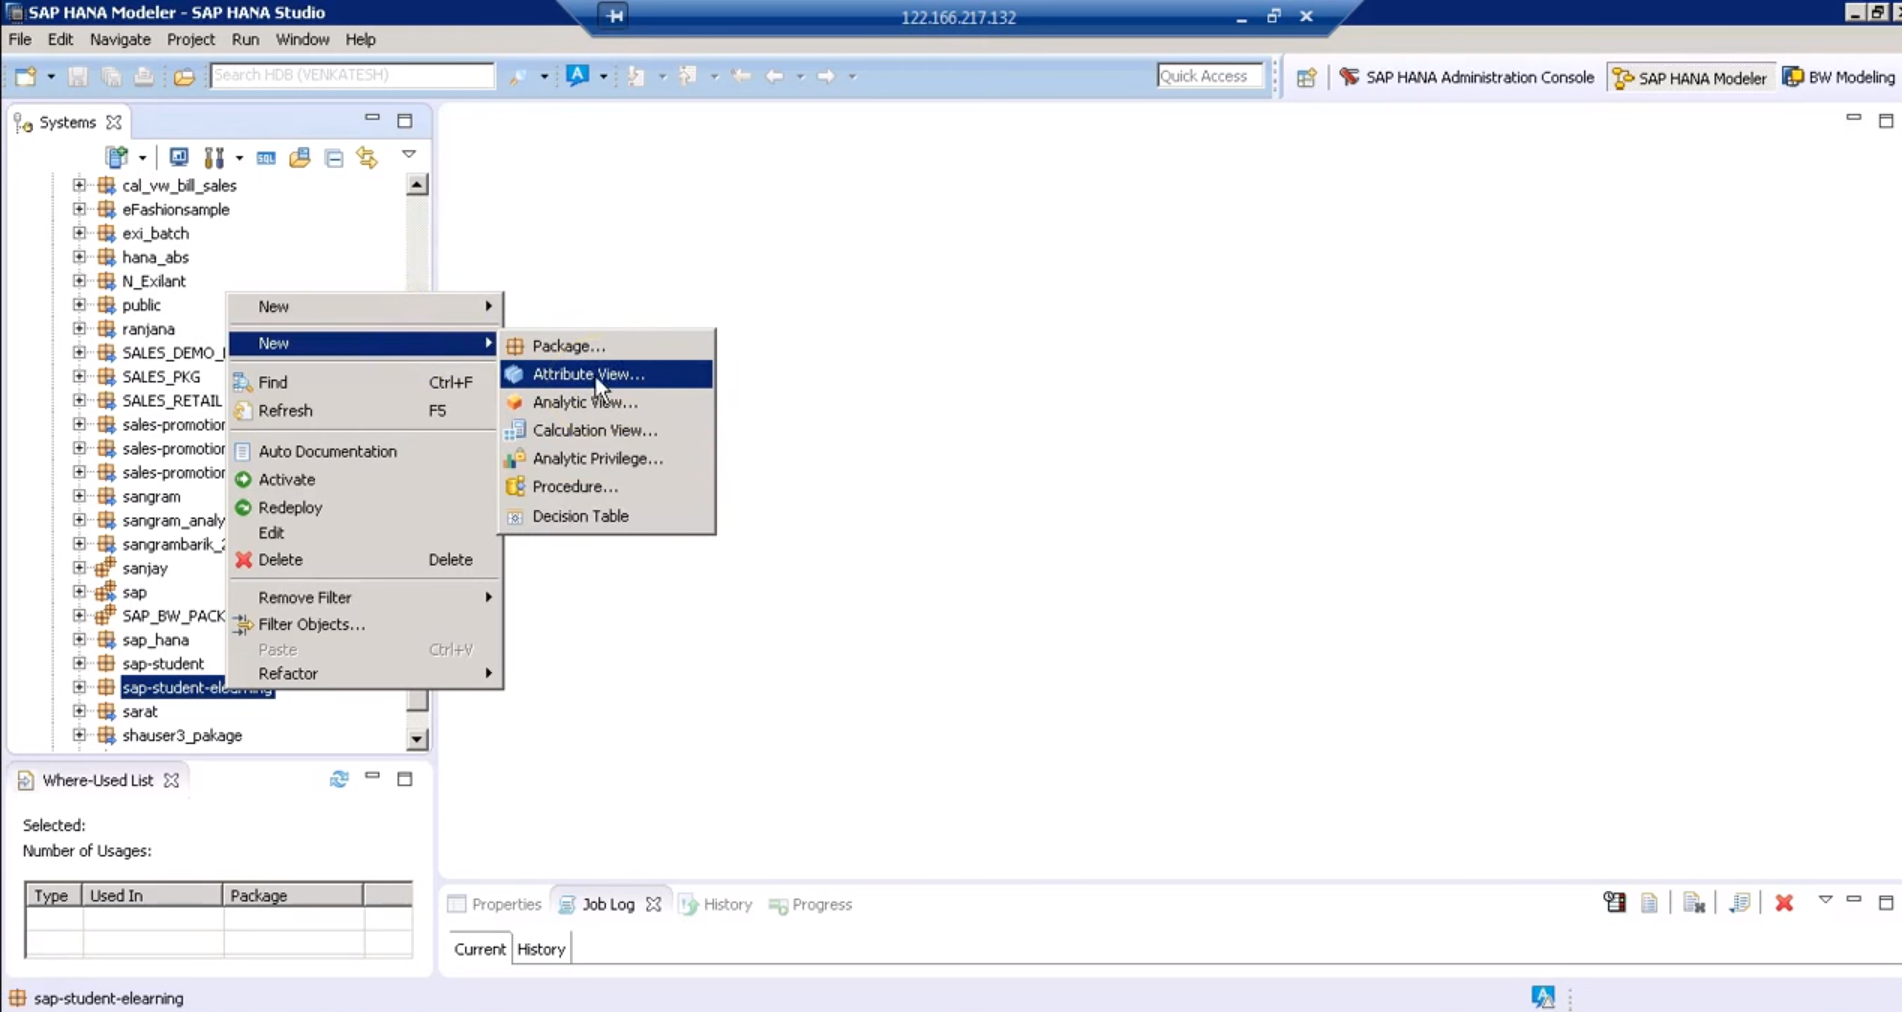
Right-click on the package name, go to New and select Attribute View option.
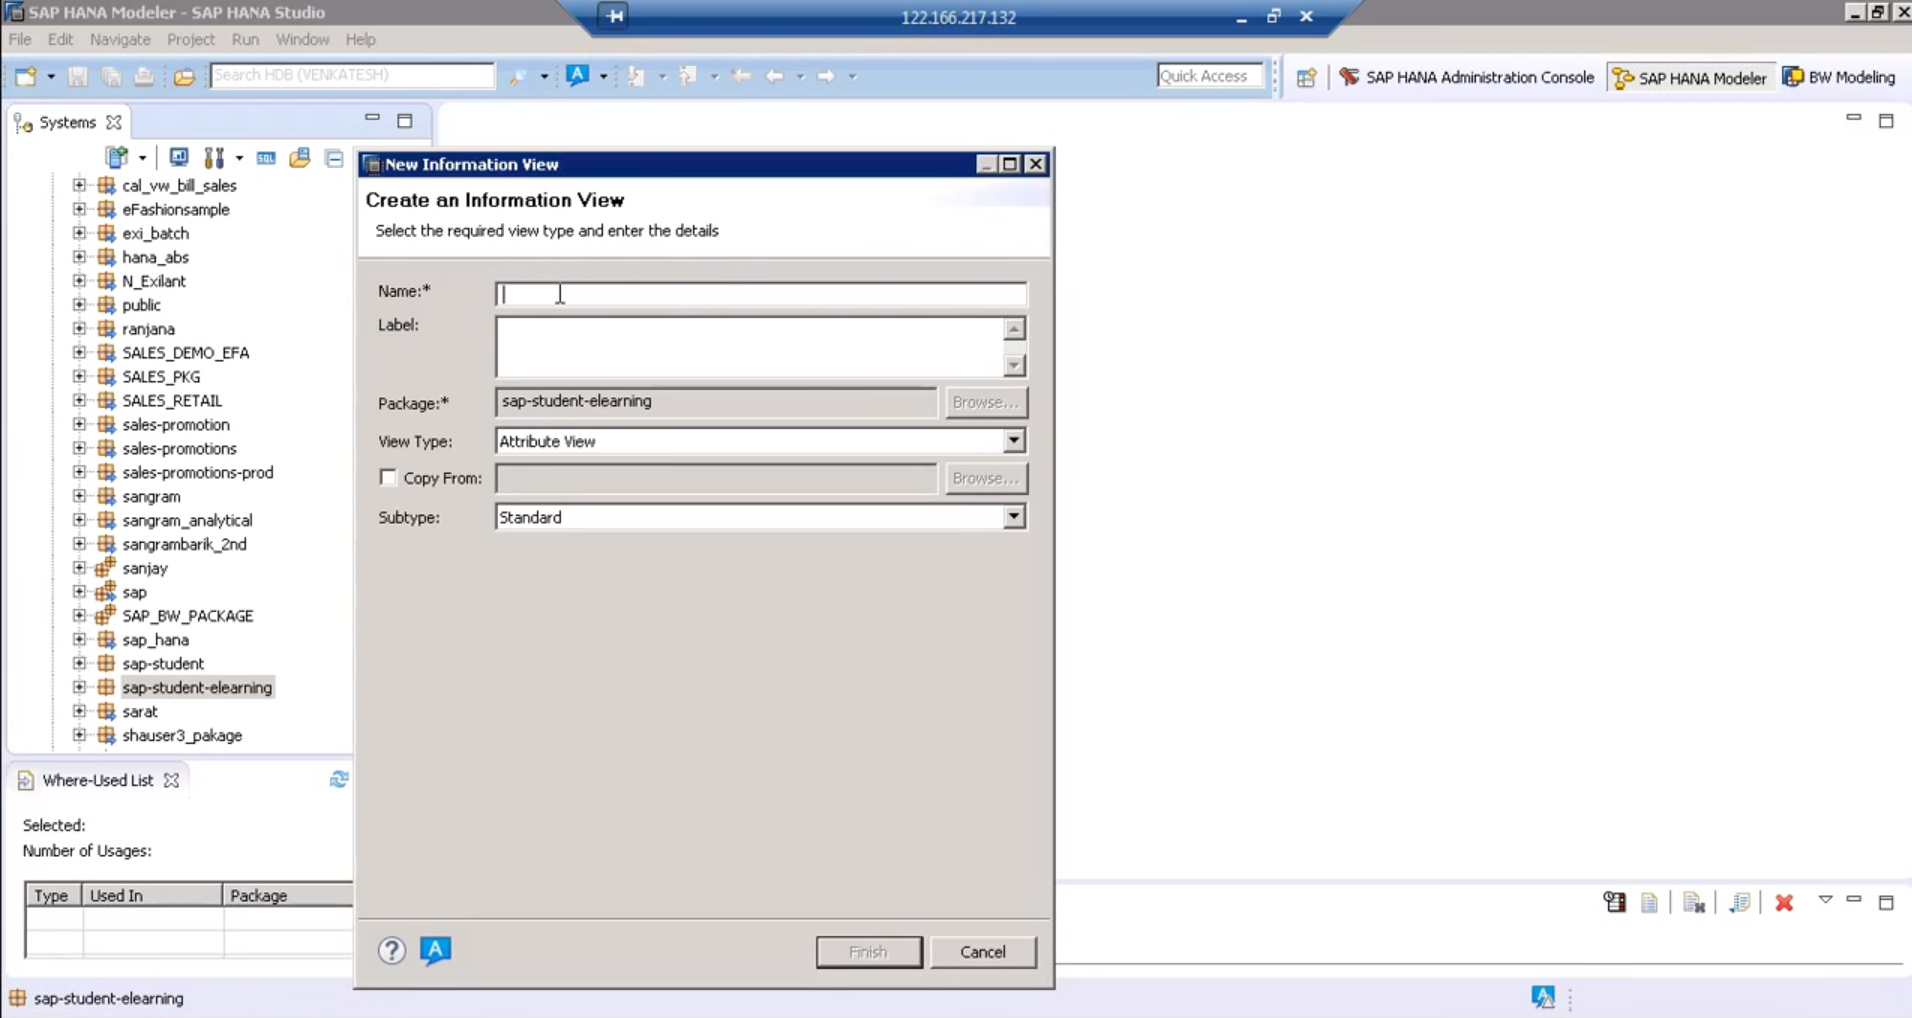
Step 3: Enter the technical name of the view carefully, as it cannot be changed later. Also, you can enter a label name. From the Copy From option, you can select an existing Attribute View to act as a basis for the new one. Select a subtype and click on Finish.
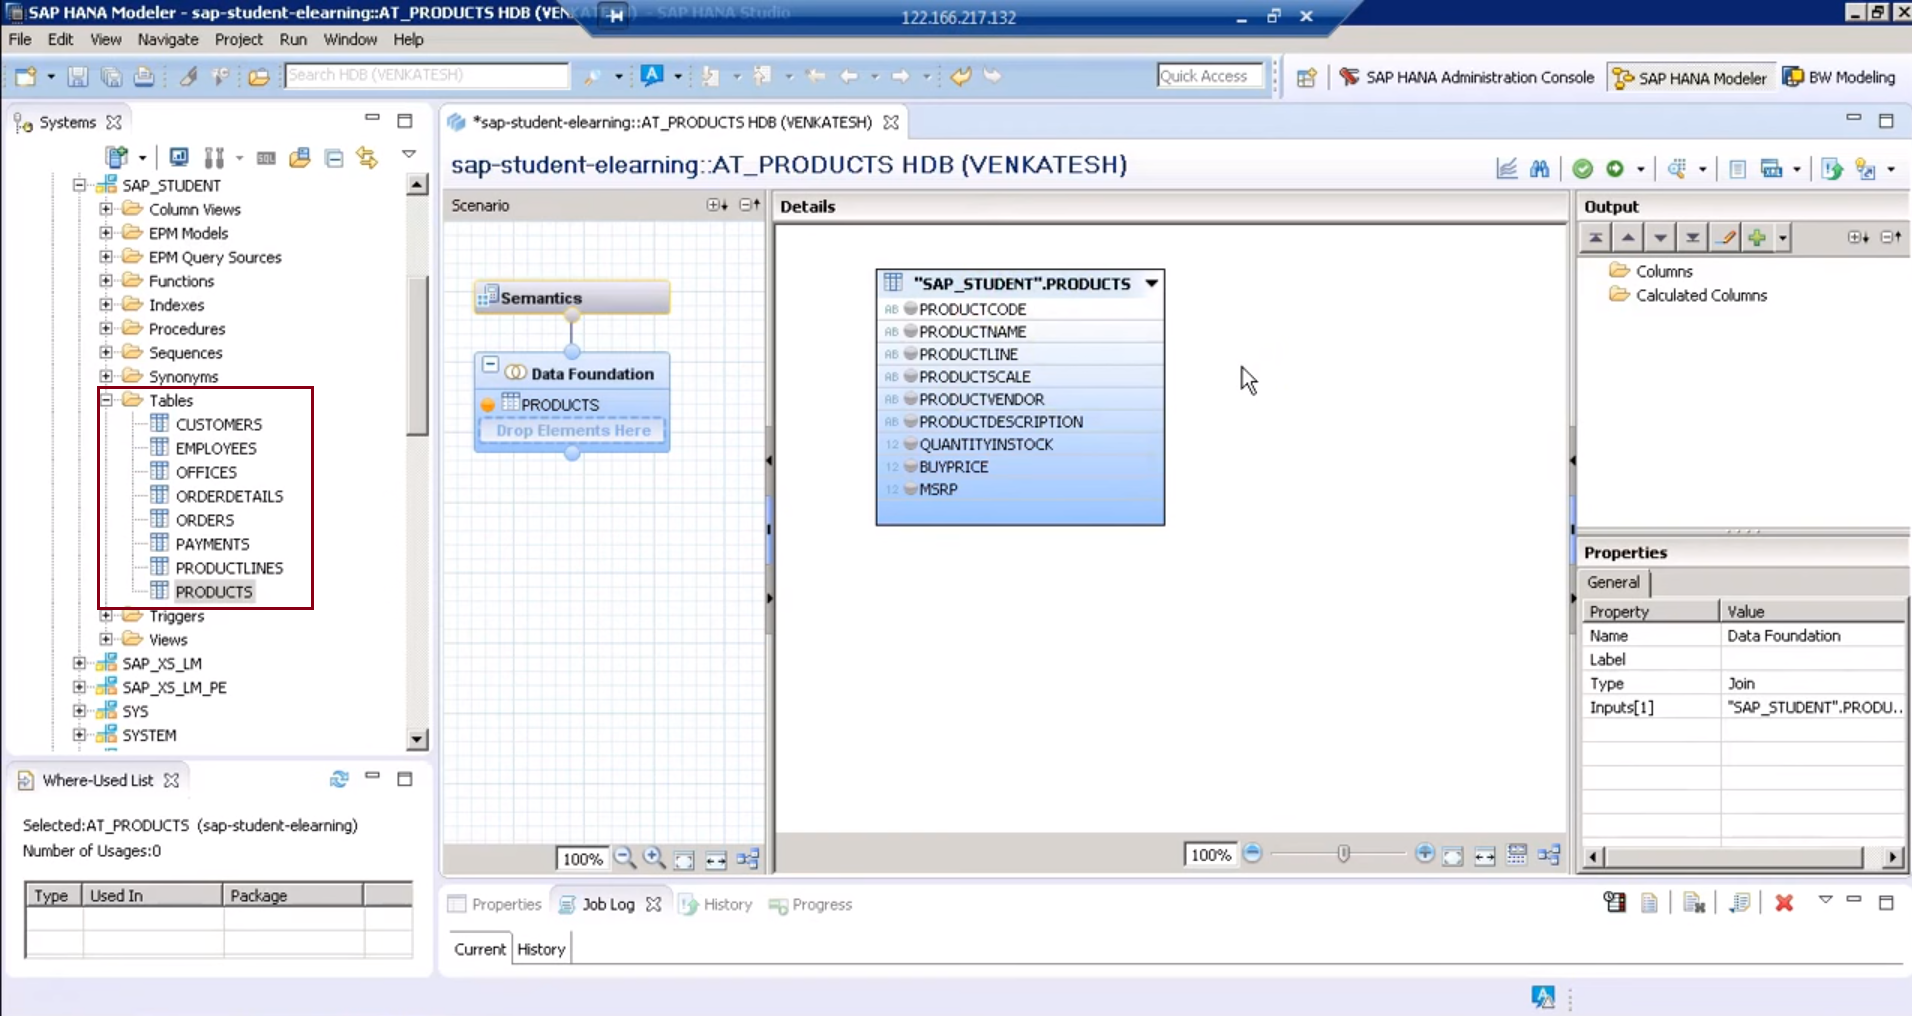
Step 4: Then, a view editor will open. The Semantics section shows all the details that relate to the columns from the tables. And, you can create the Attribute View in the Data foundation section of SAP HANA Modeler.
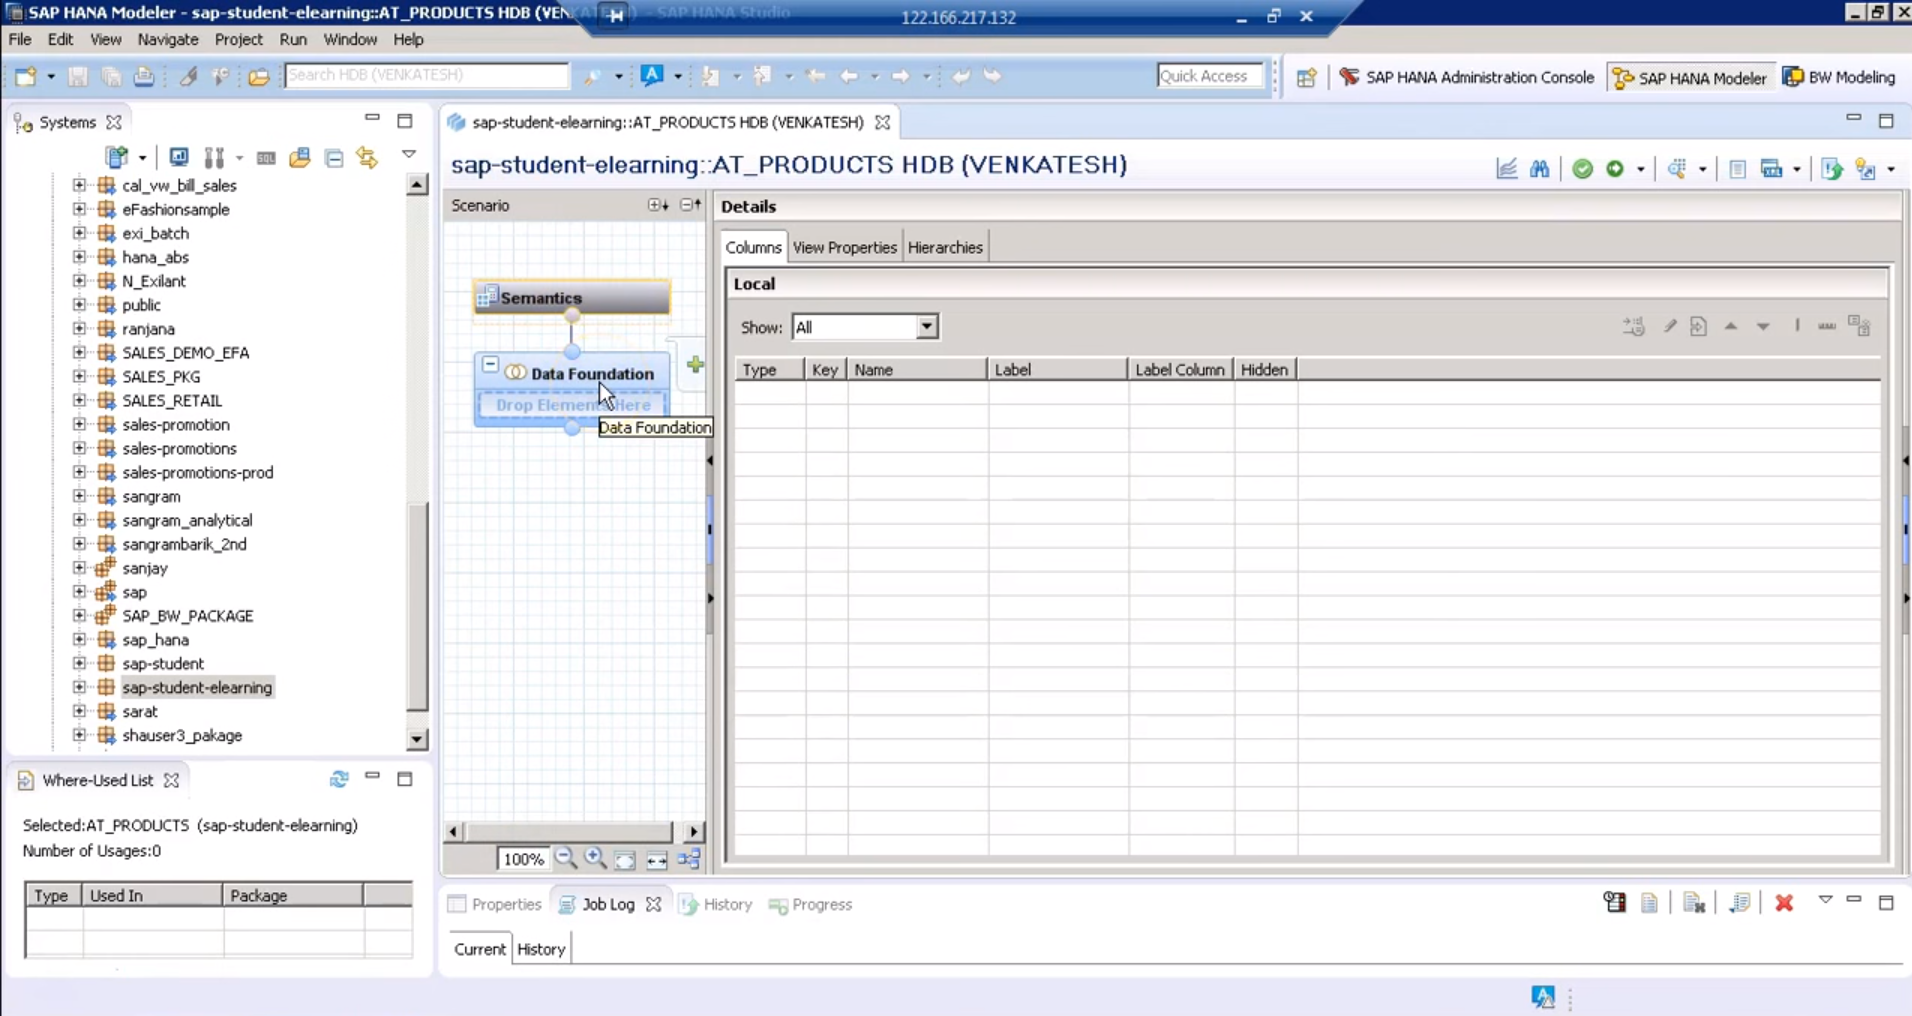 Step 5: After that, you can select the table from the schema in two ways. Either by finding the table under the schema name in Catalogue node and dragging-dropping the table on the editing pane. You can add tables from more than one schema and create joins between them.
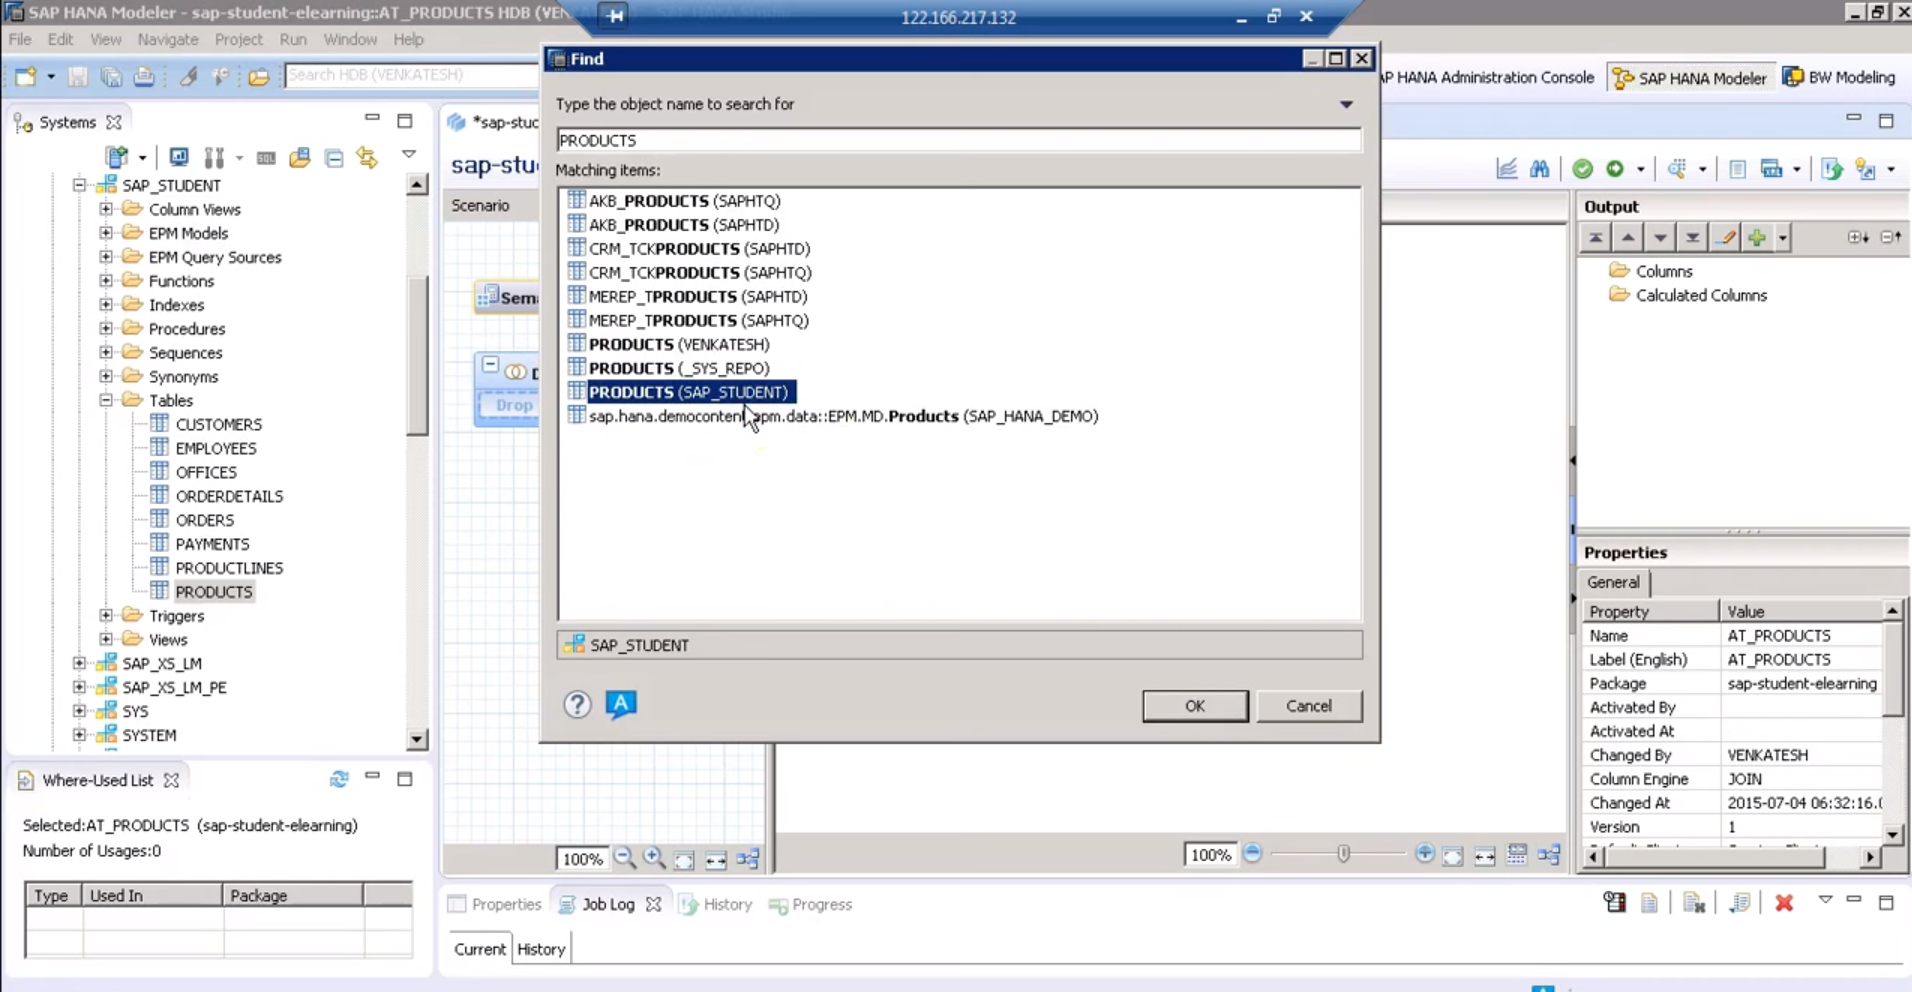
Or, by clicking on the green plus sign next to the Data foundation section and searching the table by name.
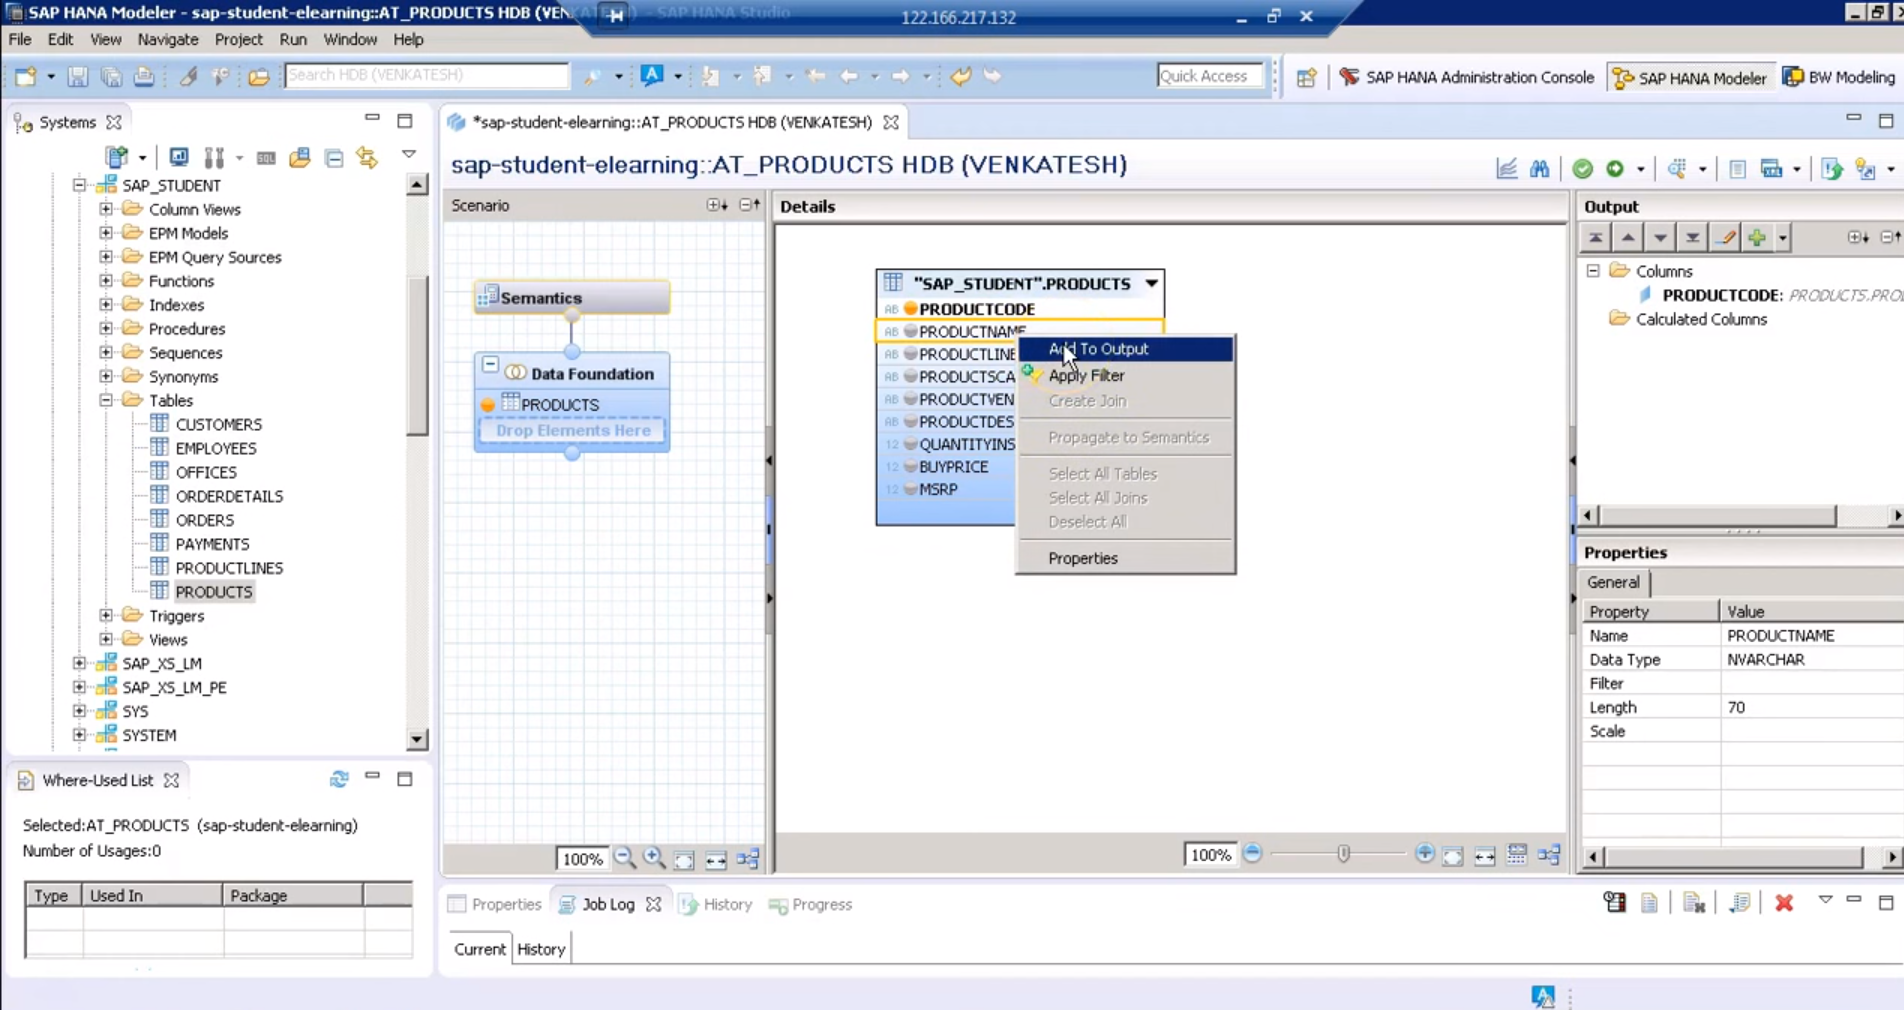
Step 6: Now, its time to select columns from the table to add into the Attribute View in SAP HANA Modeler. You can add columns into the view in two ways; either by right-clicking on the column name and selecting Add to Output.
The column name will show in the right-most Output column and also on the Data foundation at the left. Or, you can simply click on the dot present in-front of the column name and it will turn orange indicating that it is added.
 Step 7: If you wish to remove a column from the Output, right-click on the column name and click on Remove.
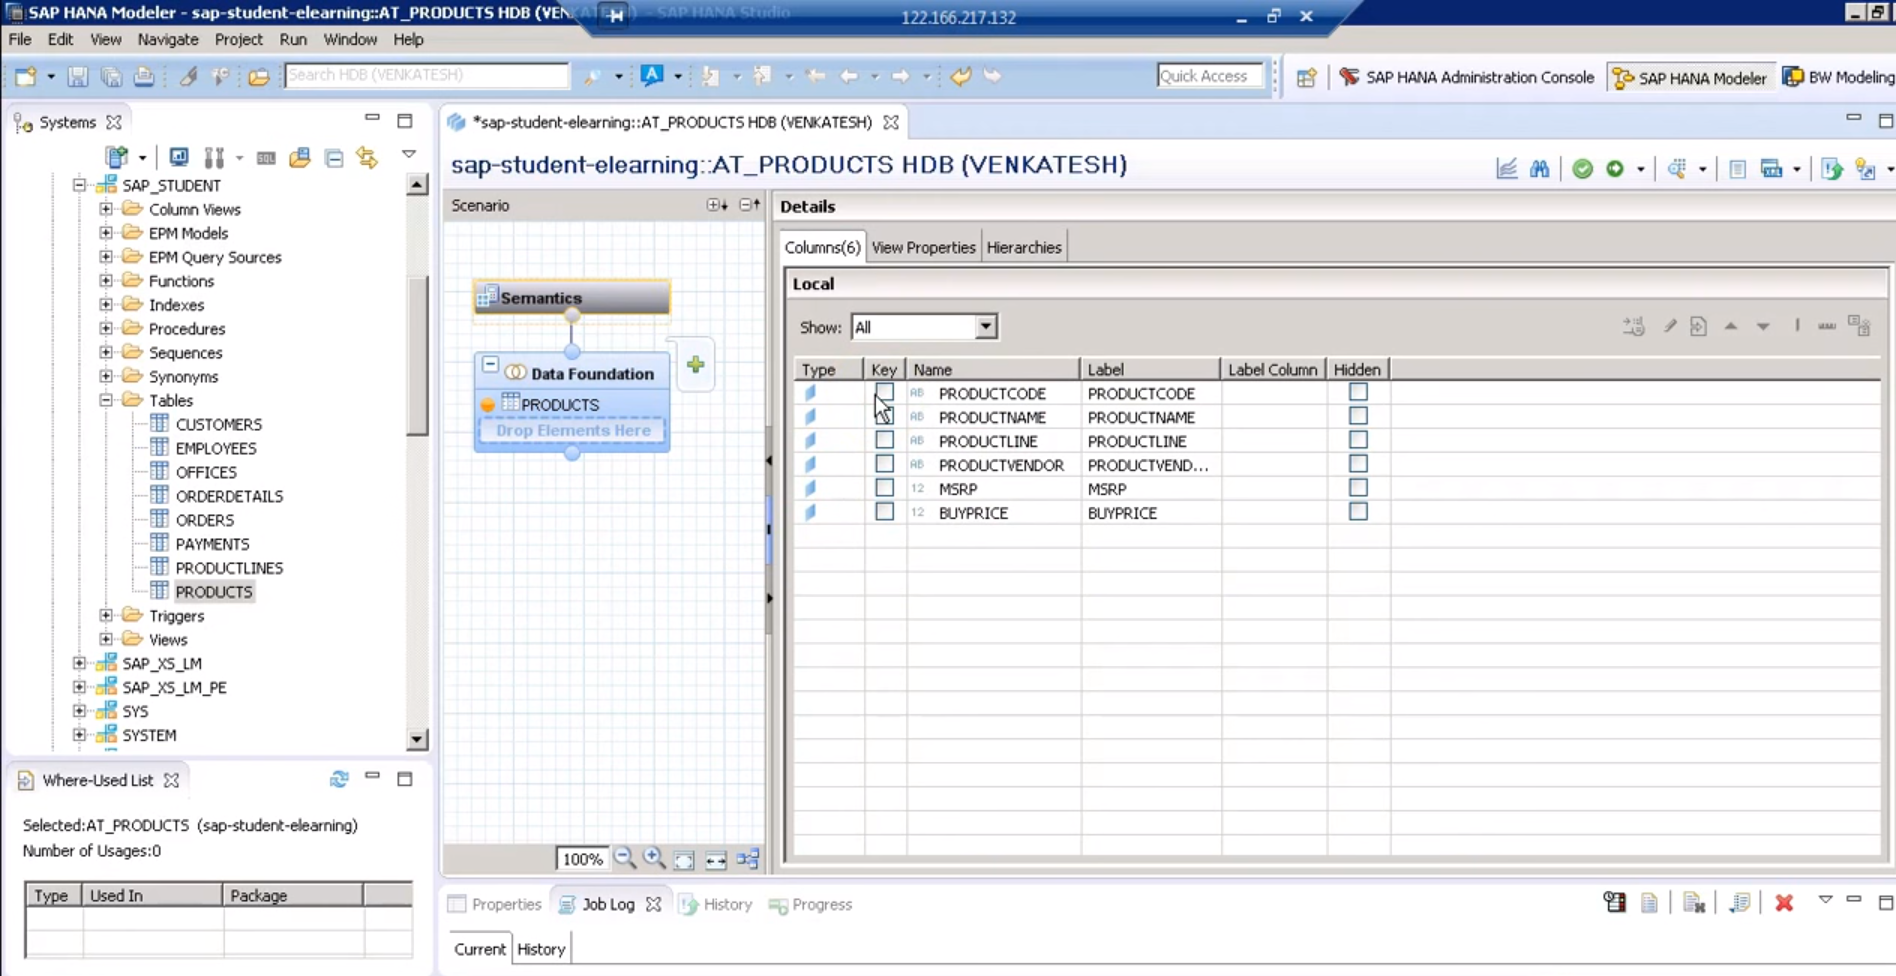
Step 8: Next, you can go to the Semantics section from where you have to select at least one column as the key attribute. From the properties section in SAP HANA Modeler, you can see the properties of the Attribute View.
Also, you can set the Cache Invalidation Period which sets the time of data loading from the RAM to the cache. The data tables stay into the cache for that defined period. And, create hierarchies from the Hierarchy section.
 Step 9: Upon completing all the processes of adding columns and tables to create the Attribute View, save and activate the view by clicking on the green tick icon and green arrow given on the panel on top. Then go to the Data preview icon.
![]()
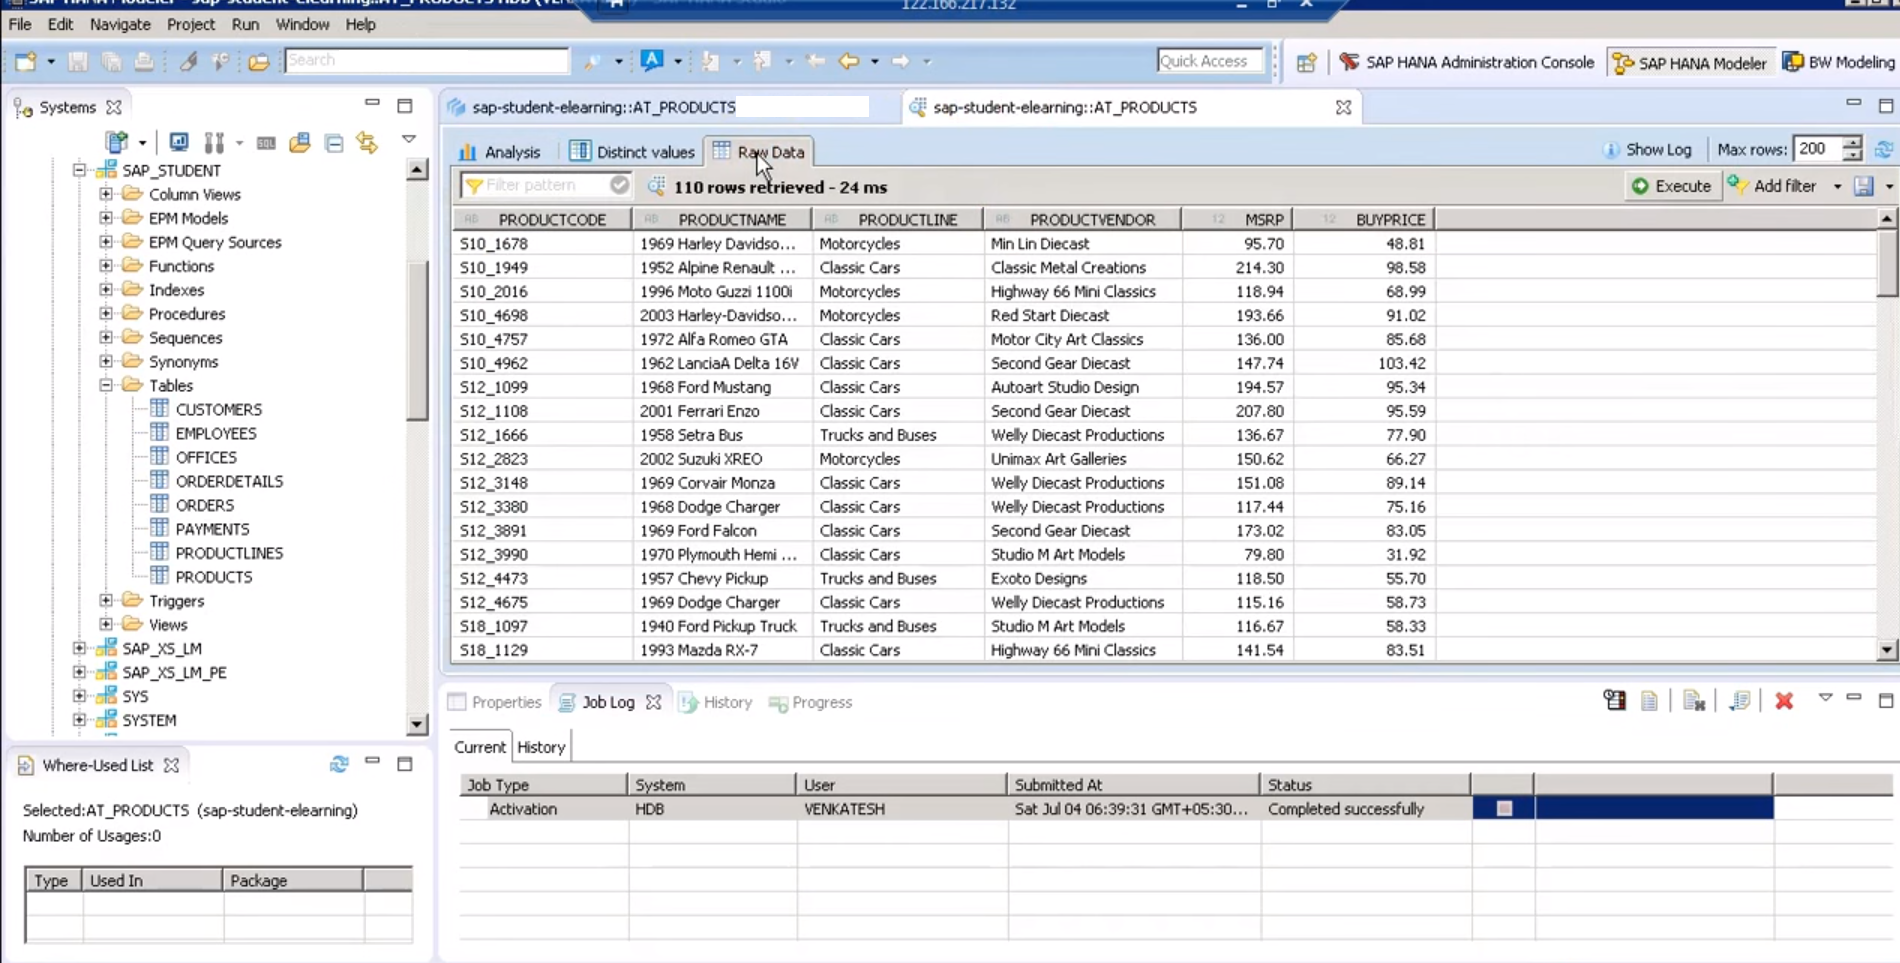
Step 10: The data preview window contains three tabs; Analysis, Distinct values, and Raw data. The raw data section shows the data in tabular form.
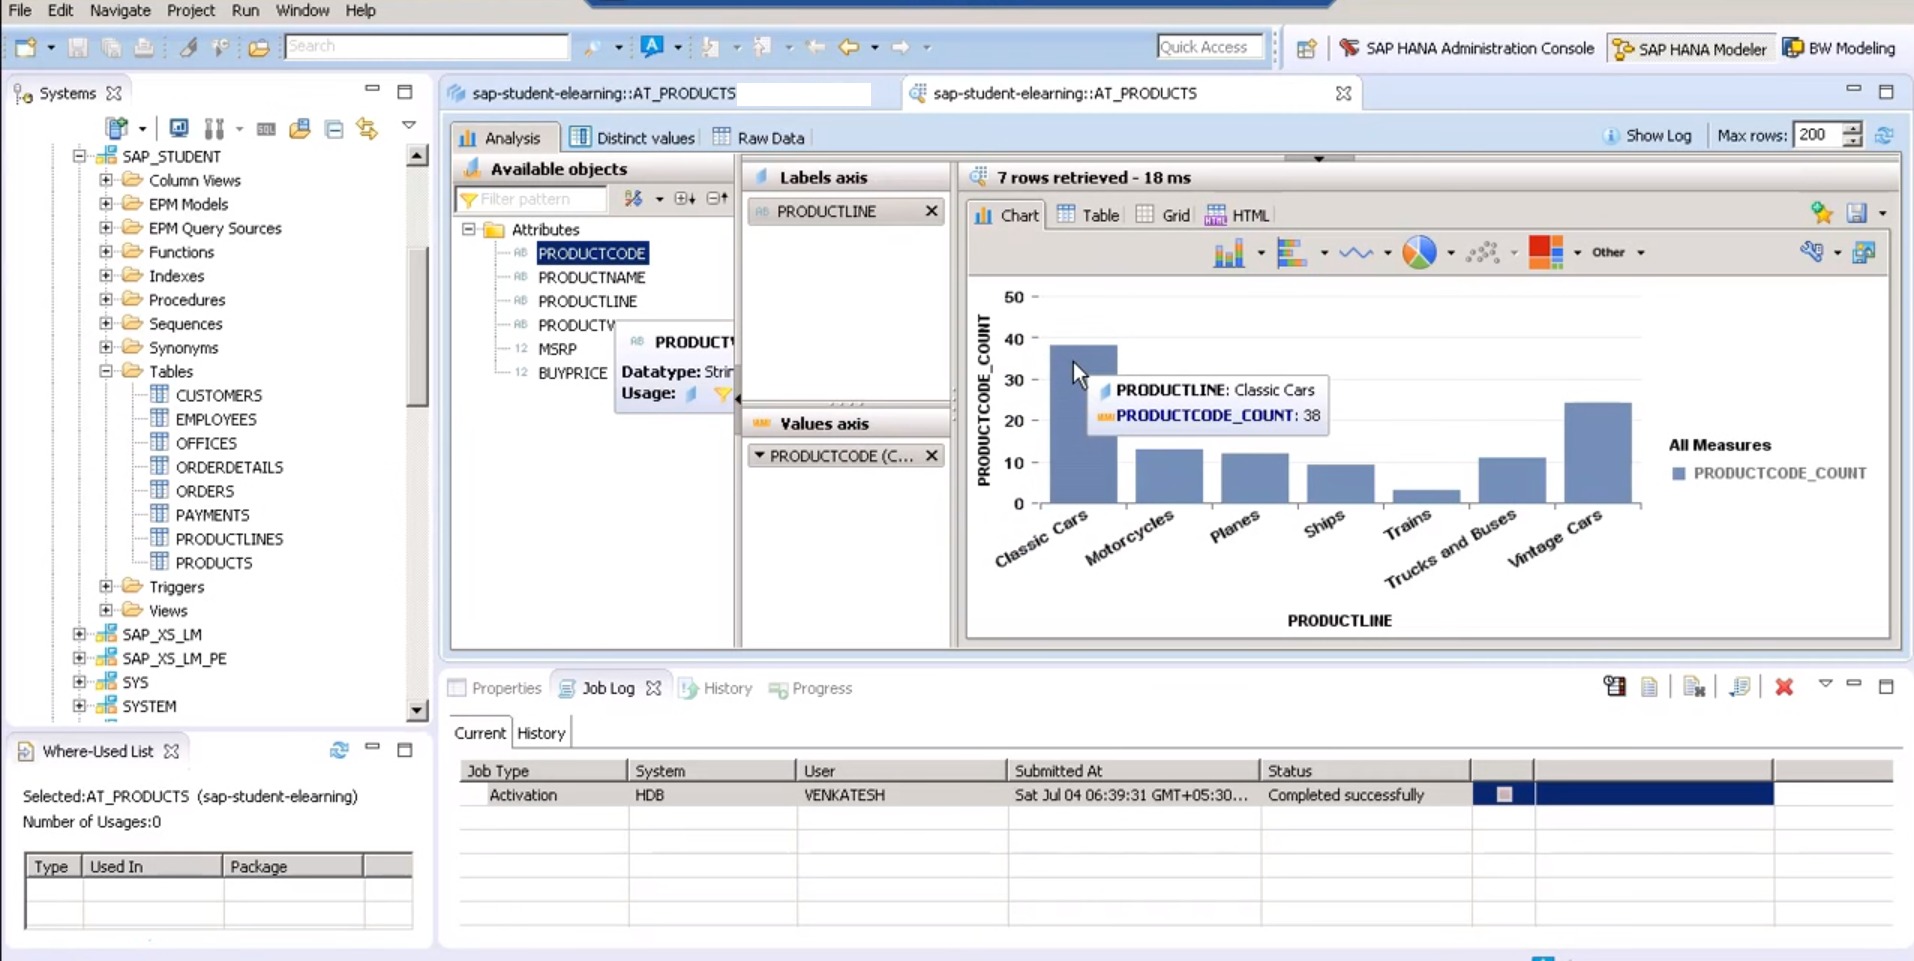
Lastly, you can do instant analysis using the data from the columns in the Analysis tab. Just drag-and-drop the columns in place of two axes and visualization create.
Summary
Thus, in this lesson, we learned about the first, which the very basic information view in SAP HANA, that is, the Attribute View. We went through the Attribute View as a concept moving forward with learning how to create it in SAP HANA Modeler. In the lessons to come, we will learn about the other two views, namely Analytic View and Calculation View.
Therefore, don’t forget to check the upcoming articles. If you have come across with any kind of queries related to SAP HANA Attribute View article, feel free to ask in the comment section.
If you are Happy with DataFlair, do not forget to make us happy with your positive feedback on Google


Well explained each and every aspects of SAP HANA . Very interesting and simple to understand.
Thank You!!
Hey Shweta,
I am glad that you liked our article. Refer our sidebar for more such interesting SAP tutorials.
Hi,
It is a nice information on SAP HANA attribute view and how to create it.
I need to know, fit what scenario we need to go for attribute views ? What is the advantage of attribute views over analytical or calculation views ?