JavaScript Project – How to Create a To-do List using JavaScript Code
Full Stack Web Development Courses with Real-time projects Start Now!!
“Rename your ‘To-do’ list to your ‘Opportunities’ list. Each day is a treasure chest filled with limitless opportunities; take joy in checking many off your list”
– Steve Maraboli
After completing the JavaScript project on countdown timer, we will work on a more significant project than we have before. We will create a beautiful page that works with a To-do list. It is one of the most common projects for developers, and you must know how to build one. There are many ways to create a To-do list using JavaScript, but I am going to discuss the best approach that I feel is the most efficient. So let’s begin the 3rd project of the JavaScript tutorial series designed by DataFlair with understanding what this JavaScript project is all about.
JavaScript Project on To-do List
The project is a single webpage containing different list items and a text area to add custom tasks. The “Add” button lets the user add an object to the list. We have the facility to check the items from the list or remove them if we want. If we wish, we can clear all the list items with a single button. It is a very user-friendly and user-interactive project that makes the work of a user a lot easier.
1. Getting Started with HTML
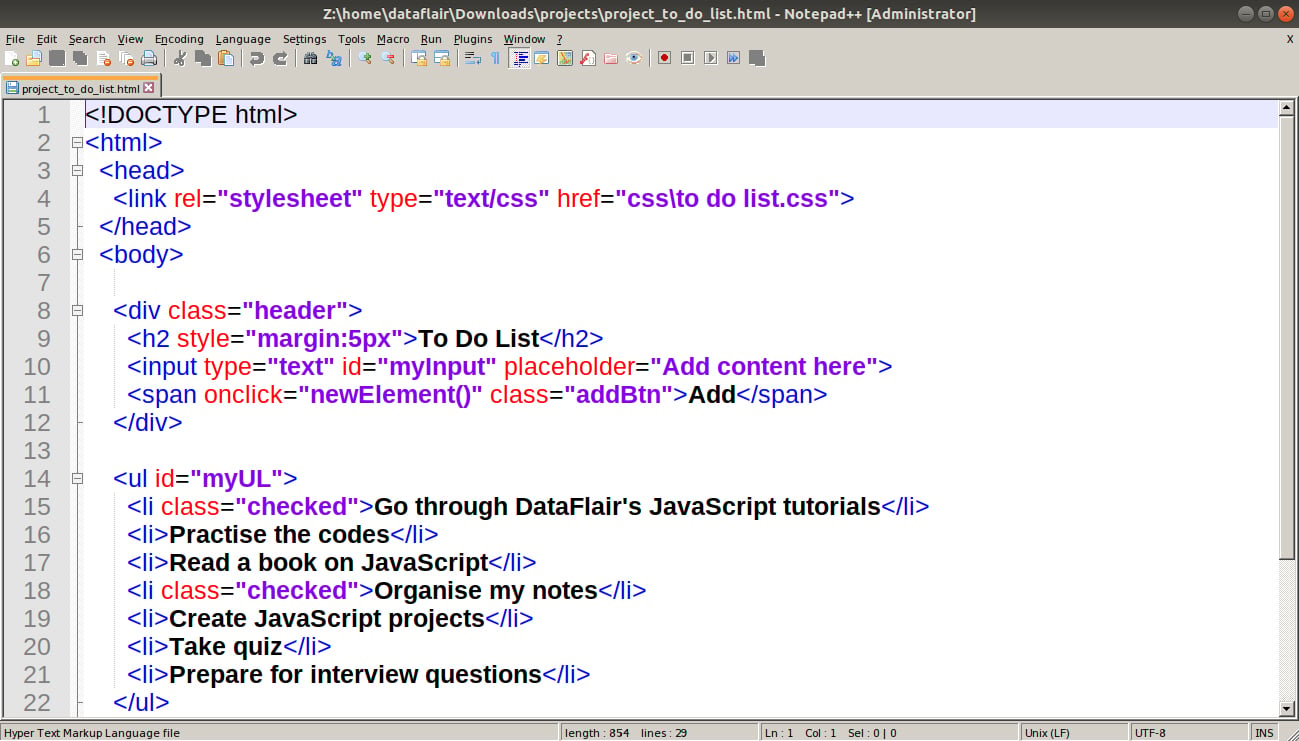
The first step of our JavaScript project (as always😝) is adding HTML. The HTML file will contain all the elements we need to show on our page when it loads. The document also includes the location of our CSS and JavaScript files that we will create in the further sections. The following is the content of your HTML file. You can edit these elements as you like and get the result in the browser.
Code:
<!DOCTYPE html>
<html>
  <head>
    <link rel="stylesheet" type="text/css" href="css\to do list.css">
  </head>
  <body>

    <div class="header">
      <h2 style="margin:5px">To Do List</h2>
      <input type="text" id="myInput" placeholder="Title...">
      <span onclick="newElement()" class="addBtn">Add</span>
    </div>

    <ul id="myUL">
      <li class="checked">Go through DataFlair's JavaScript tutorials</li>
      <li>Practise the codes</li>
      <li>Read a book on JavaScript</li>
      <li class="checked">Organise my notes</li>
      <li>Create JavaScript projects</li>
      <li>Take quiz</li>
      <li>Comprehend interview questions</li>
    </ul>
    <button type="button" id="clear-list" onclick="removeAll()">Clear Items</button>

    <script type="text/javascript" src="js\to do list.js"></script>

  </body>
</html>
Screenshot:
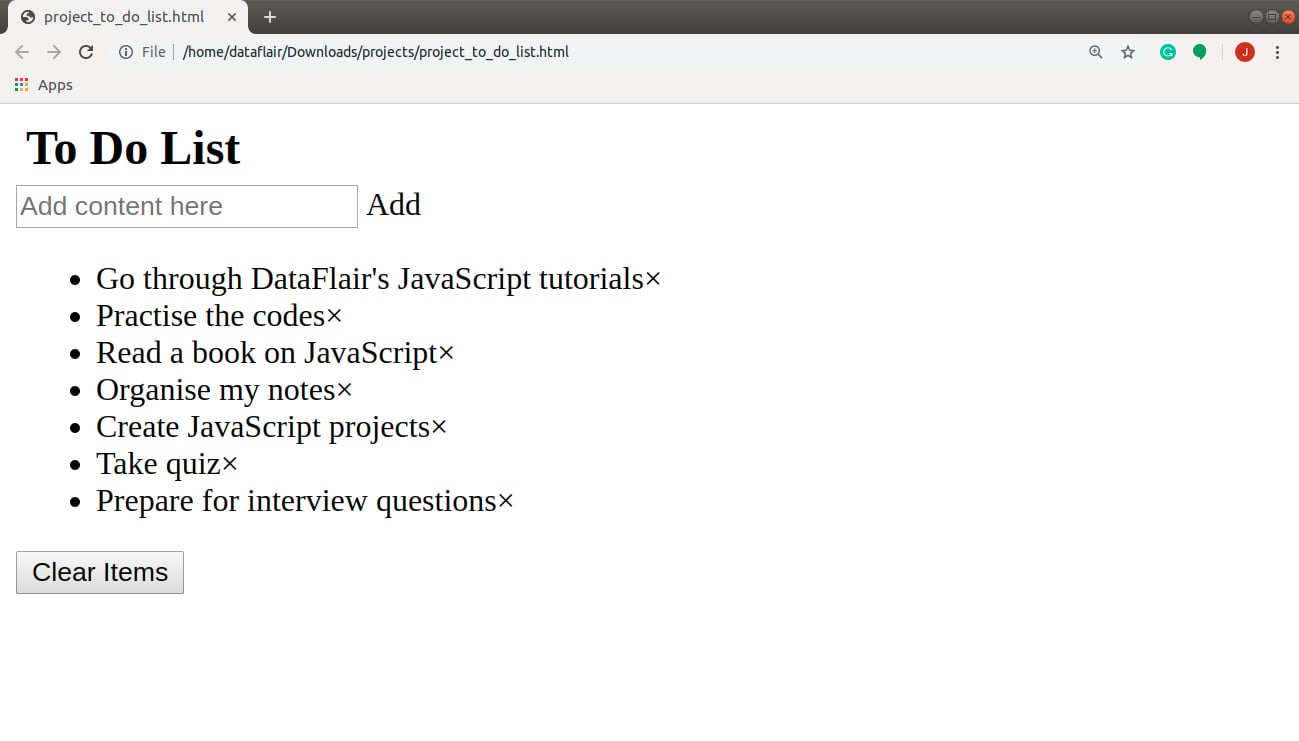
The webpage will look as follows with the HTML file:
2. Making the webpage attractive
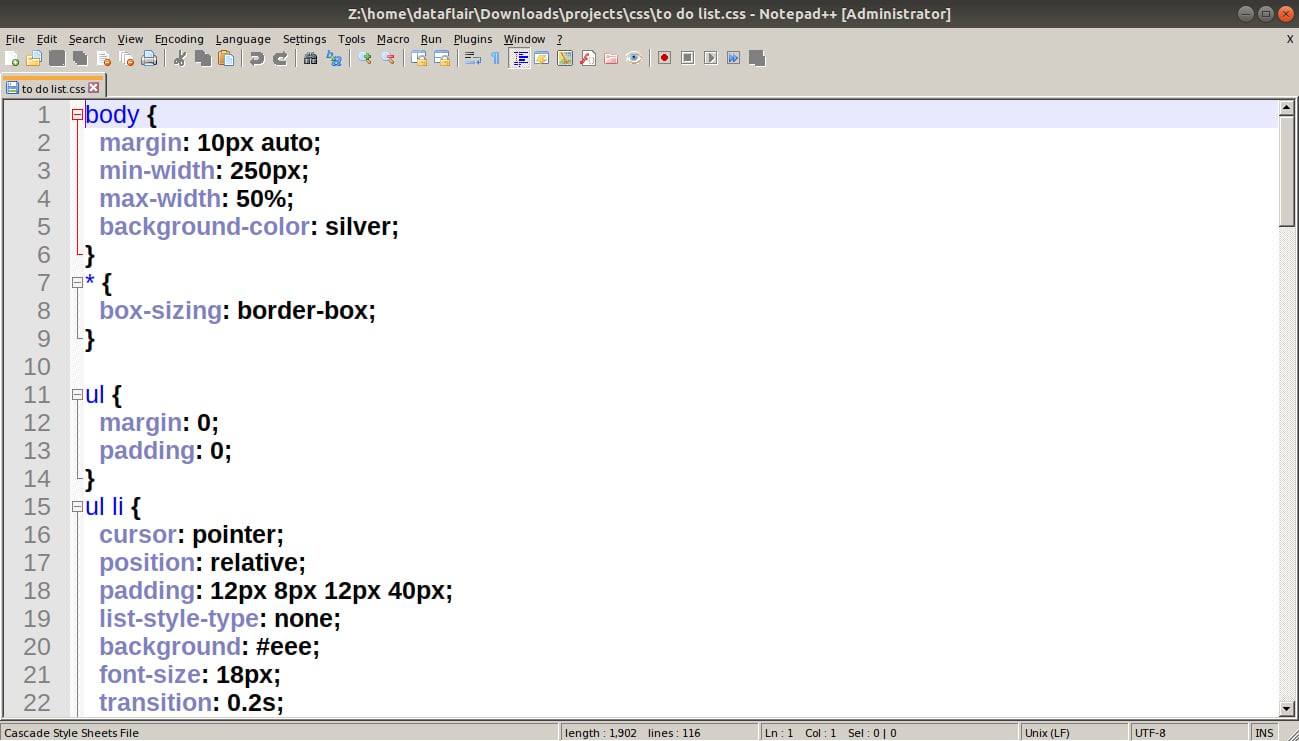
The next step is adding CSS in the webpage. To do that, create a new file in the text editor, copy the code below in the file, then save it with the name ‘to do list.css’. You can vary the file location of the file, but remember, it is standard procedure to save the CSS and JavaScript files in separate folders to avoid confusion.
Code:
body {
  margin: 10px auto;
  min-width: 250px;
  max-width: 50%;
  background-color: silver;
}
* {
  box-sizing: border-box;
}

ul {
  margin: 0;
  padding: 0;
}
ul li {
  cursor: pointer;
  position: relative;
  padding: 12px 8px 12px 40px;
  list-style-type: none;
  background: #eee;
  font-size: 18px;
  transition: 0.2s;

  /* make the list items unselectable */
  -webkit-user-select: none;
  -moz-user-select: none;
  -ms-user-select: none;
  user-select: none;
}

/* Set zebra-stripes: all odd list items to a different color */
ul li:nth-child(odd) {
background: #f9f9f9;
}
ul li:hover {
  background: #ddd;
}
ul li.checked {
  background: teal;
  color: white;
  text-decoration: line-through;
}
ul li.checked::before {
  content: '';
  position: absolute;
  border-color: #fff;
  border-style: solid;
  border-width: 0 2px 2px 0;
  top: 10px;
  left: 16px;
  transform: rotate(45deg);
  height: 15px;
  width: 7px;
}

/* Style the close button */
.close {
  position: absolute;
  right: 0;
  top: 0;
  padding: 12px 16px 12px 16px;
}

.close:hover {
  background-color: crimson;
  color: white;
}
.header {
  background-color: crimson;
  padding: 30px 40px;
  color: white;
  text-align: center;
}
.header:after {
  content: "";
  display: table;
  clear: both;
}
input {
  margin: 0;
  border: none;
  border-radius: 0;
  width: 75%;
  padding: 10px;
  float: left;
  font-size: 16px;
}
.addBtn {
  padding: 10px;
  width: 25%;
  background: #d9d9d9;
  color: #555;
  float: left;
  text-align: center;
  font-size: 16px;
  cursor: pointer;
  transition: 0.3s;
  border-radius: 0;
}
.addBtn:hover {
  background-color: #bbb;
}
#clear-list{
  width: 30%;
  font-weight: bold;
  font-style: italic;
  font-size: xx-large;
  font-family: "Times New Roman";
  margin: 40px 35%;
  background-color: darkblue;
  color: white;
}
#clear-list:hover{
  background-color: blue;
  color: white;
}
Screenshot:
Output:

3. Implementing the Complete JavaScript code
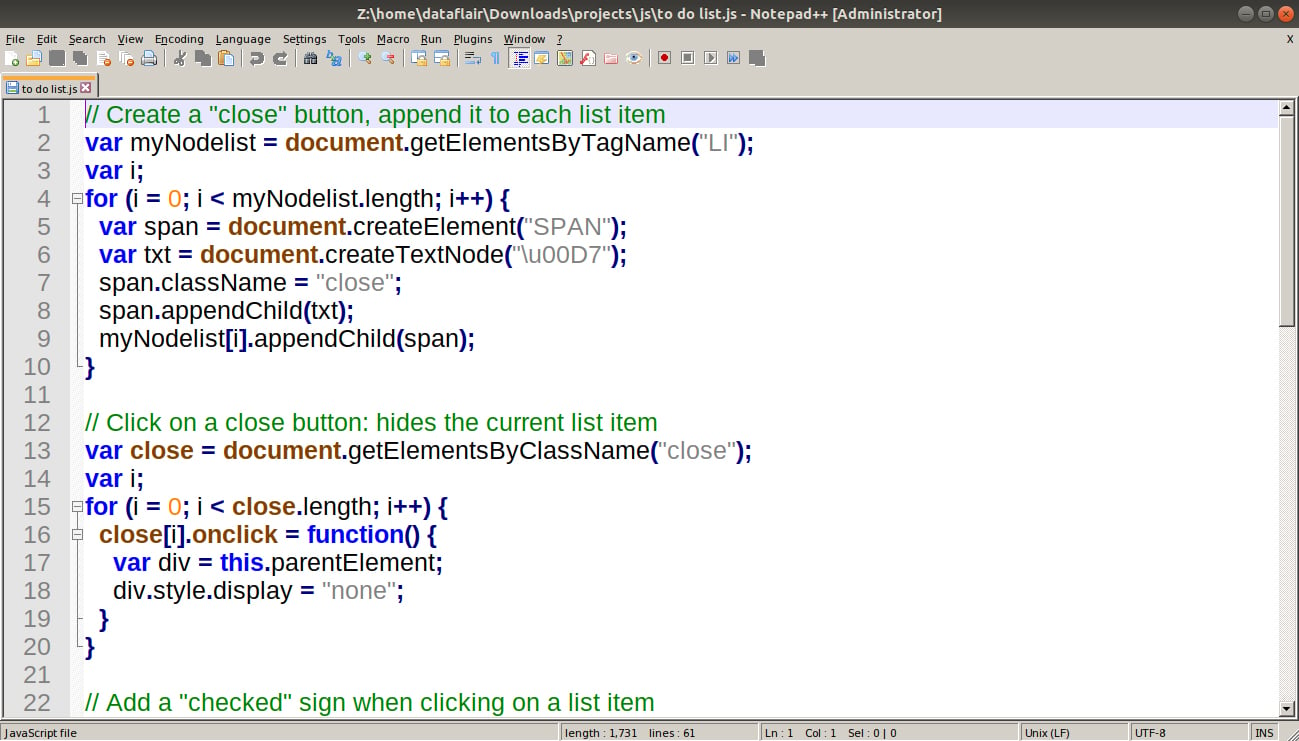
The styling of the webpage is perfect. It is time to change the page from static to dynamic. We will achieve this task with the help of JavaScript. First of all, let’s create a JavaScript file ‘to do list.js’ and save the following code in the file.
Code:
// Create a "close" button and append it to each list item
var myNodelist = document.getElementsByTagName("LI");
var i;
for (i = 0; i < myNodelist.length; i++) {
  var span = document.createElement("SPAN");
  var txt = document.createTextNode("\u00D7");
  span.className = "close";
  span.appendChild(txt);
  myNodelist[i].appendChild(span);
}

// Click on a close button to hide the current list item
var close = document.getElementsByClassName("close");
var i;
for (i = 0; i < close.length; i++) {
  close[i].onclick = function() {
  var div = this.parentElement;
  div.style.display = "none";
  }
}

// Add a "checked" symbol when clicking on a list item
var list = document.querySelector('ul');
list.addEventListener('click', function(ev) {
  if (ev.target.tagName === 'LI') {
  ev.target.classList.toggle('checked');
  }
}, false);

// Create a new list item when clicking on the "Add" button
function newElement() {
  var li = document.createElement("li");
  var inputValue = document.getElementById("myInput").value;
  var t = document.createTextNode(inputValue);
  li.appendChild(t);
  if (inputValue === '') {
  alert("You must write something!");
  } else {
    document.getElementById("myUL").appendChild(li);
  }
  document.getElementById("myInput").value = "";

  var span = document.createElement("SPAN");
  var txt = document.createTextNode("\u00D7");
  span.className = "close";
  span.appendChild(txt);
  li.appendChild(span);

  for (i = 0; i < close.length; i++) {
    close[i].onclick = function() {
        var div = this.parentElement;
        div.style.display = "none";
    }
  }
}

//Clearing the list
function removeAll(){
  var lst = document.getElementsByTagName("ul");
    lst[0].innerHTML = "";
}
Screenshot:
Run the HTML file after adding the JavaScript file. See what happens and what features you have. Next, we will break this code in small, understandable functions. We will master the concepts used and learn how to achieve different tasks. All the functions are easy to understand; you only need to be attentive. Work with the individual functions with me to get the hang of what’s happening.
4. Working with the close (x) button
The first loop in the code (used with the myNodelist variable) creates a close button, works through every list item, and appends the button at the end of each item. It uses the JavaScript method appendChild() to achieve this task. The button provides us with the facility to remove any list item from the browser’s display.
The second loop in the code (used with the close variable) removes the list item from the browser window. If you search the browser’s Elements tab, you will find that the item is still there. The reason is that we cannot delete an item from the code until we modify the DOM tree. But you need to be careful when you use DOM manipulation because it can slow down your program’s execution. Thus, in this program, we only set the display of the element as “none”. This property of an element prevents it from being displayed in the browser window.
In the webpage, the user can add or remove the text-decoration from the text with a single click. The conditional statement monitors the proper working of the checked class.
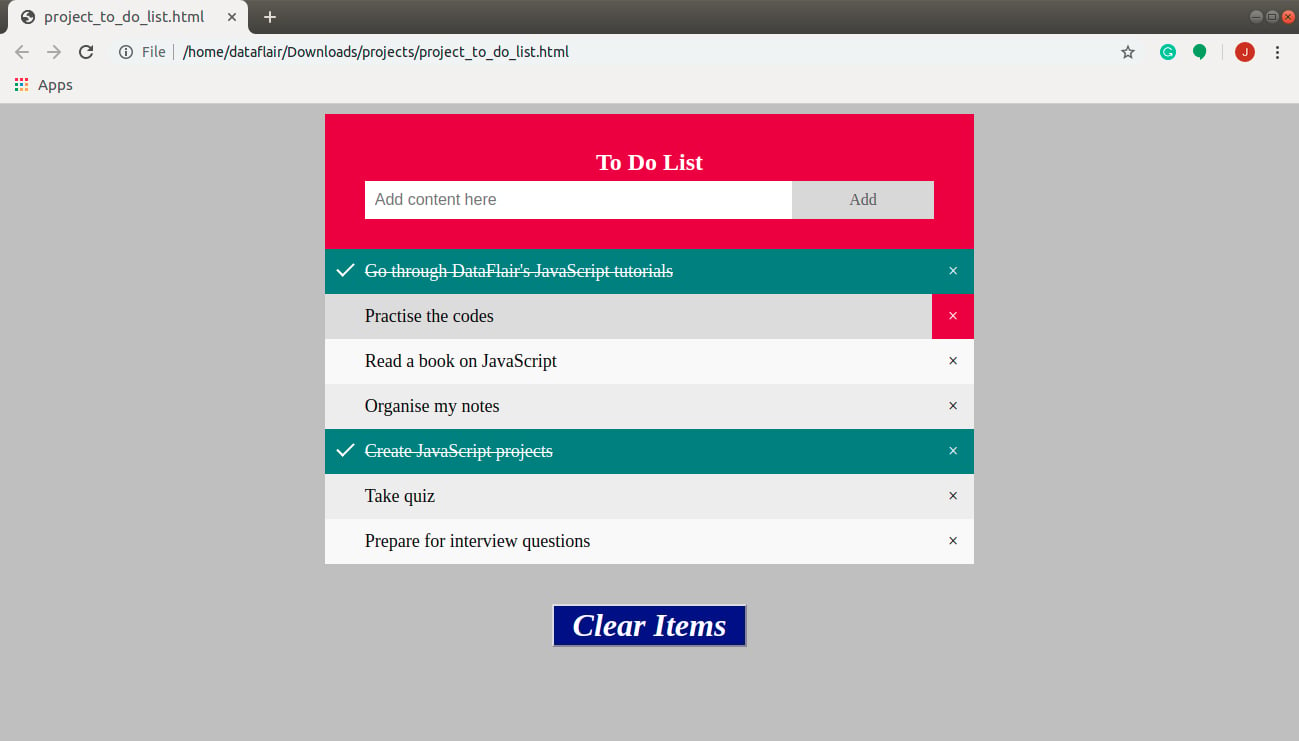
Notice that the close button changes color when I hover over it. Also, I removed the check from “Organise my notes” and checked out “Create JavaScript projects”.
Not able to recall the JavaScript DOM concept? Don’t worry, revise it from JavaScript DOM Tutorial
5. Adding a new element
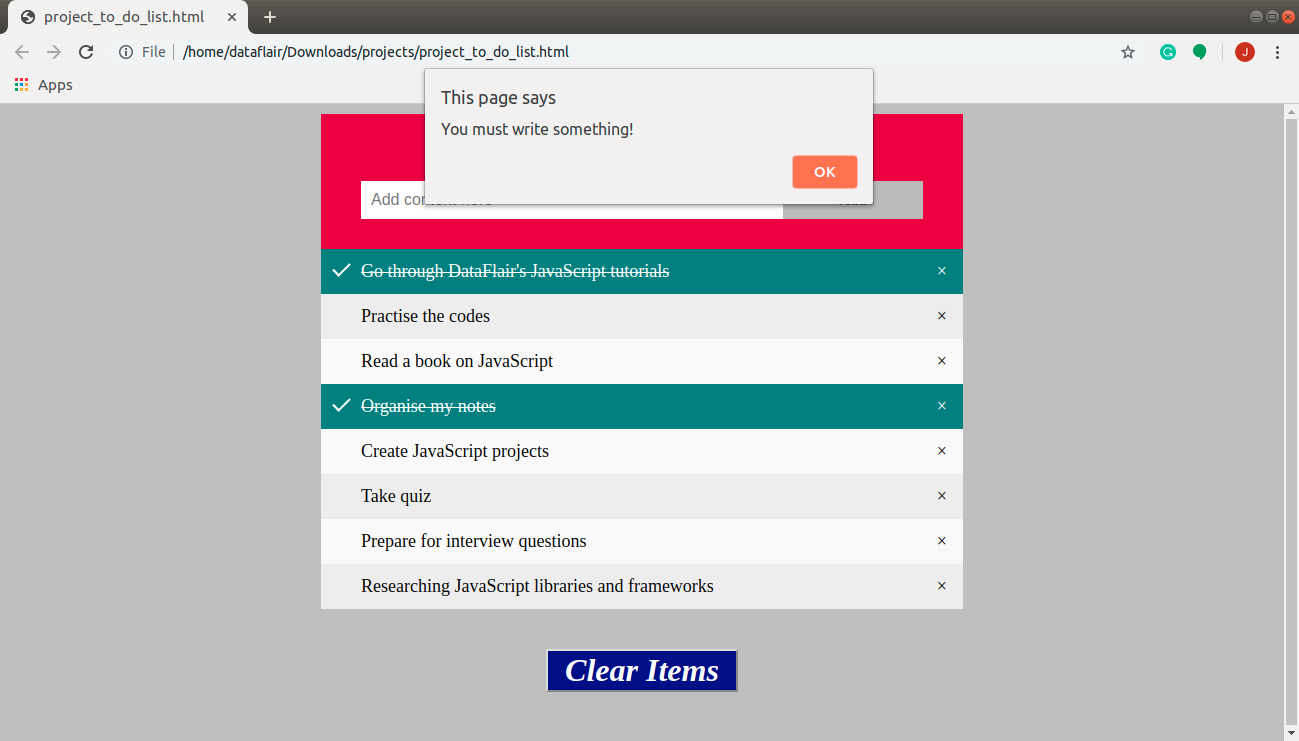
The user can add a new element to our list by using the “Add” button on the page. We used the JavaScript function newElement() for that purpose. Let us say I want to add a new item in the list: “Researching JavaScript libraries and frameworks”. After I type the text in the text area and click the “Add” button, the browser will display a page like this:

Notice that the Add button added the new list item at the end of the list. You can add a code that allows you to add your elements at a specific position, but it isn’t always necessary. But what if I clicked the Add button without writing anything in the list? Will it add an empty list item? No, the JavaScript conditional statement in the function helps us with that. The browser will show this if we try to set an empty element:
“Subtracting from your list of priorities is as important as adding to it.”
– Frank Sonnenberg
6. Removing all the elements
The user can empty the list if he/ she wishes to with the help of the “Clear Items” button at the end of the list. This button will not only remove the items from the browser window but also the Elements window. This button works with the help of the removeAll() function that empties the <ul> tag, that is, it sets the content of the tag to null. If we use the button, the output will look something like this:
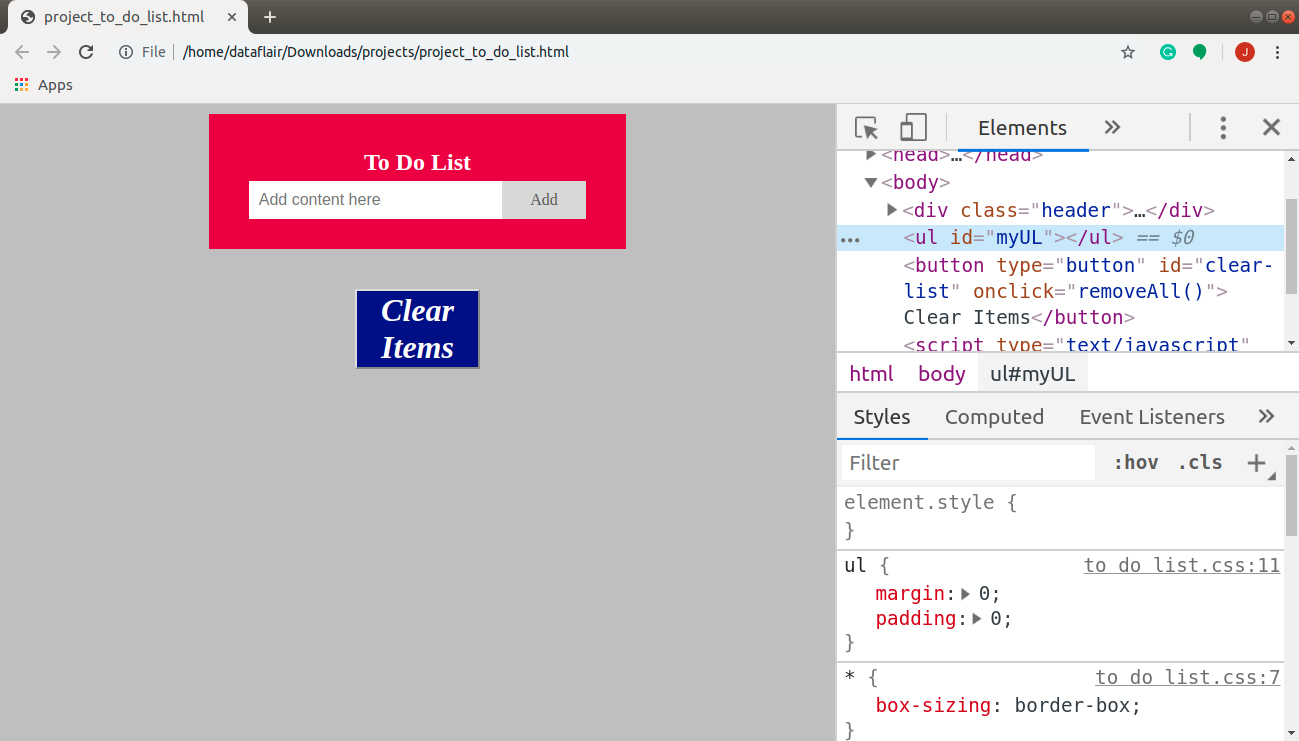
Notice that the <ul> tag is empty when you inspect the element using the shortcut Ctrl + Shift + I in the Elements window.
Summary
In this JavaScript tutorial, we made a beautiful project on To-do list. We used various functions to achieve different outcomes in our program. Now that you have a better understanding of the procedures you need to follow to create a webpage, you are ready to build more advanced projects.
Get your dream job by practicing these Top JavaScript Interview Questions
Questions regarding To-do List in JavaScript? Share your views in the comment section. Keep visiting DataFlair for regular updates.
We work very hard to provide you quality material
Could you take 15 seconds and share your happy experience on Google


can i get the code like when we click the checkbox the clicked text should enter into bottom of the text and when we clicked the same text that should comes to the same position just like google.keep.com
try to send it to my mail by the end of the day please
I’m curious, is there a way to add “Prioritization” to this list. For example, to add a star next to an item or maybe a labels on certain items on a list to show the level of important some tasks are versus others? Any helpful links to guide me to creating this, I will be very grateful for!
In the above javascript code why there is need to write same piece of code of clicking of close button twice in your program.
Actually,I have also created the to-do list and I have added the clicking of close button code inside my function of creating new element.
But after running my code,I cannot simultaneously delete two things and can only delete one item after adding new item.
After that I have to add new item,then I can delete any other item present in list.
Please resolve my query?
Hello!
I found your site (data-flair.training) from SERP and found it extremely awesome! I wanted to know if you accept paid content in the form of guest posts and give a do-follow link to our client’s site.
Kindly let me know the price per post (if you are interested to sell sponsored posts on your blog).
Also, we might be interested in placing in-content text links (link from an existing blog post) please do let me know the price per text link placement as well.
So tell me the prices, and we’ll get an agreement ☺
Have a nice day!
Regards,
Tina
Outreach Manager at Webs cordial