JavaScript Events – Explore Different Concepts and Ways of using it
Full Stack Web Development Courses with Real-time projects Start Now!!
We all eagerly waited for the lunch break in school, didn’t you? We just waited for the bell to ring, indicating the end of the class. As soon as the bell rang, we acted: packed our bags, took out our lunch boxes, exchanged the previous day’s stories with our pals. You can understand the concept of JavaScript Events easily with this example. Because the bell ringing was an event and our actions were the reactions to that event. The objective of this JavaScript tutorial is to grasp the basics of what events are, how they work, and how they react in different programming environments. JavaScript events provide a dynamic interface to a webpage, adding interactivity to your page.
So, let’s start with the best tutorial on JavaScript Events.
JavaScript Events
Any actions that you perform or any occurrence on the browser is an event. Your page loads, you click on the page, you navigate the page, an error occurs; all of these are events. The system tells you about them and you can add responses to them if you choose to. There are a lot of events available in JavaScript that you can respond to.
JavaScript provides a feature called event handler that helps you to respond to the events. An event handler is a block of code, usually a user-defined JavaScript Function, that runs when the event fires. When we define this block of code, we say that we are registering an event handler. They are sometimes interchangeably called event listeners, but they are different from each other and work together. The event handlers listen for the event to happen and the event handler is the code that runs in response to the event happening. You can add event handlers with either single quotes or double-quotes.
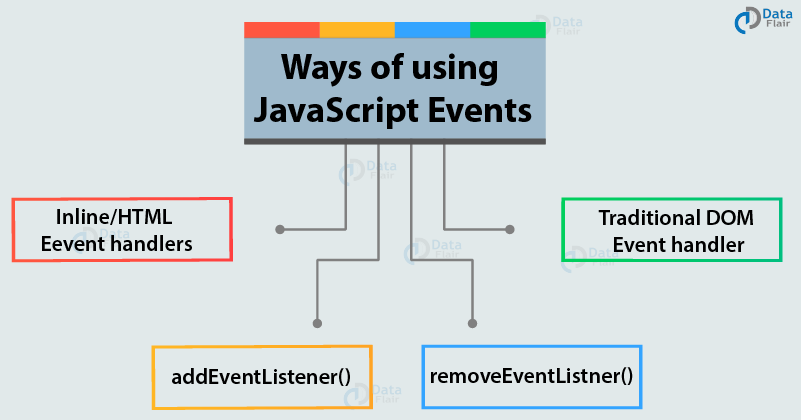
Ways of Using Web Events in JavaScript
How events trigger JavaScript code?
You can trigger JavaScript from HTML pages in three steps:
- Select the element node(s) for which you want the JavaScript script to respond.
- Indicate which event will trigger the response (binding event to the DOM node).
- Define the code you want to execute when the event occurs.
There are multiple ways by which you can add an event listener in your code that will execute when an event fires. If you don’t know any event used in this tutorial, don’t worry. DataFlair’s next JavaScript tutorial on Event types lists all the events you need to know. For now, we have a task for you.
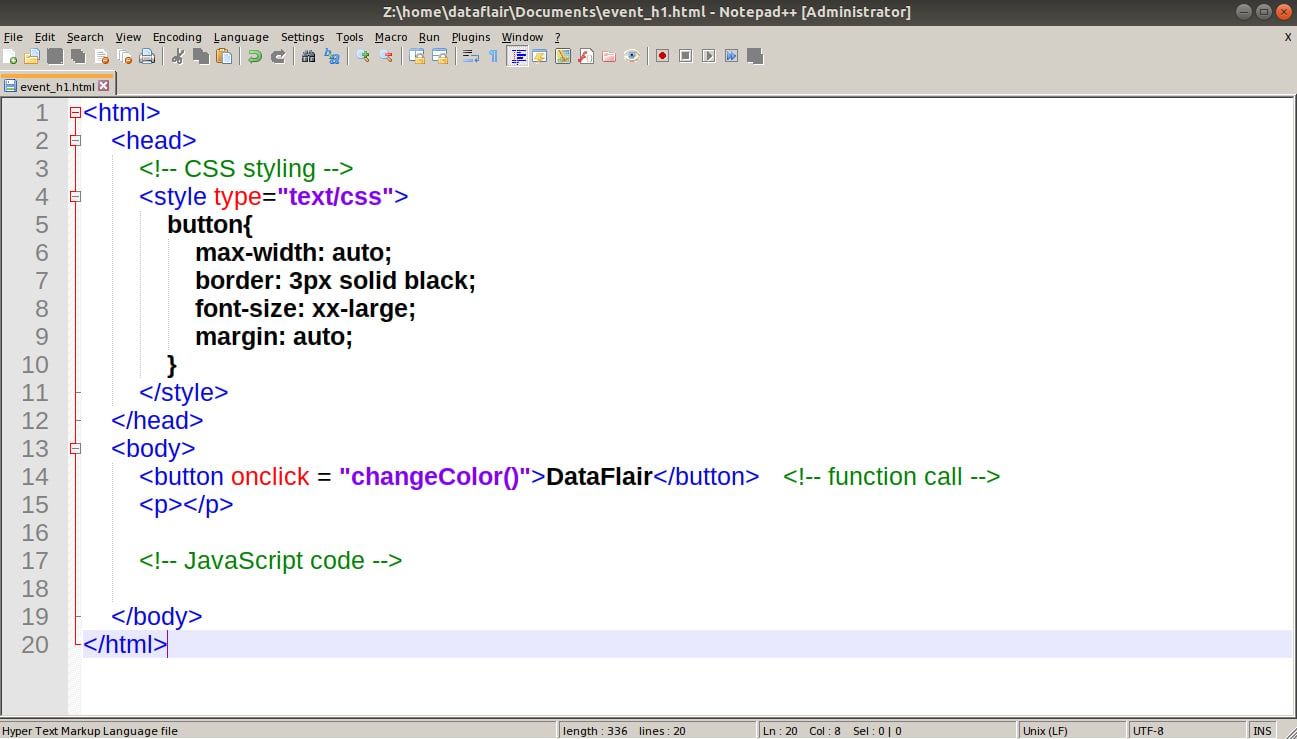
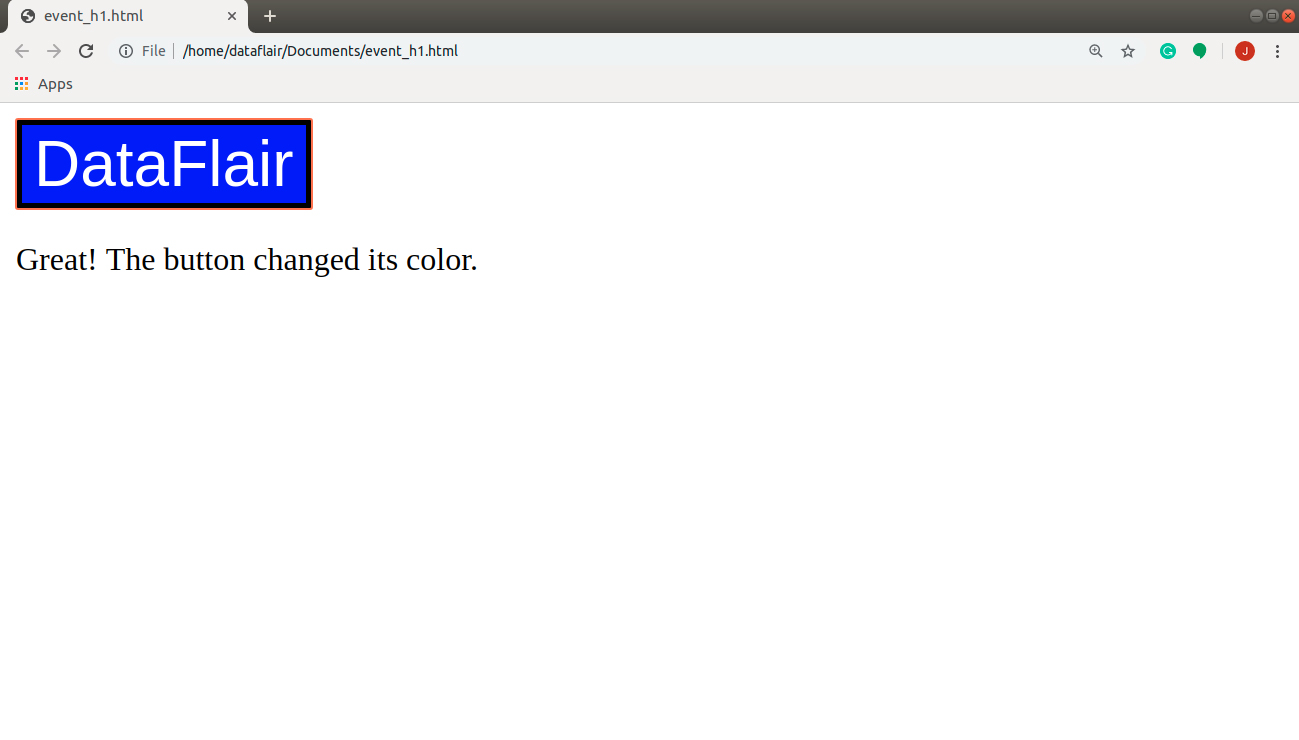
We want to create a button named “DataFlair” that changes its color when clicked. We will use different event handlers to achieve this task. This will help us compare the basics of the JavaScript events, helping us understand them better. The HTML code given below is common for all the programs. All you need to do is change the JavaScript code in your program.
Code:
 <html>
  <head>
    <!-- CSS styling -->
    <style type="text/css">
      button{
        max-width: auto;
        border: 3px solid black;
        font-size: xx-large;
        margin: auto;
      }
    </style>
  </head>
  <body>
    <button onclick = "changeColor()">DataFlair</button> <!-- function call -->
    <p></p>

    <!-- JavaScript code -->

  </body>
</html>
Screenshot:
1. Inline/HTML Event Handlers
This is bad-practice, but since you see it in older browsers, you need to be aware of it. This method is no longer in use; it is always better to separate the JavaScript from the HTML.
The attribute name matches the event names; their value calls the function linked to that event. The syntax to recognize an HTML event handler looks like this:
<element attribute = “functionName()”>
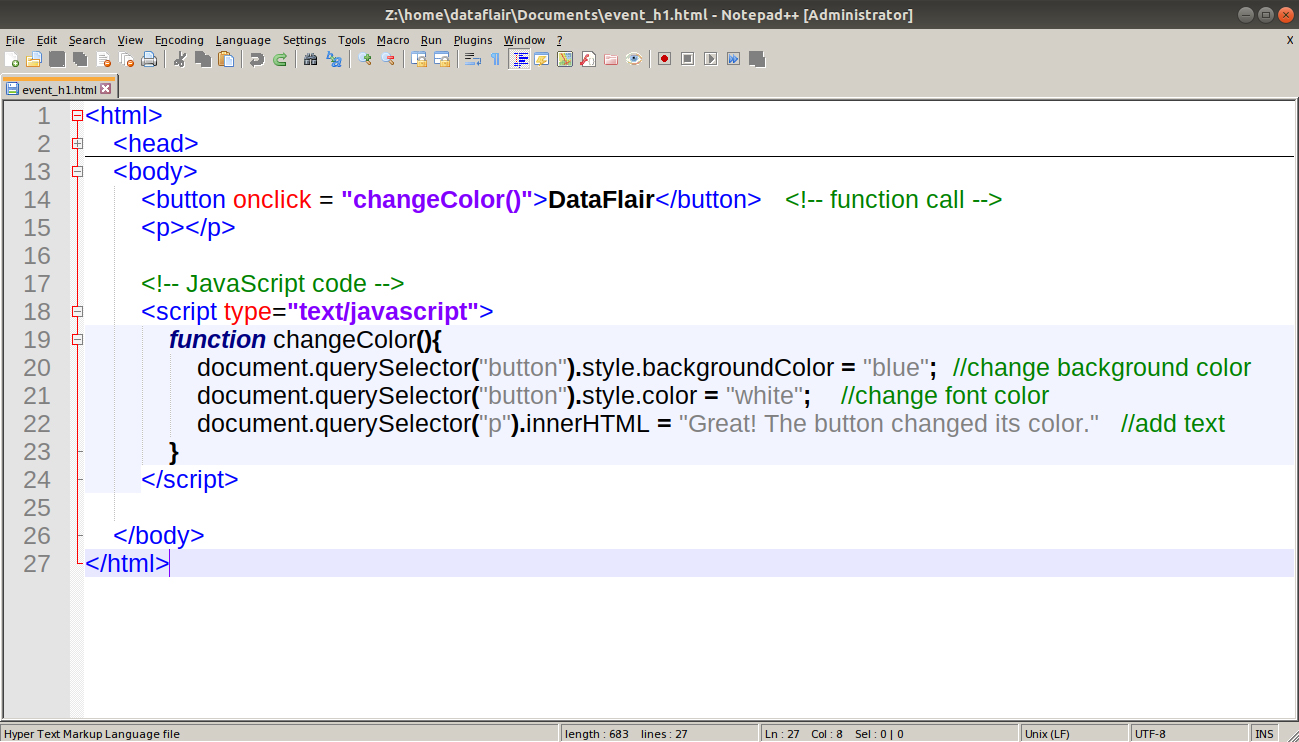
Let’s solve the above problem with the help of this method. The code below uses HTML event handlers to add events in the HTML.
Code:
<script type="text/javascript">
      function changeColor(){
        document.querySelector("button").style.backgroundColor = "blue"; //change background color
        document.querySelector("button").style.color = "white"; //change font color
        document.querySelector("p").innerHTML = "Great! The button changed its color." //add text
      }
    </script>
Screenshot:
Before click:
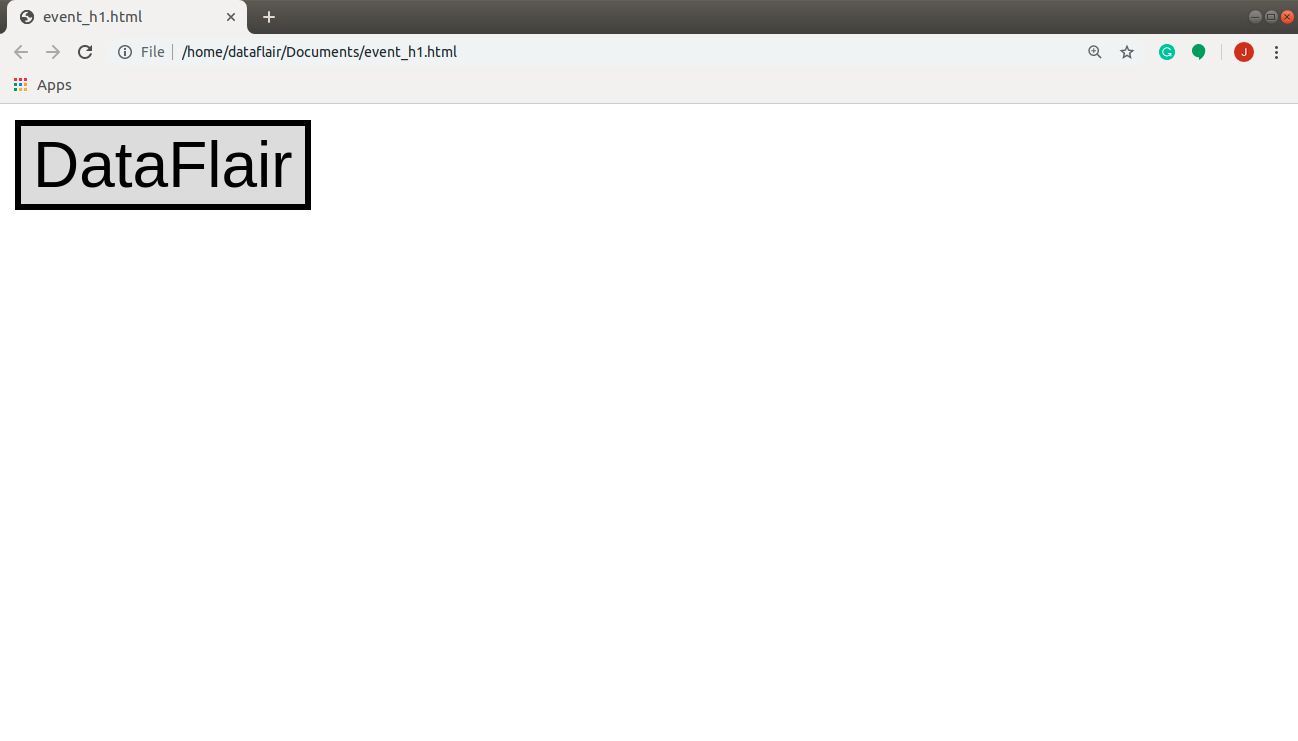
After click:
2. Traditional DOM Event Handlers
DOM event handlers, introduced in the original specification for the DOM, is an alternative to add an event handler to any element. This method separates JavaScript from the HTML, thus is preferred over Inline event handlers. All the major browsers support this approach. The drawback is that for any event, you can attach only one function. As a result, if a page uses more than one script, and both scripts respond to the same event, then one or both of the scripts may not work as intended.
Explore a little more with our tutorial on JavaScript DOM
The syntax of adding an event is something like this:
element.onevent = functionName;
Did you notice that we skipped the parenthesis with the function name? This is because when a function is called, a parenthesis following its name tells the interpreter to “run this code now”. We want the function to execute only when the event fires.
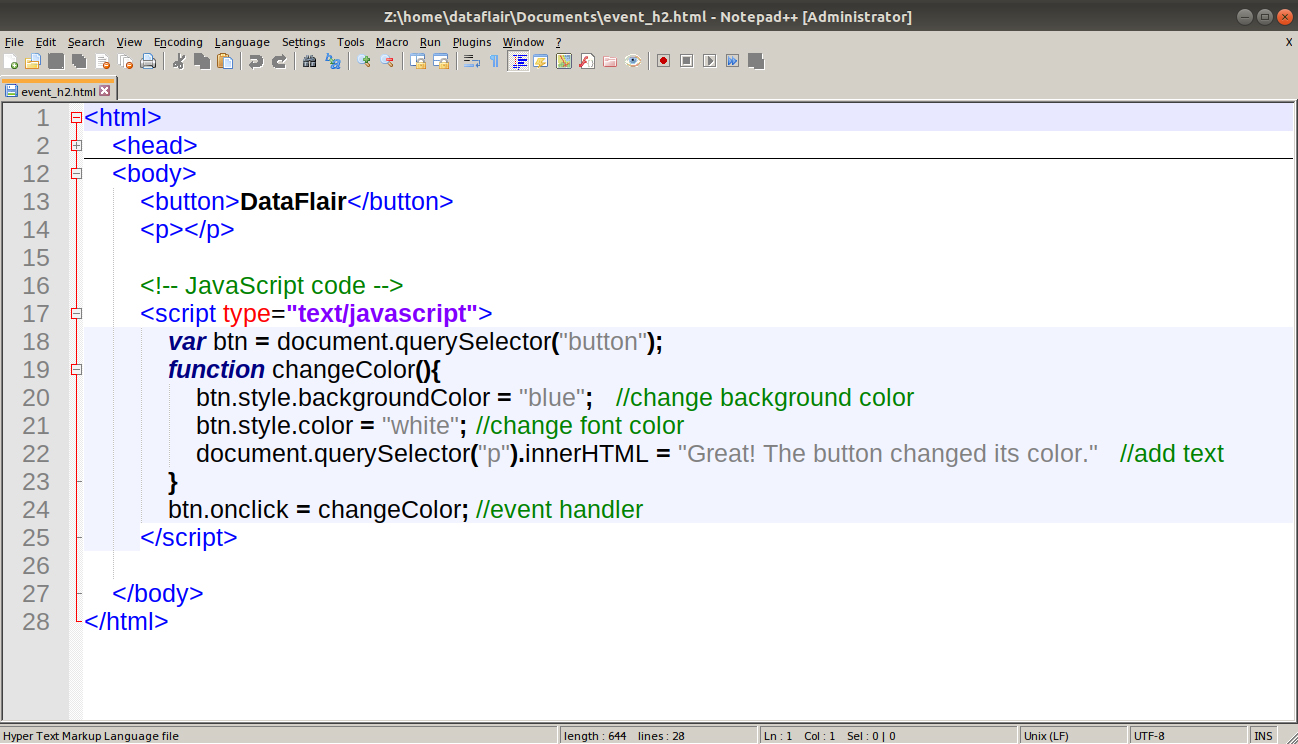
The JavaScript code, shown below, will use traditional DOM handlers to produce the desired output.
Code:
<script type="text/javascript">
      var btn = document.querySelector("button");
      function changeColor(){
        btn.style.backgroundColor = "blue"; //change background color
        btn.style.color = "white"; //change font color
        document.querySelector("p").innerHTML = "Great! The button changed its color." //add text
      }
      btn.onclick = changeColor; //event handler
    </script>
Screenshot:
3. addEventListener() and removeEventListener()
These are the favored way of adding an event handler, introduced in an update to the DOM (DOM level2, in the year 2000). Unlike traditional DOM event handlers, these allow a single event to trigger multiple functions. Thus, there are fewer conflicts between the multiple scripts that run on the same page. This technique doesn’t work with the IE8 or earlier IE versions. These differences in browser support are resolved by using jQuery.
You can add an event listener to your event with the following syntax:
element.addEventListener(“event”, functionName [, Boolean]);
Or you can remove the event listener by using the syntax below:
element.removeEventListener(“event”, functionName [, Boolean]);
By default, the value of Boolean is set to false, for event capturing. You can set the value to true if you want to change the event flow.
The code below explains the use of this approach to accomplish our desired output (adding an event listener).
You must explore the tutorial on JavaScript Data Types
Code:
<script type="text/javascript">
      var btn = document.querySelector("button");
      function changeColor(){
        btn.style.backgroundColor = "blue"; //change background color
        btn.style.color = "white"; //change font color
        document.querySelector("p").innerHTML = "Great! The button changed its color." //add text
      }
      btn.addEventListener("click", changeColor); //adds event listener
    </script>
Screenshot:

To remove the event listener from your event, use the following code:
btn.removeEventListener(“click, changeColor”);
4. Using Parameters with Event Handlers and Listeners
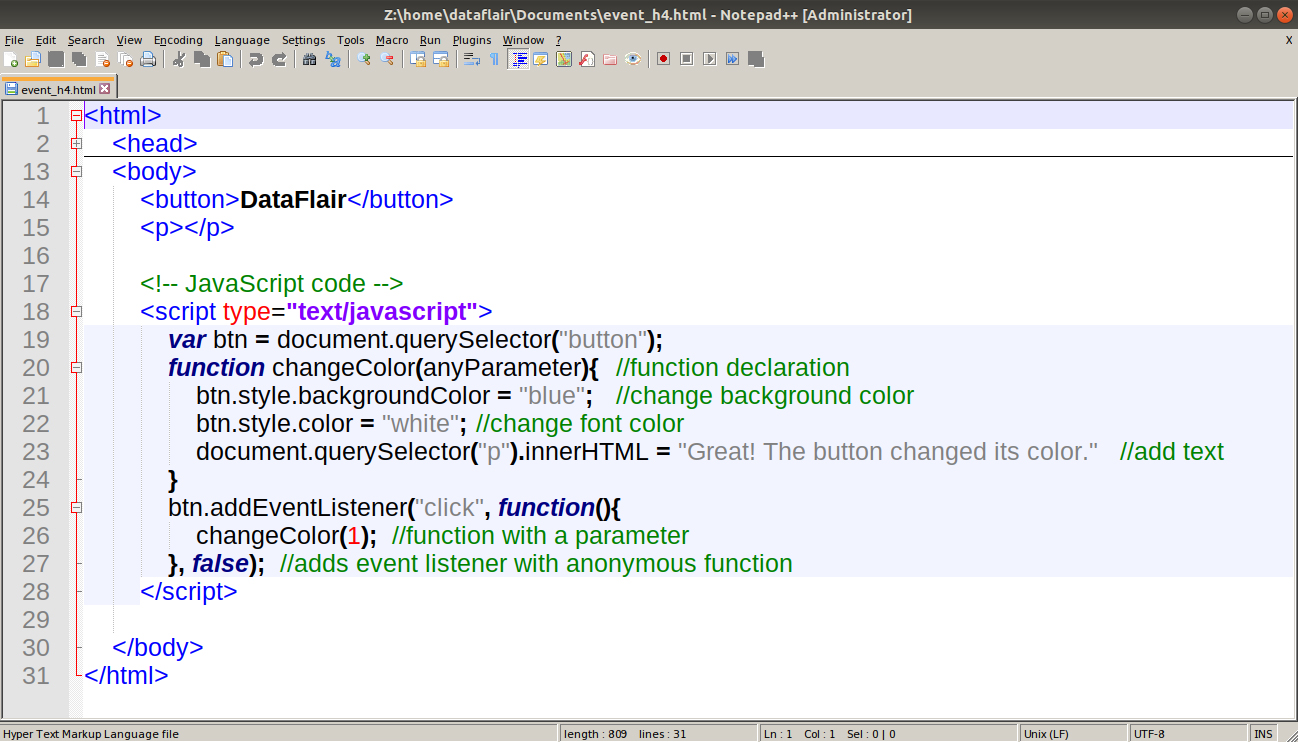
While programming, there may occur a situation when you need a function to work with parameters. The above method of adding an event doesn’t provide us with that facility. To remedy that, we use anonymous functions i.e., functions with no name.
Since parenthesis follows the function call (to pass the arguments), the code runs immediately. We wrap the function call in an anonymous function so it only runs when the event triggers it. The syntax of this approach is as follows:
element.addEventListener(“event”, function(){ functionCall(parameters); }, Boolean);We don’t need any parameter for the problem that we were solving for the above approaches, but we will use this technique for the same task just to understand how the code runs.
Code:
<script type="text/javascript">
      var btn = document.querySelector("button");
      function changeColor(anyParameter){ //function declaration
        btn.style.backgroundColor = "blue"; //change background color
        btn.style.color = "white"; //change font color
        document.querySelector("p").innerHTML = "Great! The button changed its color." //add text
      }
      btn.addEventListener("click", function(){
        changeColor(1); //function with a parameter
      }, false); //adds event listener with anonymous function
    </script>
Screenshot:
JavaScript Event Flow
You won’t come across this topic often, but it can cause serious problems in your code if you don’t understand it. There are two ways in which an event can function:
- Event Bubbling
- Event Capturing
Understanding these mechanisms will simplify what happens when event handlers are activated on an element.
Why the event flow matters?
The flow of events only really matters when the code has event handlers on both an element and one of its ancestor/descendant elements. If the Boolean value is true, it sets the capturing phase but if false, it is the bubbling phase.
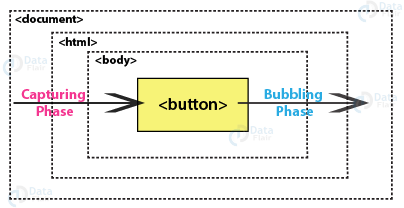
Event Bubbling
The event flows outwards from the most to the least specific node.
Event Capturing
The event flows inwards from the least to the most specific node.
Other Event Concepts in JavaScript
1. Event Objects
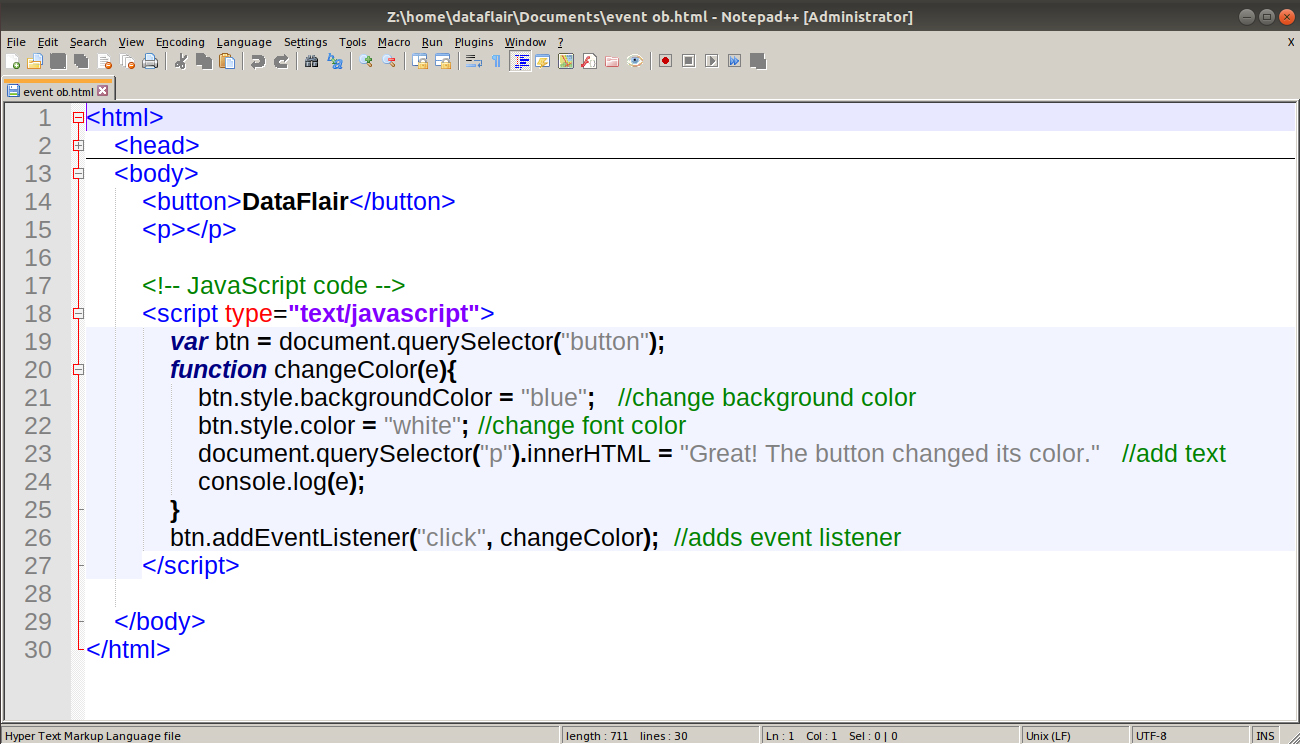
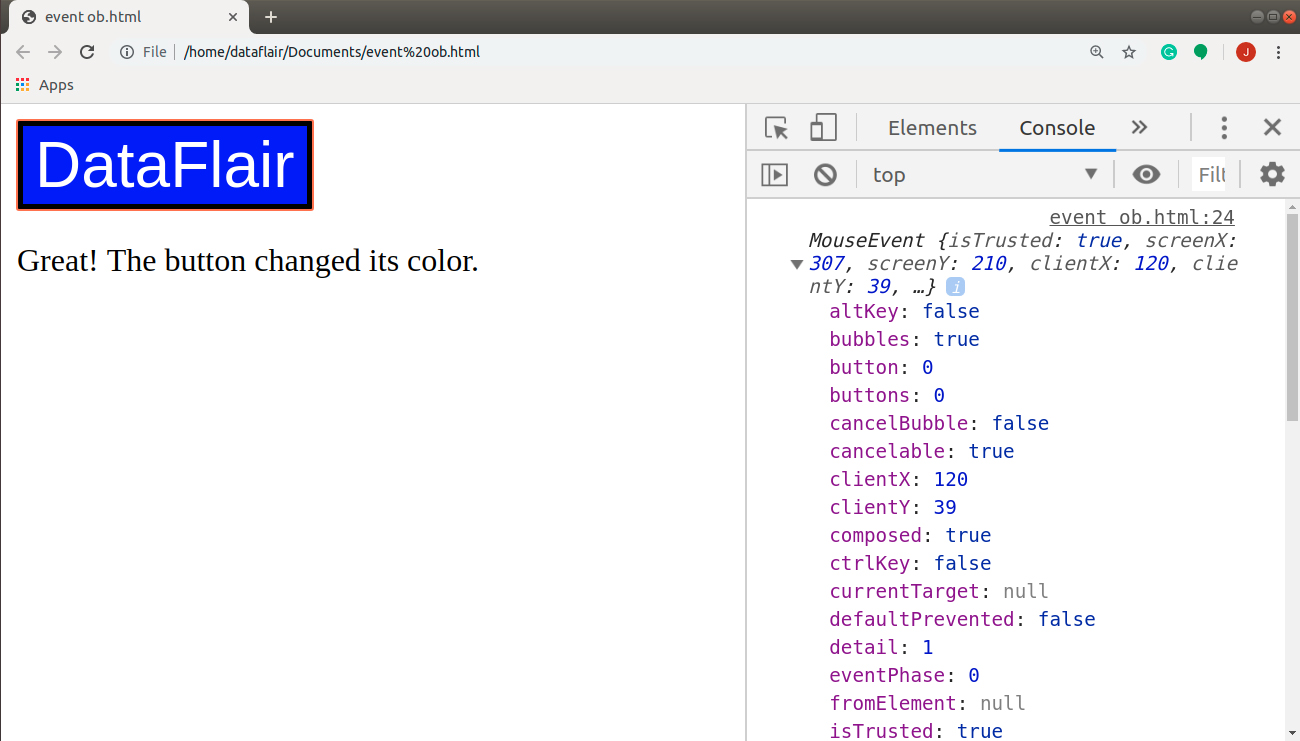
When an event fires, the event object returns information about the event, and element the event happened upon. This object is passed to any function that is the event handler/listener. When you pass arguments to a named function, the event object is automatically passed to the anonymous wrapper function. To access it, all you need to do is specify it as a parameter of the named function. The most common parameter name is e (event). Others include event and evt.
To view the details of the event object of your event, use the following code.
Code:
<script type="text/javascript">
      var btn = document.querySelector("button");
      function changeColor(e){
        btn.style.backgroundColor = "blue"; //change background color
        btn.style.color = "white"; //change font color
        document.querySelector("p").innerHTML = "Great! The button changed its color." //add text
        console.log(e);
      }
      btn.addEventListener("click", changeColor); //adds event listener
    </script>
Screenshot:
Output:
Wait! Did you check the article on JavaScript Objects?
The event object has the following properties and methods.
Properties:
| Property | IE5-8 Equivalent | Purpose |
| target | srcElement | It specifies the target of the event (most specific element). |
| type | type | It specifies the type of event fired. |
| cancelable | Not supported | It specifies whether you can cancel the default behavior of an element. |
Methods:
| Method | IE5-8 Equivalent Property | Purpose |
| preventDefault() | returnValue | It cancels the default behavior of the event (if possible). |
| stopPropogation() | cancelBubble | It stops any further bubbling/ capturing of the event. |
2. Event Delegation
If the page comprises of a lot of elements the user can interact with, adding event listeners to every element can use a great deal of memory and slow down performance. JavaScript helps you prevent this by using event delegation. The concept of event delegation relies on the concept of event bubbling. To use it, you can set your event listener to the parent element of all the elements for which you want the event attached. In other words, if you want to add event listeners to all the <li> elements, instead of adding an event to every element, you can handle the event on the <ul> element and bubble it to all the list items. Here, we delegated the job of the event listener to the parent of the element.
The advantages of using event delegation in your code include:
- It easily works with new elements; you don’t need to add event listeners with them.
- It solves the limitations with the help of “this” keyword. We can accurately determine the event was attached to which element.
- It simplifies the code as it contains fewer functions, helping maintainability.
Summary
Here we come to the end of our tutorial on JavaScript Events. In this article, we covered the various terminologies of JavaScript Events, ways of using web events, event flow, event objects and, event delegation. We have described the different types of JavaScript Events in the next tutorial. You must definitely check it.
Hope you liked our article.
If there is anything you didn’t understand, do let us know through the comment section.
Did you know we work 24x7 to provide you best tutorials
Please encourage us - write a review on Google


I really learn a lot from your site.thanks a lot.