HTML Radio Button – Radio Group and Attributes
Full Stack Web Development Courses with Real-time projects Start Now!!
HTML Radio button is typically used to select a particular option from a group of related options. To define a radio button, we use the <input> element of HTML. When a particular option is selected using a radio button, the other options are deselected i.e., one can only select a single option at a time. It lets the user select from a set of limited options.
Syntax of HTML Radio Button:
<input type= “radio” name= “rbutton” value= “val”>
When it comes to integrating radio buttons it is imperative that they are made available to users that use screen readers. Radio buttons belonging to a particular category must have the same name. The value of each radio button is not shown to the user but is sent to the server after its selection by the user. Therefore, correct labeling and positioning of radio buttons makes them easy to use and offers easy command over them. It is a good practice to use a <label> tag along with radio buttons for better accessibility.
Defining Radio Group in HTML
We can define a group for radio buttons by giving each radio button the same name. As and when the user selects a particular option from this group, other options are deselected.
Following is an example of radio buttons with different names within a form.
<html>
<head>
  <title>Radio Buttons</title>
</head>
<body>
<form>
  <p>Please select your preferred contact method</p>
  <div>
    <input type="radio" id="contactChoice1"
     name="contact" value="email">
    <label for="Choice1">Email</label>
    <input type="radio" id="contactChoice2"
     name="contact" value="phone">
    <label for="Choice2">Phone</label>
    <input type="radio" id="contactChoice3"
     name="contact" value="mail">
    <label for="Choice3">Mail</label>
  </div>
  <div>
    <button type="submit">Submit</button>
  </div>
</form>
</body>
</html>
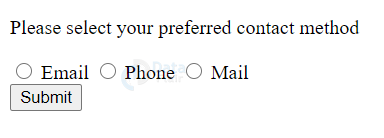
Output-
Attributes of HTML Radio Group
| Name | Description |
| type | Specifies the type of input, in this case set as ‘radio’. |
| name | Specifies the name of the control that is delivered to the server. |
| value | Specifies the value that will be sent to the server, if the radio button is checked. |
| checked | Defines a by default checked radio button. |
Another best practice is to provide clear instructions on what each of the radio buttons represents. This will help the users to understand the options quickly and also make an informed decision.
We should specify the value attribute so that the information is delivered to the server, on form submission. If the value attribute is not specified, the form data assigns a value ‘on’ to the entire radio group (this isn’t a good practice).
Selecting Radio Button by default
If no radio button is selected by the user, no information of the radio buttons is delivered to the server. Hence, it is recommended to use the ‘checked’ state of the radio button and eliminate inefficiency.
<html>
<head>
  <title>Radio Buttons</title>
</head>
<body>
<form>
  <p>Please select your preferred contact method</p>
  <div>
    <input type="radio" id="contactChoice1"
     name="contact" value="email" checked>
    <label for="Choice1">Email</label>
    <input type="radio" id="contactChoice2"
     name="contact" value="phone">
    <label for="Choice2">Phone</label>
    <input type="radio" id="contactChoice3"
     name="contact" value="mail">
    <label for="Choice3">Mail</label>
  </div>
  <div>
    <button type="submit">Submit</button>
  </div>
</form>
</body>
</html>
Output-
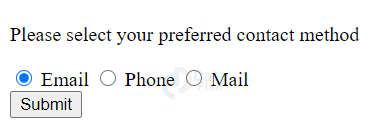
If ‘checked’ is put along with every button, the one put later overrides the ones put before it.
CSS and Radio Buttons
We can style radio buttons using CSS3.
<html>
<head>
<title>Radio Buttons</title>
<style>
label {
margin-right: 15px;
line-height: 32px;
}
input {
-webkit-appearance: none;
-moz-appearance: none;
appearance: none;
border-radius: 50%;
width: 16px;
height: 16px;
border: 2px solid #999;
transition: 0.2s all linear;
margin-right: 5px;
position: relative;
top: 4px;
}
</style>
</head>
<body>
<form>
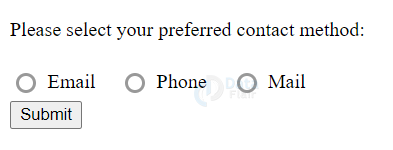
<p>Please select your preferred contact method:</p>
<div>
<input type="radio" id="contactChoice1"
name="contact" value="email">
<label for="contactChoice1">Email</label>
<input type="radio" id="contactChoice2"
name="contact" value="phone">
<label for="contactChoice2">Phone</label>
<input type="radio" id="contactChoice3"
name="contact" value="mail">
<label for="contactChoice3">Mail</label>
</div>
<div>
<button type="submit">Submit</button>
</div>
</form>
<pre id="log">
</pre>
</body>
</html>
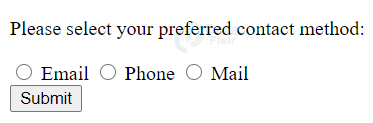
Output-
JavaScript and Radio Buttons
We can add an event listener to the submit button of the form. Following is an example-
<html>
<head>
  <title>Radio Buttons</title>
  <script type="text/javascript">
var form = document.querySelector("form");
var log = document.querySelector("#log");
form.addEventListener("submit", function(event) {
  var data = new FormData(form);
  var output = "";
  for (const entry of data) {
    output = output + entry[0] + "=" + entry[1] + "\r";
  };
  log.innerText = output;
  event.preventDefault();
}, false);
  </script>
</head>
<body>
<form>
  <p>Please select your preferred contact method:</p>
  <div>
    <input type="radio" id="contactChoice1"
           name="contact" value="email">
    <label for="contactChoice1">Email</label>
    <input type="radio" id="contactChoice2"
           name="contact" value="phone">
    <label for="contactChoice2">Phone</label>
    <input type="radio" id="contactChoice3"
           name="contact" value="mail">
    <label for="contactChoice3">Mail</label>
  </div>
  <div>
    <button type="submit">Submit</button>
  </div>
</form>
<pre id="log">
</pre>
</body>
</html>
Output-
Summary
In this article, we discussed HTML radio buttons, which are of the utmost importance when details are required from the user. Radio buttons enable the users to select options from a set of limited options, as provided by the developer or as per the form relevance. Radio buttons consist of ‘name’ and ‘value’ as its mandatory attributes. We have also looked at the usage of radio buttons with JavaScript and CSS.
Your opinion matters
Please write your valuable feedback about DataFlair on Google


Good