HTML ID Attribute Syntax and Example
Free Web development courses with real-time projects Start Now!!
In this HTML Tutorial, we are going to learn about HTML id Attribute and its uses. So let’s start!!!
HTML ID Attribute
Id attribute is useful to identify a particular element in the document uniquely. It can be used with at most one element. It also acts as a distinguisher between two or more elements with the same name. HTML ID is widely used to style a particular element using CSS or perform a task on it using JavaScript.
Usage of Id Attribute in HTML
- The id value can be accessed by CSS and JavaScript for styling and performing specific tasks respectively.
- id of an element is case sensitive and must contain at least one character.
- The id attribute can be applied to all the elements.
Syntax-
<tagname id=””></tagname>
Example of HTML ID Attribute
<!DOCTYPE html>
<html>
<head>
    <title>DataFlair id attribute</title>
    <style>
        #DataFlair {
            font-size:50px;
            font-weight:bold;
            text-align:center;
         }
         #Article {
             text-align:center;
             font-size:50px;
         }
    </style>
</head>
<body>
    <div id="DataFlair">DataFlair</div>
    <div id="Article">E-learning</div>
</body>
</html>
(Here, two divisions with id DataFlair and Article have been created and styled with CSS. ‘#’ is used to access these elements with id).
Output-
Note- The ID of an element must contain at least one character and should be devoid of spaces.
Difference between HTML Class and HTML ID
Each element in an HTML document can have only one unique ID and that ID is used to access that particular element only. On the other hand, multiple elements can have the same class and a single element can belong to multiple classes.
<!DOCTYPE html>
<html>
<head>
<style>
/* Style the element with the id "myId" */
#myId {
  background-color: lightblue;
  color: black;
  padding: 40px;
  text-align: center;
}

/* Style all elements with the class name "courses" */
.courses {
  background-color: tomato;
  color: white;
  padding: 10px;
}
</style>
</head>
<body>
<h1 id="myId">My Courses</h1>
<!-- Multiple similar elements -->
<h2 class="city">HTML5</h2>
<h2 class="city">Python</h2>
<h2 class="city">Machine Learning</h2>
</body>
</html>
Technology is evolving rapidly!
Stay updated with DataFlair on WhatsApp!!
Output-
HTML Bookmarks
If a web-page is too long, it would be a tedious task to jump to its specific portions. To facilitate this, link bookmarks can be used. For this, the ID of the element is given as the link. For example,
<html>
<body>
<p><a href="#T11">Jump to Topic 11</a></p> <!--link the ID in href-->
<p><a href="#T17">Jump to Topic 17</a></p>
<p><a href="#T20">Jump to Topic 20</a></p>
<h2>Topic 1</h2>
<p>paragraph 1 </p>
<h2>Topic 2</h2>
<p>paragraph 1 </p>
<h2>Topic 3</h2>
<p>paragraph 1 </p>
<h2>Topic 4</h2>
<p>paragraph 1 </p>
<h2>Topic 5</h2>
<p>paragraph 1 </p>
<h2>Topic 6</h2>
<p>paragraph 1 </p>
<h2>Topic 7</h2>
<p>paragraph 1</p>
<h2>Topic 8</h2>
<p>paragraph 1 </p>
<h2>Topic 9</h2>
<p>paragraph 1 </p>
<h2>Topic 10</h2>
<p>paragraph 1 </p>
<h2 id="T11">Topic 11</h2> <!--create an ID-->
<p>paragraph 1 </p>
<h2>Topic 12</h2>
<p>paragraph 1 </p>
<h2>Topic 13</h2>
<p>paragraph 1 </p>
<h2>Topic 14</h2>
<p>paragraph 1 </p>
<h2>Topic 15</h2>
<p>paragraph 1 </p>
<h2>Topic 16</h2>
<p>paragraph 1 </p>
<h2 id="T17">Topic 17</h2>
<p>paragraph 1 </p>
<h2>Topic 18</h2>
<p>paragraph 1 </p>
<h2>Topic 19</h2>
<p>paragraph 1 </p>
<h2 id="T20">Topic 20</h2>
<p>paragraph 1 </p>
</body>
</html>
Output-
JavaScript and ID Attribute in HTML
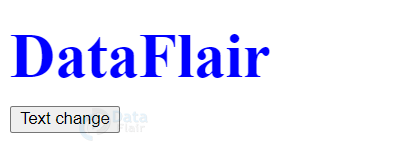
In order to perform task on a particular element, ID attribute is useful. The getElementByID() method is used here. For example,
<!DOCTYPE html>
<html>
    <head>
        <style>
            #dataflair {
                font-size:50px;
                color:blue;
                font-weight:bold;
                margin-bottom:10px;
            }
        </style>
        <script>
        function DataFlair() {
        document.getElementById("dataflair").innerHTML =
                             "Welcome to DataFlair E-learning";
        document.getElementById("dataflair").style.color = "black";
    }
    </script>
    </head>
    <body>
    <div id="dataflair">DataFlair</div>
    <button onclick="DataFlair()">Text change</button>
    </body>
</html>
Output-
Before-
After-
HTML Supported Browsers
- Google Chrome
- Mozilla
- Internet Explorer
- Safari
- Opera
Summary
The ID attribute in HTML 5 is useful to uniquely identify element. This element can be styled using CSS and dynamic tasks can be performed on it using any scripting language. In this article, we’ve looked at the syntax of ID attributes, accessing it using CSS and JavaScript and using it to create bookmarks. We’ve also discussed the differences between class, and ID attributes of HTML5.
Your opinion matters
Please write your valuable feedback about DataFlair on Google


