Create a Music Player using Java [Source Code Included]
Get Job-ready: Java Course with 45+ Real-time Projects! - Learn Java
Java music player is a simple classic mp3 player which has features like playing selected mp3 music files, pausing the music, resuming the music, and stopping the music. The music player is used daily by all types of users. Music helps users to create a fresh mind, inspire life, and also boost the mind of the user.
Java Music Player Functionalities
- Play the mp3 music.
- Pause / resume the music.
- Stop the music.
Project Prerequisites:
- IDE Used: NetBeans 11.2 (You can use eclipse ide)
- Java should be installed on the machine.
- To build an mp3 music player using java we require basic knowledge of java.
- Abstract Window Toolkit (AWT) & Swing packages are standard graphical user interfaces used to render graphics. By default, these packages are installed by java.
- Jlayer library is required for performing music functions such as play, pause, resume, stop. Jlayer is an open-source library we need to download from the internet.
Download Music Player Java Code
Please download the source code of java music player project: MP3 Music Player Project Code
Steps to Create MP3 Music Player using java:
- Import packages
- Initialize User Interface
- Adding Actions to buttons
- Performing actions of the button
1. Import packages:
In this step, we will import required packages such as swing, awt, Jlayer library, etc.
By default, Swing & AWT packages are installed by JAVA. But for the Jlayer library, we have to download a jar from the internet and import it into our project.
Download Link: Jlayer jar file
How to import the jar?
a. Click on Tools> Libraries
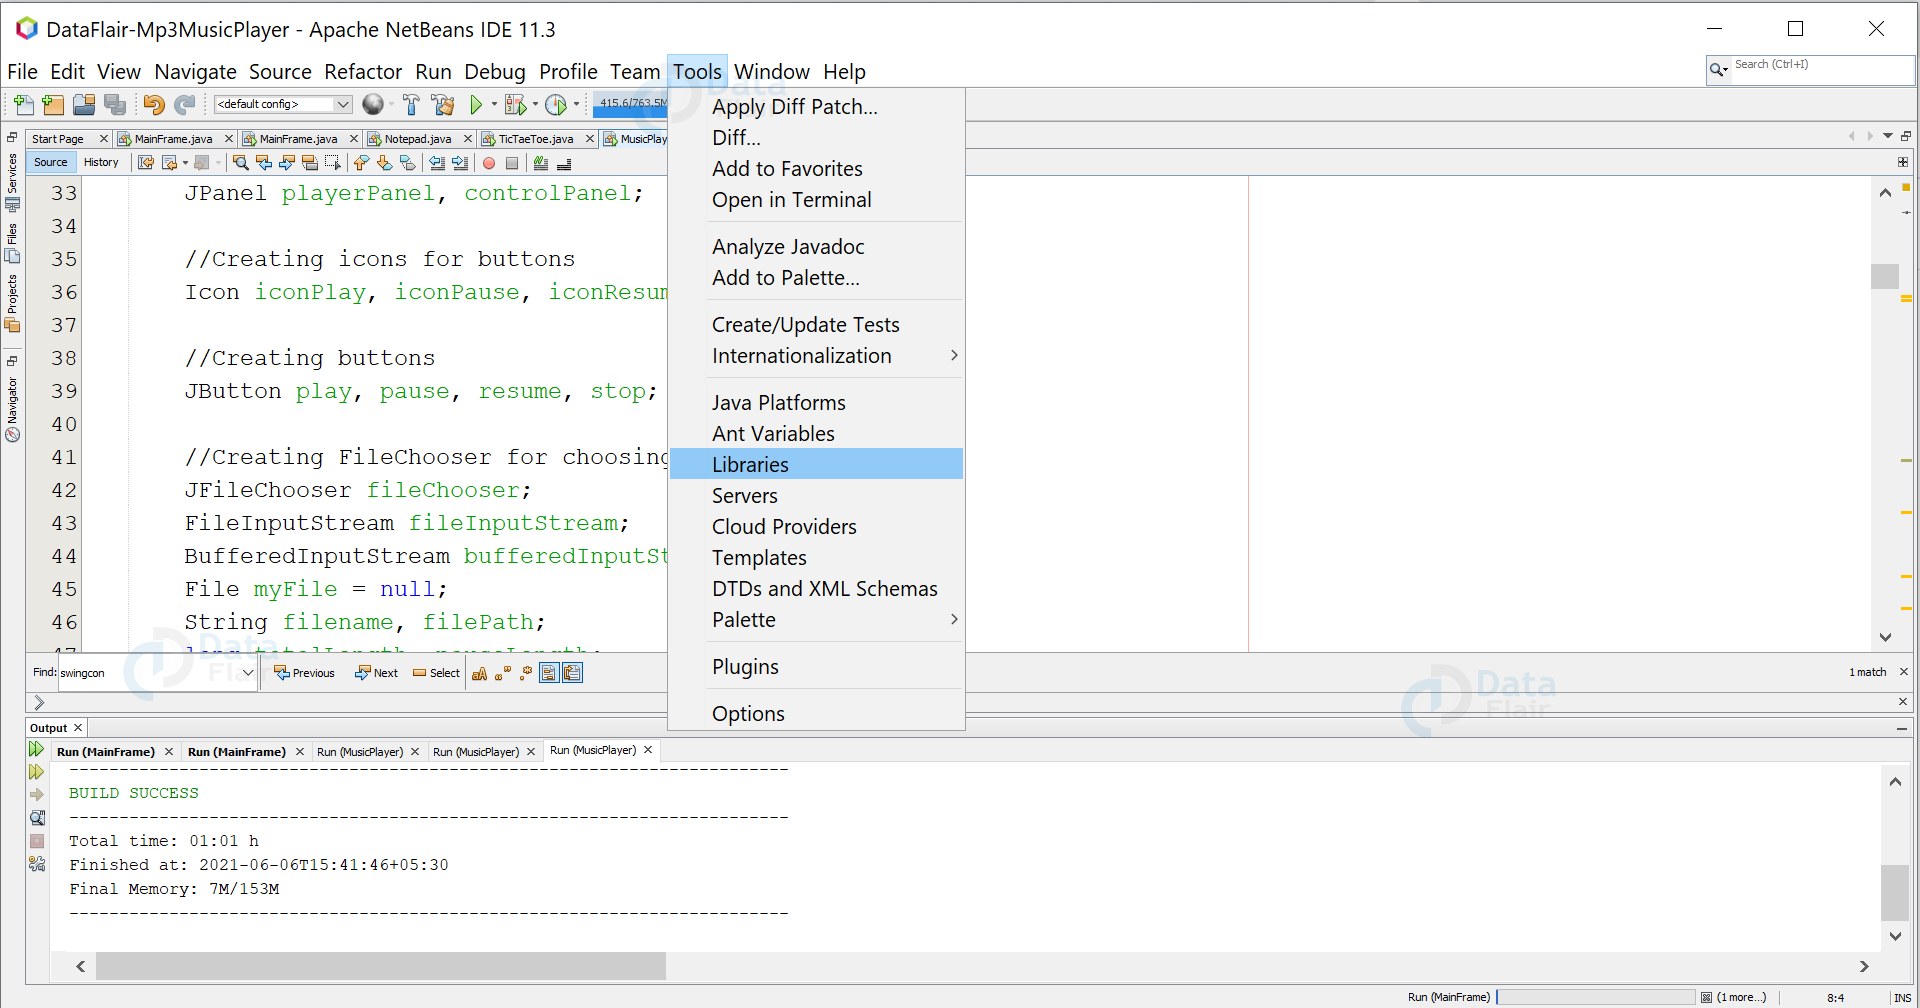
b. At the bottom left Click on “New Library”
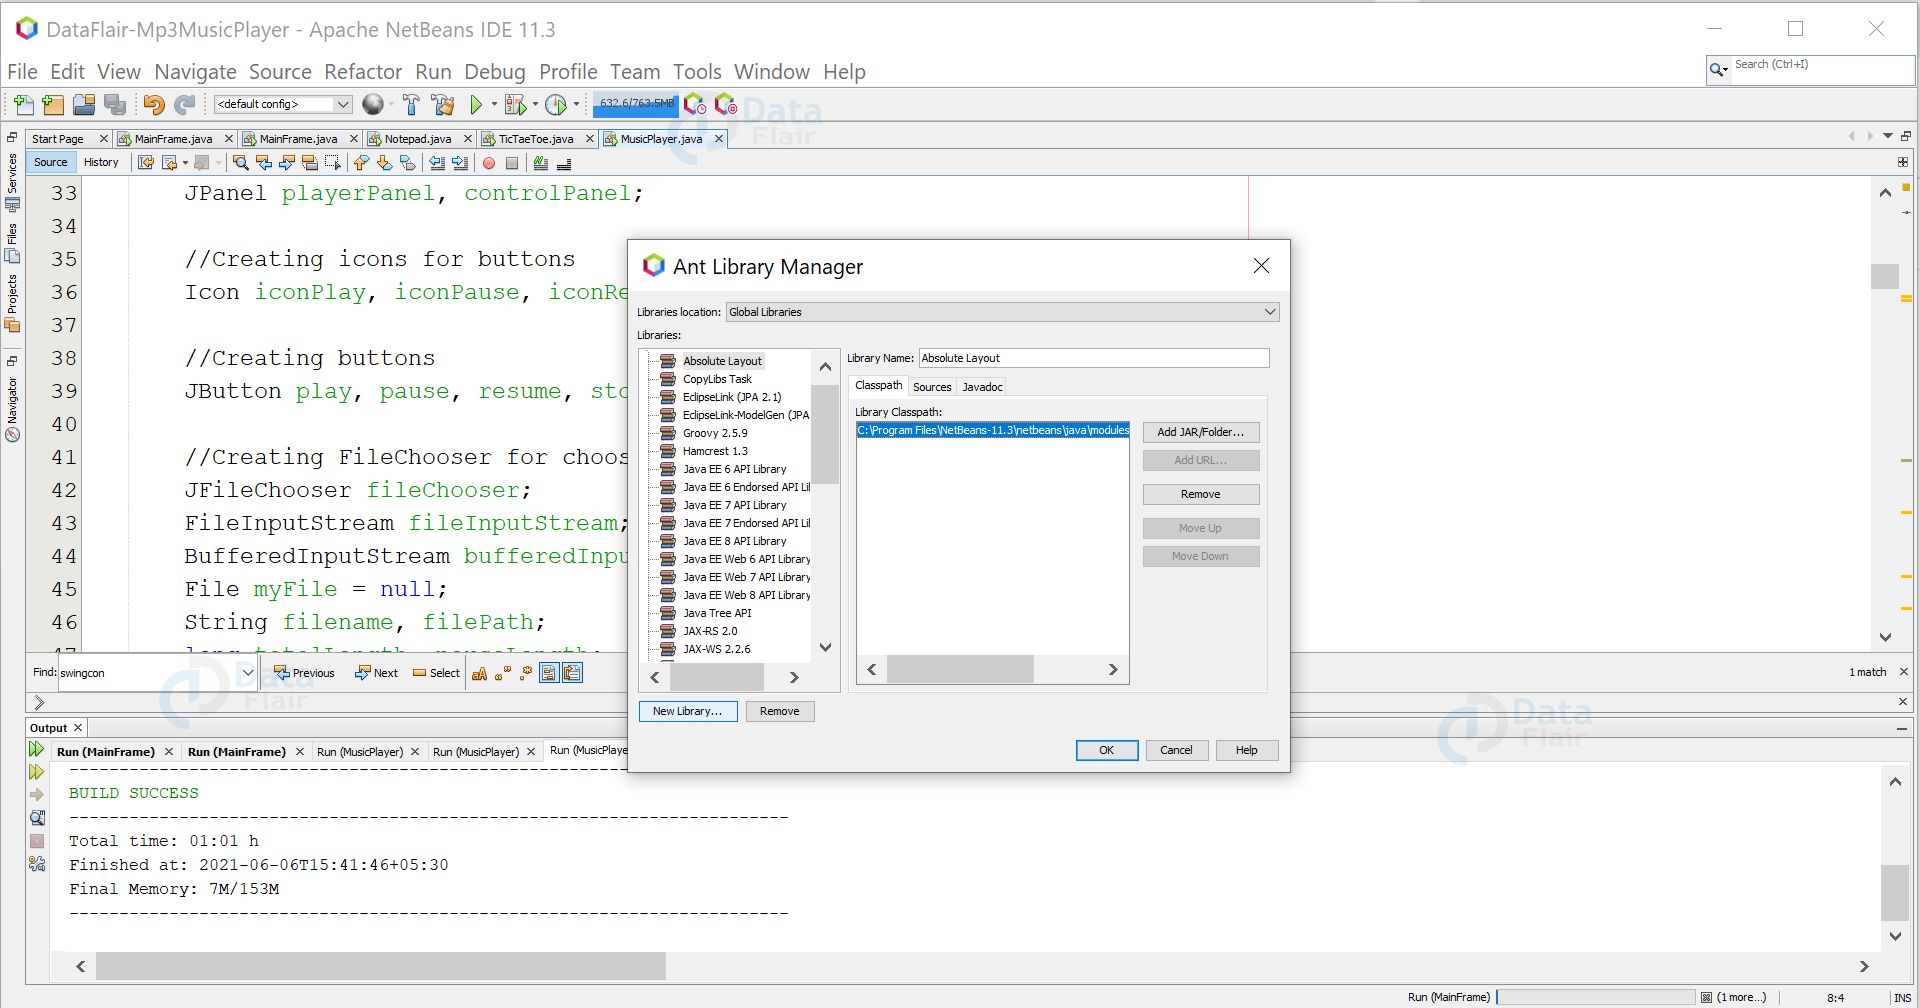
c. Name your library and click on “OK”.
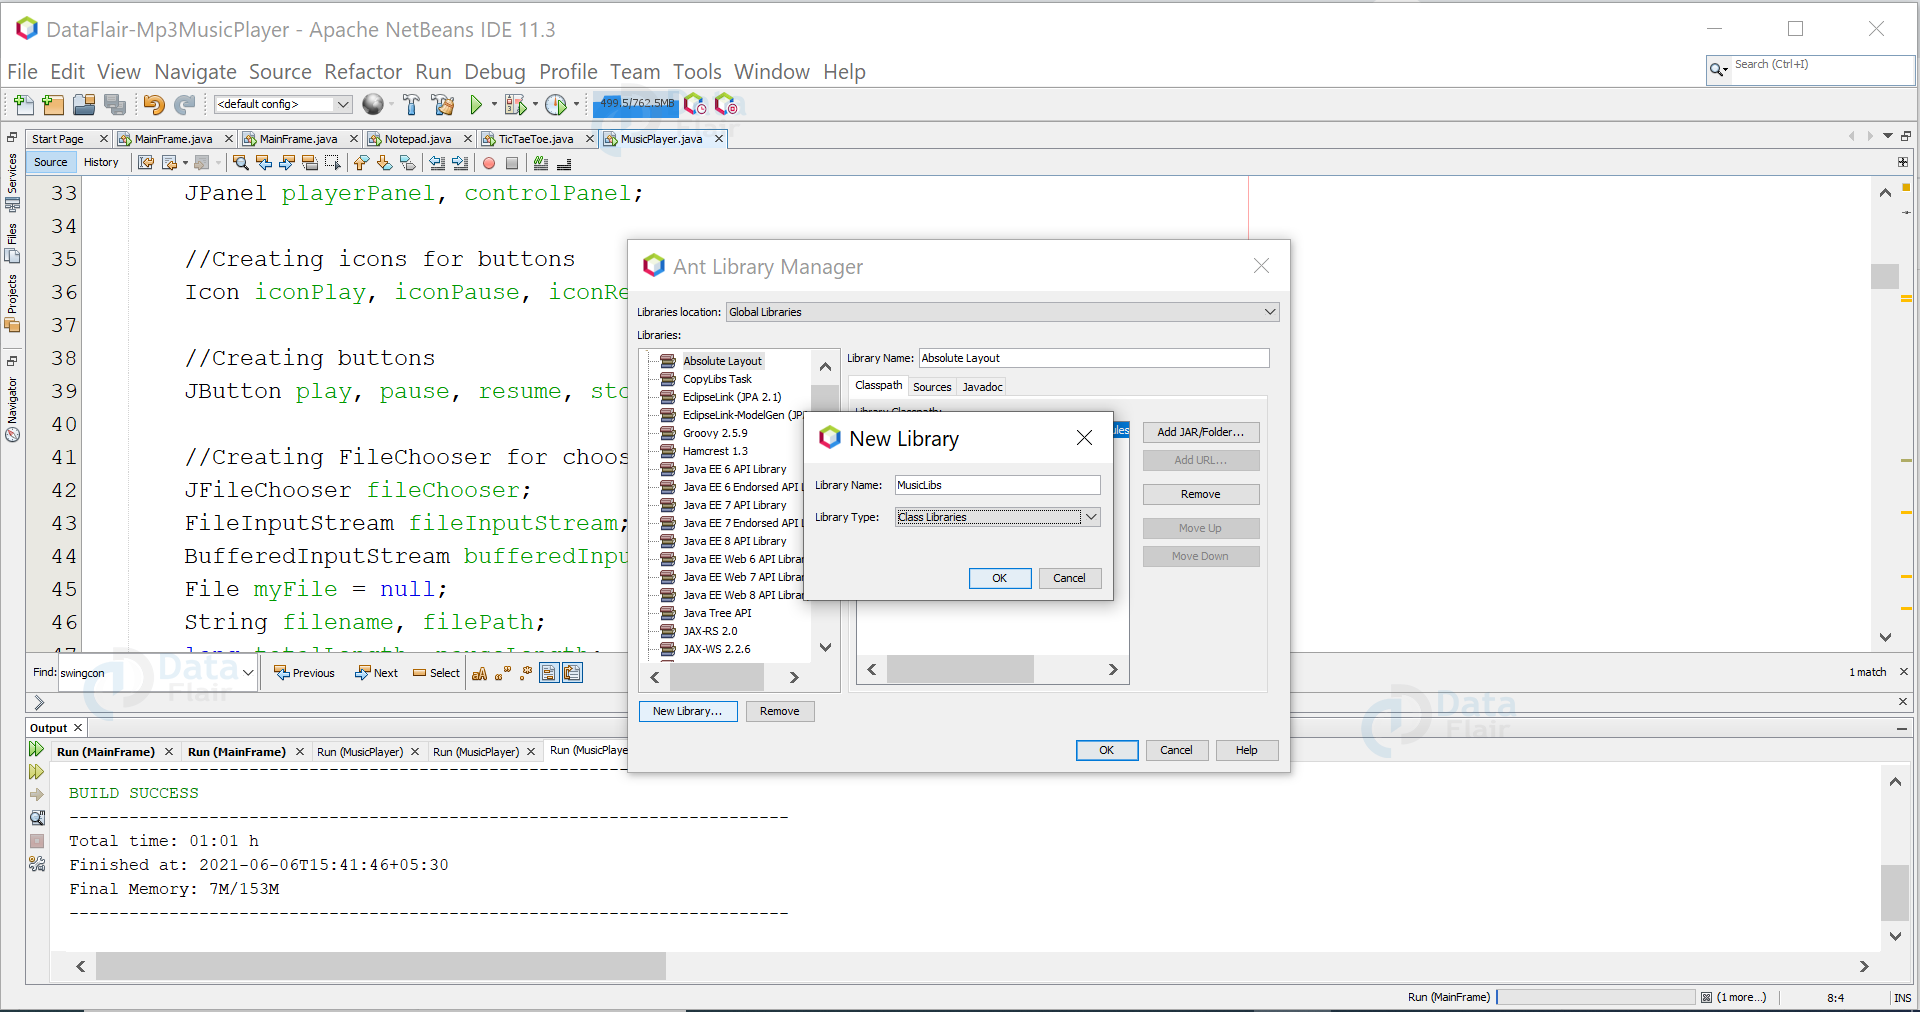
d. Now Click on Add JAR/Folder and select the downloaded file to add in our project.
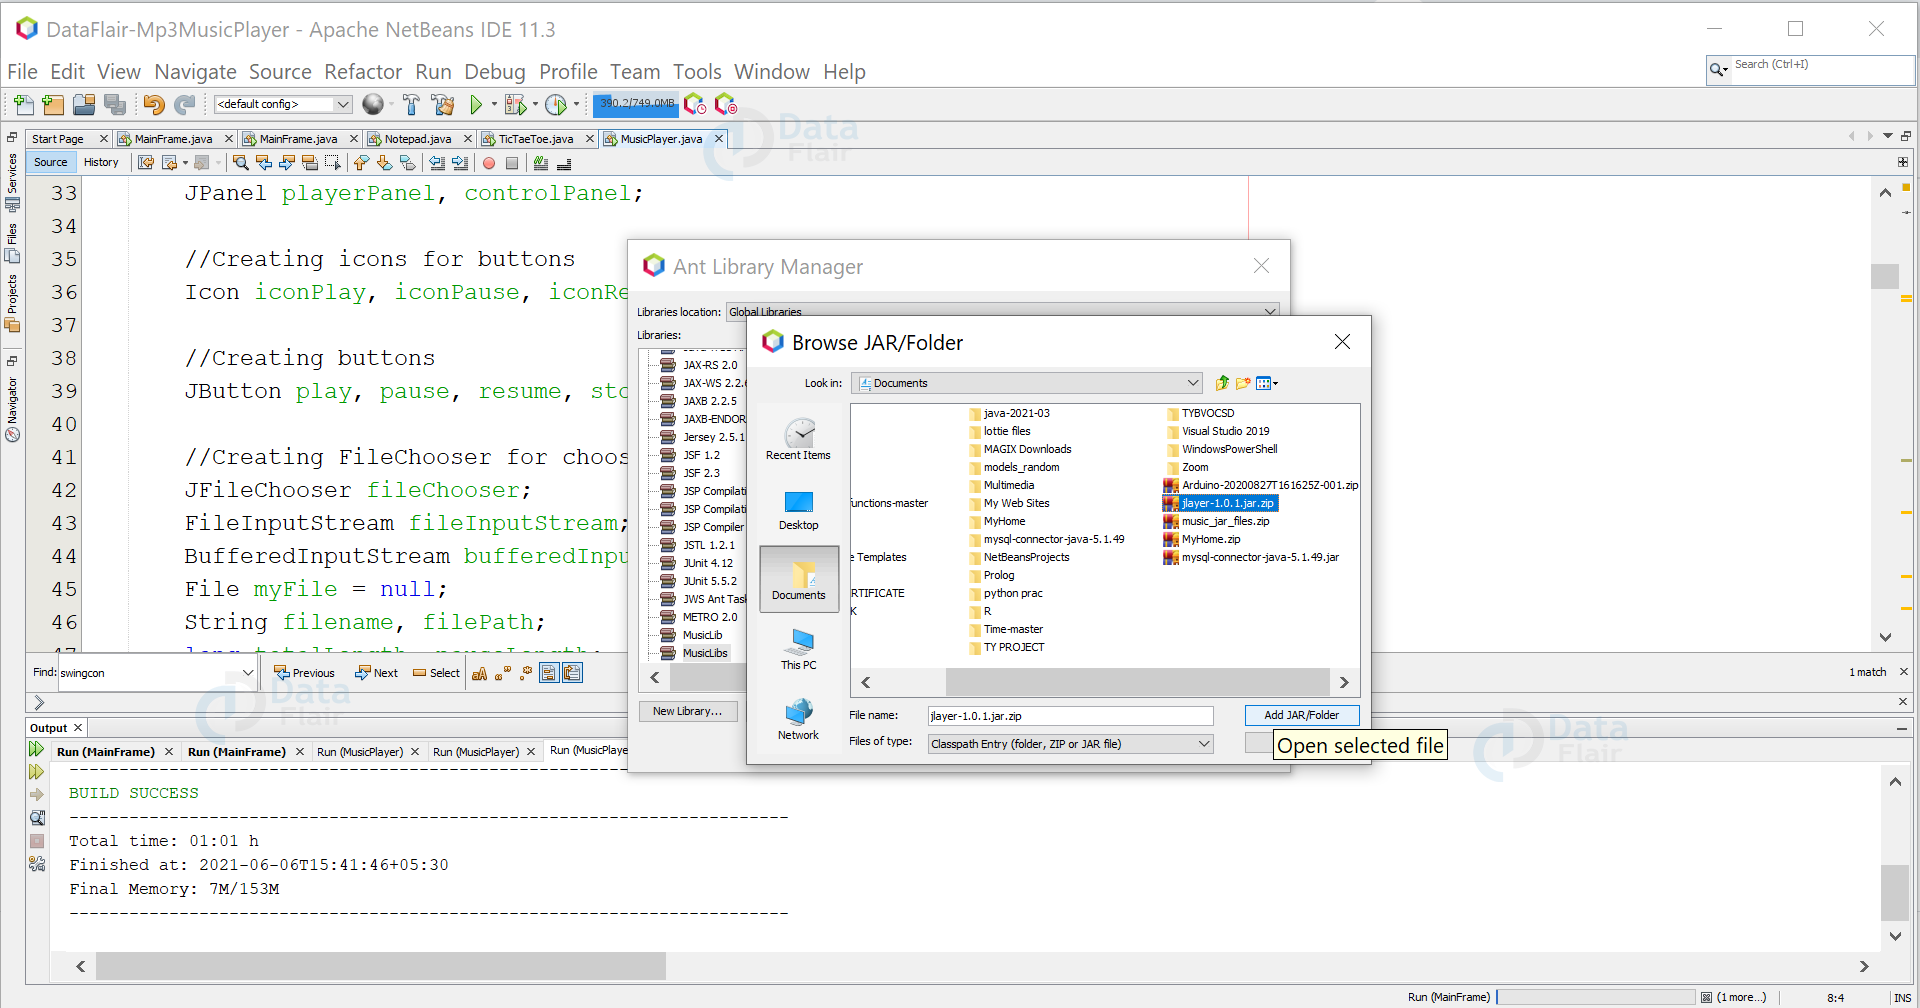
e. Now click on “ok”.
Code:
import javazoom.jl.player.Player;

import javax.swing.*;
import javax.swing.filechooser.FileNameExtensionFilter;

import java.awt.*;
import java.awt.event.ActionEvent;
import java.awt.event.ActionListener;
import java.io.*;
2. Initialize User Interface:
In this step, we will create a user interface for our mp3 music player in java. We will need five image buttons such as play, pause, resume, stop, selecting song. Also we need FileChooser which helps us to choose the mp3 music file from the directory of the system and one label is needed to print which current song is selected.
Functions Definitions:
- setBackground(Color.WHITE): This function will set the background color of the UI component.
- setLayout(layout): This function will set the layout of the frame or panel. Layout can be grid, flow, gridbag, etc.
- setText(“your text”): This function will set the text of the label, button, etc.
- setVisible(true): This function will set the frame/window to be visible to the user. By default, it is false.
- setSize(int width, int height): This function is used to set the size of frame, panel, etc. It takes two parameters such as width and height.
- setTitle(“any text”): This function is used to set the title of the java music player window.
- add(obj): This function is used to add the component object in frame or panel.
Code:
public void initUI() {

        //Setting songName Label to center
        songName = new JLabel("", SwingConstants.CENTER);

        //Creating button for selecting a song
        select = new JButton("Select Mp3");

        //Creating Panels
        playerPanel = new JPanel(); //Music Selection Panel
        controlPanel = new JPanel(); //Control Selection Panel

        //Creating icons for buttons
        iconPlay = new ImageIcon("C:\\Users\\DataFlair\\Downloads\\play-button.png");
        iconPause = new ImageIcon("C:\\Users\\DataFlair\\Downloads\\pause-button.png");
        iconResume = new ImageIcon("C:\\Users\\DataFlair\\Downloads\\resume-button.png");
        iconStop = new ImageIcon("C:\\Users\\DataFlair\\Downloads\\stop-button.png");

        //Creating image buttons
        play = new JButton(iconPlay);
        pause = new JButton(iconPause);
        resume = new JButton(iconResume);
        stop = new JButton(iconStop);

        //Setting Layout of PlayerPanel
        playerPanel.setLayout(new GridLayout(2, 1));

        //Addings components in PlayerPanel
        playerPanel.add(select);
        playerPanel.add(songName);

        //Setting Layout of ControlPanel
        controlPanel.setLayout(new GridLayout(1, 4));

        //Addings components in ControlPanel
        controlPanel.add(play);
        controlPanel.add(pause);
        controlPanel.add(resume);
        controlPanel.add(stop);

        //Setting buttons background color
        play.setBackground(Color.WHITE);
        pause.setBackground(Color.WHITE);
        resume.setBackground(Color.WHITE);
        stop.setBackground(Color.WHITE);

        //Initialing the frame
        frame = new JFrame();

        //Setting Frame's Title
        frame.setTitle("DataFlair's Music Player");

        //Adding panels in Frame
        frame.add(playerPanel, BorderLayout.NORTH);
        frame.add(controlPanel, BorderLayout.SOUTH);

        //Setting Frame background color
        frame.setBackground(Color.white);
        frame.setSize(400, 200);
        frame.setVisible(true);
        frame.setResizable(false);
        frame.setDefaultCloseOperation(JFrame.EXIT_ON_CLOSE);

}
3. Adding Actions to buttons:
In this step, we basically assign the actions to our buttons. When a play, pause, resume, stop, select buttons are clicked then what will happen in music or mp3 player app.
Code:
public void addActionEvents() {
    //registering action listener to buttons
    select.addActionListener(this);
    play.addActionListener(this);
    pause.addActionListener(this);
    resume.addActionListener(this);
    stop.addActionListener(this);
}
4. Performing actions of the button:
In this step, we will specify what will happen when a particular button is clicked. If a select button is clicked then it allows users to select one mp3 music file.
Why we have use thread?
We require a concurrent process for playing and resuming the music in java music player app.
How resume works?
We store the total length of music and length when the music is paused by the user. When the user resumes the music we subtract the pause length from the total length of the music.
Functions Definitions:
- setCurrentDirectory(new File(“C:\\Users”)): This function is used to set the default directory path of the file chooser.
- setDialogTitle(“any text”): This function is used to set the title of the file chooser window.
- setFileSelectionMode(): This function is used to set file selection mode of file chooser such as files only, folder only.
- setFileFilter(): This function is used to set the file extension allowed to be chosen by the user.
- getSelectedFile(): This function gets the selected file by the user in the application memory.
- getName(): This function returns the name of the selected music file.
- getPath(): This function returns the directory path of the selected file.
- play(): This function is used to play the mp3 music.
- close(): This function is used for pausing & stopping the mp3 music in java mp3 music player.
- skip(): This function will skip that particular part of the mp3 music file at the time of playing. Use at the time of resume() function.
Code:
@Override
    public void actionPerformed(ActionEvent e) {
        if (e.getSource().equals(select)) {
            fileChooser = new JFileChooser();
            fileChooser.setCurrentDirectory(new File("C:\\Users"));
            fileChooser.setDialogTitle("Select Mp3");
fileChooser.setFileSelectionMode(JFileChooser.FILES_ONLY);
fileChooser.setFileFilter(new FileNameExtensionFilter("Mp3 files", "mp3"));
            if (fileChooser.showOpenDialog(select) == JFileChooser.APPROVE_OPTION) {
                myFile = fileChooser.getSelectedFile();
                filename = fileChooser.getSelectedFile().getName();
                filePath = fileChooser.getSelectedFile().getPath();
                songName.setText("File Selected : " + filename);
            }
        }
        if (e.getSource().equals(play)) {
            //starting play thread
            if (filename != null) {
                playThread.start();
                songName.setText("Now playing : " + filename);
            } else {
                songName.setText("No File was selected!");
            }
        }
        if (e.getSource().equals(pause)) {
            //code for pause button
            if (player != null && filename != null) {
                try {
                    pauseLength = fileInputStream.available();
                    player.close();
                } catch (IOException e1) {
                    e1.printStackTrace();
                }
            }
        }

        if (e.getSource().equals(resume)) {
            //starting resume thread
            if (filename != null) {
                resumeThread.start();
            } else {
                songName.setText("No File was selected!");
            }
        }
        if (e.getSource().equals(stop)) {
            //code for stop button
            if (player != null) {
                player.close();
                songName.setText("");
            }

        }

    }

    Runnable runnablePlay = new Runnable() {
        @Override
        public void run() {
            try {
                //code for play button
                fileInputStream = new FileInputStream(myFile);
                bufferedInputStream = new BufferedInputStream(fileInputStream);
                player = new Player(bufferedInputStream);
                totalLength = fileInputStream.available();
                player.play();//starting music
            } catch (Exception e) {
                e.printStackTrace();
            }
        }
    };

    Runnable runnableResume = new Runnable() {
        @Override
        public void run() {
            try {
                //code for resume button
                fileInputStream = new FileInputStream(myFile);
                bufferedInputStream = new BufferedInputStream(fileInputStream);
                player = new Player(bufferedInputStream);
                fileInputStream.skip(totalLength - pauseLength);
                player.play();
            } catch (Exception e) {
                e.printStackTrace();
            }
        }
    };
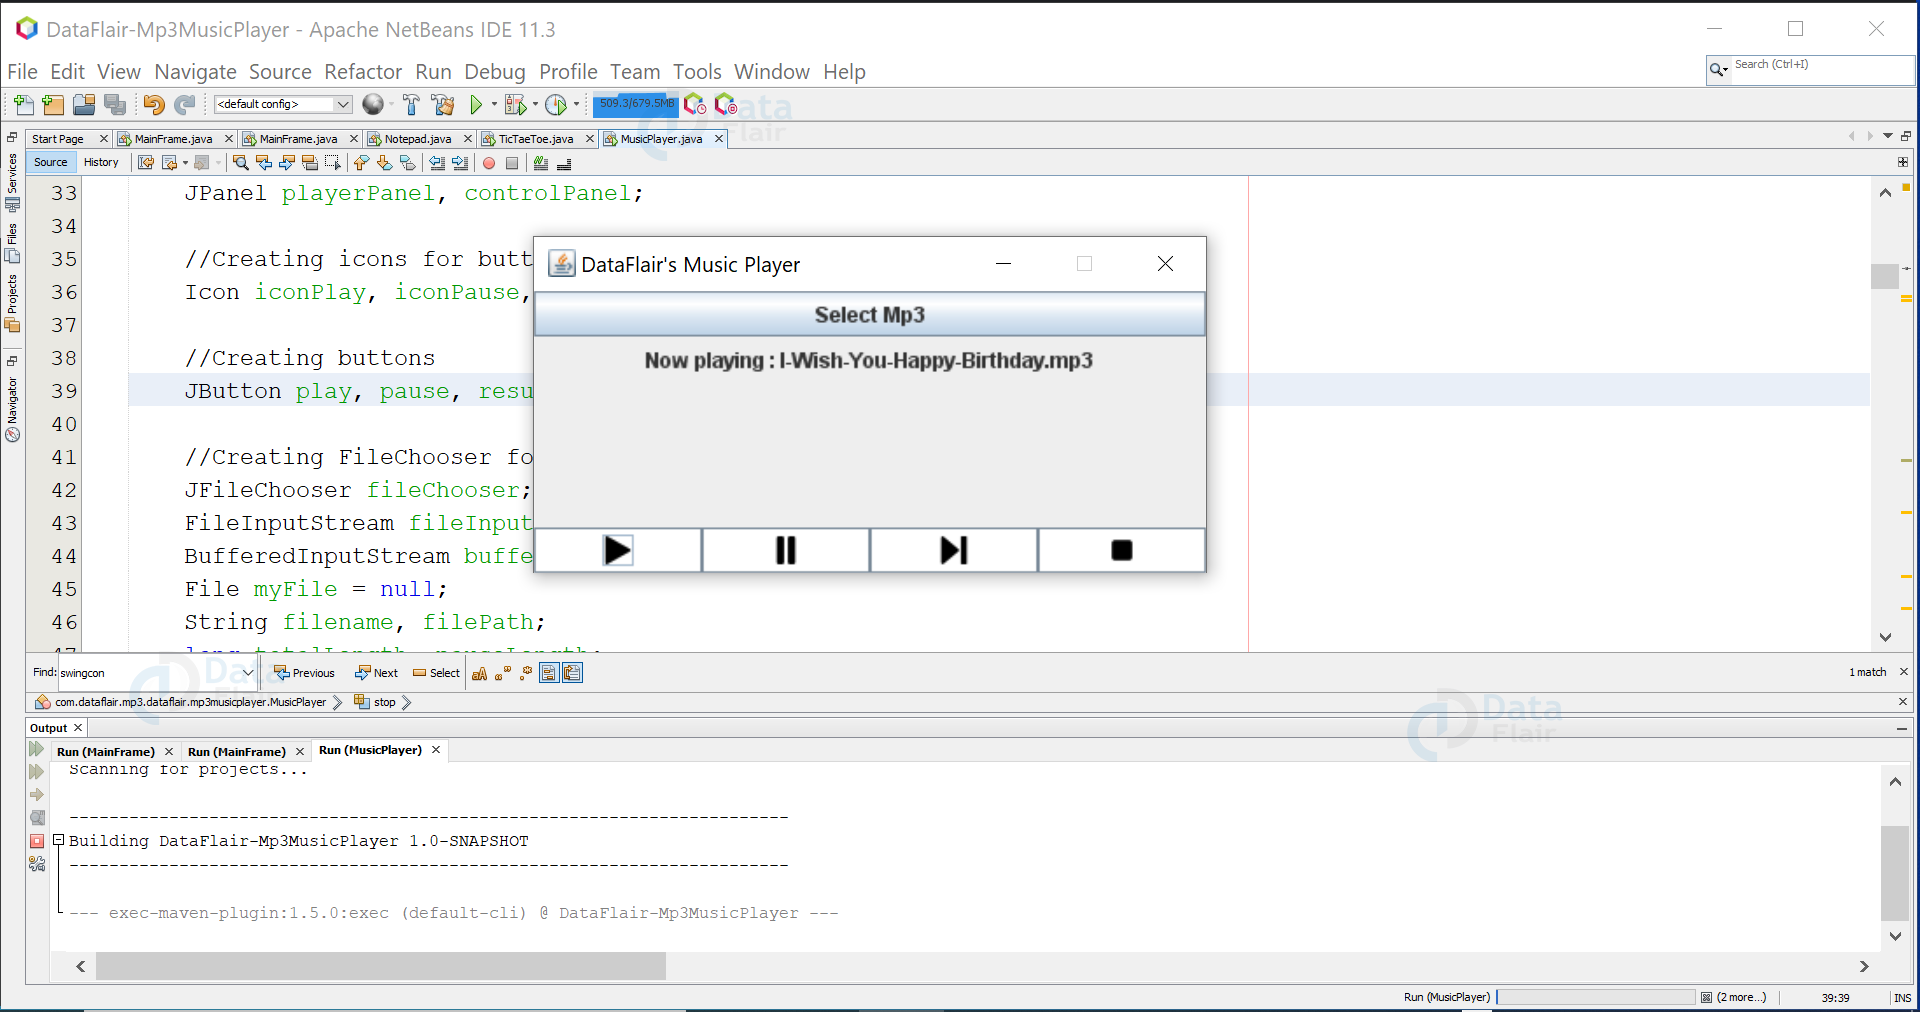
Java Music Player Output
Summary
Yay! We have finally built our mp3 music player in java. Now we can listen to any mp3 music on our desktop. From this java project, we have learned how to integrate any extra library to the project, how to do file operations, and how to create user interface components such as frame, panels, buttons, labels, filechooser, etc with the help of AWT and Swing packages.
You give me 15 seconds I promise you best tutorials
Please share your happy experience on Google


could you please explain in some detail that how these threads works?
that jar file is currpted can you please give me uncurrepted file at email
Thank you very much
It shows syntax error for void. Can you show the compiled code for the entire music player?