Learn SQL Auto Increment Field With Syntax
Placement-ready Courses: Enroll Now, Thank us Later!
In this tutorial, we will discuss auto increment in SQL. Let us now dive deep into the concept, syntax and examples of Auto Increment in SQL.
What is Auto Increment in SQL?
The data which we store in our database does not always have unique properties to enable identification of each record uniquely.
To ensure that we can uniquely identify each record we need to create an external unique identification attribute, which enables us to identify each row.
We create an additional attribute of numeric type and set it to Auto Increment, ones set to auto-increment the values are automatically incremented and stored in the database.
This helps us to identify each record easily. We need to set a column as Auto Increment in the Create statement itself as otherwise, problems would arise.
We assign the auto-increment to the Primary Key attribute to ensure that the unique identity of data is maintained.
Syntax:
1. To create an Auto Increment Column.
CREATE TABLE tableName (
col1 NOT NULL AUTO_INCREMENT,
Col2, col3,......
PRIMARY KEY(col1)
);
2. To alter the starting point of the Auto Increment Column.
ALTER TABLE tableName AUTO_INCREMENT = n;
3. To alter the amount of increment of each column.
CREATE TABLE tableName (
col1 NOT NULL AUTO_INCREMENT(n,m),
Col2, col3,......
PRIMARY KEY(col1)
);
Where n is the starting point and m is the gap between each created record.
Features of SQL Auto Increment
Some of the features of Auto Increment are as follows:
1. Allows us to create Primary Key in data which doesn’t have any unique identification attribute.
2. We can set the starting value explicitly and modify the same at any particular time.
3. Helps us to create unique identification in the records.
4. Provides us with the flexibility to handle the gap between each record.
5. We can leave the attribute set to auto-increment empty as it will automatically take its values.
Steps to create an Auto Increment Attribute
1. Let us create a new database called DataFlair_emp with the following columns.
- ID int Auto Increment NOT NULL
- Name varchar(50)
- Location varchar(50)
Query:
USE DataFlair;
CREATE TABLE DataFlair_emp(
ID int NOT NULL auto_increment,
Name varchar(50),
Location varchar(50),
PRIMARY KEY(ID));
Output:
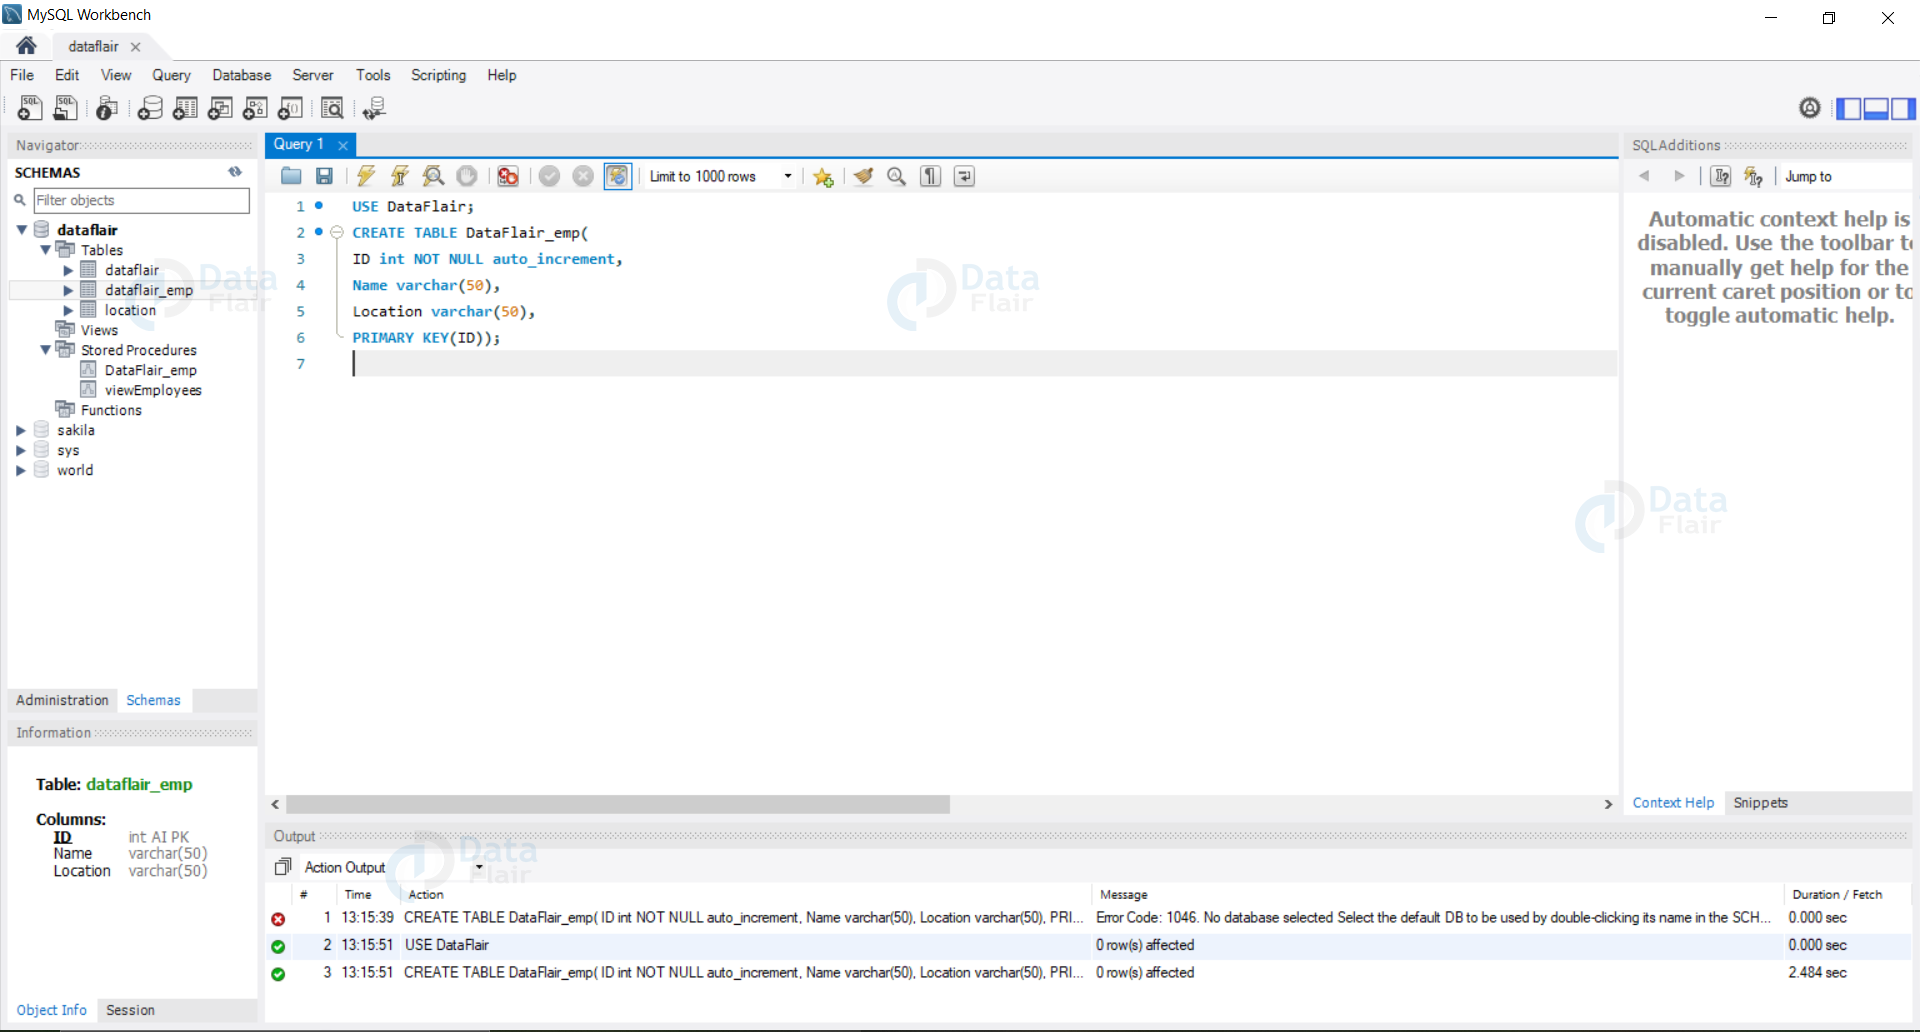
We can see that our database with ID as the Auto Increment attribute is created.
2. Let us now insert data in our database.
Query:
USE DataFlair;
INSERT INTO DataFlair_emp(Name, Location) VALUES
("Amit","Indore"),
("RAJ","Pune"),
("Rita","Noida"),
("Shiv","Indore"),
("Ram","Noida");
SELECT * FROM DataFlair_emp;
Output:
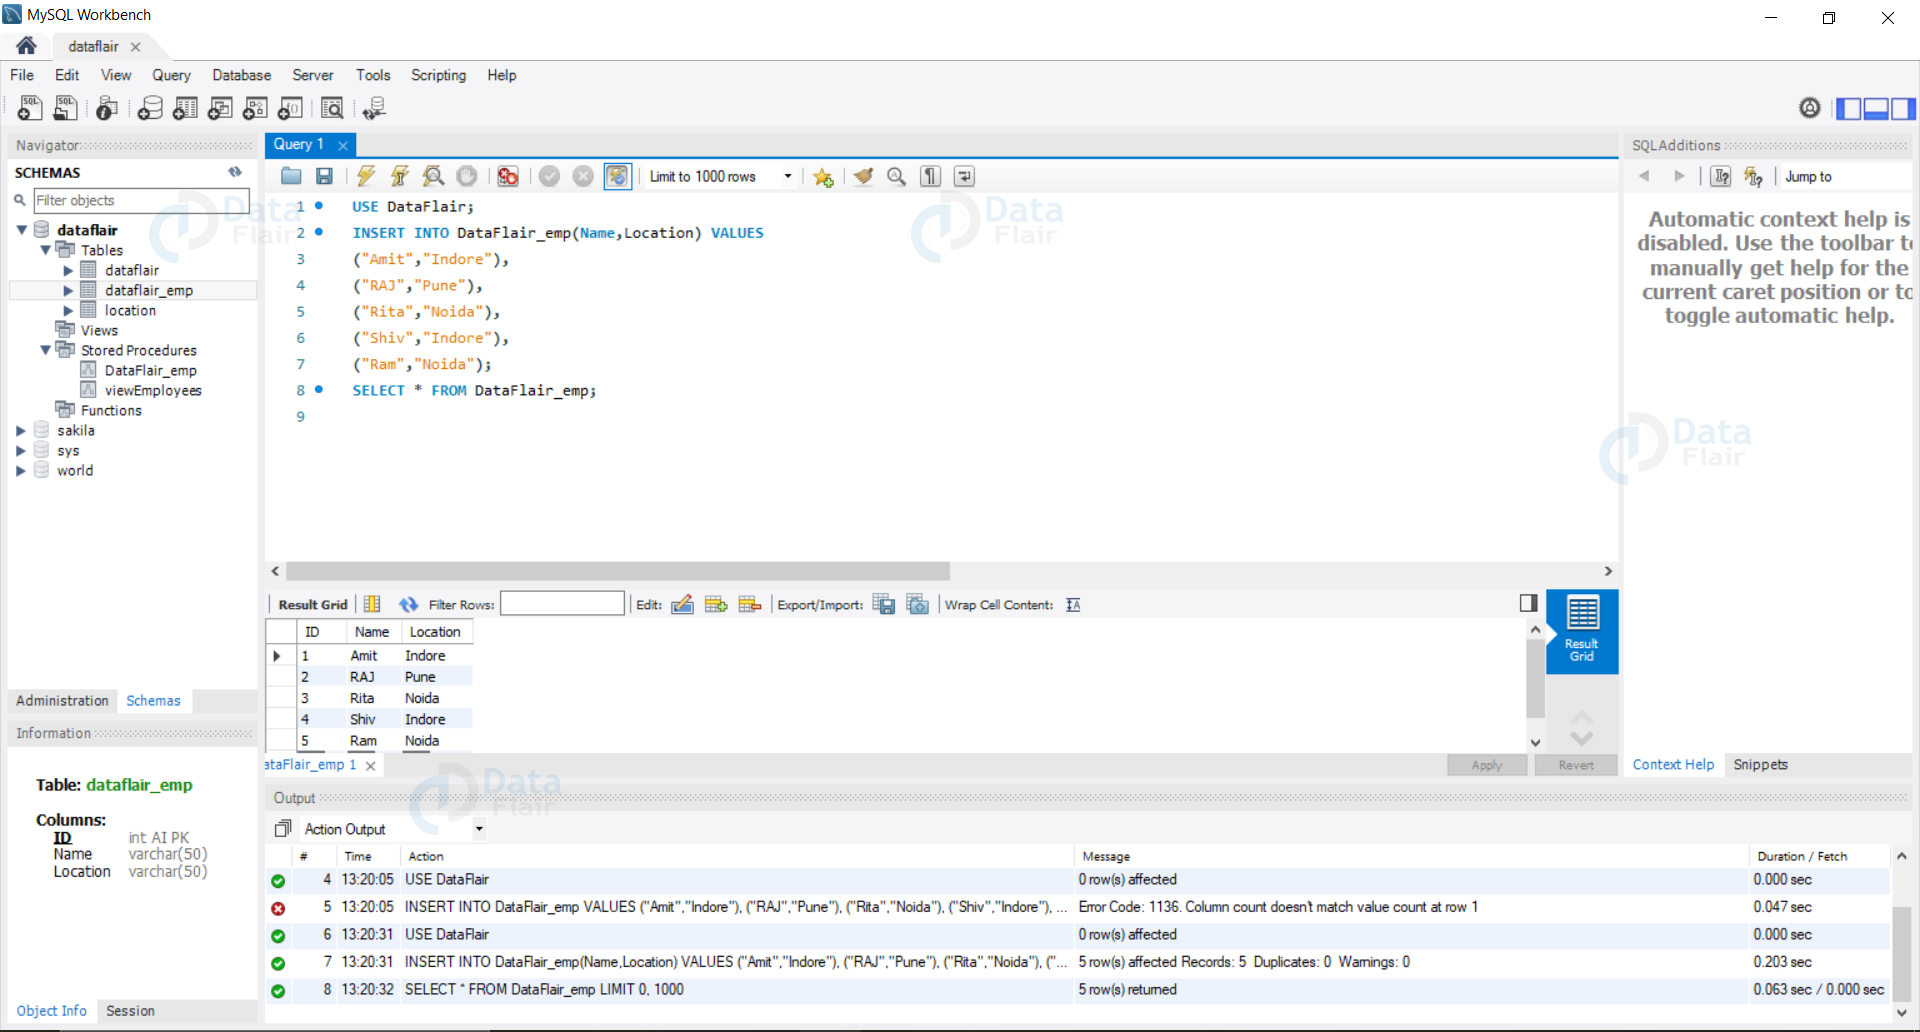
We can see that despite having not passed any value or ID column the values are automatically incremented and inserted in our database.
3. Let us now alter the starting value of Autoincrement and then again insert some new records in our database.
Query:
USE DataFlair;
ALTER TABLE DataFlair_emp AUTO_INCREMENT = 100 ;
INSERT INTO DataFlair_emp(Name,Location) VALUES
("Riya","Indore"),
("Shriya","Pune");
SELECT * FROM DataFlair_emp;
Output:
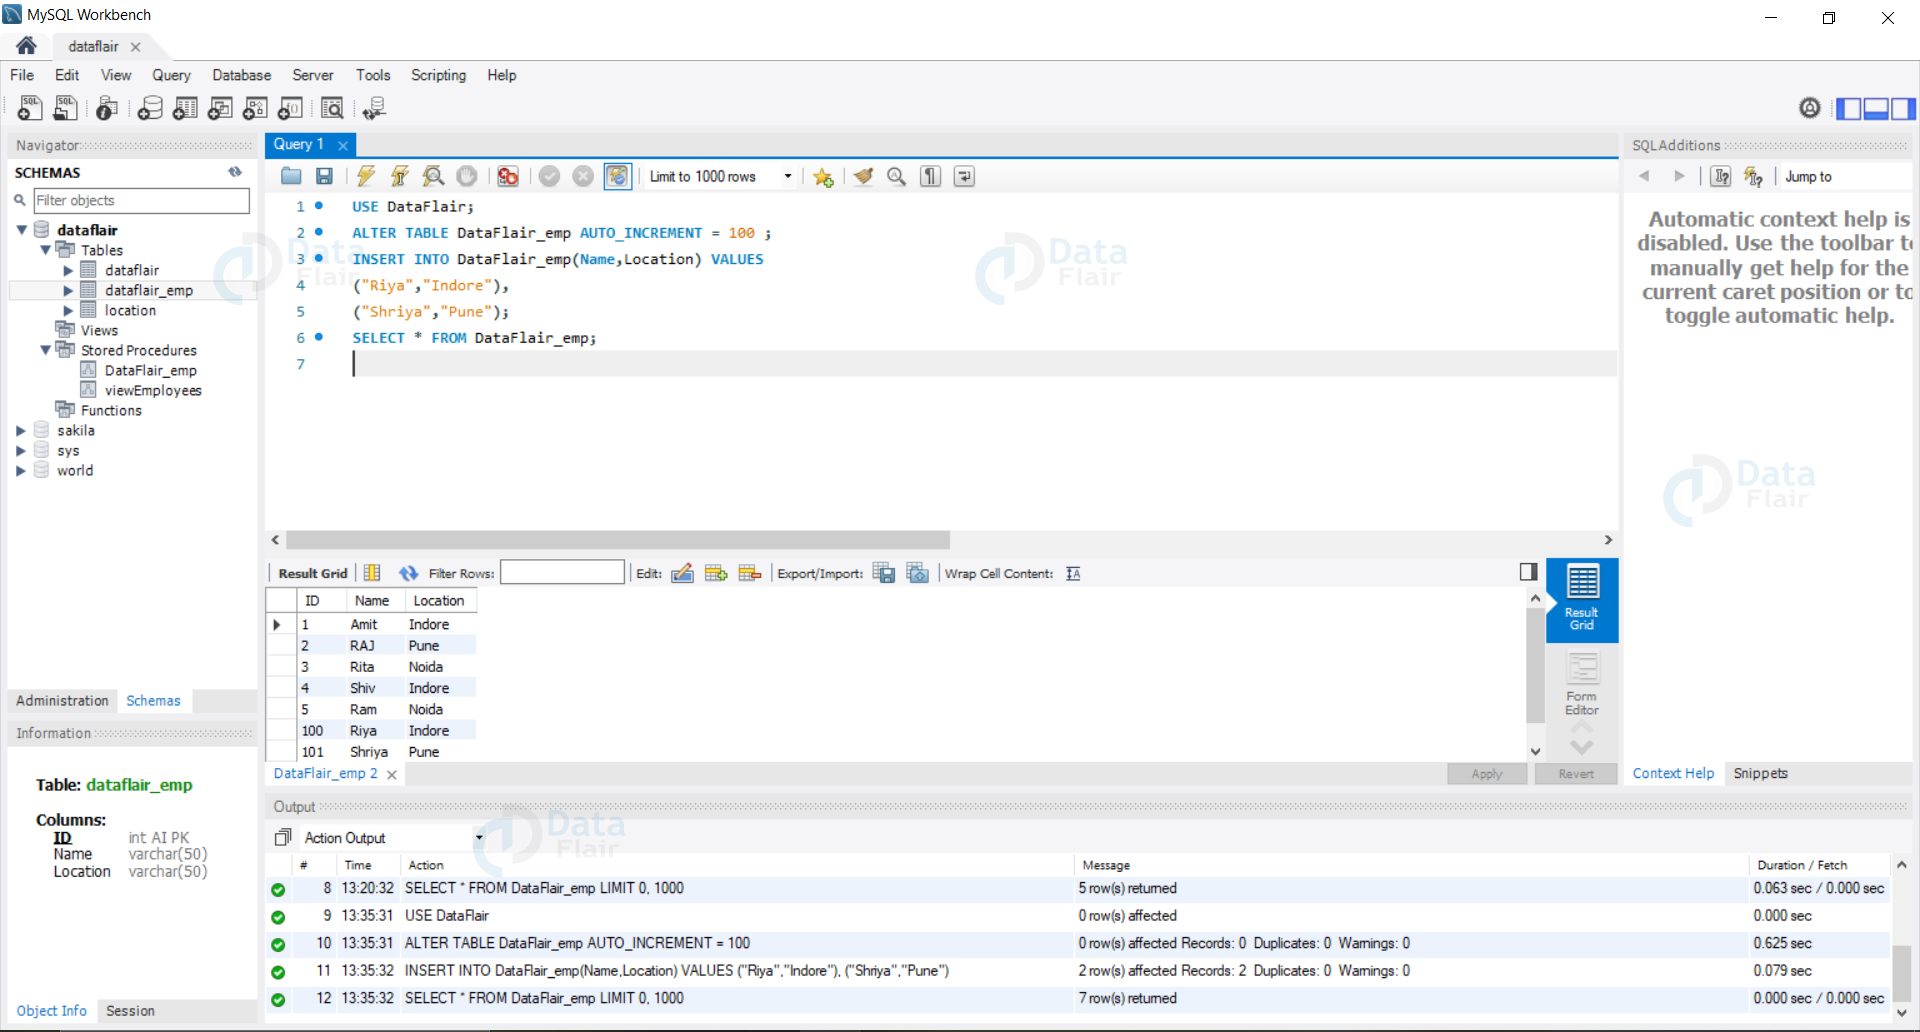
We can see that now the Auto Increment value is set to 100, also by inserting multiple records we can see that the values are being incremented by 1 and are being stored in our database as Primary Key.
Summary
In this tutorial, we have seen what an Auto Increment attribute is and how to apply and use it to store data.
The auto-increment function allows us to create Primary Key for the data which lacks unique identification. We can now clearly understand the use of Auto Increment in our database.
We have seen the syntax and examples of the same.
Autoincrement also provides us with the flexibility to modify both the start and the gap values of our Primary Key.
Did we exceed your expectations?
If Yes, share your valuable feedback on Google


