Keras Tutorial – Ultimate Guide to Deep Learning
Machine Learning courses with 100+ Real-time projects Start Now!!
Welcome to DataFlair Keras Tutorial. This tutorial will introduce you to everything you need to know to get started with Keras. You will discover the characteristics, features, and various other properties of Keras. This article also explains the different neural network layers and the pre-trained models available in Keras. You will get the idea of how Keras makes it easier to try and experiment with new architectures in neural networks. And how Keras empowers new ideas and its implementation in a faster, efficient way.
Introduction to Keras
Keras is an open-source high level deep learning framework developed in python. Developers favor Keras because it is user-friendly, modular, and extensible. Keras allows developers for fast experimentation with neural networks.
Keras is a high-level API and uses Tensorflow, Theano, or CNTK as its backend. It provides a very clean and easy way to create deep learning models.
Characteristics of Keras
Keras has the following characteristics:
- It is simple to use and consistent. Since we describe models in python, it is easy to code, compact, and easy to debug.
- Keras is based on minimal substructure, it tries to minimize the user actions for common use cases.
- Keras allows us to use multiple backends, provides GPU support on CUDA, and allows us to train models on multiple GPUs.
- It offers a consistent API that provides necessary feedback when an error occurs.
- Keras can run of top of various frameworks like tensorflow, pytorch etc.
- Using Keras, you can customize the functionalities of your code up to a great extent. Even small customization makes a big change because these functionalities are deeply integrated with the low-level backend.
Benefits of using Keras
The following major benefits of using Keras over other deep learning frameworks are:
- The simple API structure of Keras is designed for both new developers and experts.
- The Keras interface is very user friendly and is pretty optimized for general use cases.
- In Keras, you can write custom blocks to extend it.
- Keras is the second most popular deep learning framework after TensorFlow.
- Tensorflow also provides Keras implementation using its tf.keras module. You can access all the functionalities of Keras in TensorFlow using tf.keras.
Keras Installation
Before installing TensorFlow, you should have one of its backends. We prefer you to install Tensorflow. Install Tensorflow and Keras using pip python package installer.
pip install tensorflow

pip install Keras
Starting with Keras
The basic data structure of Keras is model, it defines how to organize layers. A simple type of model is the Sequential model, a sequential way of adding layers. For more flexible architecture, Keras provides a Functional API. Functional API allows you to take multiple inputs and produce outputs.
Keras Sequential model
from Keras.models import Sequential,Dense
model=Sequential()
model.add(Dense(units=64,activation=’relu’,input_dim=50))
model.add(Dense(units=10,activation=’softmax’))
Keras Functional API
It allows you to define more complex models.
from keras.layers import Input,Dense
from keras.models import Model

input=Inputs(shape=(784,))
layer_1=Dense(64,activation=’relu’)(input)
layer_2=Dense(10,activation=’softmax’)(layer_1)

model=Model(inputs=input,outputs=layer_2)
Keras Layers
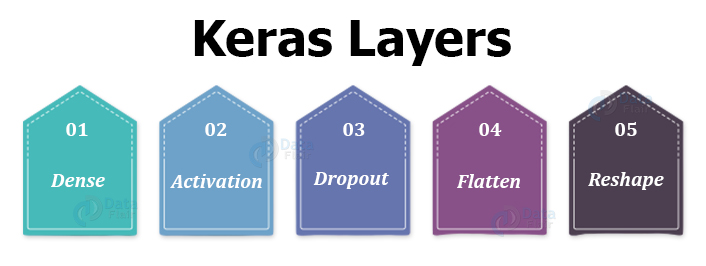
1. Dense Layer
It implements the function.
output=activation(dot(input,kernel)+bias)
Syntax:
keras.layers.Dense(units, activation, use_bias, kernel_initializer, bias_initializer, kernel_regularizer, bias_regularizer, activity_regularizer, kernel_constraint, bias_constraint)
2. Keras Activation Layer
It is to apply a specific activation function to the output.
Syntax:
keras.layers.Activation(activation)
3. Keras Dropout Layer
This is to prevent the model from overfitting. It randomly sets a fraction of input to 0 at each update.
Syntax:
keras.layers.Dropout(rate, noise_shape, seed)
4. Keras Flatten Layer
To convert the higher dimension input into one dimension,i.e flatten the input.
Syntax:
keras.layers.Flatten(data_format)
5. Keras Input Layer
To instantiate an input tensor.
Syntax:
keras.engine.input_layer.Input()
6. Keras Reshape Layer
To reshape the output to a particular shape. Gives output,
(batch_size,)+target_shape
Syntax:
keras.layers.Reshape(target_shape)
Keras Pretrained Models
The major Keras deep learning framework is that it provides 10 deep learning models with pre-trained weights. These models are trained for the ImgaeNet dataset. These are available in Keras to study major image classification algorithms. These models are available in the “applications” module of Keras.
These models are:
- Xception
- VGG16
- VGG19
- ResNet,ResNetV2
- InceptionV3
- InceptionResNetV2
- MobileNet
- MobileNetV2
- DenseNet
- NASNet
For ex: to load a VGG16 model
from keras.applications.vgg16 import VGG16
  model=VGG16(weights=’imagenet’,include_top=False)
Keras Compile Model
To configure the learning process with loss function, optimizer, and loss metrics we have to compile the model before training. Below is the code to compile a model using binary_crossentropy loss function, adam optimizer, and accuracy metric.
my_model.compile(
loss=’binary_crossentropy’,
optimizer=’adam’,
metrics=[‘accuracy’])
Keras Image Data Augmentation
Data quantity is the most important concern in deep learning. The more the data, the better will be our model. Data Augmentation is the set of techniques through which we can create more data from existing data. This technique is majorly for image data. For this purpose, we use transformations on available data. We perform rotation, zooming, and adding some noise to augment the image data.
This is done using the ImageDataGenerator function in Keras. It is available in keras.preprocessing module of Keras.
data_generator_object=ImageDataGenerator(
rotation_range=15,
width_shift_range=0.1,
height_shift_range=0.1,
zoom_range=0.1
)
Keras Fit Model
We use fit or fit_generation to train the neural network. When we perform data augmentation, we create a generator object, and to use this object for training, we pass it to fit_generator.
Using fit_generator to train the model.
my_model.fit_generator(data_generator_object,x_train,y_train,batch_size,epochs,validation_data=(test_x,test_y),steps_per_epoch)
Using fit to train the model.
my_model.fit(x_train,y_train,batch_size,epochs,validation_data=(test_x,test_y),steps_per_epoch)
Keras Visualize Training
There are many visualization tools available in python to analyze our model during training. Some of the best-known tools are Matplotlib, scikit_learn, and Bokeh. We can object to some important statistics like what is the accuracy and loss after each epoch of training.
The common visualization techniques are plotting line charts between accuracy/epoch, and loss/epoch. This is done using the plot method of Matplotlib.
import matplotlib.pyplot as plt
plt.plot(x=epochs,y=accuracy,label=”training_accuracy”)
plt.plot(x=epochs,y=validation_accuracy,label=”testing_accuracy”)
Summary
This is an introduction tutorial for Keras. It explains about Keras, its characteristics, its installation, how to get started in Keras and its major applications.
This tutorial also describes Keras’ models and both of its types. We have seen how to create models using Sequential Model and Functional API respectively. Then we talk about some of the pre-trained models that are available in Keras.
You give me 15 seconds I promise you best tutorials
Please share your happy experience on Google


