Deep Learning with Keras Implementation and Example
Machine Learning courses with 100+ Real-time projects Start Now!!
Welcome back to DataFlair Keras Tutorial series. In this Keras tutorial, we will walk through deep learning with keras and an important deep learning algorithm used in keras. We will study the applications of this algorithm and also its implementation in Keras.
Deep Learning is a subset of machine learning which concerns the algorithms inspired by the architecture of the brain. In the last decade, there have been many major developments to support deep learning research. Keras is the result of one of these recent developments which allow us to define and create neural network models in a few lines of code.
There has been a boom in the research of Deep Learning algorithms. Keras ensures the ease of users to create these algorithms.
But before we begin with Tensorflow Keras Deep learning article, let us do keras installation.

Popular Algorithms for Deep Learning with Keras
Below are mentioned some of the popular algorithms in deep learning:
- Auto-Encoders
- Convolution Neural Nets
- Recurrent Neural Nets
- Long Short Term Memory Nets
- Deep Boltzmann Machine(DBM)
- Deep Belief Nets(DBN)
There are implementations of convolution neural nets, recurrent neural nets, and LSTM in our previous articles.
Here we will take a tour of Auto Encoders algorithm of deep learning.
Auto-Encoders
These types of neural networks are able to compress the input data and reconstruct it again. These are very old deep learning algorithms. It encodes the input upto a bottleneck layer and then decodes it to get the input back. At the bottleneck layer, we get a compressed form of input.
Anomaly detection and denoising an image are a few of the major applications of Auto-Encoders.
Types of Auto-Encoders
There are seven types of deep learning auto encoders as mentioned below:
- Denoising autoencoders
- Deep autoencoders
- Sparse autoencoders
- Contractive autoencoders
- Convolutional autoencoders
- Variational autoencoders
- Undercomplete autoencoders
For our study, we will create a Denoising autoencoder.
Implementation of Denoising Auto-encoder in Keras
For the purpose of its implementation in Keras, we will work on MNIST handwritten digit dataset.
Firstly, we will introduce some noise in the MNIST images. Then we will create an Auto – Encoder for removing noise from the images and reconstruct the original images.
1. Import required modules
import numpy as np
import matplotlib.pyplot as plt
from keras.datasets import mnist
from keras.layers import Input,Dense,Conv2D,MaxPooling2D,UpSampling2D

from keras.models import Model
from keras import backend as K
2. Load MNIST images from datasets module of keras
from keras.datasets import mnist
(x_train,y_train),(x_test,y_test)=mnist.load_data()
3. Convert dataset in range of 0 to 1
x_train=x_train.astype('float32')/255
x_test=x_test.astype('float32')/255


x_train=np.reshape(x_train,(len(x_train),28,28,1))
x_test=np.reshape(x_test,(len(x_test),28,28,1))
4. Introducing noise in MNIST images using Gaussian distribution
noise_factor=0.5

x_train_noisy=x_train + noise_factor * np.random.normal(loc=0.0, scale=1.0,size=x_train.shape)
x_test_noisy=x_test + noise_factor * np.random.normal(loc=0.0, scale=1.0,size=x_test.shape)

x_train_noisy= np.clip(x_train_noisy,0.,1.)
x_test_noisy= np.clip(x_test_noisy,0.,1.)
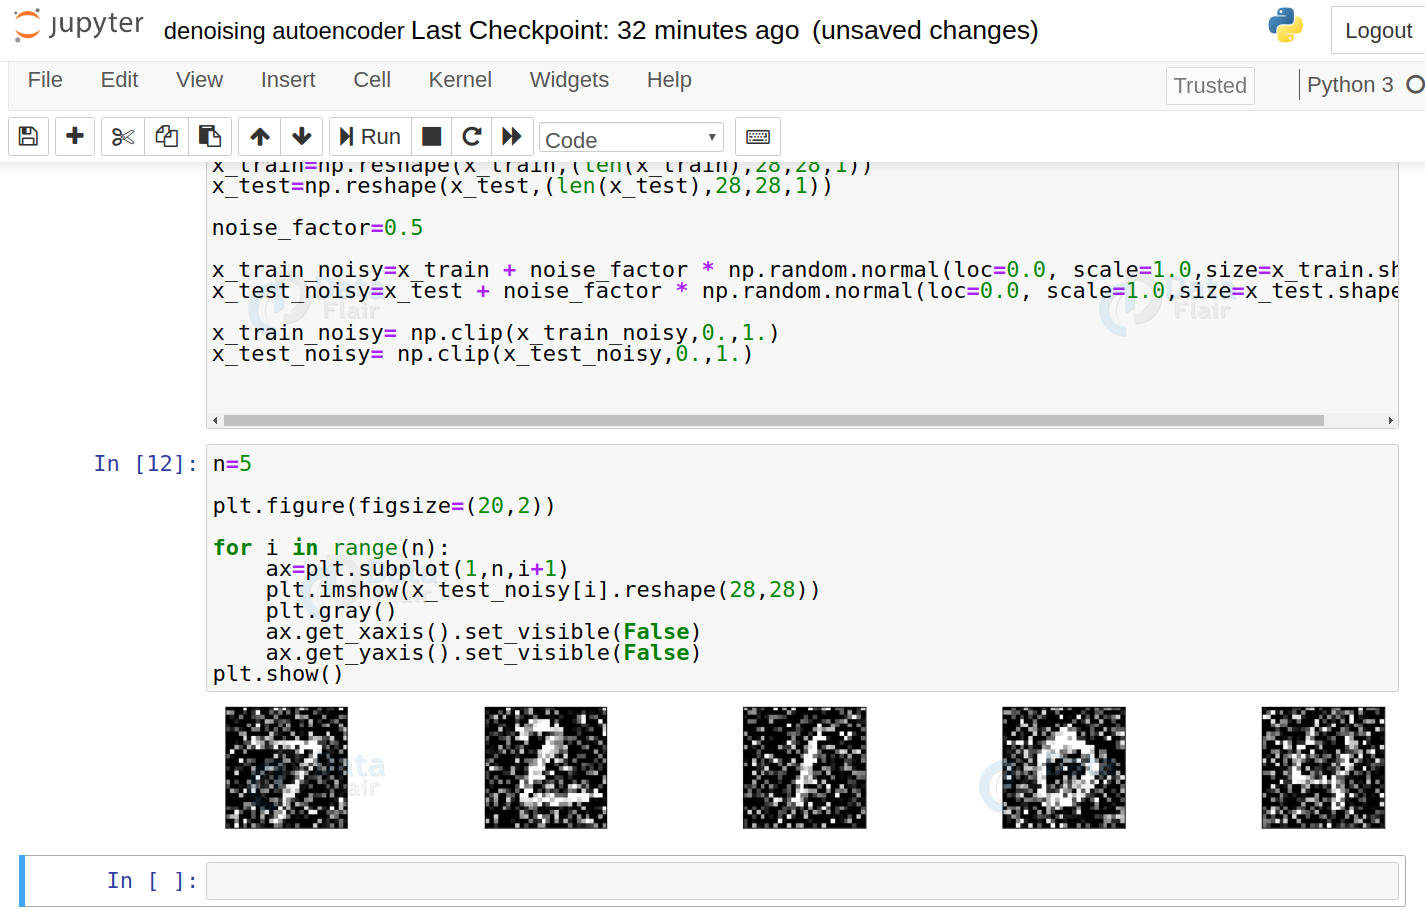
5. Visualize the noise introduced
n=5

plt.figure(figsize=(20,2))

for i in range(n):
ax=plt.subplot(1,n,i+1)
plt.imshow(x_test_noisy[i].reshape(28,28))
plt.gray()
ax.get_xaxis().set_visible(False)
ax.get_yaxis().set_visible(False)
plt.show()
6. Specify input layer and create model
input_img=Input(shape=(28,28,1))

x=Conv2D(32,(3,3),activation='relu',padding='same')(input_img)
x=MaxPooling2D((2,2),padding='same')(x)
x=Conv2D(32,(3,3),activation='relu',padding='same')(x)
encoded=MaxPooling2D((2,2),padding='same')(x)
7. Encoded is the bottleneck layer and consists of a compressed form of images.
x=Conv2D(32,(3,3),activation='relu',padding='same')(encoded)
x=UpSampling2D((2,2))(x)
x=Conv2D(32,(3,3),activation='relu',padding='same')(x)
x=UpSampling2D((2,2))(x)
decoded=Conv2D(1,(3,3),activation='sigmoid',padding='same')(x)
8. Train the autoencoder
x=Conv2D(32,(3,3),activation='relu',padding='same')(encoded)
x=UpSampling2D((2,2))(x)
x=Conv2D(32,(3,3),activation='relu',padding='same')(x)
x=UpSampling2D((2,2))(x)
decoded=Conv2D(1,(3,3),activation='sigmoid',padding='same')(x)
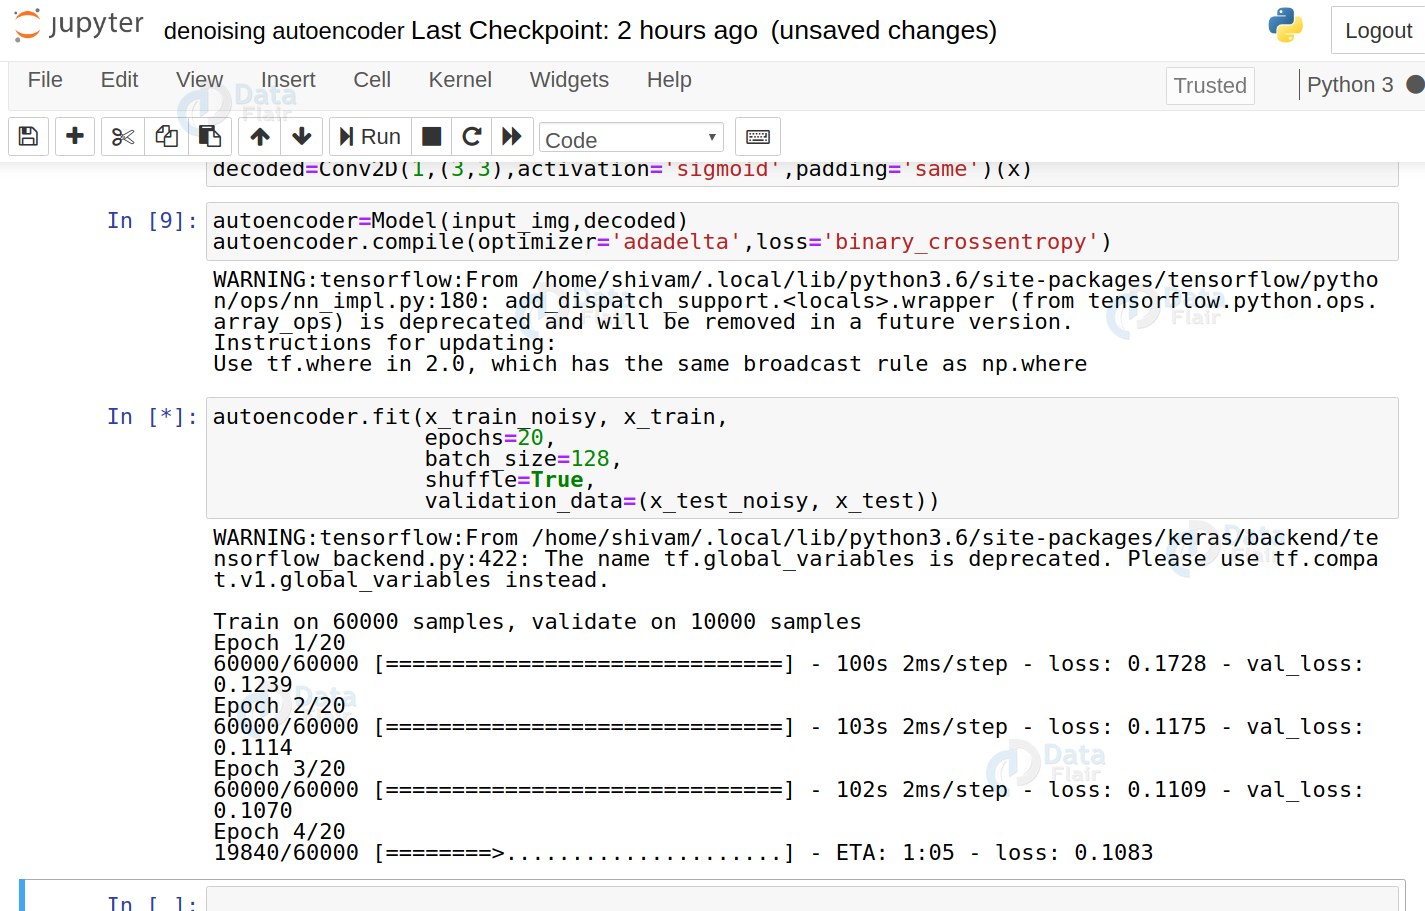
Here I am training my model on 20 epochs only, you can train it with 100 epochs as well.
9. Get prediction on noisy data
x_test_result = autoencoder.predict(x_test_noisy, batch_size=128)
10. Again visualize the reconstructed images
n=5

plt.figure(figsize=(20,2))

for i in range(n):
ax=plt.subplot(1,n,i+1)
plt.imshow(x_test_result[i].reshape(28,28))
plt.gray()
ax.get_xaxis().set_visible(False)
ax.get_yaxis().set_visible(False)
plt.show()
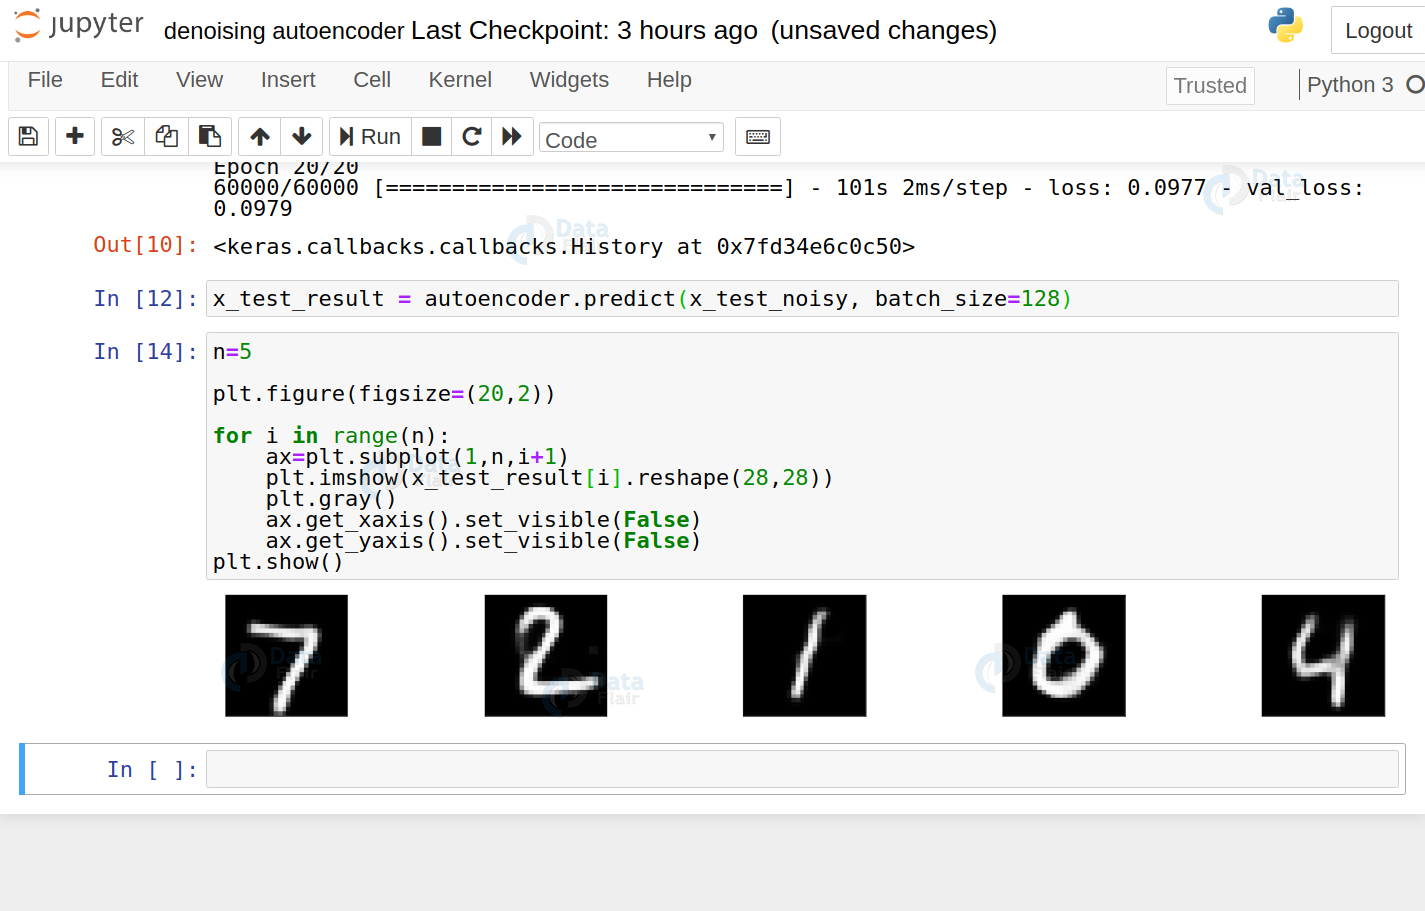
You can see our Auto Encoder is able to reconstruct the images and remove its noise. We will get better quality if we increase the epoch count of training.
Summary
To conclude, we have seen Deep learning with Keras implementation and example. This article concerns the Keras library and its support to deploy major deep learning algorithms. It also introduces you to Auto-Encoders, its different types, its applications, and its implementation.
It explains how to build a neural network for removing noise from our data.
When you have learnt deep learning with keras, let us implement deep learning projects for better knowledge.
Do share your feedback in the comment section.
Your 15 seconds will encourage us to work even harder
Please share your happy experience on Google


