TensorFlow Audio Recognition in 10 Minutes
Machine Learning courses with 100+ Real-time projects Start Now!!
By now you’ve already learned how to create and train your own model. In this Tensorflow tutorial, you’ll be recognizing audio using TensorFlow. Moreover, in this TensorFlow Audio Recognition tutorial, we will go through the deep learning for audio applications using TensorFlow.
Along with this, we will see training process and the confusion matrix. Also, we will touch TensorBoard and working model for audio recognition in TensorFlow. Lastly, we will study command recognition and also how can we customize our audio model.
So, let’s begin TensorFlow Audio Recognition.
TensorFlow Audio Recognition
This tutorial will show you how to build a basic TensorFlow speech recognition network that recognizes ten words. Actual speech and audio recognition systems are very complex and are beyond the scope of this tutorial.
Just like the MNIST tutorial for images, this should give you a basic understanding of the techniques involved. Once you’ve completed this TensorFlow Audio Recognition tutorial, you’ll have a model that tries to classify a one-second audio clip as either:
- silence,
- an unknown word,
- yes
- no
- up
- down
- left
- right
- on
- off
- stop
- go
Before starting you should have TensorFlow installed on your system with a good internet connectivity and some hard disk space.
Training in TensorFlow Audio Recognition
To begin the training process in TensorFlow Audio Recognition, head to the TensorFlow source and type the following:
python tensorflow/examples/speech_commands/train.py
This command will download the speech dataset, which consists of 65k .wav audio files where people say 30 different words.
You’ll see the output information for every training step along the process like the one given below:
I0730 16:54:41.813438 55030 train.py:252] Saving to “/tmp/speech_commands_train/conv.ckpt-100”
The trained weights are being saved to a checkpoint file and if you ever interrupted the training, you can always go back to the checkpoint file to resume from the last point of training.
Confusion Matrix in TensorFlow
The first 400 steps, will give you:
I0730 16:57:38.073667   55030 train.py:243] Confusion Matrix:
 [[258   0   0   0   0   0   0   0   0   0   0   0]
 [  7   6  26  94   7  49   1  15  40   2   0  11]
 [ 10   1 107  80  13  22   0  13  10   1   0   4]
 [  1   3  16 163   6  48   0   5  10   1   0  17]
 [ 15   1  17 114  55  13   0   9  22   5   0   9]
 [  1   1   6  97   3  87   1  12  46   0   0  10]
 [  8   6  86  84  13  24   1   9   9   1   0   6]
 [  9   3  32 112   9  26   1  36  19   0   0   9]
 [  8   2  12  94   9  52   0   6  72   0   0   2]
 [ 16   1  39  74  29  42   0   6  37   9   0   3]
 [ 15   6  17  71  50  37   0   6  32   2   1   9]
 [ 11   1   6 151   5  42   0   8  16   0   0  20]]
Where the first section is a matrix. Each column represents a set of samples that were estimated to be each keyword. In the above matrix, the first column represents all the clips that were predicted to be silence, the second representing the unknown words, the third “yes”, and so on.
The rows represent clips by their correct, truth keywords. The first row is all the clips that were silenced, the second clips that were unknown words, the third “yes”, etc.
Thus, in the confusion matrix, Reflection is in the network mistakes. Now, all the entries in the first row are zero but the first because the first row contains all the clips that are actually silence.
Thus, the positive number shows the errors outside the first cell. This means that there are some false positives in the network, and the network is recognizing words which are not “silence” to be silence.
a. Validating
I0730 16:57:38.073777 55030 train.py:245] Step 400: Validation accuracy = 26.3% (N=3093)
You should separate your data set into three categories: The biggest one for training the network, a smaller one for calculating the accuracy during training, and another one to process the accuracy after the training has been completed.
Hence, the script does this division into categories for you, and the logging line shown above will tell you the accuracy. Overfitting occurs when the validation doesn’t increase but the accuracy does,
TensorBoard in TensorFlow
You can visualize how the training progress using TensorBoard. The events are saved to /tmp/retrain_logs, and loaded using:
tensorboard --logdir /tmp/retrain_logs
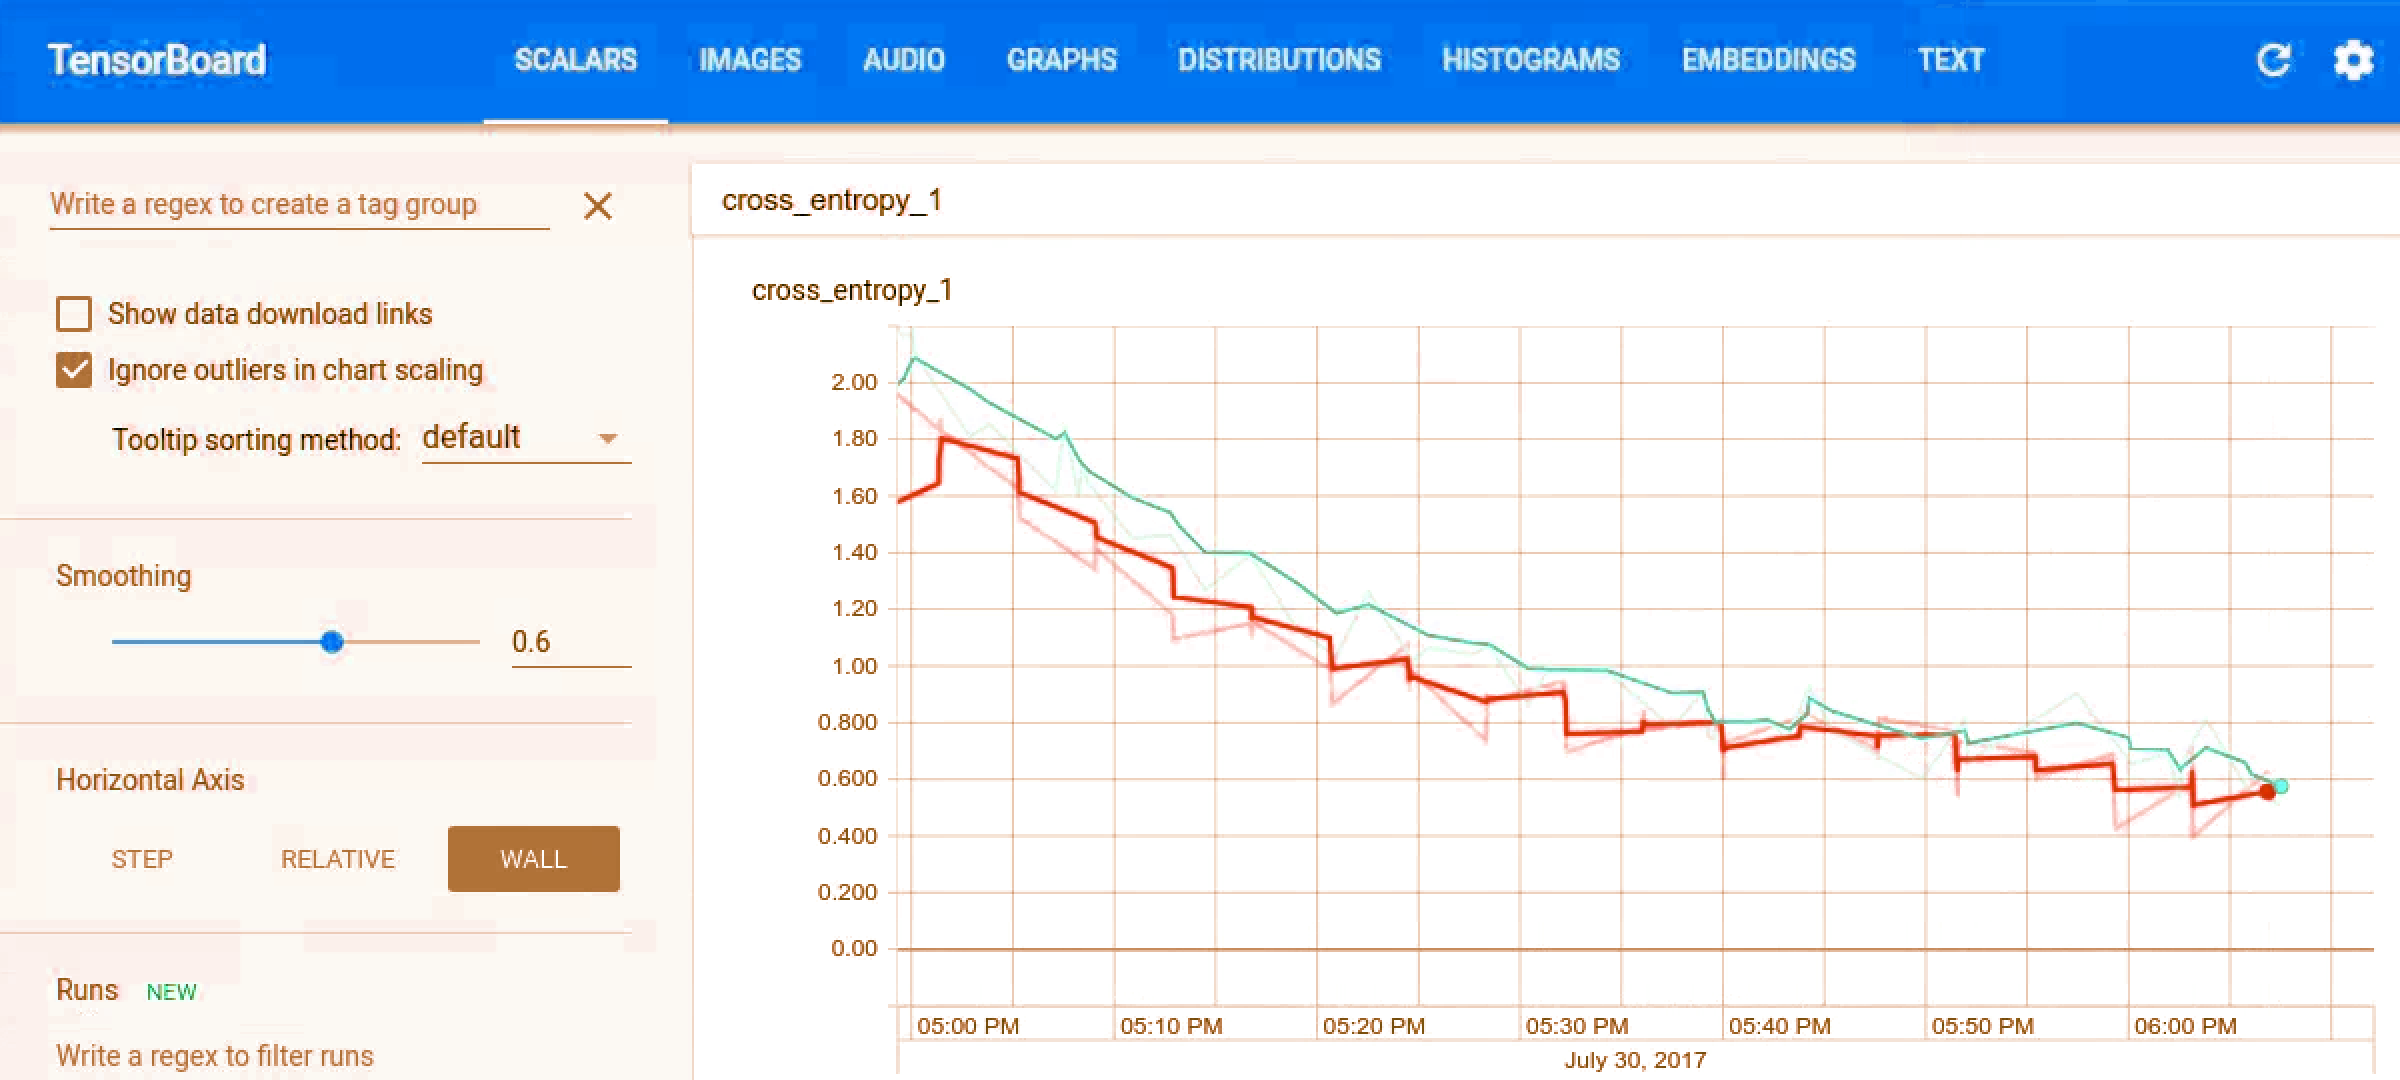
Audio Recognition in TensorFlow- TensorBoard
You have to go to http://localhost:6006 in your system browser, to see charts and graphs in TensorBoard.
Finished Training in TensorFlow Audio Recognition
After a few hours of training, the script usually completes about 20,000 steps, printing out a final confusion matrix, and the accuracy percentage
You can export to mobile devices in a compact form using:
python tensorflow/examples/speech_commands/freeze.py \
--start_checkpoint=/tmp/speech_commands_train/conv.ckpt-18000 \
--output_file=/tmp/my_frozen_graph.pb
Running on Android
Download the demo app from github: https://github.com/tensorflow/tensorflow/tree/master/tensorflow/examples/android#prebuilt-components and install them on your phone.
You’ll see ‘TF Speech’ in your app list, and after it has been opened it will show you the list of words that you’ve just trained your model with. After letting the app use your microphone, you should be able to try the words and see them highlighted in the interface when the model recognizes them.
Working- TensorFlow Speech Recognition Model
This TensorFlow Audio Recognition tutorial is based on the kind of CNN that is very familiar to anyone who’s worked with image recognition like you already have in one of the previous tutorials. The audio is a 1-D signal and not be confused for a 2D spatial problem.
Now, we solve the issue by defining a time slot in which your spoken words should fit, and changing the signal in that slot into an image. You can do this by grouping the incoming audio into short segments, and calculating the strength of the frequencies.
Each segment is treated as a vector of numbers, which are arranged in time to form a 2D array. This array of values can then be treated like a one-channel image, also known as a spectrogram. You can view what kind of image an audio sample produces with:
bazel run tensorflow/examples/wav_to_spectrogram:wav_to_spectrogram -- \
--input_wav=/tmp/speech_dataset/happy/ab00c4b2_nohash_0.wav \
--output_png=/tmp/spectrogram.png
/tmp/spectrogram.png will show you:
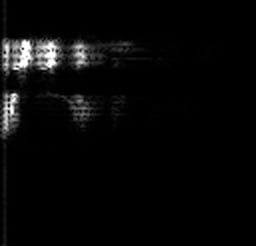
Working Model Of TensorFlow Audio Recognition
This is also a 2D, one-channel representation so we can treat it like an image too.
The image that’s produced is then fed into a multi-layer convolutional neural network, with a fully-connected layer followed by a softmax at the end.
Command Recognition in TensorFlow
TensorFlow Command Recognition
RecognizeCommands is fed the output of running the TensorFlow model, it averages the signals, and returns a value of the keyword when it thinks a recognized word has been found. we can do this at the Java level on Android, or Python on the RasPi.
As long as they share the common logic, you can alter the parameters that will change the average, and then transfer them over to your application to get similar results.
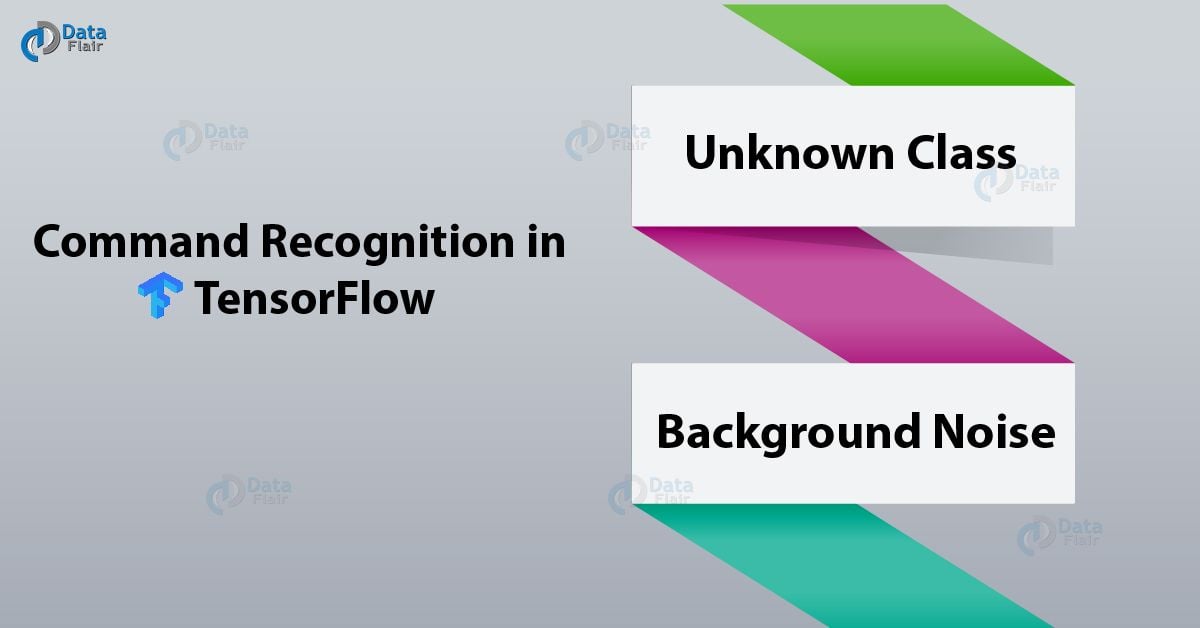
a. Unknown Class
Your app may hear sounds that are not a part of your training set. To make the network learn which sounds to boycott, you need to provide clips of audio that are not a part of your classes. To do this, you can create boo, meow, and shoo subfolders and fill them with noises from animals.
The Speech Commands dataset include 20 words in its unknown classes, including the digits zero through nine along with some random names.
Hence, you can control the percentage of the number of sets pick from the unknown classes using –unknown_percentage flag which by default is 10%.
b. Background Noise
There are obviously background noises in any captured audio clip. To build a model that’s immune to this such noises, you need to train the model against recorded audio with identical properties.
The files in the Speech Commands dataset were recorded on multiple devices and in many different surroundings, so that will help for the training.
Then, we can randomly choose small excerpts from the files along with loudness level denoted by –background_volume and mixed at a low volume into clips during training. Not all clips have a background added, the –background_frequency flag controls what proportion have them mixed in.
Customizing
The model used for the script is huge, using 940k weight parameters that will have too many calculations to run at speeds on devices with limited resources.
The other options to counter this are:
low_latency_conv: The accuracy here is lower than conv but the amount of weight parameters is nearly the same and it is much faster
You should specify –model_architecture=low_latency_conv to use this model on the command line.
You should add parameters like the learning rate = 0.01 and steps = 20,000.
low_latency_svdf: Here too, the accuracy is lower than conv but it only uses about 750k parameters, and has an optimized execution.
Typing –model_architecture=low_latency_svdf on the command line to use the model, and specifying the training rate and the number of steps along with:
python tensorflow/examples/speech_commands/train \
--model_architecture=low_latency_svdf \
--how_many_training_steps=100000,35000 \
--learning_rate=0.01,0.005
Other parameters to customize: You can also change the spectrogram parameters. That will change the size of the input image to the model. If the input is smaller, the model will require fewer computations and it is a great way to sacrifice some accuracy for improved latency.
So, this was all about TensorFlow Audio recognition. Hope you like our explanation.
Conclusion
Hence, that was how you perform a simple TensorFlow audio recognition of ten words. In conclusion, we discussed TensorBoard in TensorFlow, Confusion matrix. Also, we learned a working model of TensorFlow audio recognition and training in audio recognition.
Next up is a tutorial for Linear Model in TensorFlow. Furthermore, if you have any doubt regarding TensorFlow Audio Recognition, feel free to ask through the comment section.
Did you know we work 24x7 to provide you best tutorials
Please encourage us - write a review on Google


what is the model size of pb file generated using tensorflow audio recognition
please explain me how automatic speech recognition work and how to made acoustic and language model .
I need to know what is the difference between Kaldi and tensorflow
I have replaced the model with my own sound recognition RNN model, however I dont know what to substitute for these values private static final String INPUT_DATA_NAME = “y_:0”;
private static final String SAMPLE_RATE_NAME = “y_:1”;
private static final String OUTPUT_SCORES_NAME = “y_”;
I am getting an error that these operations are not present in the graph. How do i figure out their equivalent in my graph ?
thanks
Overfitting is happening as I follows this tutorial. What should I do?
Hi Ishita, how did you solve this?